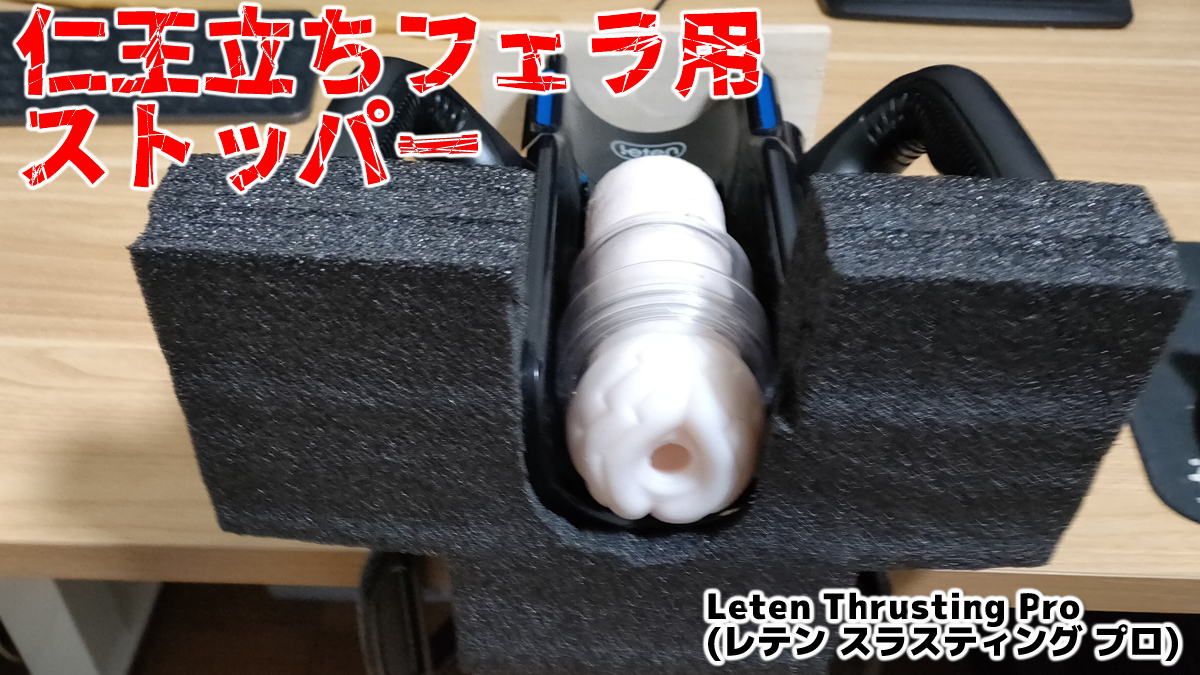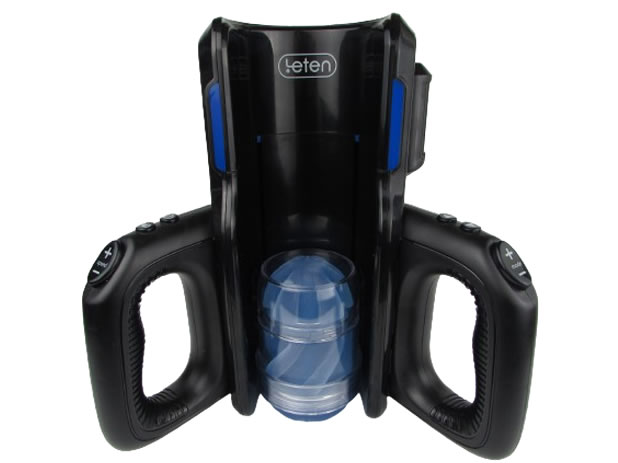
Leten Thrusting Pro
Dual-handle high-speed Automatic Male Masturbators


![[ Leten Thrusting Pro Fixed Stand Production]](../../imgs/dendou/leten_thrusting_pro-kotei/leten_thrusting_pro-kotei-d13.jpg)
Completed image
 [ Leten Thrusting Pro Fixing Stand Production] Board Pressing
[ Leten Thrusting Pro Fixing Base Fabrication] Embedding of threaded inserts
[ Leten Thrusting Pro Fixing Stand Fabrication] Hardware Installation
[ Leten Thrusting Pro Fixing Stand Fabrication] Velcro Attachment
[ Leten Thrusting Pro Mounting Stand Production] Completed!
[ Leten Thrusting Pro Mounting Stand Fabrication] Stand Basic Installation (Video Available)
[ Leten Thrusting Pro Mounting Stand Fabrication] VORZE Arm Stand Installation (Video Available)
[ Leten Thrusting Pro Fixing Stand Production] Benefits of sharing fixing devices
![[ Leten Thrusting Pro Fixing Stand Production] Board Crimping 1](../../imgs/dendou/leten_thrusting_pro-kotei/leten_thrusting_pro-kotei-a1.jpg)
I got the boards from Daiso again this time. They cost 110 yen including tax.
![[ Leten Thrusting Pro Fixing Stand Production] Board Crimping 2](../../imgs/dendou/leten_thrusting_pro-kotei/leten_thrusting_pro-kotei-a2.jpg)
The board measures 23.62 in (60 cm) x 4.72 in (12 cm) x 6mm thick. I needed two 11.81 in (30 cm) x 4.72 in (12 cm) boards, so this only required cutting them in half. However, I encountered a problem after using it for a while. Because it's only 6mm thick, it's prone to cracking. Therefore, when screwing it in, you need to drill pilot holes with a thin drill bit.
Therefore, those who are not used to it will need to buy two copies.This board is 15.75 in (40 cm) x 4.72 in (12 cm) x 9mm thick.The 9mm thicker version is less likely to break and therefore more reliable.
![[ Leten Thrusting Pro Fixing Stand Production] Board Crimping 3](../../imgs/dendou/leten_thrusting_pro-kotei/leten_thrusting_pro-kotei-a3.jpg)
First, draw a line down the middle and cut it in half.
![[ Leten Thrusting Pro Fixing Stand Production] Board Crimping 4](../../imgs/dendou/leten_thrusting_pro-kotei/leten_thrusting_pro-kotei-a4.jpg)
A saw is used for cutting.
![[ Leten Thrusting Pro Fixing Stand Production] Board Crimping 5](../../imgs/dendou/leten_thrusting_pro-kotei/leten_thrusting_pro-kotei-a5.jpg)
This saw is highly recommended because it has an excellent cutting edge and cuts through wood very smoothly.
| Product name | UM Industries (Silky) Rubber Boy Multipurpose Saw 240mm 121-24 | ||
|---|---|---|---|
| price | 1,936 yen (tax included) | ||
![[ Leten Thrusting Pro Fixing Stand Production] Board Crimping 6](../../imgs/dendou/leten_thrusting_pro-kotei/leten_thrusting_pro-kotei-a6.jpg)
I cut it. Now I have two pieces of wood measuring 11.81 in (30 cm) x 4.72 in (12 cm). I'll smooth the cut edges with sandpaper to remove any burrs.
![[ Leten Thrusting Pro Fixing Stand Production] Board Crimping 7](../../imgs/dendou/leten_thrusting_pro-kotei/leten_thrusting_pro-kotei-a7.jpg)
Press the two pieces of wood together using wood glue.
![[ Leten Thrusting Pro Fixing Stand Production] Board Crimping 8](../../imgs/dendou/leten_thrusting_pro-kotei/leten_thrusting_pro-kotei-a8.jpg)
Apply glue to the two pieces and clamp them together to press them firmly. Leaving it for a day should be sufficient.
![[ Leten Thrusting Pro Fixing Stand Production] Board Crimping 9](../../imgs/dendou/leten_thrusting_pro-kotei/leten_thrusting_pro-kotei-a9.jpg)
I left it for a day, but the middle section is still lifting. Ideally, I should have clamped the middle section during the initial crimping, but I only had four clamps, so I had no choice.
![[ Leten Thrusting Pro Fixing Stand Production] Board Crimping 10](../../imgs/dendou/leten_thrusting_pro-kotei/leten_thrusting_pro-kotei-a10.jpg)
Apply glue to the gap and then clamp the middle section again to press it together. When applying glue to the gap, cardboard is useful. I used the male masturbator packaging as I have plenty of it.
![[ Leten Thrusting Pro Fixing Stand Production] Board Crimping 11](../../imgs/dendou/leten_thrusting_pro-kotei/leten_thrusting_pro-kotei-a11.jpg)
I left it for another day, and finally the crimping was finished. If you only have a few clamps like me, it will take time, but you can manage it by doing it in two stages like this.
Incidentally, the reason why it needs to be this thickness is because we need to embed the threaded inserts in the next step.
![[ Leten Thrusting Pro Fixing Base Fabrication] Embedding of threaded inserts 1](../../imgs/dendou/leten_thrusting_pro-kotei/leten_thrusting_pro-kotei-b1.jpg)
I used leftover threaded inserts from when I made the mounting base for handy . For instructions on how to install the threaded inserts, I borrowed the installation images from the product page where the threaded inserts were sold.
| Product name | Embedded nuts, M4, M5, M6, M8, M10, 80-piece set | ||
|---|---|---|---|
| price | 749 yen (tax included) | ||
![[ Leten Thrusting Pro Fixing Base Fabrication] Embedding of threaded inserts 2](../../imgs/dendou/leten_thrusting_pro-kotei/leten_thrusting_pro-kotei-b2.jpg)
The mounting holes are located in three places, corresponding to the hole positions on the T-shaped plate common to both the Stand Basic and VORZE arm stands.
Align the plate with the center line drawn on the board as shown in the image.
![[ Leten Thrusting Pro Fixing Base Fabrication] Embedding of threaded inserts 3](../../imgs/dendou/leten_thrusting_pro-kotei/leten_thrusting_pro-kotei-b3.jpg)
Mark the hole locations with a pencil.
![[ Leten Thrusting Pro Fixing Base Fabrication] Embedding of threaded inserts 4](../../imgs/dendou/leten_thrusting_pro-kotei/leten_thrusting_pro-kotei-b4.jpg)
The position of the first hole has been determined. We will drill the holes one by one, not all at once.
![[ Leten Thrusting Pro Fixing Base Fabrication] Embedding of threaded inserts 5](../../imgs/dendou/leten_thrusting_pro-kotei/leten_thrusting_pro-kotei-b5.jpg)
Prepare a drill for making holes. Many sets are available that include a drill bit with an electric screwdriver. A set costing around 2000 yen should be sufficient.
![[ Leten Thrusting Pro Fixing Base Fabrication] Embedding of threaded inserts 6](../../imgs/dendou/leten_thrusting_pro-kotei/leten_thrusting_pro-kotei-b6.jpg)
I looked through the set to find threaded inserts that fit the screws included with the Stand Basic and VORZE arm stands. These two, with different lengths, were the only ones that fit.
If the board is 18mm thick, use the longer threaded insert nut; if the board is 12mm thick, use the shorter threaded insert nut.
![[ Leten Thrusting Pro Fixing Base Fabrication] Embedding of threaded inserts 7](../../imgs/dendou/leten_thrusting_pro-kotei/leten_thrusting_pro-kotei-b7.jpg)
With a thickness of 12mm, you'll need to drill holes all the way through to install the threaded inserts. Well, drilling through is probably easier.
After drilling through, use a hex wrench to embed the threaded insert as shown in the installation instructions. I was able to install it without it sticking out too much.
![[ Leten Thrusting Pro Fixing Base Fabrication] Embedding of threaded inserts 8](../../imgs/dendou/leten_thrusting_pro-kotei/leten_thrusting_pro-kotei-b8.jpg)
Once embedded, check to make sure the screws can be properly tightened all the way.
![[ Leten Thrusting Pro Fixing Base Fabrication] Embedding of threaded inserts 9](../../imgs/dendou/leten_thrusting_pro-kotei/leten_thrusting_pro-kotei-b9.jpg)
Now that the first one is installed, we'll determine the positions of the holes for the second and third ones to match it.
![[ Leten Thrusting Pro Fixing Base Fabrication] Embedding of threaded inserts 10](../../imgs/dendou/leten_thrusting_pro-kotei/leten_thrusting_pro-kotei-b10.jpg)
Install the second one in the same way, and then drill the hole for the third and final one. It's easier to drill the holes one by one, rather than all at once, as this helps prevent the holes from being misaligned.
![[ Leten Thrusting Pro Fixing Base Fabrication] Embedding of threaded inserts 11](../../imgs/dendou/leten_thrusting_pro-kotei/leten_thrusting_pro-kotei-b11.jpg)
I was able to embed threaded inserts in three locations.
![[ Leten Thrusting Pro Fixing Base Fabrication] Embedding of threaded inserts 12](../../imgs/dendou/leten_thrusting_pro-kotei/leten_thrusting_pro-kotei-b12.jpg)
Check that the screws tighten properly in all three places. It's okay if they're slightly misaligned at this point! In fact, they're almost always a little misaligned, so you can fine-tune the holes from here and it won't be a problem.
![[ Leten Thrusting Pro Fixing Base Fabrication] Embedding of threaded inserts 13](../../imgs/dendou/leten_thrusting_pro-kotei/leten_thrusting_pro-kotei-b13.jpg)
Remove the threaded insert from the misaligned hole, then use a Phillips bit or similar tool to widen the hole in the direction you want to widen it. In this case, I wanted to widen the hole slightly upwards, so I widened it by twisting upwards.
![[ Leten Thrusting Pro Fixing Base Fabrication] Embedding of threaded inserts 14](../../imgs/dendou/leten_thrusting_pro-kotei/leten_thrusting_pro-kotei-b14.jpg)
By making some minor adjustments, all three screws can now be tightened all the way.
Make sure to tighten the screws all the way here. If they are not tightened completely, it can cause rattling noises.
![[ Leten Thrusting Pro Fixing Base Fabrication] Embedding of threaded inserts 15](../../imgs/dendou/leten_thrusting_pro-kotei/leten_thrusting_pro-kotei-b15.jpg)
This is what the back looks like. The two holes at the bottom will be hidden when the L-shaped brackets are attached. If you use a 9mm x 2 board, you can do it without drilling all the way through.
![[ Leten Thrusting Pro Fixing Stand Fabrication] Bracket Installation 1](../../imgs/dendou/leten_thrusting_pro-kotei/leten_thrusting_pro-kotei-c1.jpg)
This one
| Product name | DAIDOHANT (Reinforcement Hardware) Uniqlo Extra Thick Shelf Bracket L-shaped [Steel] (W)16 x (A)75 x (B)150mm (1 piece) 63176 | ||
|---|---|---|---|
| price | 338 yen (tax included) x 2 | ||
![[ Leten Thrusting Pro Fixing Base Fabrication] Bracket Installation 2](../../imgs/dendou/leten_thrusting_pro-kotei/leten_thrusting_pro-kotei-c2.jpg)
Attach the metal fittings with wood screws. Since the board is thin this time, I drilled pilot holes before using them.
| Product name | Echo Metal Wood Screw Set 50P (Case Included) | ||
|---|---|---|---|
| price | 98 yen (tax included) | ||
![[ Leten Thrusting Pro Fixing Base Fabrication] Bracket Installation 3](../../imgs/dendou/leten_thrusting_pro-kotei/leten_thrusting_pro-kotei-c3.jpg)
The L-shaped brackets are attached to the base in this way to prevent the board from tipping over.
![[ Leten Thrusting Pro Fixing Base Fabrication] Bracket Installation 4](../../imgs/dendou/leten_thrusting_pro-kotei/leten_thrusting_pro-kotei-c4.jpg)
Next, I prepared these two metal fittings.
| Product name | DAIDOHANT (Reinforcement Hardware) Black Multi-purpose Hardware L-shaped [Steel] (W)40 x (A)45 x (B)90mm (1 piece) 69103 | ||
|---|---|---|---|
| price | 377 yen (tax included) x 2 | ||
![[ Leten Thrusting Pro Fixing Base Fabrication] Mounting Hardware 5](../../imgs/dendou/leten_thrusting_pro-kotei/leten_thrusting_pro-kotei-c5.jpg)
I installed it like this, but the bracket on the right side could only be secured with two wood screws, which seemed insufficient in terms of strength, so I added G17 adhesive to the back of the bracket afterwards.
![[ Leten Thrusting Pro Fixing Base Fabrication] Bracket Installation 6](../../imgs/dendou/leten_thrusting_pro-kotei/leten_thrusting_pro-kotei-c6.jpg)
That completes the attachment of the metal fittings. However, thinking about it afterward, I think it might have been better to attach the hook-and-loop fasteners, which I will introduce next, before attaching the L-shaped fittings.
When using a staple gun on hook-and-loop fasteners, I think it's easier if there are no metal parts.
![[ Leten Thrusting Pro Fixing Stand Production] Velcro Attachment 1](../../imgs/dendou/leten_thrusting_pro-kotei/leten_thrusting_pro-kotei-d1.jpg)
I have prepared these hook-and-loop fasteners for you.
| Product name | iHouse all Velcro Fasteners, Double-Sided Tape, Hot Melt, Super Strong, Waterproof, Heat Resistant, Dustproof, Male and Female (5 x 3.94 in (10 cm), 15 pieces) | ||
|---|---|---|---|
| price | 699 yen (tax included) | ||
![[ Leten Thrusting Pro Fixing Stand Fabrication] Velcro Attachment 2](../../imgs/dendou/leten_thrusting_pro-kotei/leten_thrusting_pro-kotei-d2.jpg)
The back of Leten Thrusting Pro has a flat surface like this. Degrease the bonding surface with parts cleaner.
![[ Leten Thrusting Pro Fixing Stand Production] Velcro Attachment 3](../../imgs/dendou/leten_thrusting_pro-kotei/leten_thrusting_pro-kotei-d3.jpg)
The hook-and-loop fastener has an adhesive side on the back.
![[ Leten Thrust Pro Fixing Stand Production] Velcro Attachment 4](../../imgs/dendou/leten_thrusting_pro-kotei/leten_thrusting_pro-kotei-d4.jpg)
As you can see, two hook-and-loop fasteners can be attached vertically. Because of their strong adhesive properties, simply sticking them on provides sufficient strength.
![[ Leten Thrust Pro Fixing Stand Production] Velcro Attachment 5](../../imgs/dendou/leten_thrusting_pro-kotei/leten_thrusting_pro-kotei-d5.jpg)
Attach one side of the hook-and-loop fastener to the mounting base, but since this is wood, add G17 adhesive as well.
![[ Leten Thrust Pro Fixing Stand Production] Velcro Attachment 6](../../imgs/dendou/leten_thrusting_pro-kotei/leten_thrusting_pro-kotei-d6.jpg)
I left it for a day to let the glue dry. However, since the hook-and-loop fasteners are repeatedly attached and detached, I think this method won't be strong enough and they will eventually peel off.
![[ Leten Thrusting Pro Fixing Stand Production] Velcro Attachment 7](../../imgs/dendou/leten_thrusting_pro-kotei/leten_thrusting_pro-kotei-d7.jpg)
So, I decided to use a staple gun to fasten it. This is the staple gun I used.
| Product name | MAX TG-H Stapler, suitable for use on wood. | ||
|---|---|---|---|
| price | 1,064 yen (tax included) | ||
![[ Leten Thrust Pro Fixing Stand Production] Velcro Attachment 8](../../imgs/dendou/leten_thrusting_pro-kotei/leten_thrusting_pro-kotei-d8.jpg)
A tacker is a stapler that can also be used on wood. We'll use it to fasten things together with a bang, bang.
![[ Leten Thrust Pro Fixing Stand Production] Velcro Attachment 9](../../imgs/dendou/leten_thrusting_pro-kotei/leten_thrusting_pro-kotei-d9.jpg)
I've finished attaching the hook-and-loop fasteners using a staple gun. They're a little uneven, but the strength is more than adequate.
![[ Leten Thrust Pro Fixing Stand Production] Velcro Attachment 10](../../imgs/dendou/leten_thrusting_pro-kotei/leten_thrusting_pro-kotei-d10.jpg)
Finally, I attached the leftover anti-slip pads to the metal fittings at the top. I added them because I had some extras, so it's not a problem if you don't use them.
![[ Leten Thrusting Pro Fixing Stand Production] Velcro Attachment 11](../../imgs/dendou/leten_thrusting_pro-kotei/leten_thrusting_pro-kotei-d11.jpg)
This is an anti-slip pad with adhesive tape on the back. Cut it to fit the metal fittings and stick it on.
| Product name | Anti-slip pads | ||
|---|---|---|---|
| price | 718 yen (tax included) | ||
![[ Leten Thrusting Pro Fixing Stand Production] Velcro Attachment 12](../../imgs/dendou/leten_thrusting_pro-kotei/leten_thrusting_pro-kotei-d12.jpg)
I attached anti-slip pads.
![[ Leten Thrusting Pro Mounting Stand Production] Completed! 1](../../imgs/dendou/leten_thrusting_pro-kotei/leten_thrusting_pro-kotei-e1.jpg)
Let's try attaching Leten Thrusting Pro to the completed mounting base.
![[ Leten Thrusting Pro Mounting Stand Production] Completed! 2](../../imgs/dendou/leten_thrusting_pro-kotei/leten_thrusting_pro-kotei-e2.jpg)
This is how it's fixed in place when viewed from the side.
![[ Leten Thrusting Pro Mounting Stand Production] Completed! 3](../../imgs/dendou/leten_thrusting_pro-kotei/leten_thrusting_pro-kotei-e3.jpg)
I'm using it on Stand Basic . This is what the back looks like.
![[ Leten Thrusting Pro Mounting Stand Production] Completed! 4](../../imgs/dendou/leten_thrusting_pro-kotei/leten_thrusting_pro-kotei-e4.jpg)
This is what the other side looks like. The two metal fittings at the top are misaligned because of the connection point for the earphones and the USB port.
![[ Leten Thrusting Pro Mounting Stand Production] Completed! 5](../../imgs/dendou/leten_thrusting_pro-kotei/leten_thrusting_pro-kotei-e5.jpg)
The L-shaped bracket is designed like this to avoid interfering with male masturbator .
![[ Leten Thrusting Pro Mounting Stand Production] Completed! 6](../../imgs/dendou/leten_thrusting_pro-kotei/leten_thrusting_pro-kotei-e6.jpg)
This is a view from above.
![[ Leten Thrusting Pro Mounting Stand Production] Completed! 7](../../imgs/dendou/leten_thrusting_pro-kotei/leten_thrusting_pro-kotei-e7.jpg)
The hook-and-loop fasteners are so strong that they alone provide sufficient hold. Even if you shake it as hard as you can, it won't budge at all.
![[ Leten Thrusting Pro Mounting Stand Fabrication] Stand Basic Installation 1](../../imgs/dendou/leten_thrusting_pro-kotei/leten_thrusting_pro-kotei-f1.jpg)
Now let's try it out and see what happens when we actually use it with Stand Basic .
![[ Leten Thrusting Pro Mounting Stand Fabrication] Stand Basic Installation 2](../../imgs/dendou/leten_thrusting_pro-kotei/leten_thrusting_pro-kotei-f2.jpg)
It won't fall off even if you turn it upside down or shake it.
![[ Leten Thrusting Pro Mounting Stand Fabrication] Stand Basic Installation 3](../../imgs/dendou/leten_thrusting_pro-kotei/leten_thrusting_pro-kotei-f3.jpg)
Since it becomes almost horizontal, a standing blowjob position is of course possible.
![[ Leten Thrusting Pro Mounting Stand Fabrication] Stand Basic Installation 4](../../imgs/dendou/leten_thrusting_pro-kotei/leten_thrusting_pro-kotei-f4.jpg)
Stand Basic pairs perfectly with a height-adjustable desk. Having one makes a huge difference in usability.
![[ Leten Thrusting Pro Mounting Stand Fabrication] Stand Basic Installation 5](../../imgs/dendou/leten_thrusting_pro-kotei/leten_thrusting_pro-kotei-f5.jpg)
The angle can be adjusted, so you can set it to your preferred angle.
![[ Leten Thrusting Pro Mounting Stand Fabrication] Stand Basic Installation 6](../../imgs/dendou/leten_thrusting_pro-kotei/leten_thrusting_pro-kotei-f6.jpg)
It can be pointed straight down at most, but it cannot be bent in the opposite direction.
As for the user experience, it's fantastic! The feeling of satisfaction really increases when it's properly secured. Even if male masturbator is sticking out a little, it can be adjusted to the perfect position regardless, allowing you to keep it running in the most comfortable state, which is wonderful. I'm glad I made it.
.png) Advantages of Stand Basic
Advantages of Stand Basic
Unlike monitor arms, this mount attaches directly to the base, resulting in very little vibration. Therefore, if you want to move your monitor around a lot, we recommend Stand Basic .
With Leten Thrusting Pro × Stand Basic combination, it seemed like it could handle speeds up to three levels. You might think, "Only three levels?", but the three levels of the Reten Thrusting Pro are already incredibly fast.
Since it doesn't require an extendable arm like a monitor arm, it takes up less installation space. It's also easy to set up, which is great because you can do it whenever you want.
The ease of installation is quite important for mounting fixtures, and if it's troublesome, you'll gradually stop wanting to use them, so being able to install them easily is a big advantage.
Disadvantages of Stand Basic
Because this type of restraint device requires you to position yourself in a fixed location, it's not good at making precise adjustments to your position.
It is possible to adjust it by moving it up and down RIDE ), but it is quite troublesome.
This mounting device is convenient if you have an electric height-adjustable desk, but it's difficult to use with desks that don't have this function, so I recommend a monitor arm instead.
It can handle angles ranging from nearly horizontal to directly downwards, but it cannot handle angles like reverse curvature.
Therefore, for those with a very erect penis that touches their stomach, this type of device is likely to slip off easily.
When the erection angle and the angle of Automatic Male Masturbators match perfectly, the pleasure is doubled, so if your erection angle is upward, you'll probably find it more pleasurable to adjust the angle with a monitor arm.
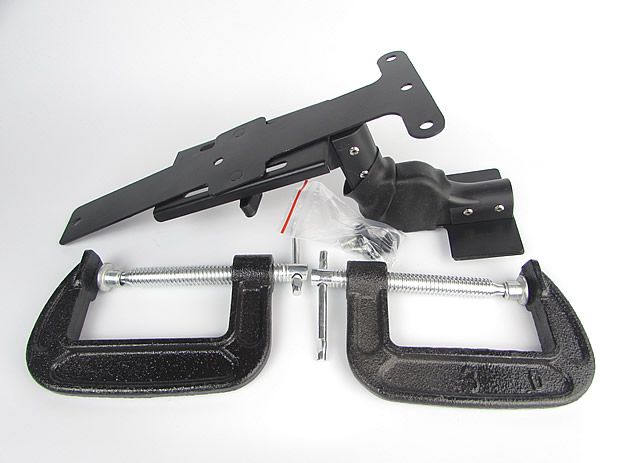
![[ Leten Thrusting Pro Mounting Stand Fabrication] VORZE Arm Stand Installation 1](../../imgs/dendou/leten_thrusting_pro-kotei/leten_thrusting_pro-kotei-g1.jpg)
I installed it on the VORZE arm stand. I always think that the pole is really in the way.
![[ Leten Thrusting Pro Mounting Stand Fabrication] VORZE Arm Stand Installation 2](../../imgs/dendou/leten_thrusting_pro-kotei/leten_thrusting_pro-kotei-g2.jpg)
The back is secured like this. Since it uses the same T-shaped plate as Stand Basic , it can be secured using the same hole positions.
![[ Leten Thrusting Pro Mounting Stand Fabrication] VORZE Arm Stand Installation 3](../../imgs/dendou/leten_thrusting_pro-kotei/leten_thrusting_pro-kotei-g3.jpg)
The strength of the arm is that it can be moved freely. Since it works with any desk, I don't feel any inconvenience even without a height adjustment function.
![[ Leten Thrusting Pro Mounting Stand Fabrication] VORZE Arm Stand Mounting 4](../../imgs/dendou/leten_thrusting_pro-kotei/leten_thrusting_pro-kotei-g4.jpg)
A horizontal position is also possible, of course.
![[ Leten Thrusting Pro Mounting Stand Fabrication] VORZE Arm Stand Mounting 5](../../imgs/dendou/leten_thrusting_pro-kotei/leten_thrusting_pro-kotei-g5.jpg)
You can also adjust the angle precisely.
![[ Leten Thrusting Pro Mounting Stand Fabrication] VORZE Arm Stand Installation 6](../../imgs/dendou/leten_thrusting_pro-kotei/leten_thrusting_pro-kotei-g6.jpg)
Unlike Stand Basic , it allows for reverse curvature to be fixed in place.
![[ Leten Thrusting Pro Mounting Stand Fabrication] VORZE Arm Stand Mounting 7](../../imgs/dendou/leten_thrusting_pro-kotei/leten_thrusting_pro-kotei-g7.jpg)
If you're a man with a strong erection that touches your stomach when sitting, this angle of the penis in the reverse direction should reduce slippage and provide more stability.
Regarding the user experience, the ability to reverse the arm makes it less likely to slip out compared to Stand Basic , which is a good thing. However, the arm moves if there is strong shaking, so I would like a stronger arm. Overall, the user experience was very good. I would definitely recommend that anyone who owns the Thrusting Pro try the hands-free function.
Advantages of the VORZE Arm Stand
The biggest advantage is that you can make fine adjustments within the arm's range of motion. I think it's the perfect mounting device for desks that don't have an electric height adjustment function.
Unlike Stand Basic , this allows for fixing at a reversed angle. For those with an upward-facing erection, setting it in the reverse-curved position will prevent it from slipping out.
Disadvantages of the VORZE Arm Stand
Since it's an arm, it's not suitable for moving things around at high speeds. Of course, this probably depends on the arm's performance.
The monitor arm used in the VORZE arm stand is, frankly, not a very good one, costing around 5000 yen or less, so naturally, the arm's fixing strength is not very high.
If you have the money, I think you could make a very strong mounting system by using a high-performance arm like those from Ergotron. I'd like to try it someday.
The long arm takes up a considerable amount of installation space. Furthermore, the pole is unnecessarily long, making it feel cumbersome to leave installed when not in use.
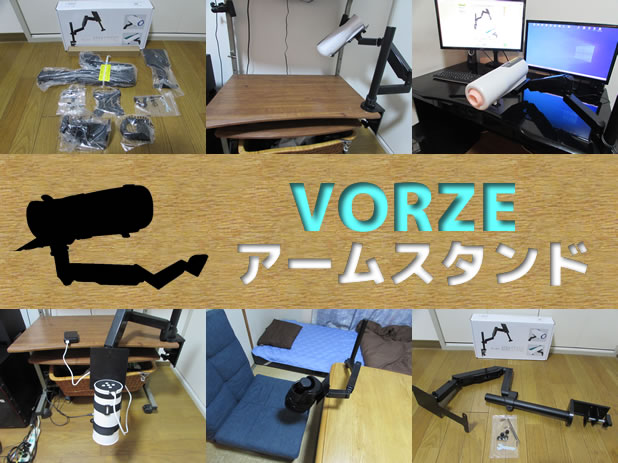
![[ Leten Thrusting Pro Fixing Stand Production] Electric male masturbator Holder Mounting 1](../../imgs/dendou/leten_thrusting_pro-kotei/leten_thrusting_pro-kotei-h1.jpg)
As a bonus, I also tried attaching it to the male masturbator holder. It only has two holes, but it can be fixed in place. I think it would be even more stable if another threaded insert nut were embedded at the top.
![[ Leten Thrusting Pro Fixing Stand Production] Electric male masturbator Holder Mounting 2](../../imgs/dendou/leten_thrusting_pro-kotei/leten_thrusting_pro-kotei-h2.jpg)
Yes, the male masturbator holder is strong enough to support the A10 piston SA in terms of weight, so it was able to be fixed without any problems. However, the distance to the hole is too far to use it as is. It's only within reach if you sit on the stacked cushions.
A major drawback of the male masturbator holder is that the angle cannot be adjusted. Personally, I would like to see a male masturbator holder that can be raised to a vertical position.
If you want to use Leten or Thrusting Pro on a bed or chair, we recommend this mounting method.
![[ Leten Thrusting Pro Fixed Stand Production] Big Advantages](../../imgs/dendou/leten_thrusting_pro-kotei/leten_thrusting_pro-kotei-t.jpg)
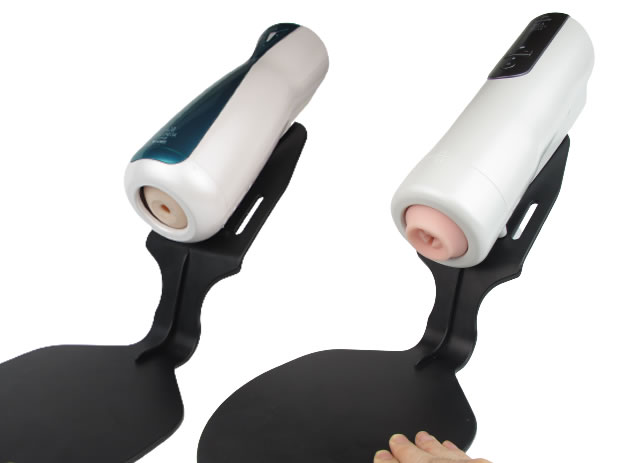
All of these can share the same fasteners.
This mounting bracket is designed to be attachable to the Stand Basic and VORZE arm stands. The reason for this type of mounting base is that we want to be able to share one mounting bracket with various Automatic Male Masturbators .
If you only need one Automatic Male Masturbators , you can probably just make one dedicated mounting bracket. However, if you're a greedy person like me who wants to use multiple Automatic Male Masturbators , you'll need to prepare a lot of them.
If we were to create custom mounting fixtures for each item, it would take up a lot of space and the cost would be exorbitant.
Are there others like me who, even if they use handy today, suddenly feel the urge to use the Cyclone depending on their mood? If you own multiple airbrushes like that, I highly recommend using a common mounting bracket, as it's definitely more convenient.