Handy 2 Maintenance
How to use the Handy Maintenance Kit


 |
|
|
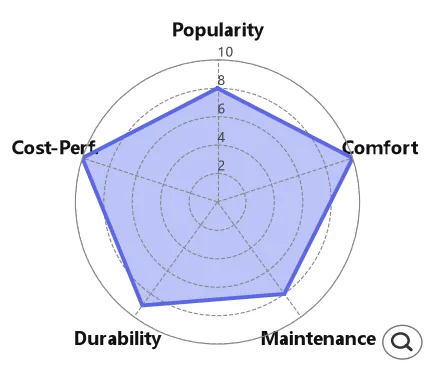
| Popularity | 8 | |
|---|---|---|
| Feeling good | 10 | |
| maintenance | 8 | |
| durability | 9 | |
| Cost performance | 10 | |
| retailers | the handy | ||
|---|---|---|---|
| size | Overall length: approximately 8.46 in (21.5 cm), width: approximately 2.36 in (6 cm), height: 2.87 in (7.3 cm) Included male masturbator : 5.12 in (13 cm), Weight 0.28 lb (128 g) Total weight (excluding included male masturbator ): 1.83 lb (831 g) | ||
| Manufacturer | handy | price | Check current price at retailer |
| Year of release | 2026 | Material name | none |
| Tightness | usually | stimulation | usually |
| odor | I don't mind | Oiliness | I don't mind |
| softness | soft | Inside out | ○ |
| kinds | Automatic Male Masturbators | ||
The handy2, whose release was suddenly announced in the summer of 2024, will finally be available for purchase from the official website this year, 2026. (The official website states that shipping will begin in February.) The original handy was released in 2021, so it will be released after a five-year gap. The popular Japanese-made A10 Piston SA was renewed in 2023, but the initial model was released in 2018, so it has been seven years since then. Considering that, five years until the release of a new handy model is a very fast pace.
Last summer, the crowdfunding campaign for the product began, and I placed an order. The product arrived around November of last year. As it was the long-awaited new handy product, I intended to write a review right away, but when I heard that the release date was February of the following year, 2026, I thought it might be a bit early to write a review. Before I knew it, the end of the year arrived, and now, finally, I'm writing this review as we welcome 2026.
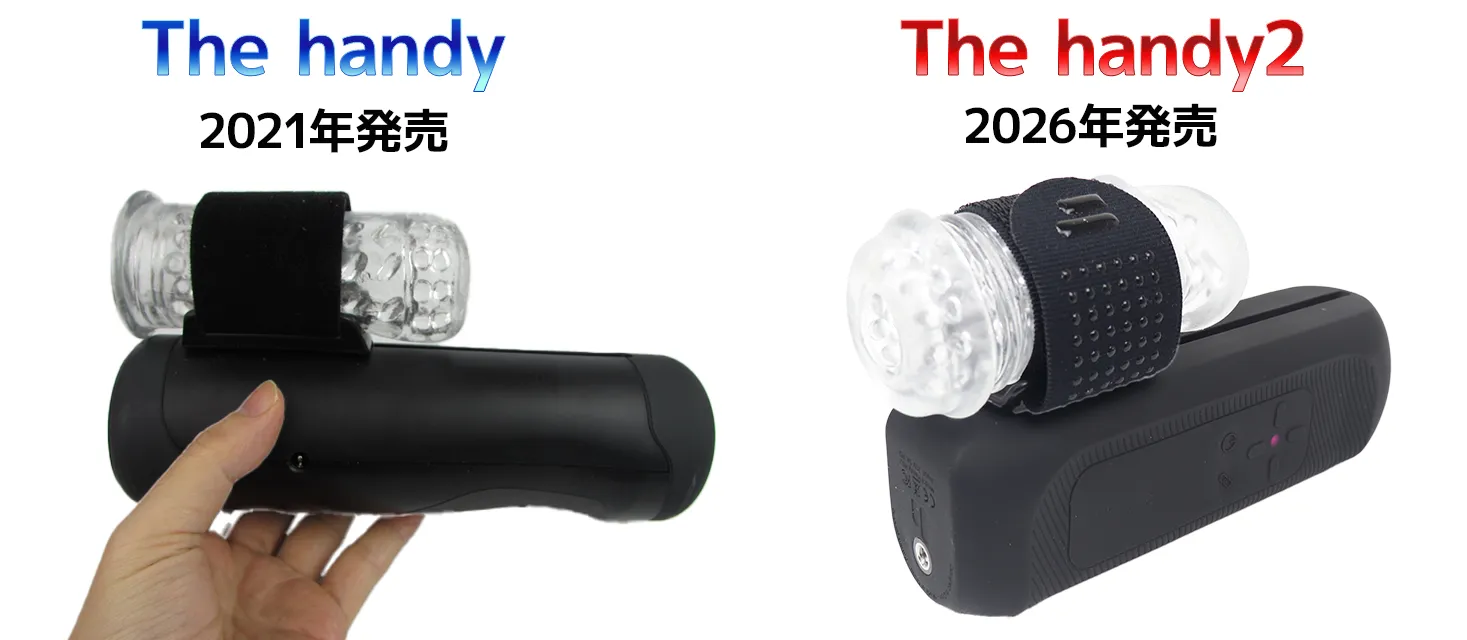
Of course, since it had been a long period of time, I had tried various things while continuously using the product, so I realize that I had spent a considerable amount of time on each review.
This time, I'll be reviewing the device in its normal state and using the genuine male masturbator for the first time. I'll try to make the review as detailed as possible so that it's easy to understand not only for those who have been using handy for a long time, but also for those who want to try handy for the first time. If you're interested, I'd be very happy if you read to the end!
table of contents
How to use the Handy Maintenance Kit
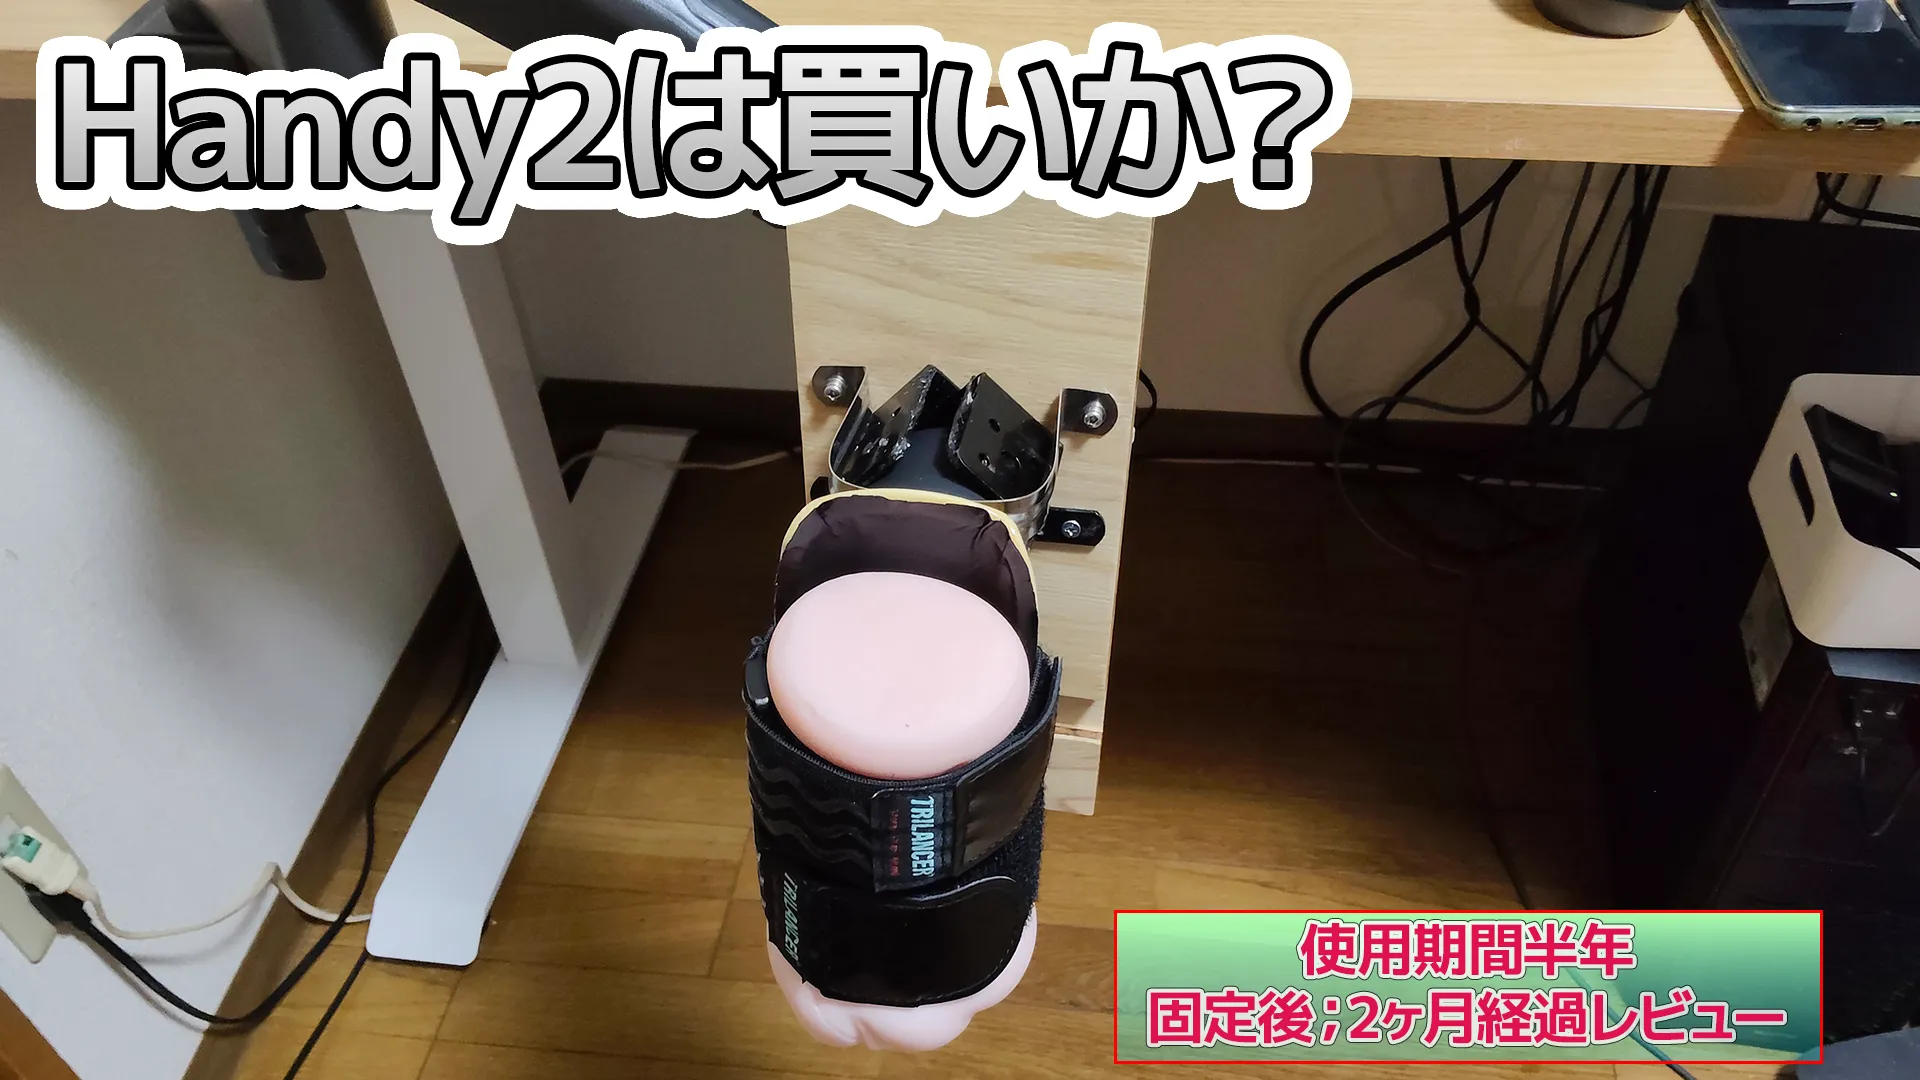
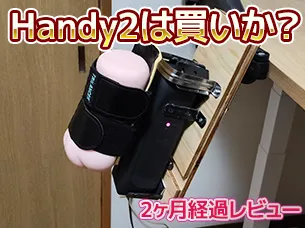
Positive aspects after using the fixing device for two months after its creation
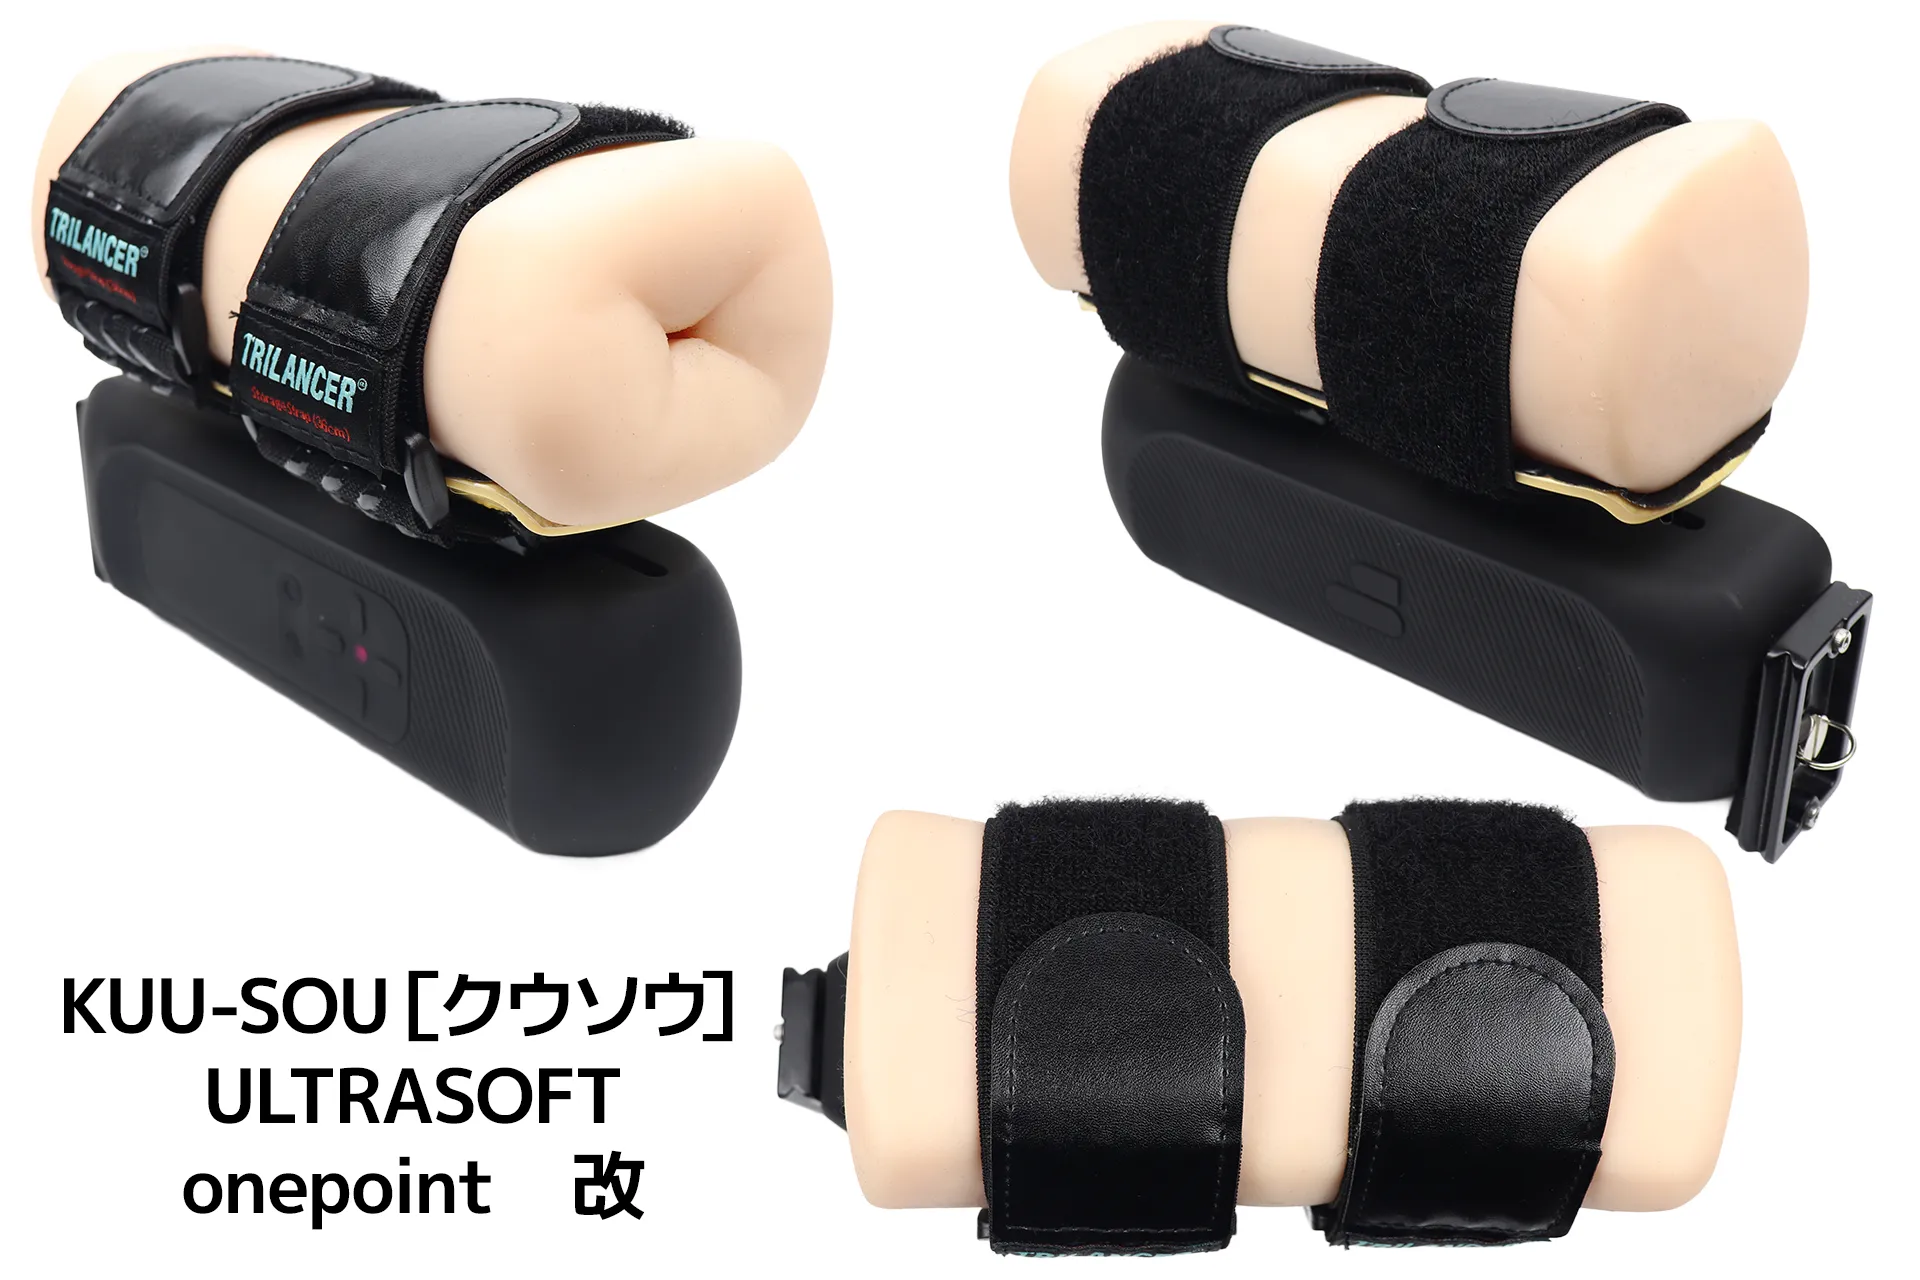
It finally arrived! Accessories for handy 2
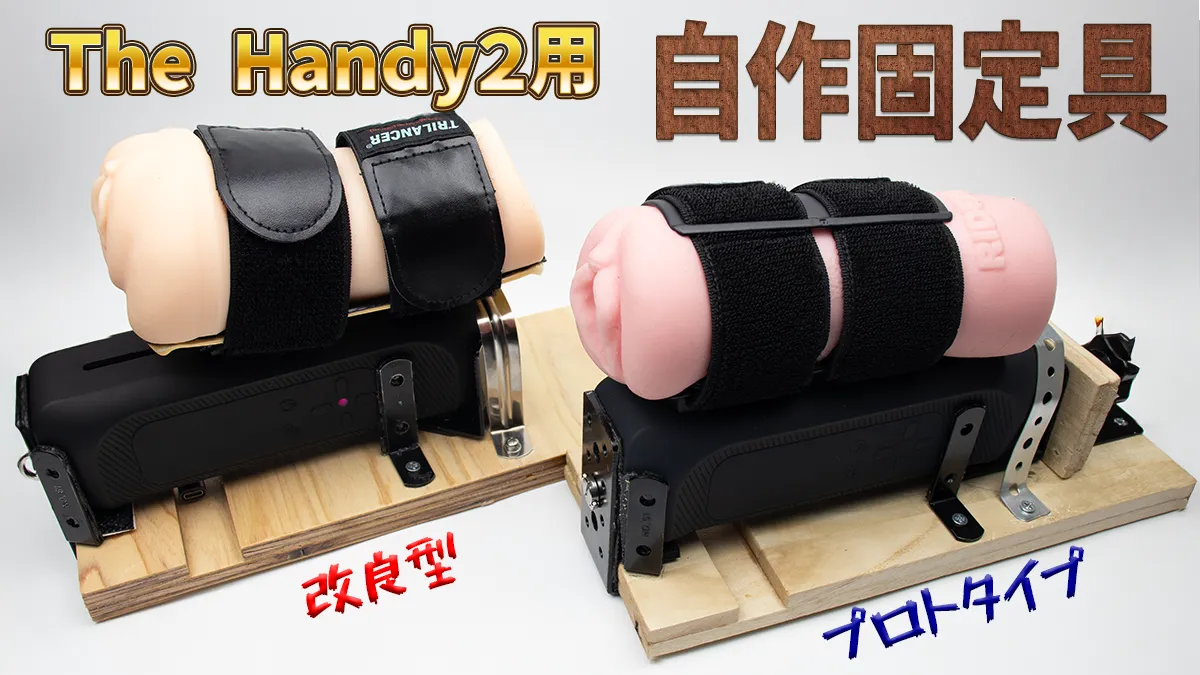
Tools needed for making fasteners
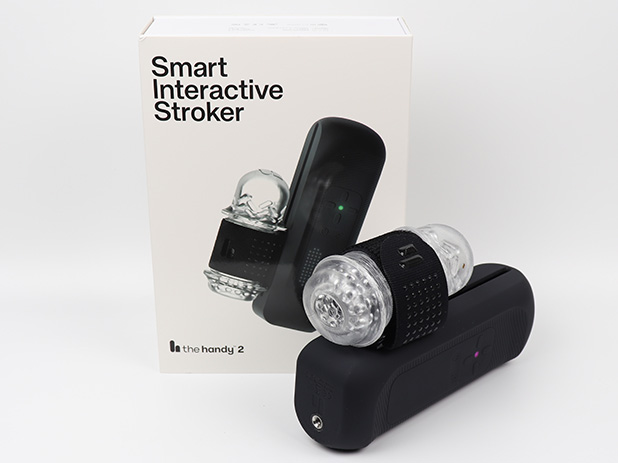
The Standard model offers comparable performance to the handy2 PRO , while maintaining high cost-performance.
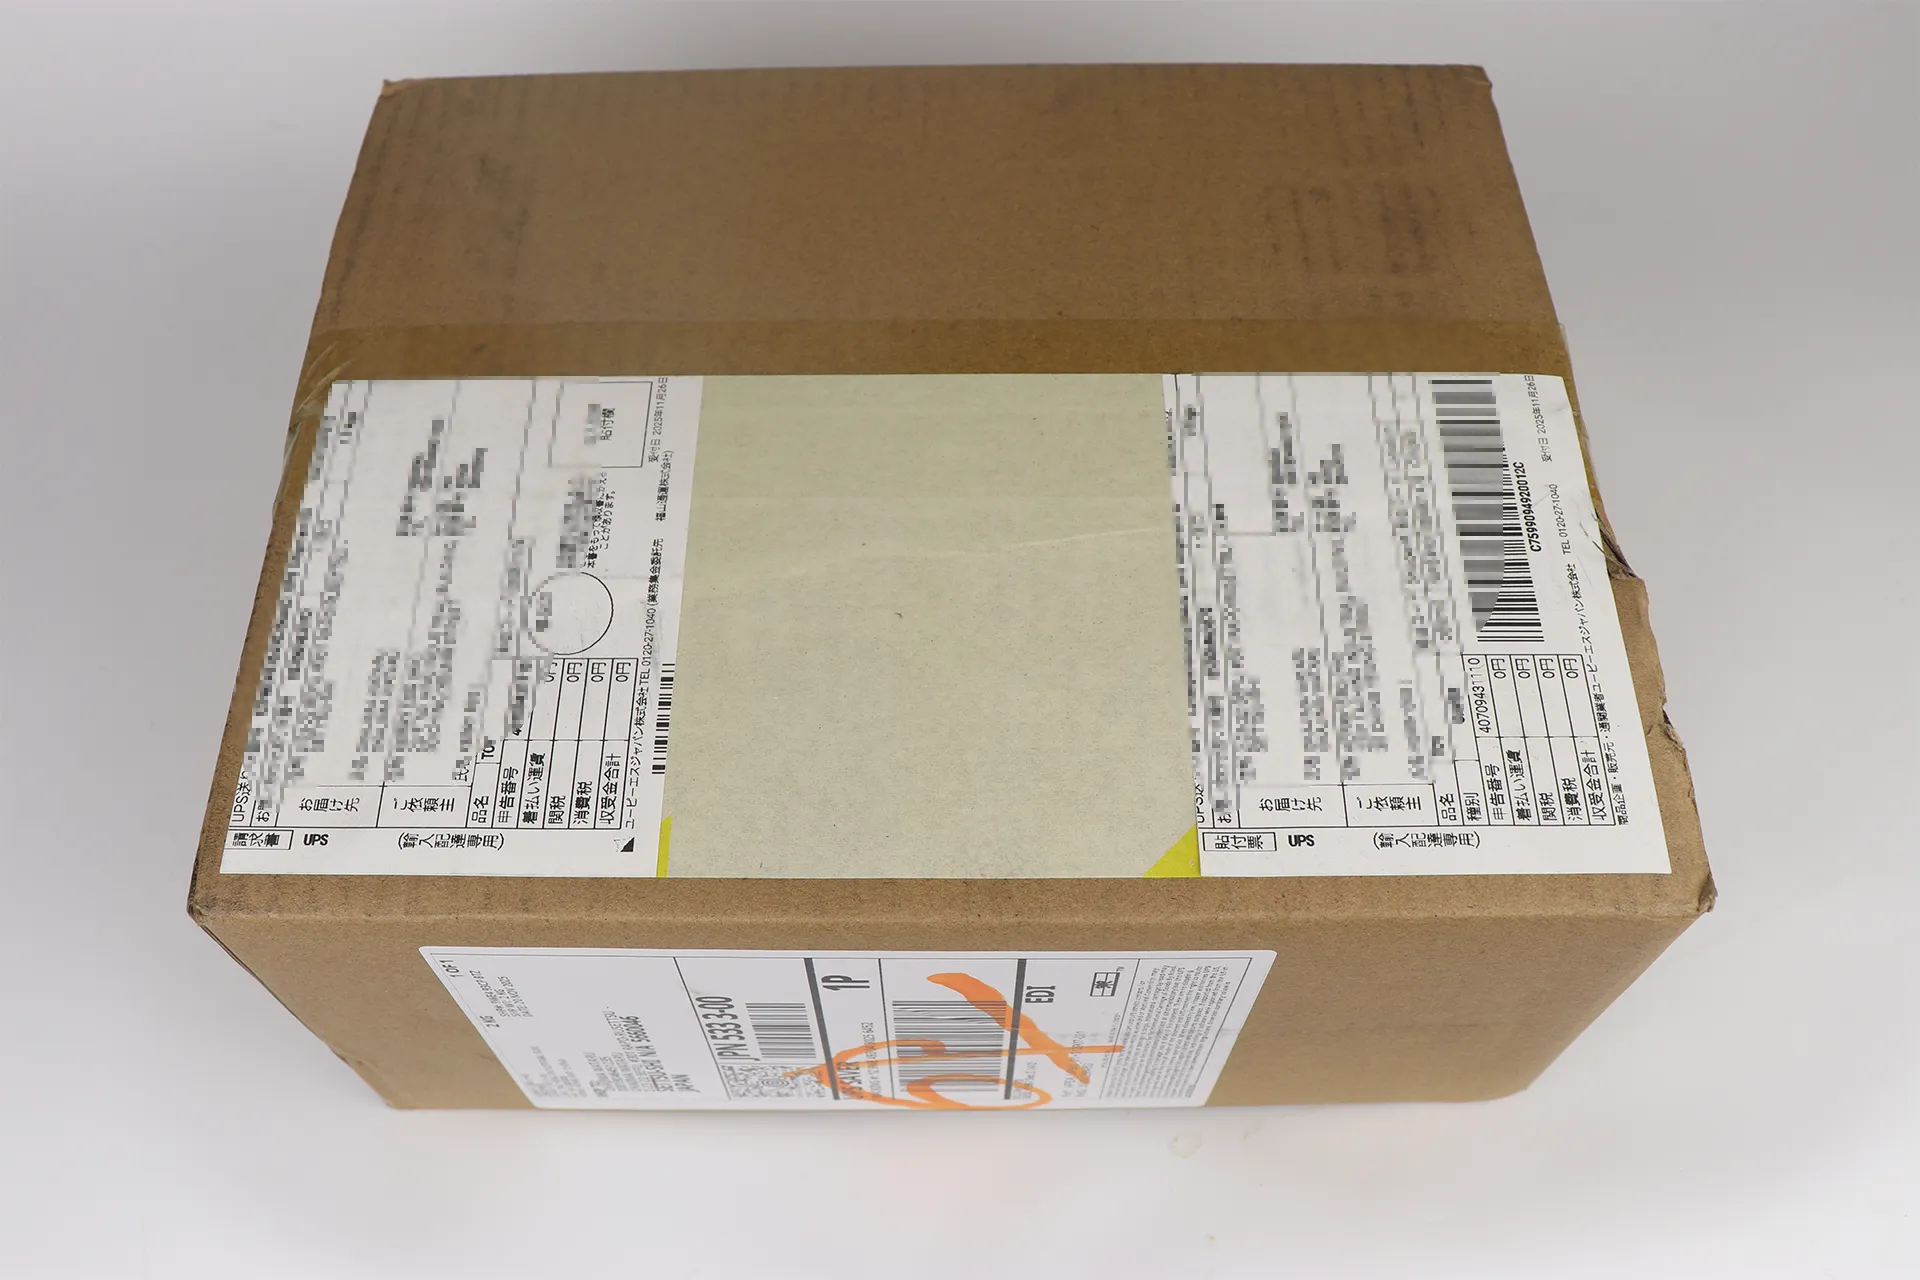
The package was shipped from Hong Kong via UPS, and I received a shipping notification by email. Domestic delivery was handled by Fukuyama Transport.
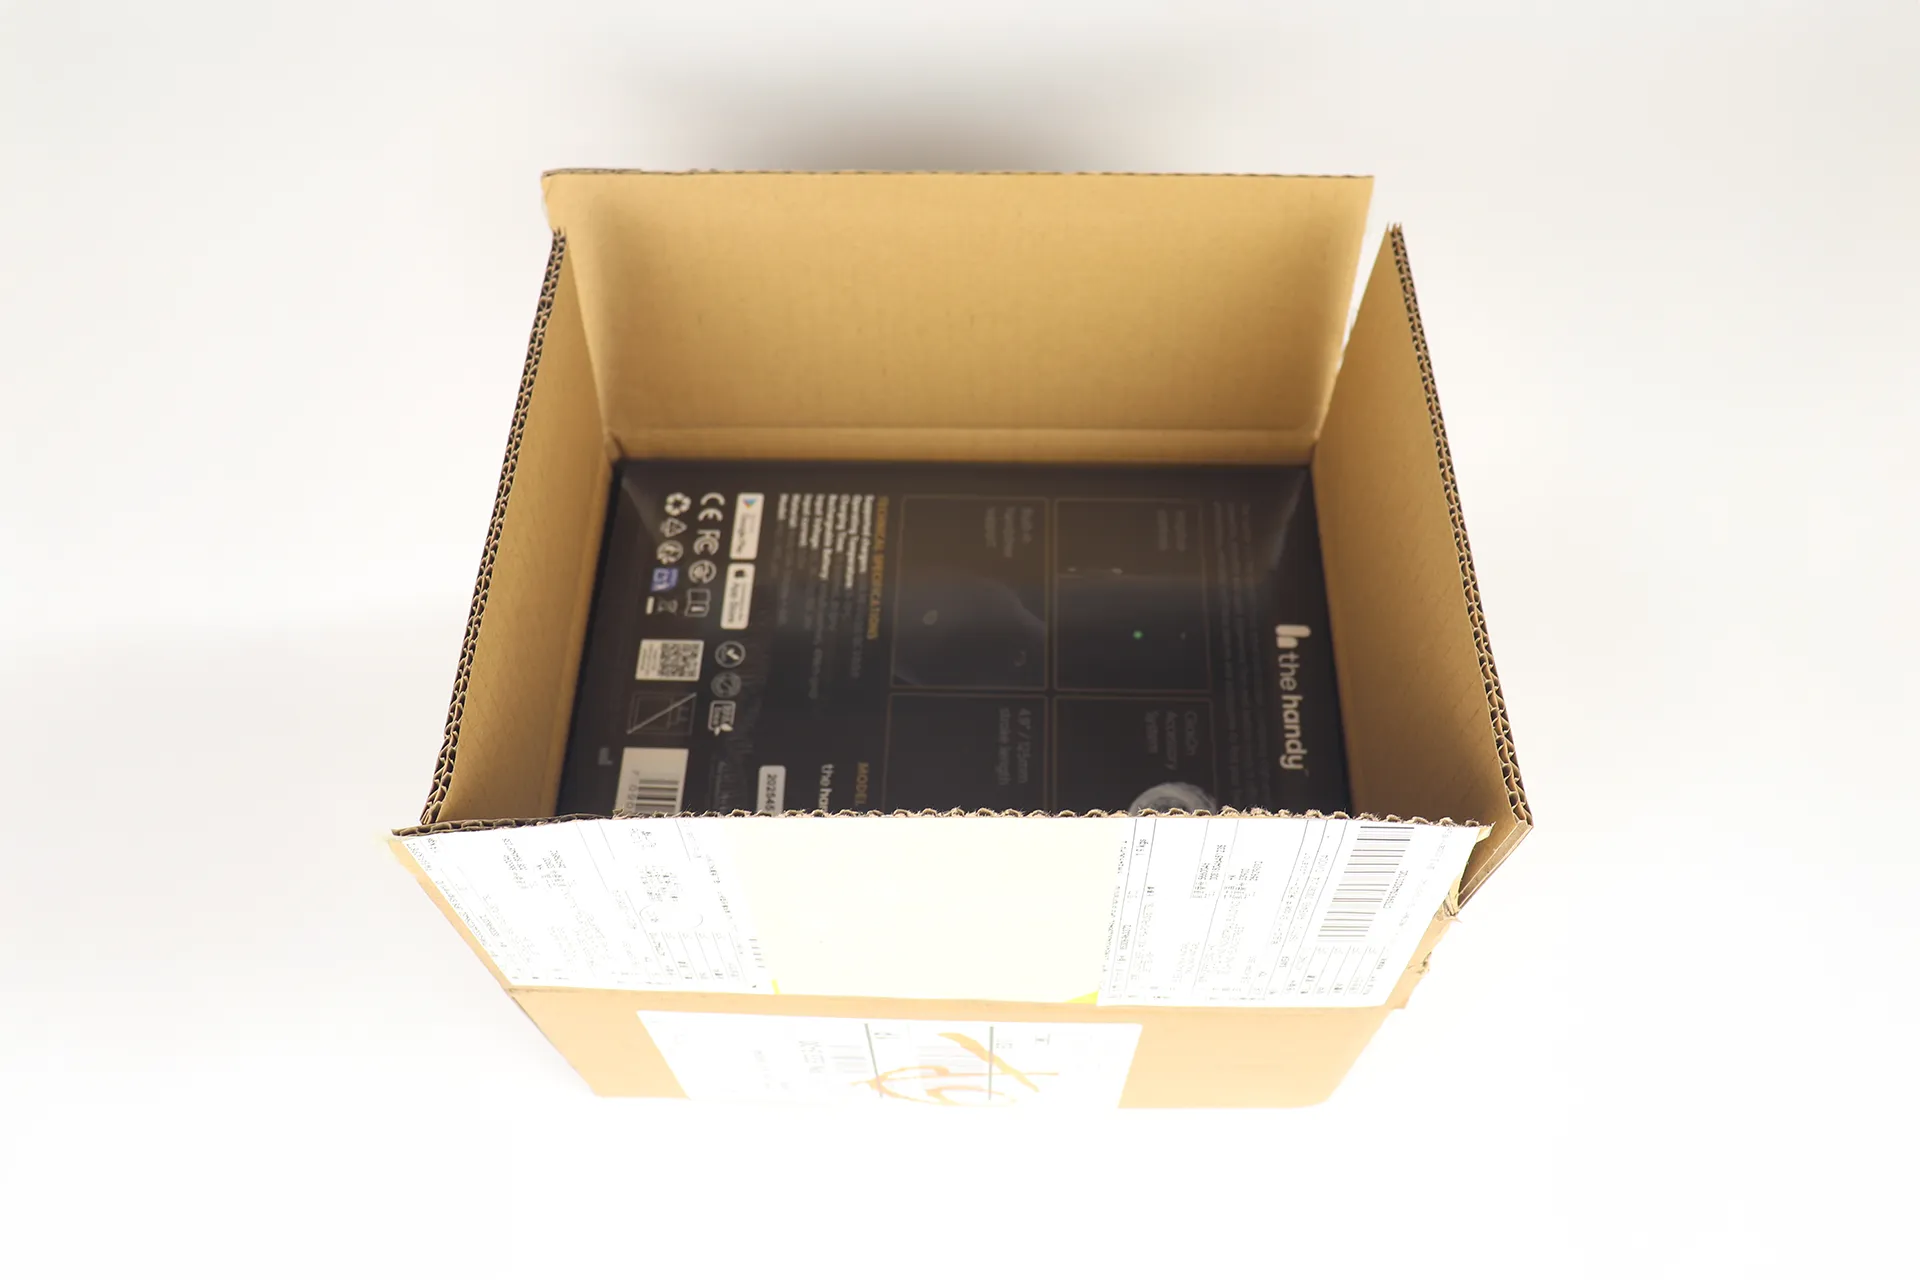
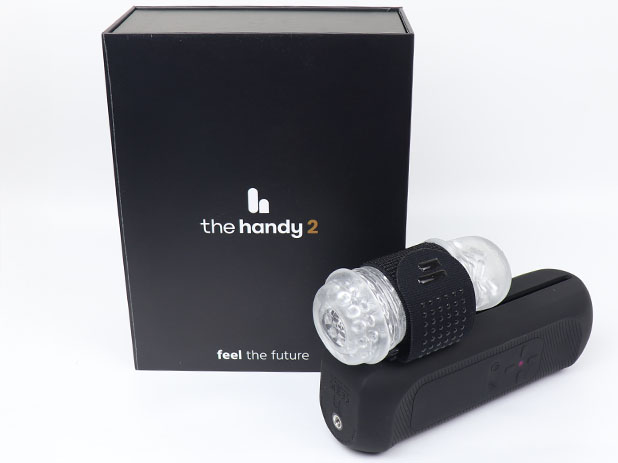
Unboxing complete! The box is the perfect size. It's shipped from overseas, but don't worry, there's no risk of delivery fraud.
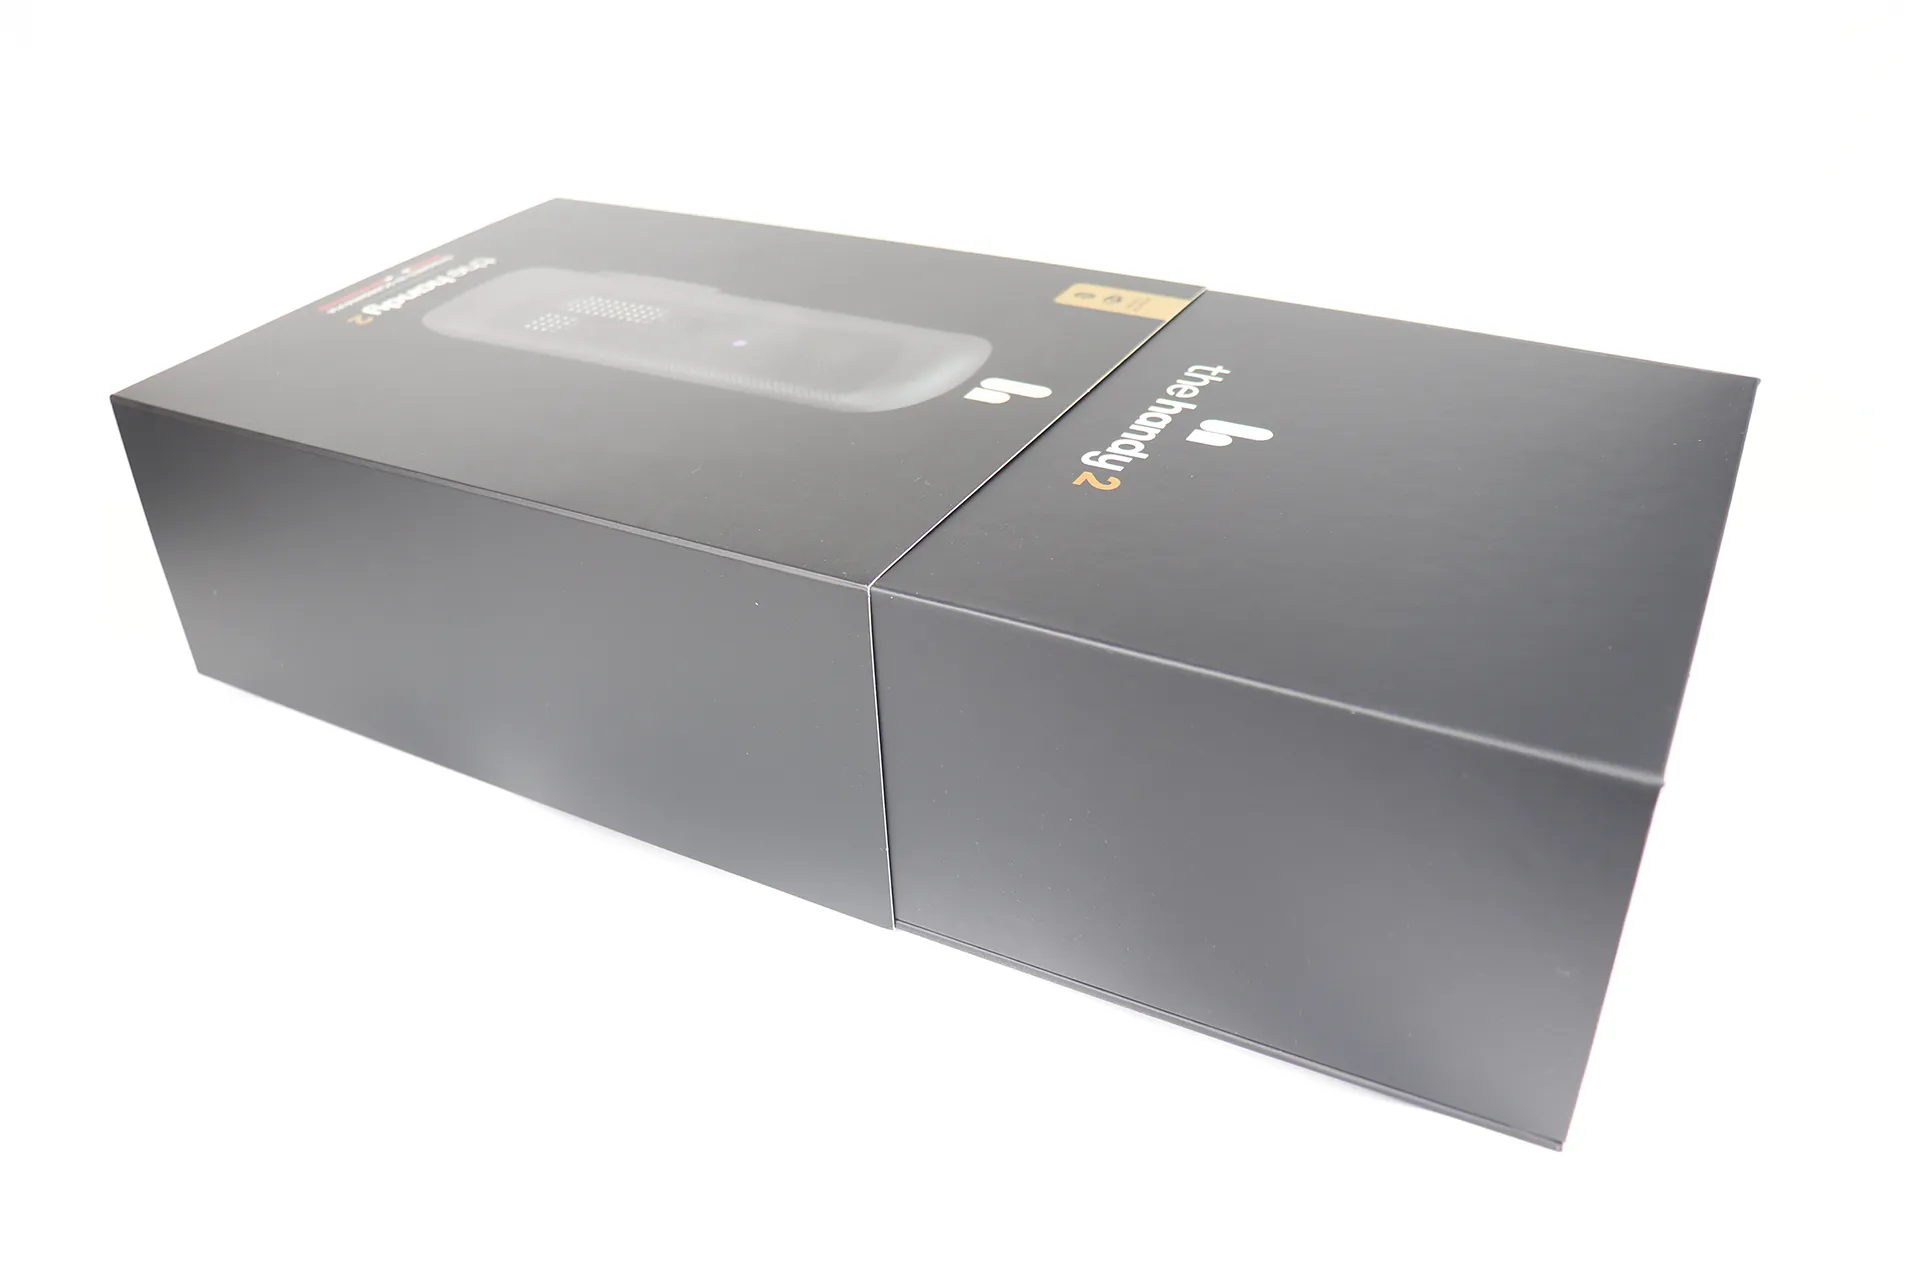
Pull out the black box.
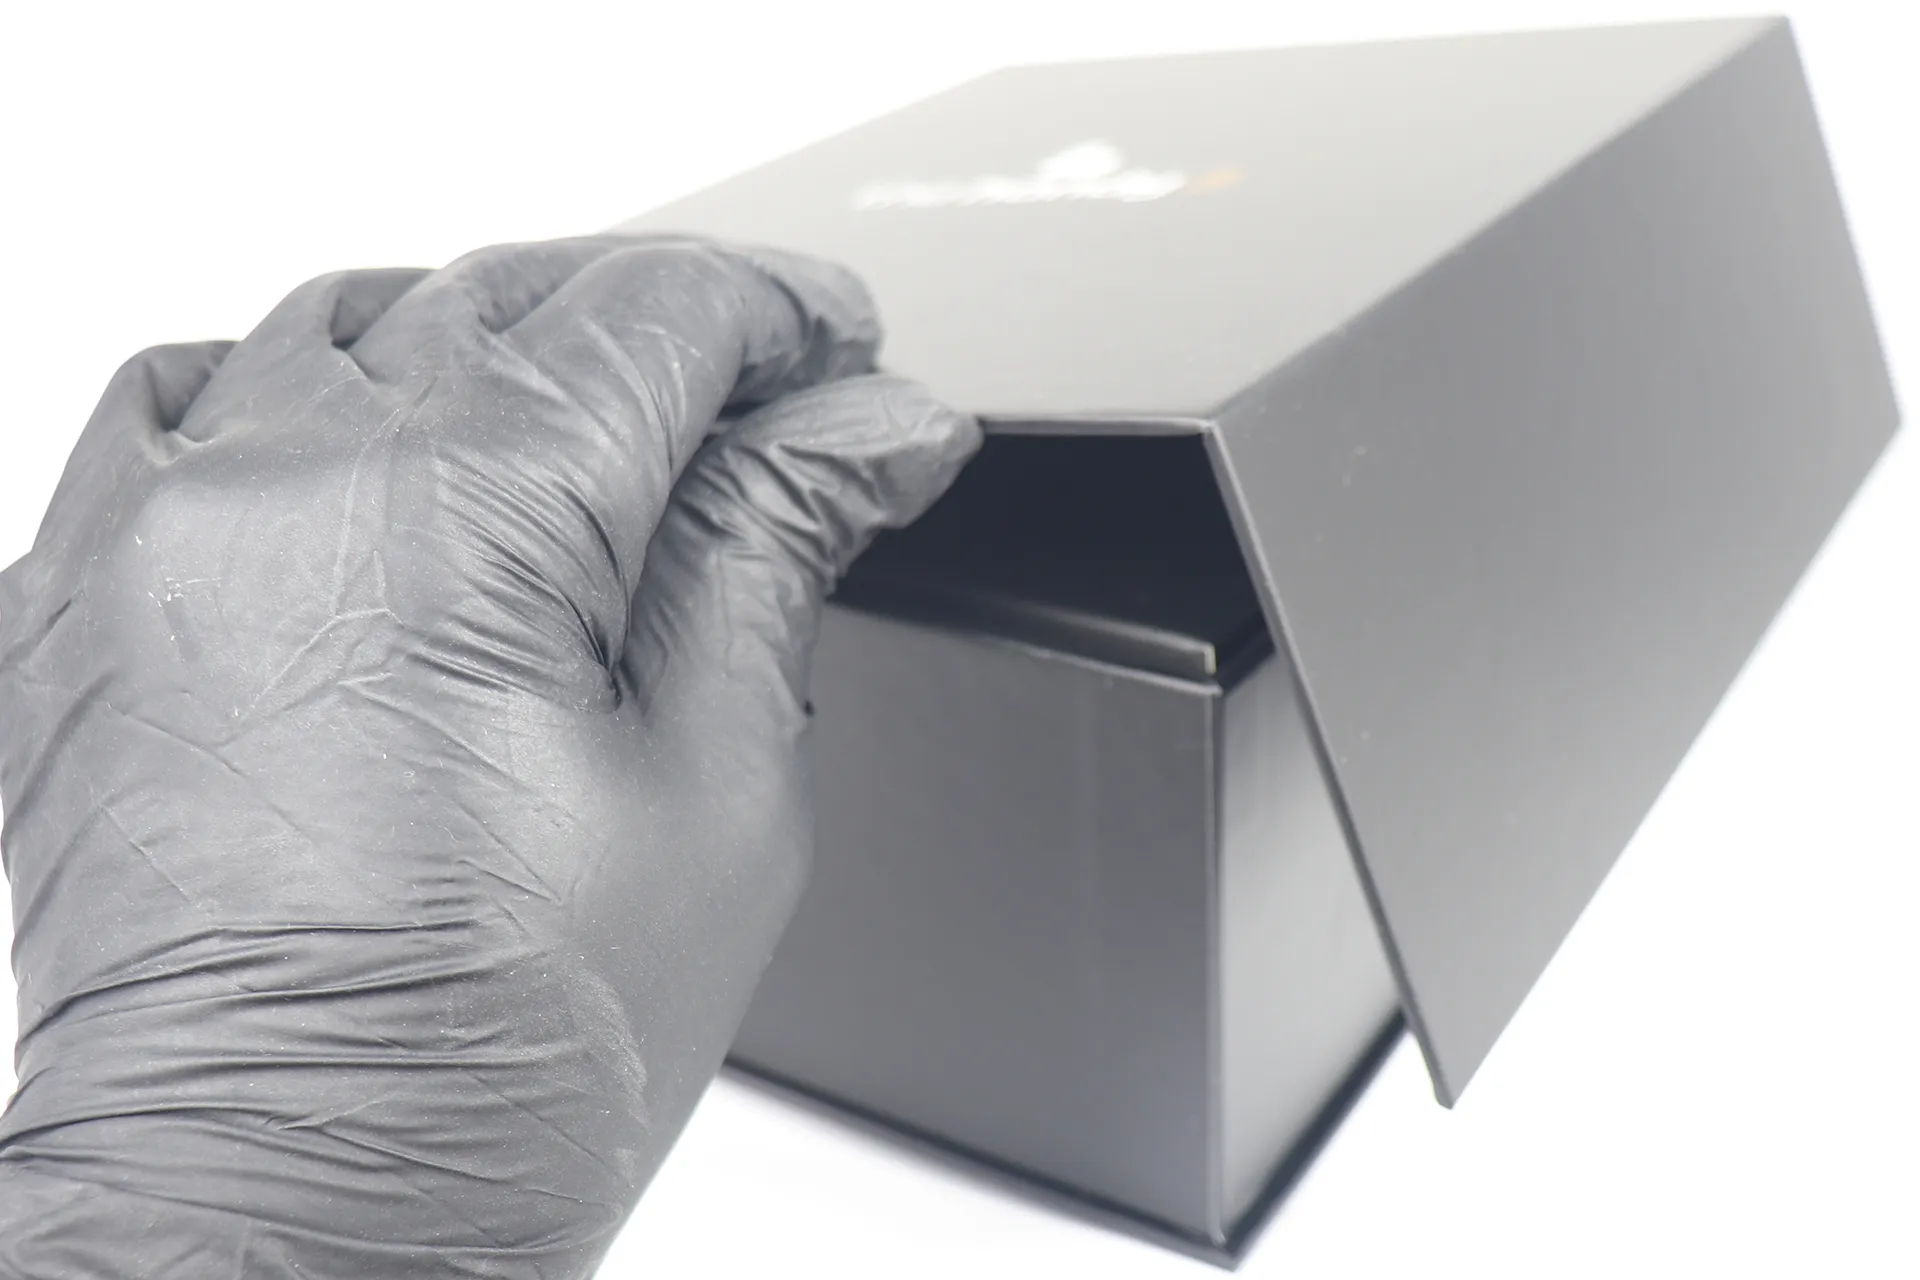
The box has a magnetic closure and looks very high-end. Since the box doesn't contain any erotic elements, you can store it as is with peace of mind.
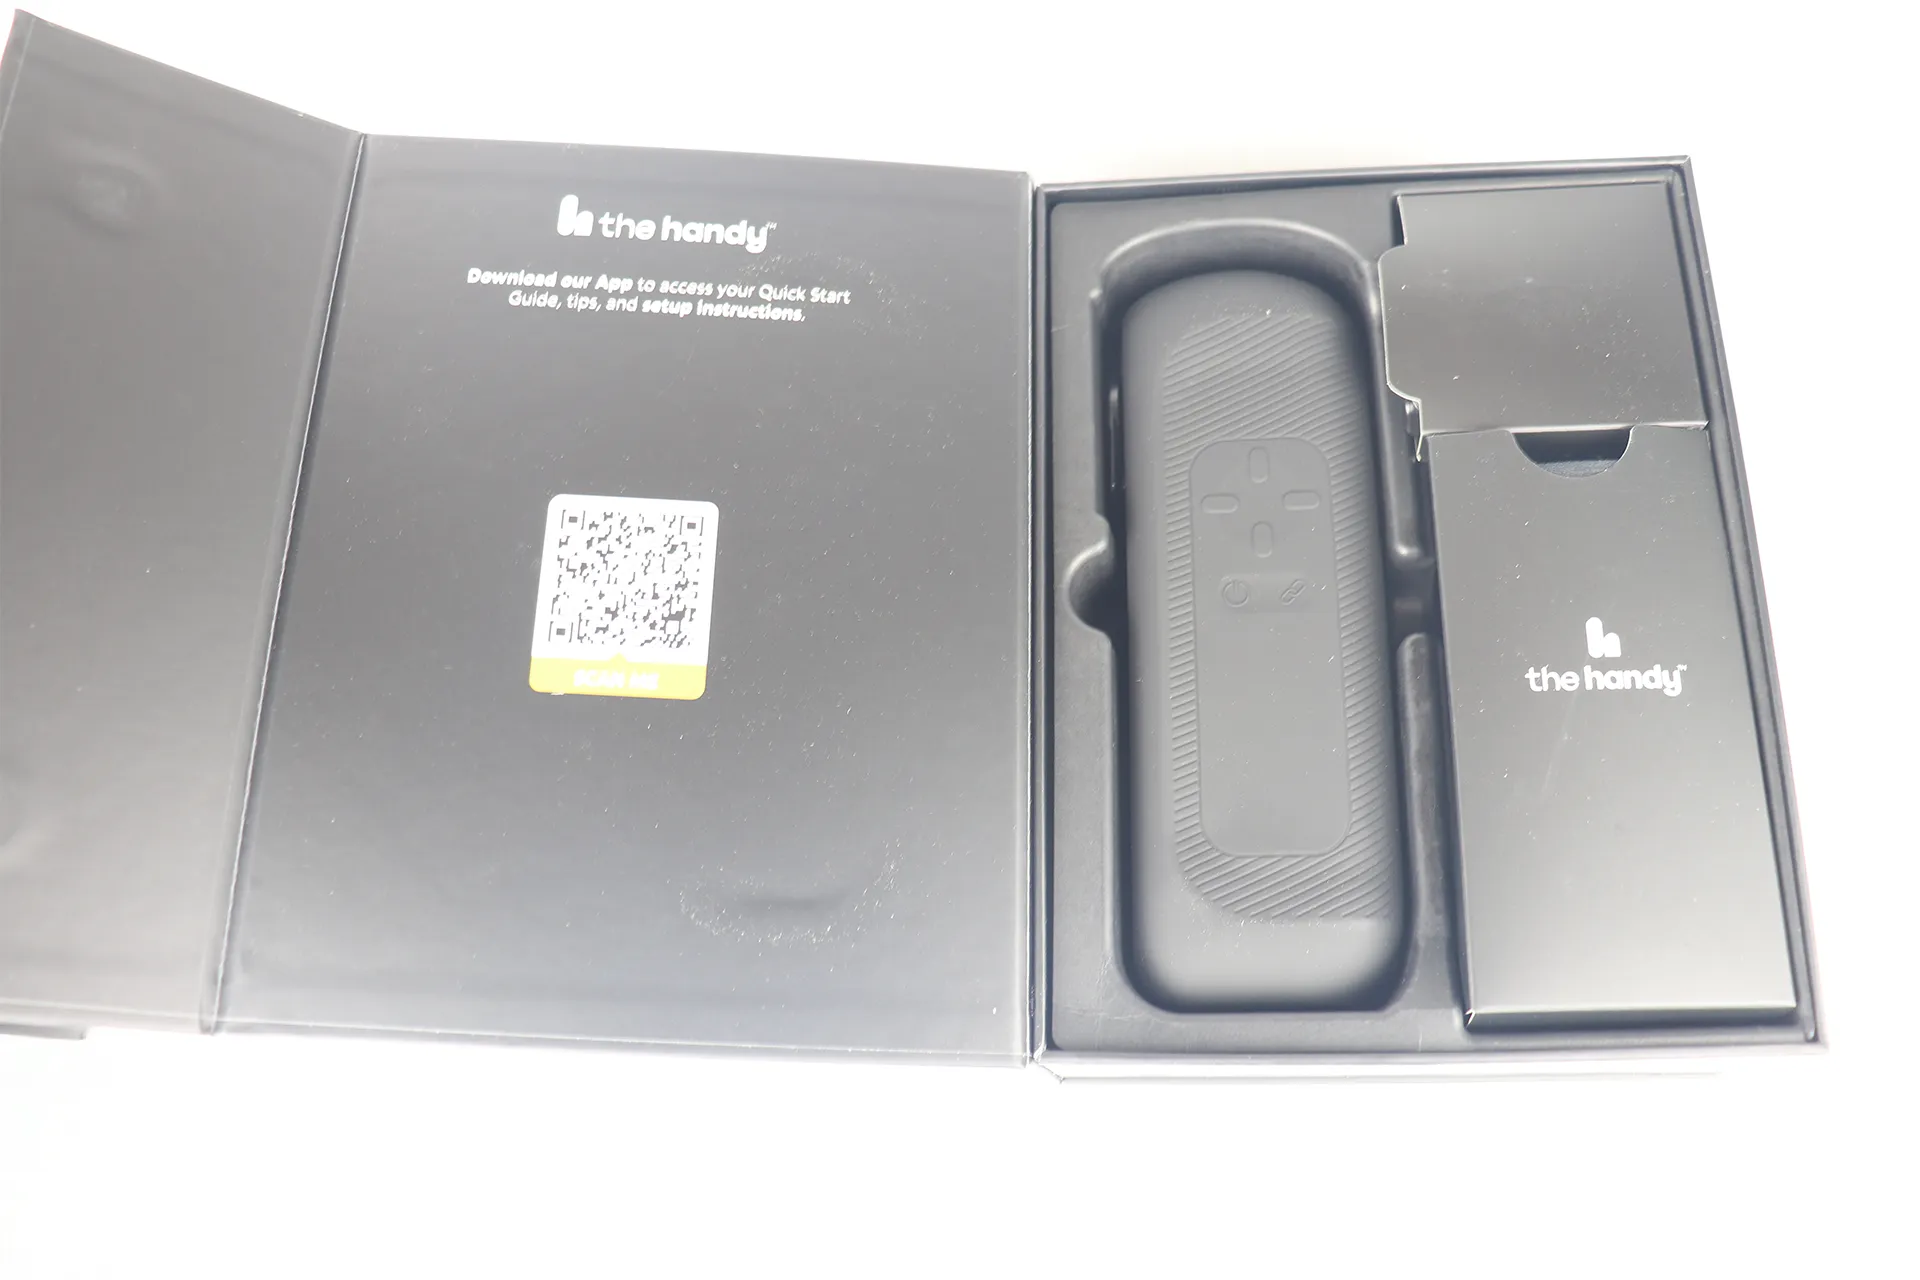
This is how the product looked inside the box. It includes a QR code for the app, so download it right away.
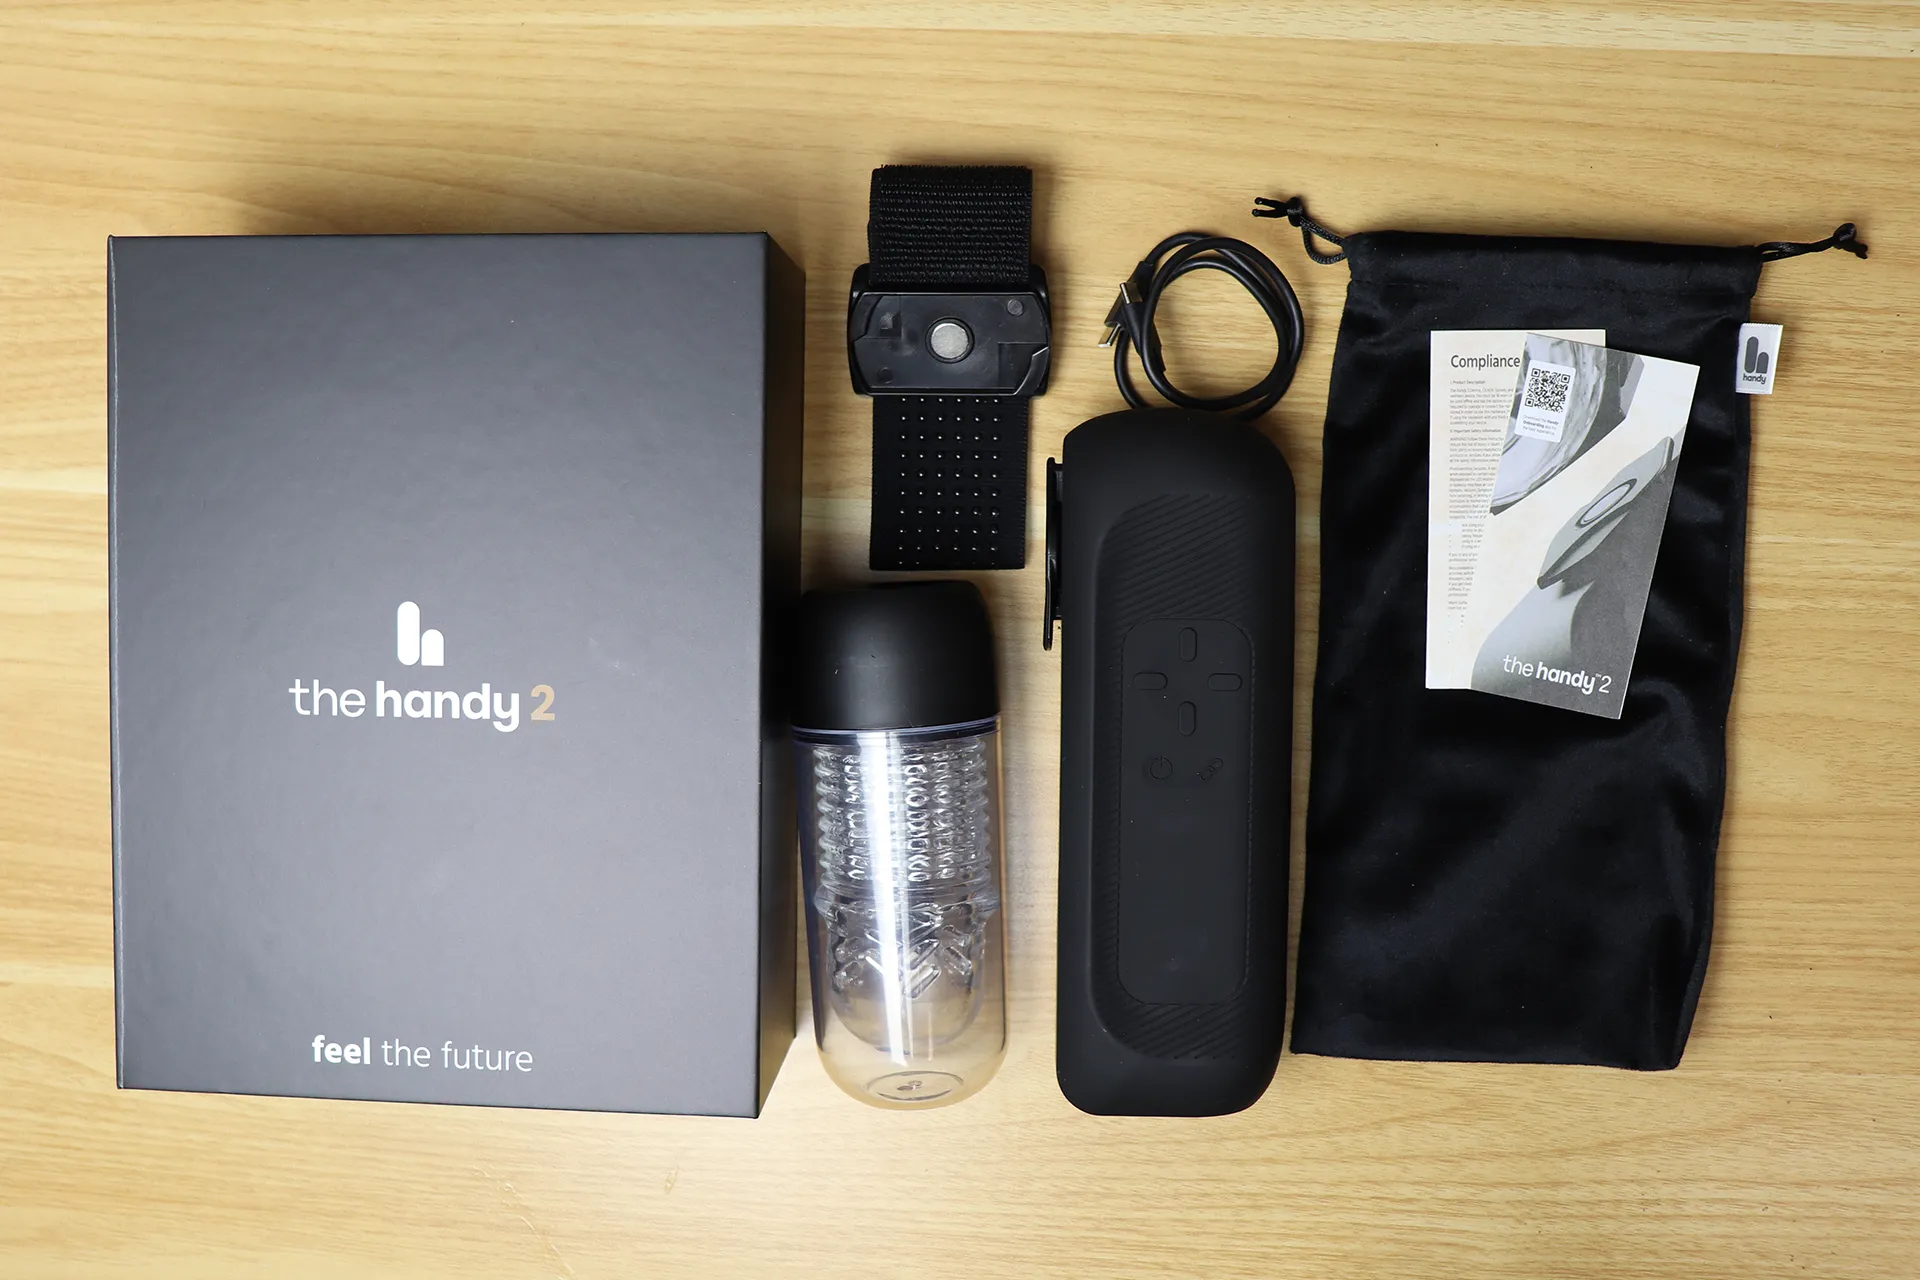
The included accessories were the dedicated male masturbator , the male masturbator holder, the main unit, a USB cable, an instruction manual, and a suede-like drawstring bag.
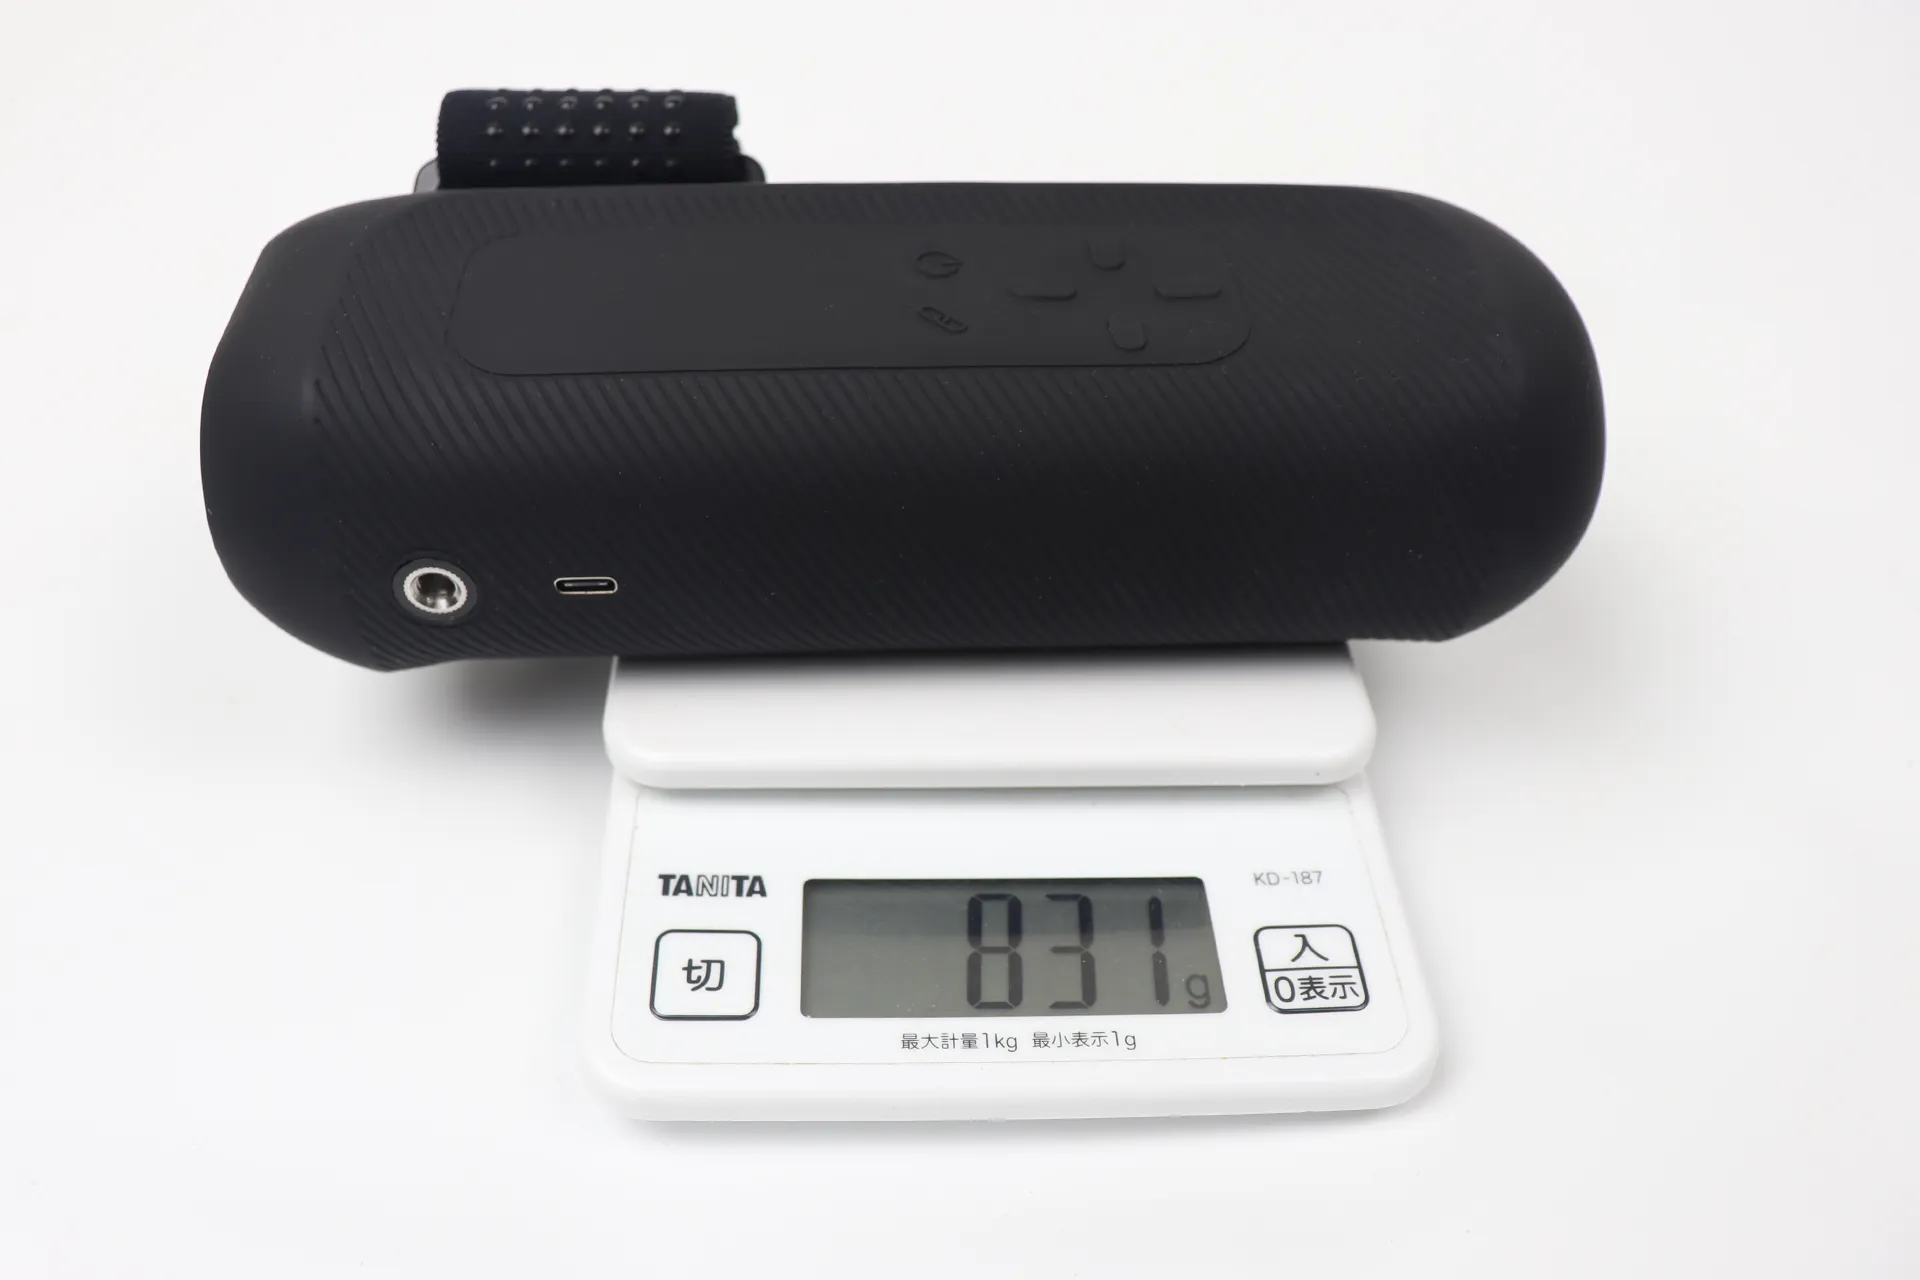
The main unit weighs 1.83 lb (831 g). Since it has a built-in battery, this weight is probably unavoidable.
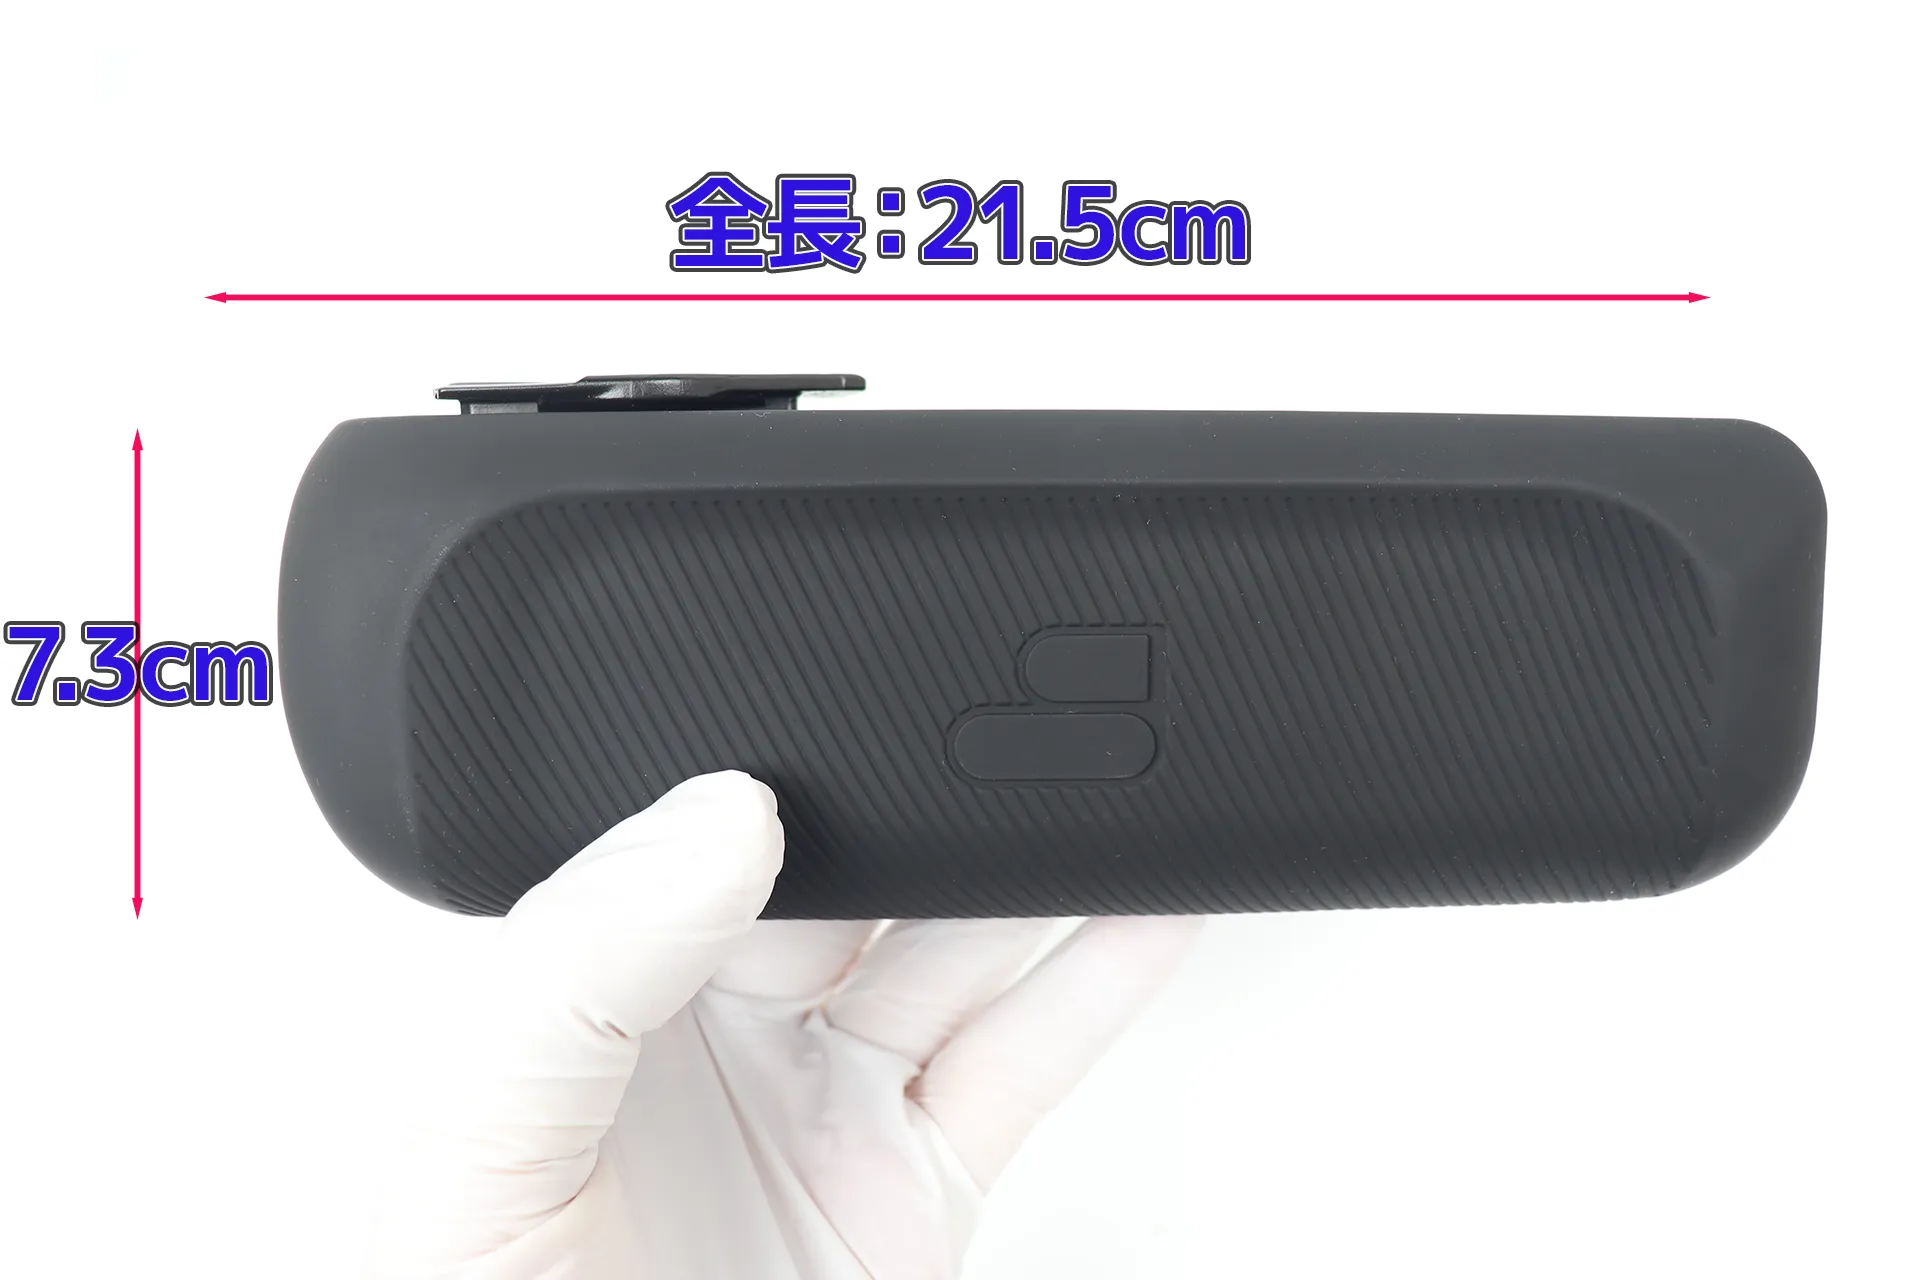
It has a square shape, measuring 8.46 in (21.5 cm) in length and 2.87 in (7.3 cm) in height. The body had a rubbery texture.
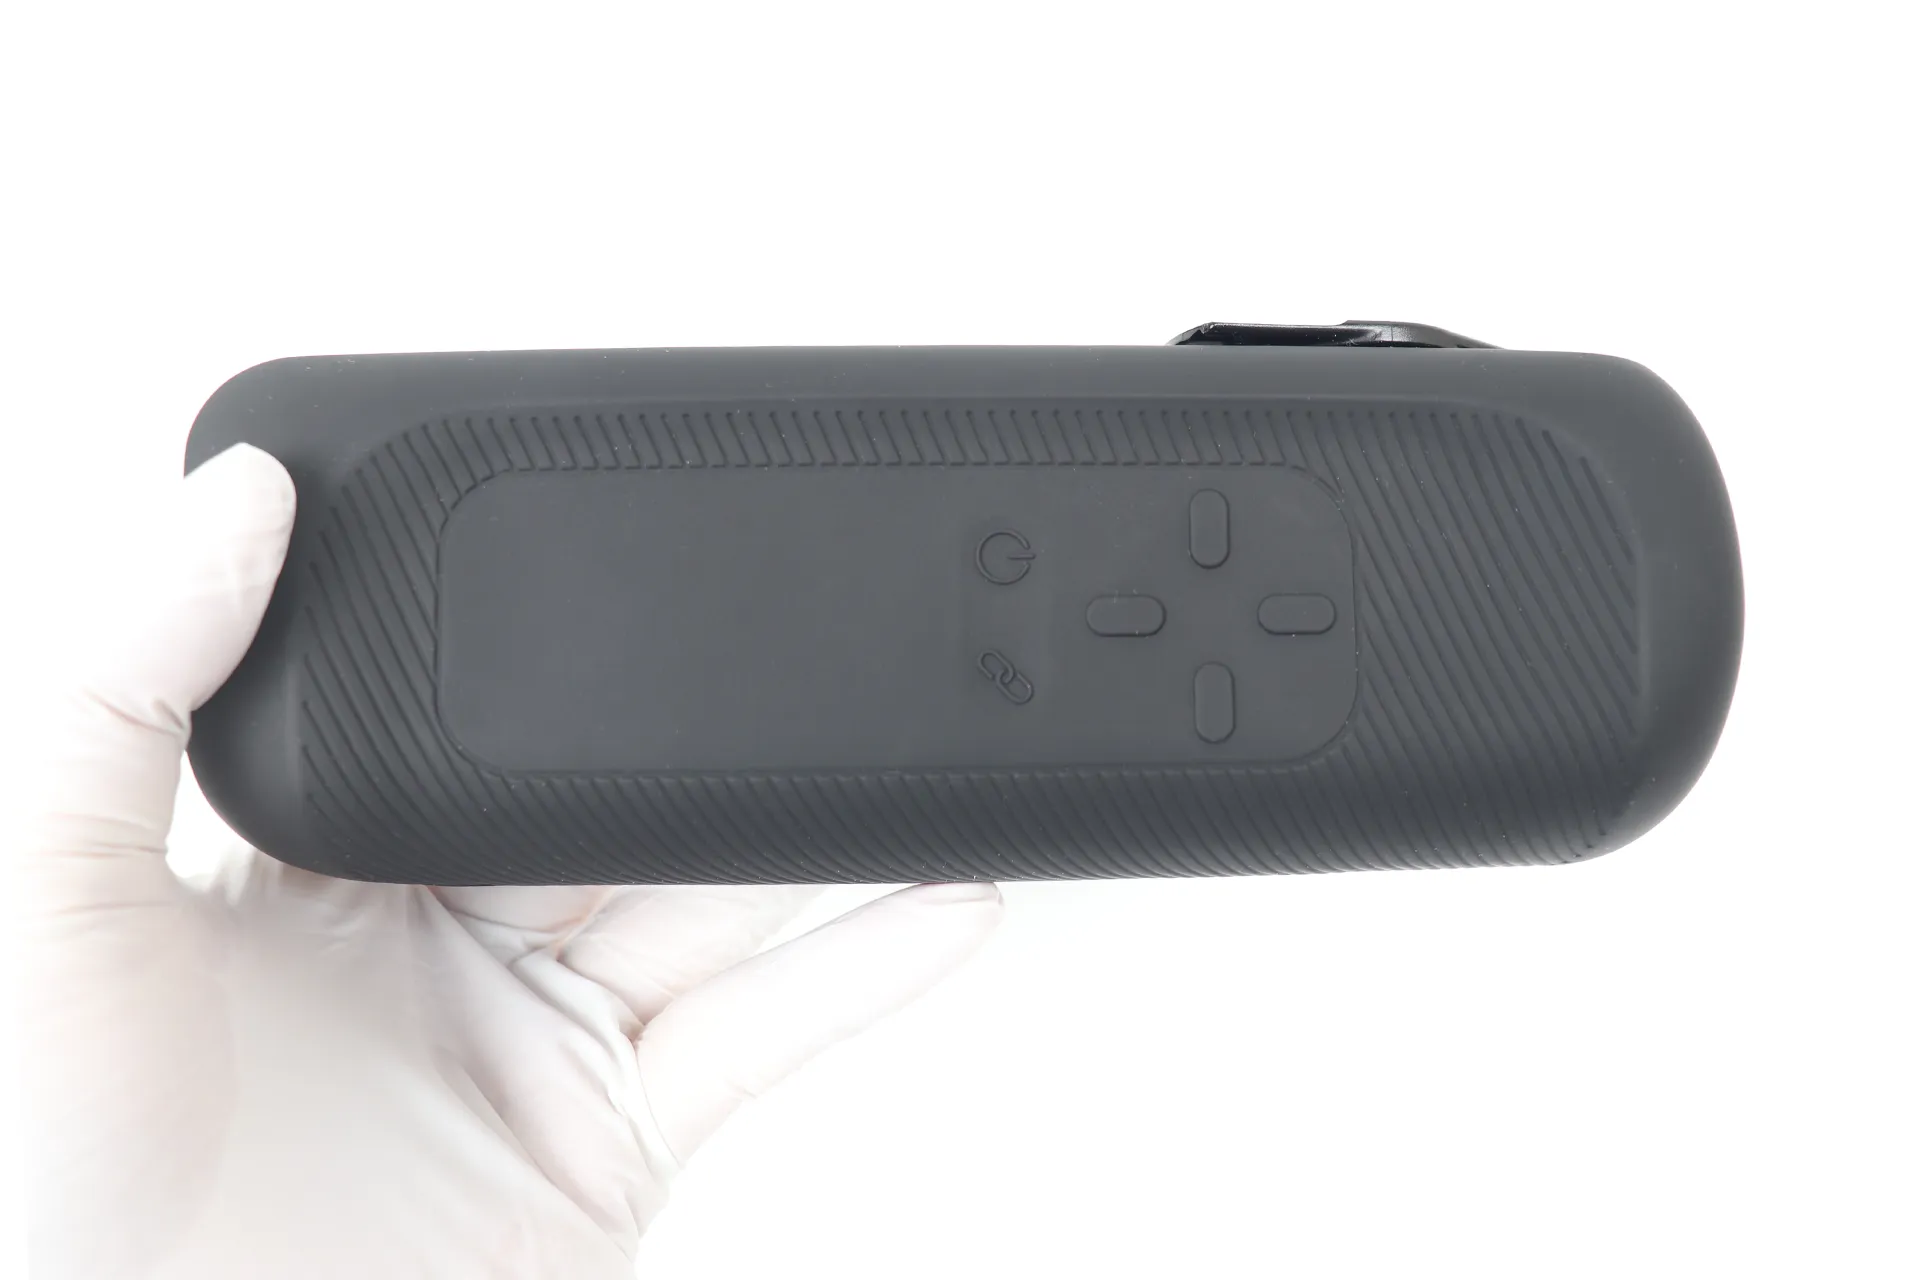
The side features buttons arranged in a cross shape, along with a power button and an action button, and the left side displays an LED.
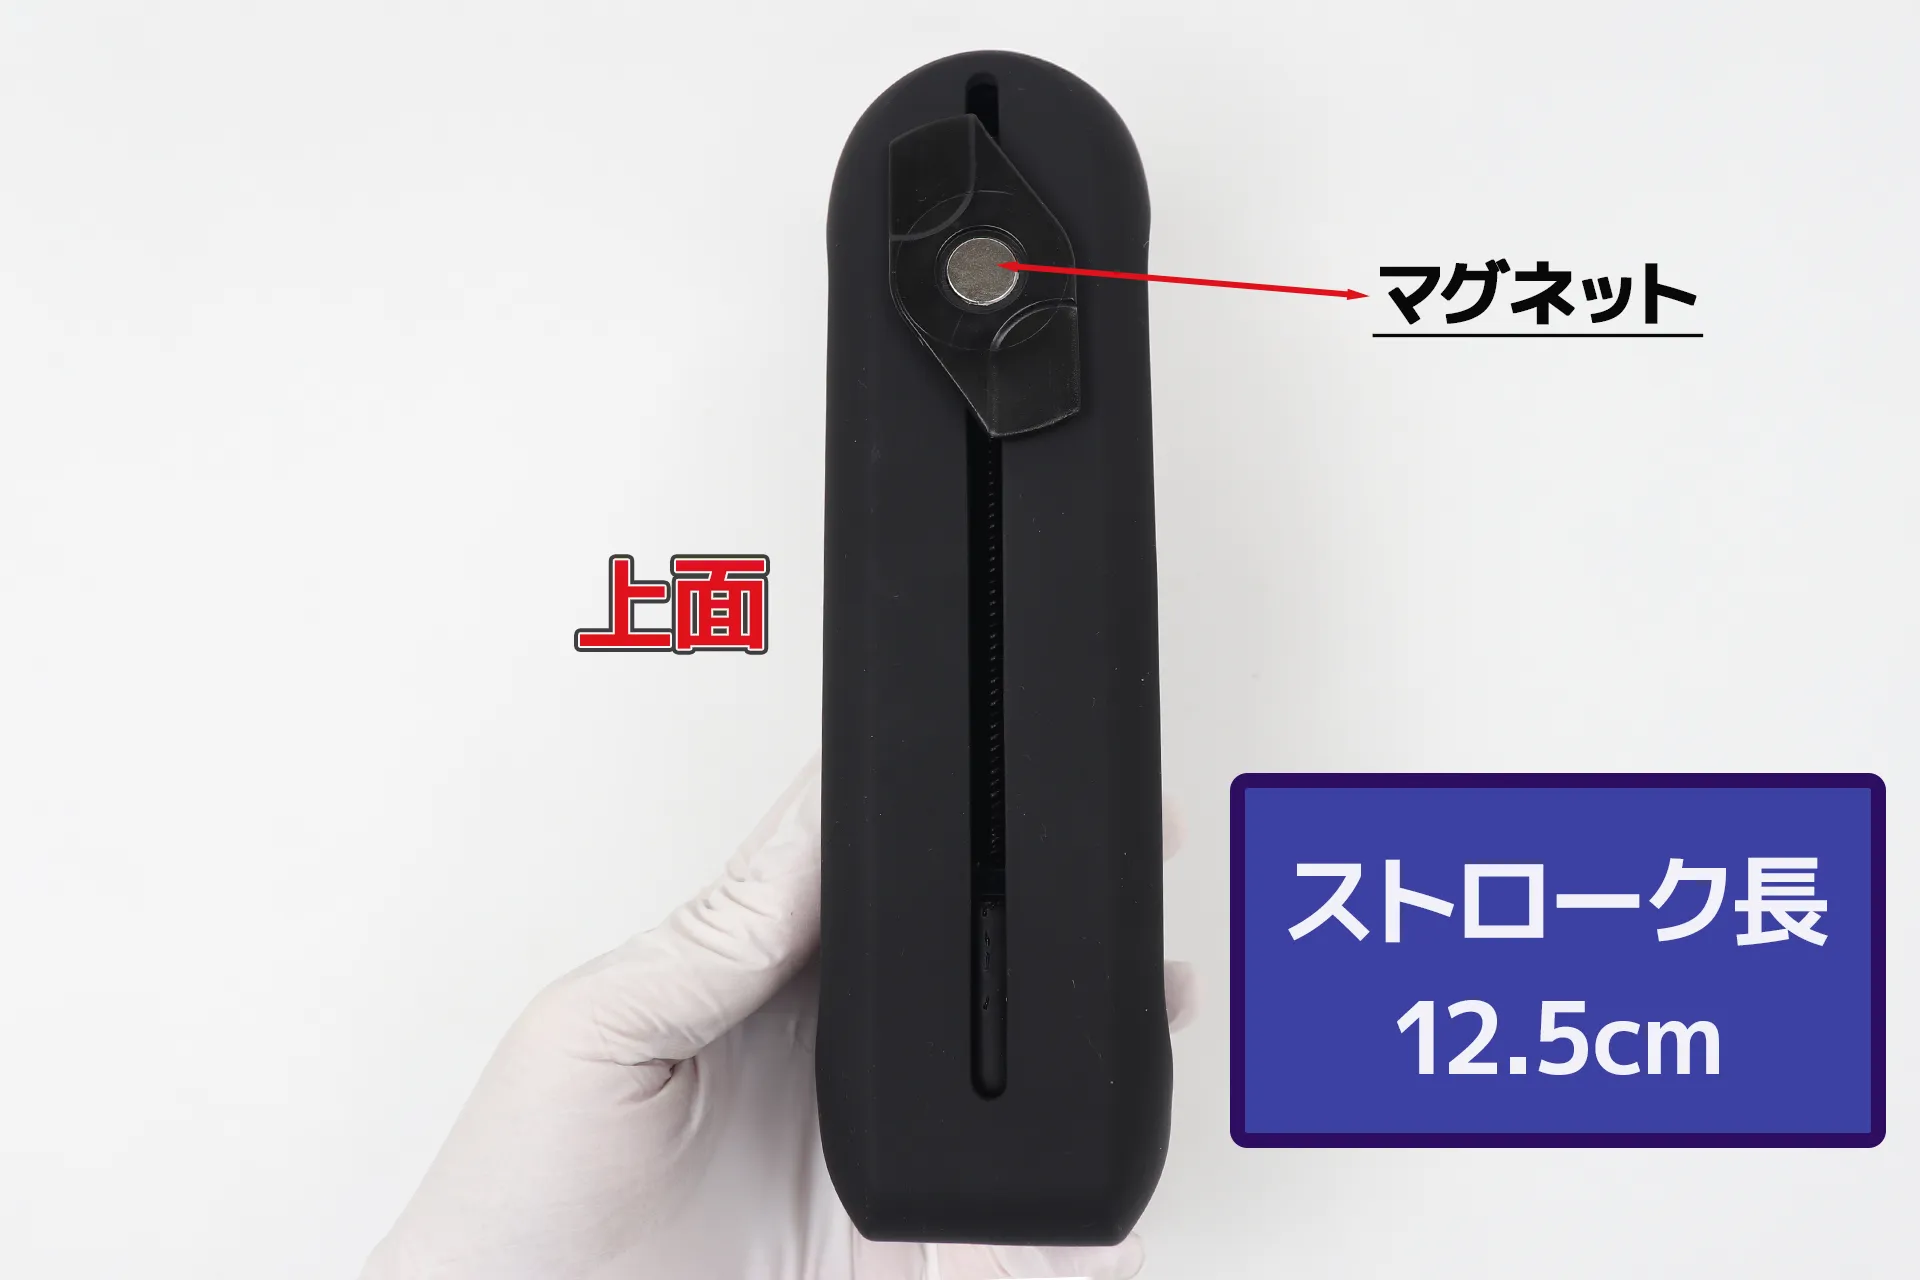
With a stroke length of 4.92 in (12.5 cm), it allows for extra-long strokes. The base on which the holder is attached has a magnet.
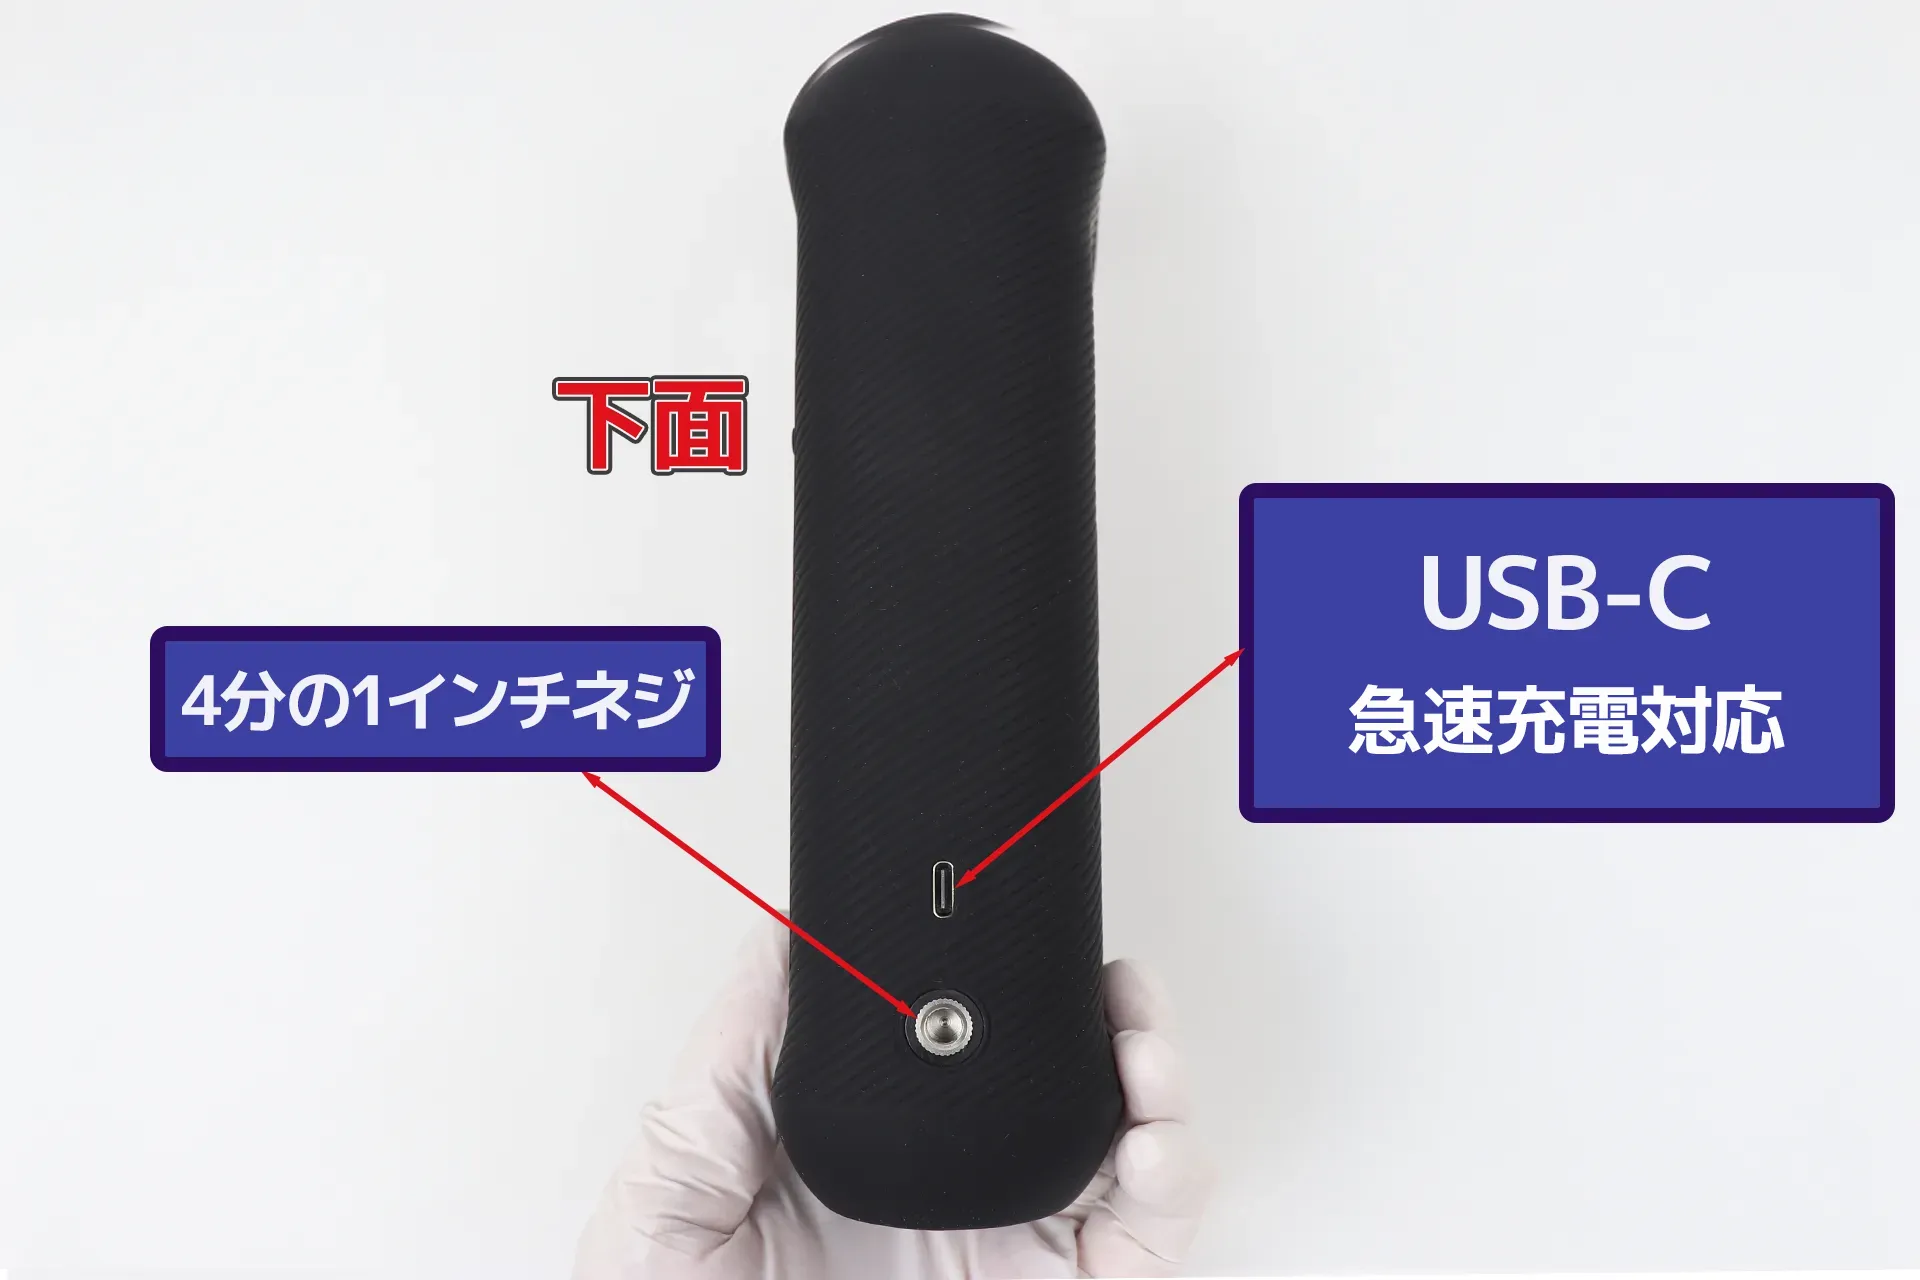
The bottom has a screw hole and a USB-C port. While the screw hole is used to attach the tripod below, it's completely useless. It also interferes with the USB port, so its only real use would be for attaching the official thin arm.
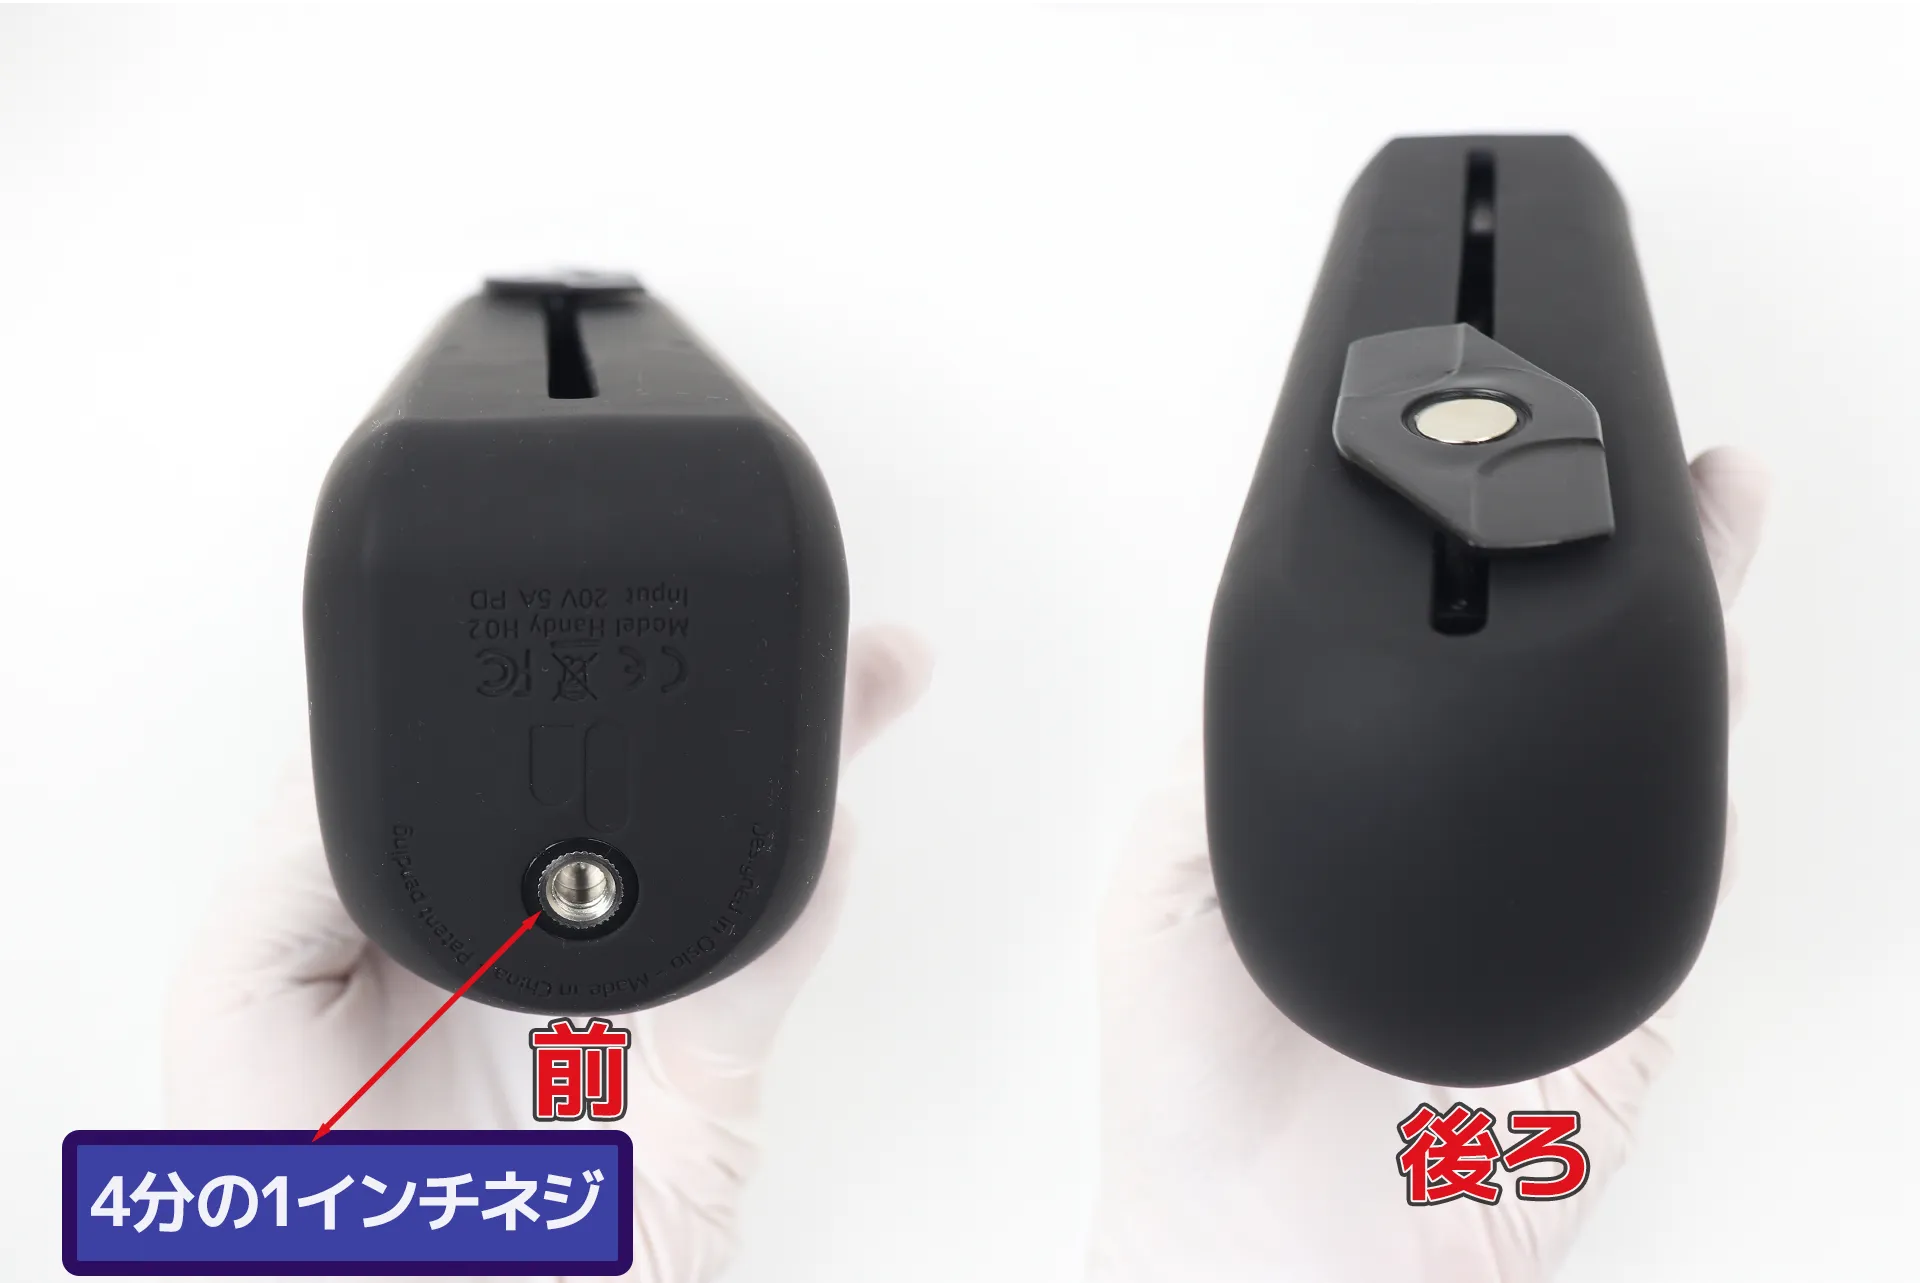
Although it has a square body, it's subtly rounded, making it quite difficult to attach the fasteners. The screw holes on the front seem to be the only usable ones. The back has a completely rounded shape with no corners at all.
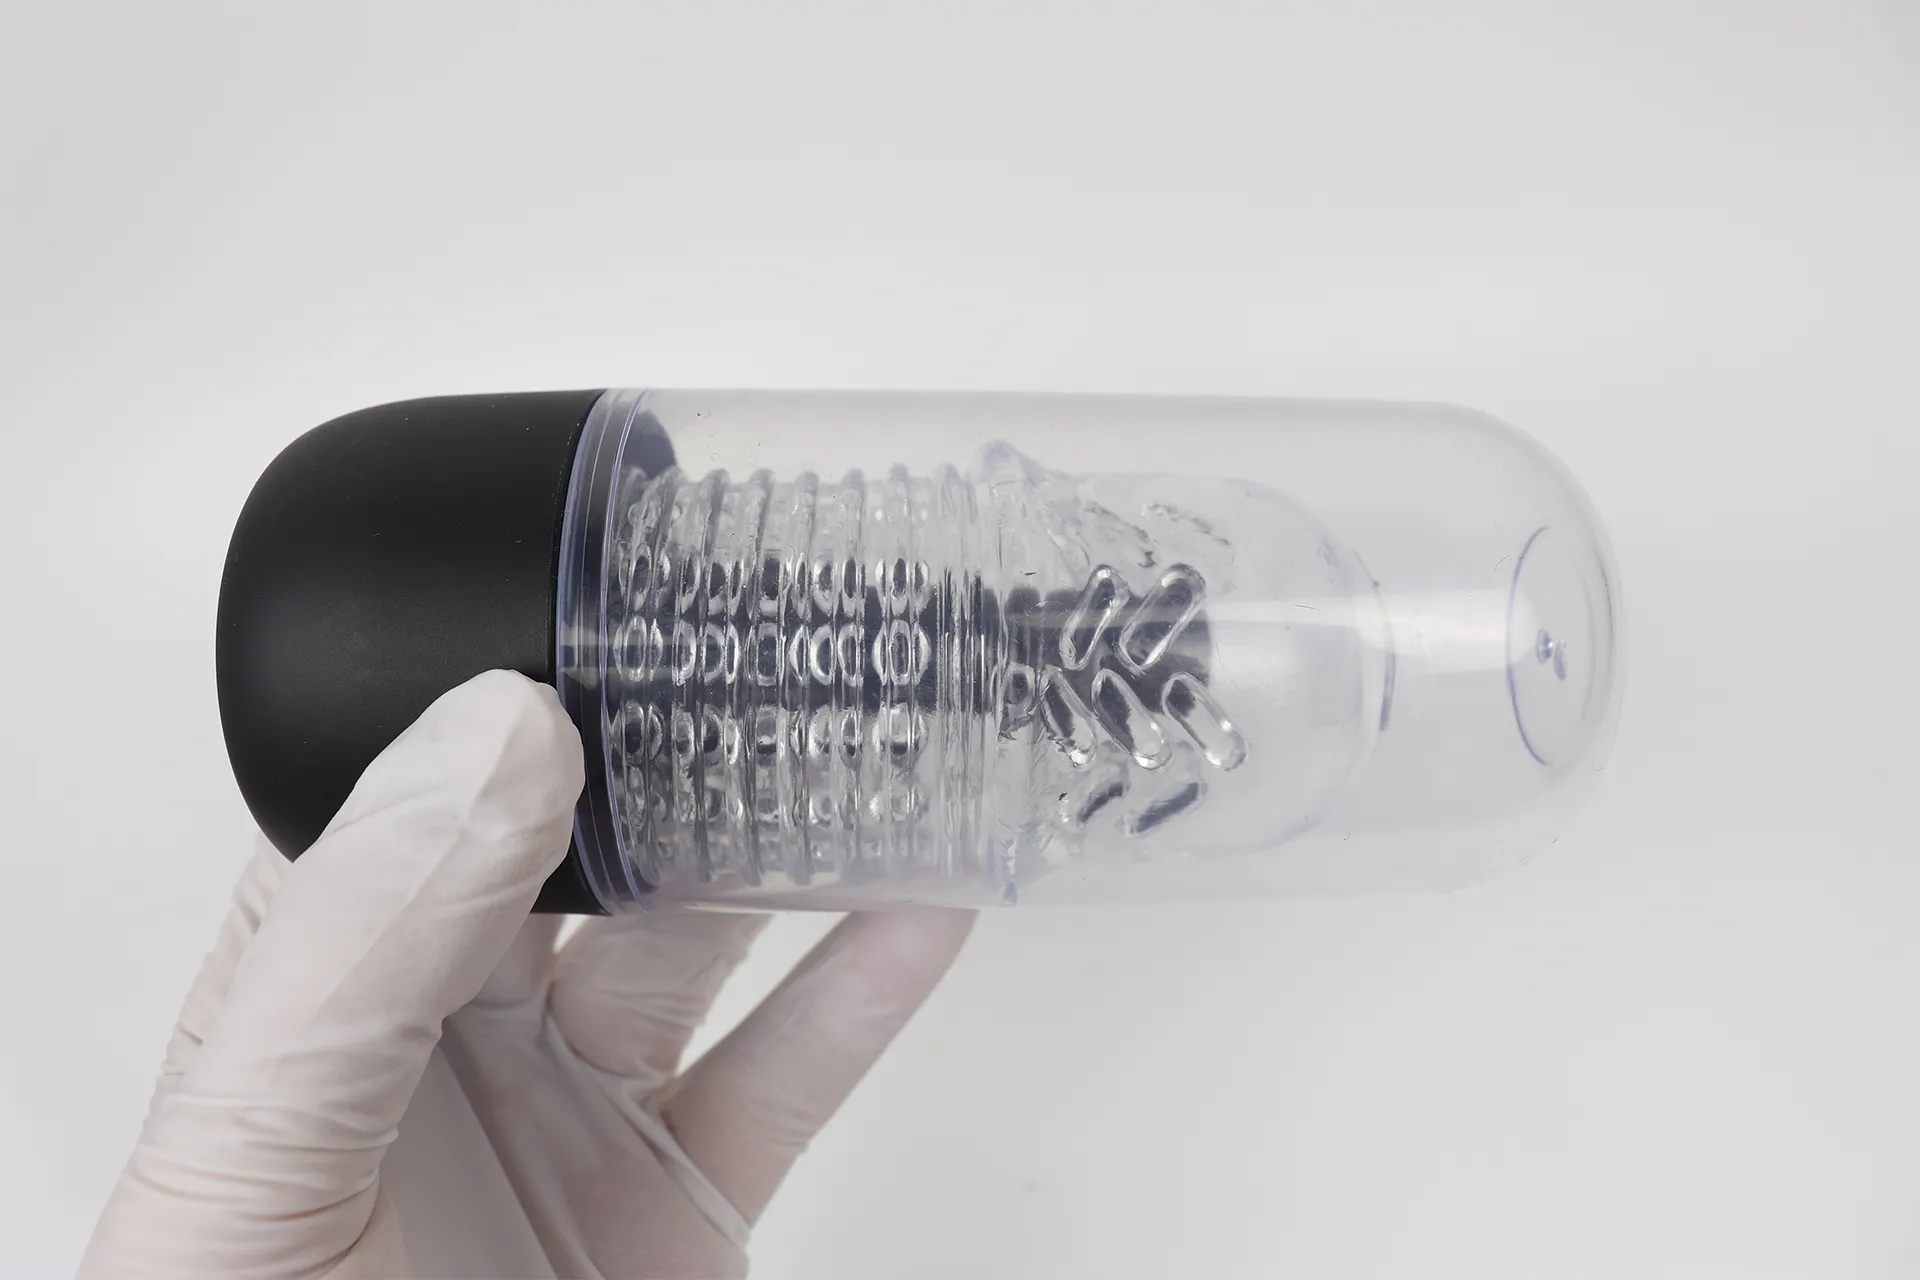
The included male masturbator comes in a large capsule-like container, similar to those found in gacha machines.
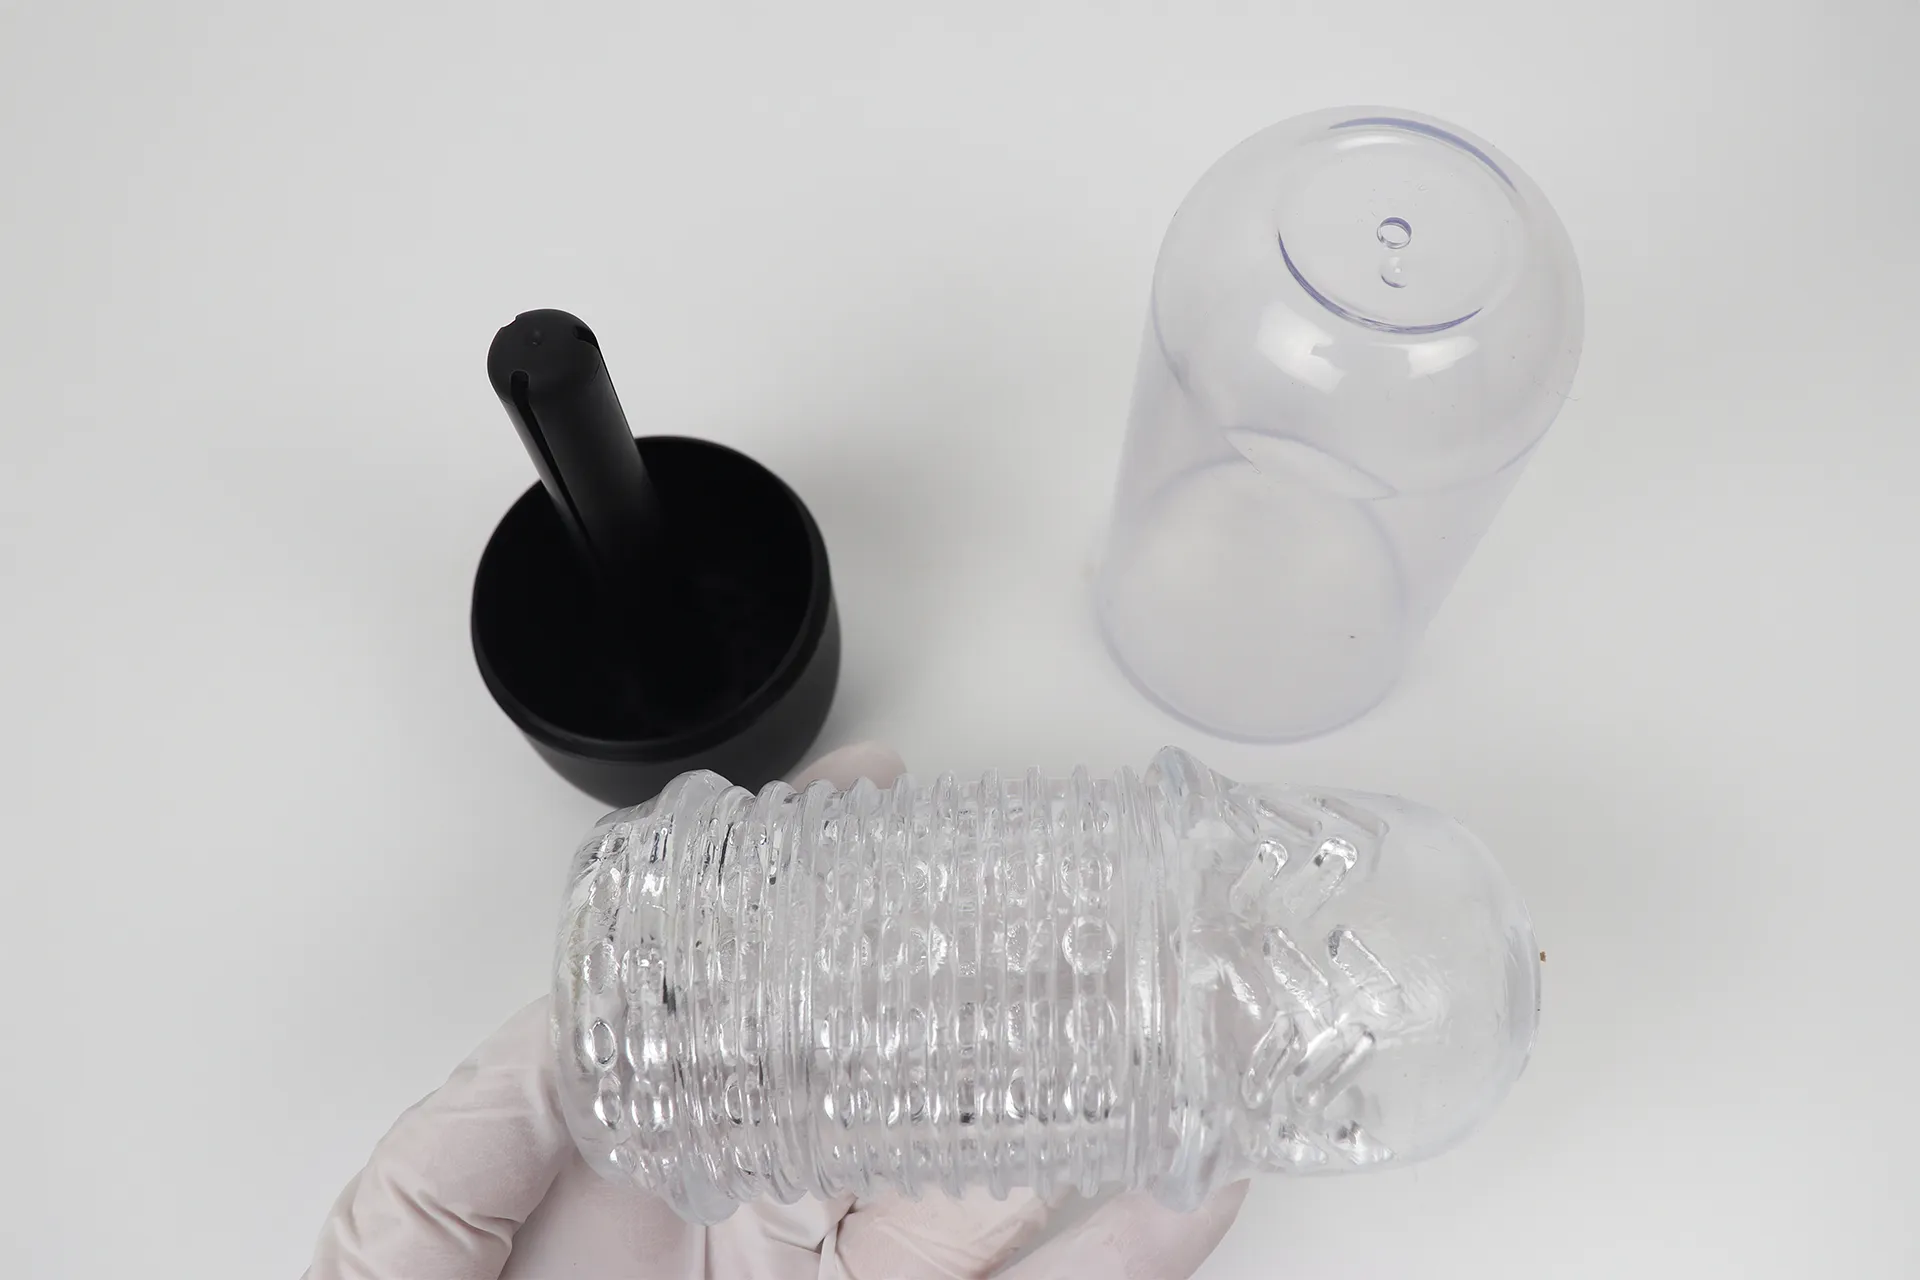
I took it out. It's transparent and sticky, so no powder is applied to it. It's nice that it comes with a case because it attracts dust easily.
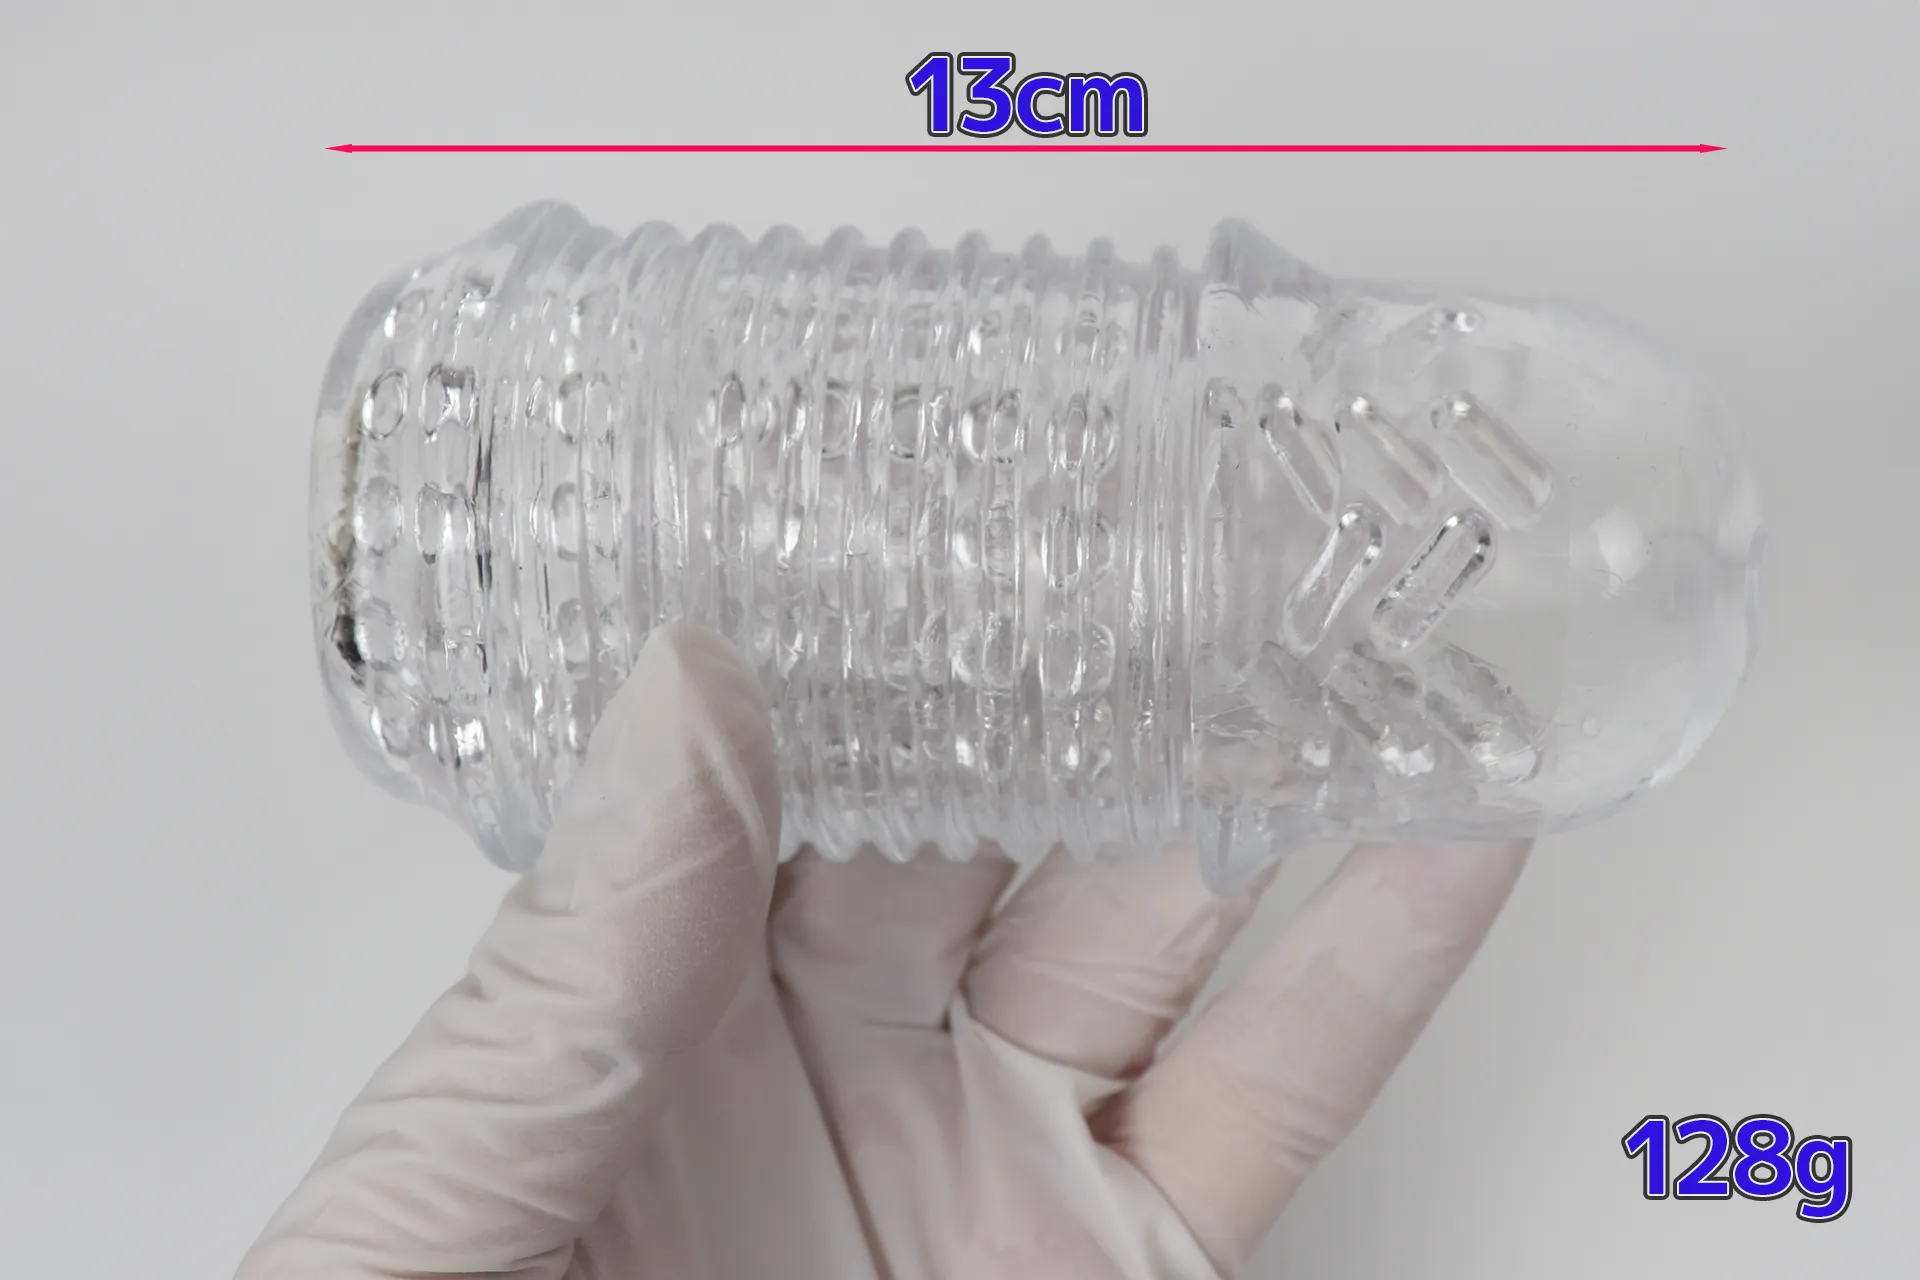
It has a small and lightweight body, measuring 5.12 in (13 cm) in length and weighing 0.28 lb (128 g).
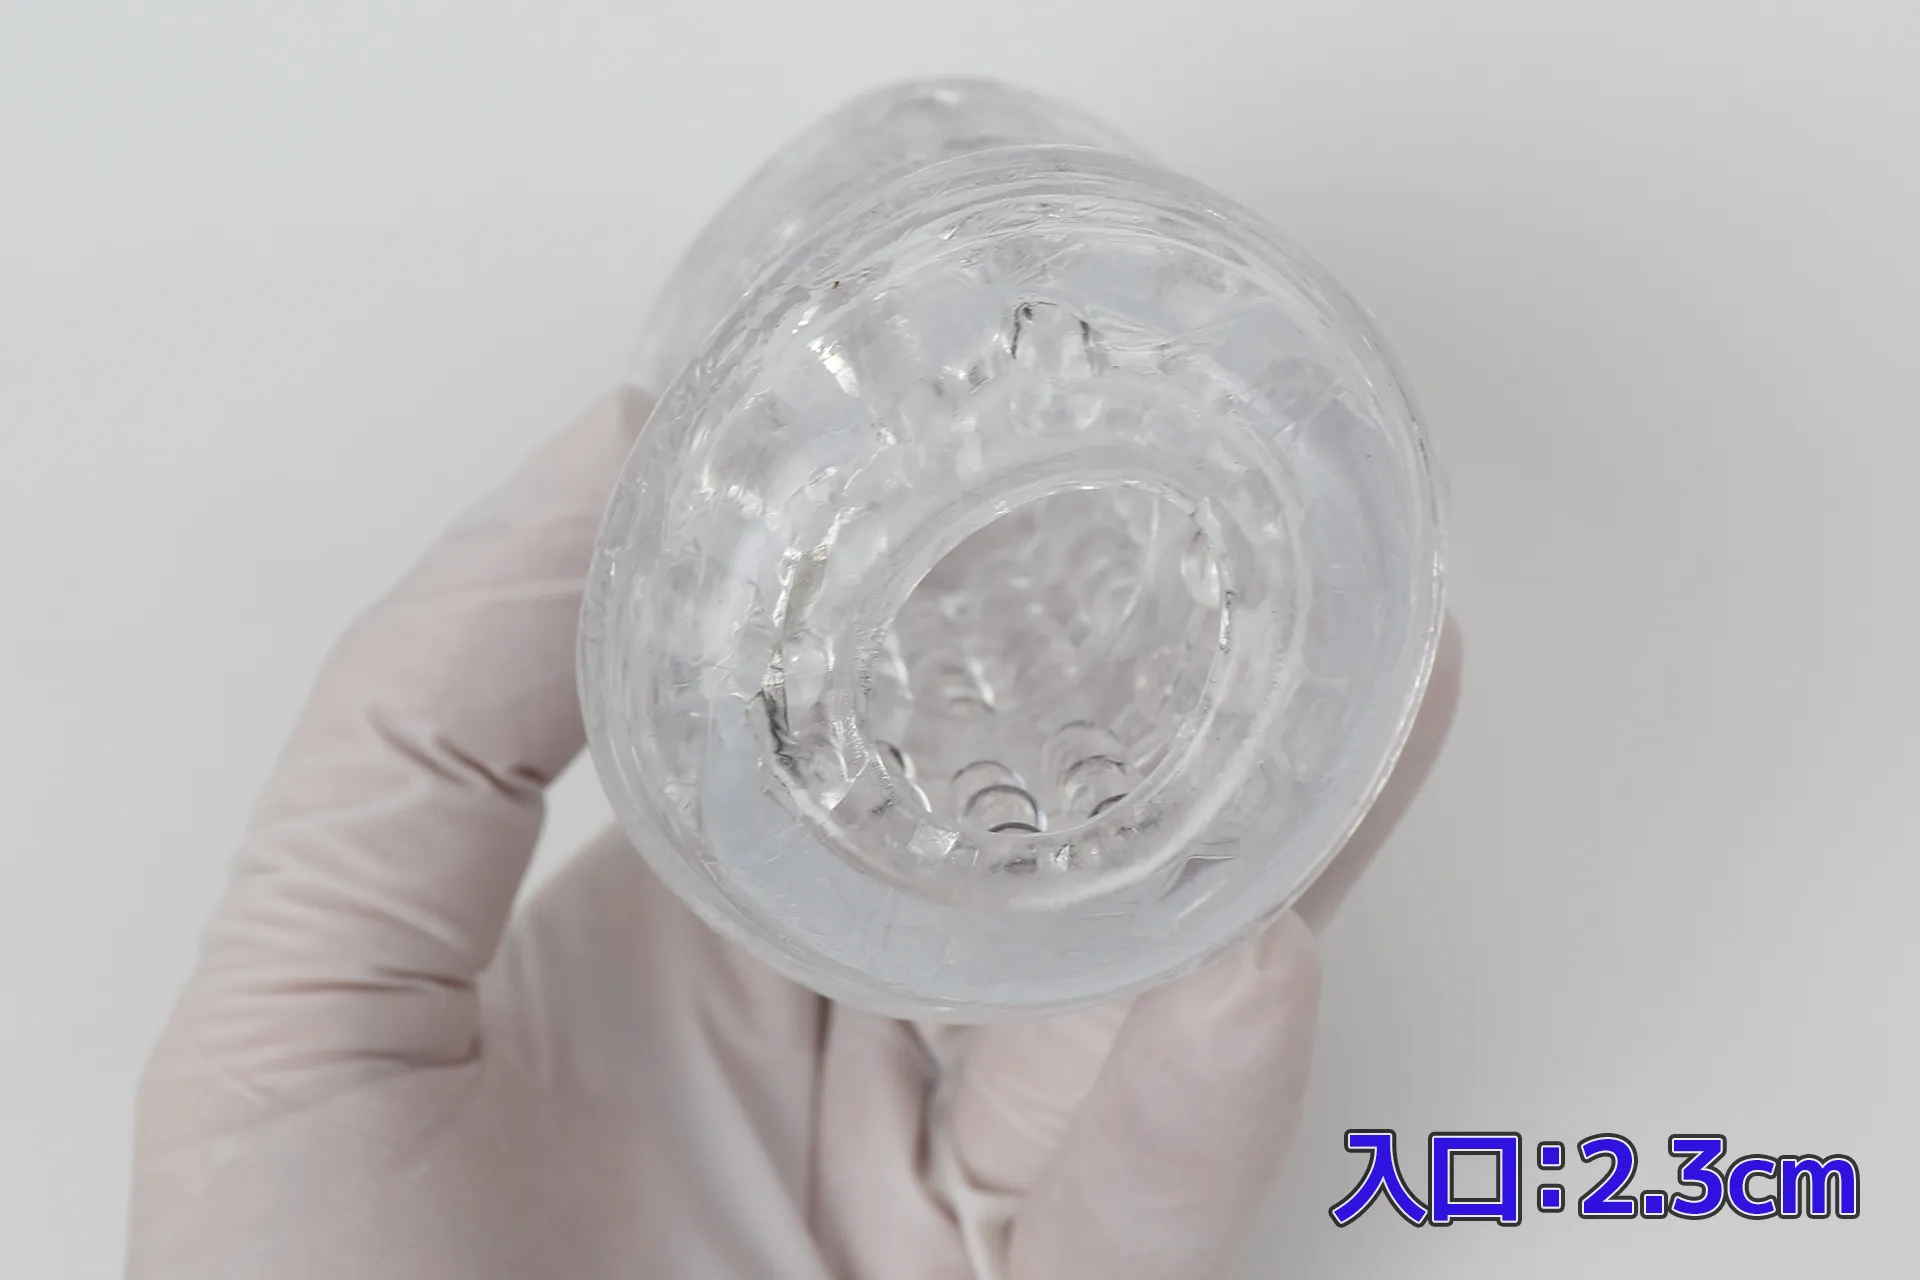
The opening is wide, about 0.91 in (2.3 cm), so insertion is easy.
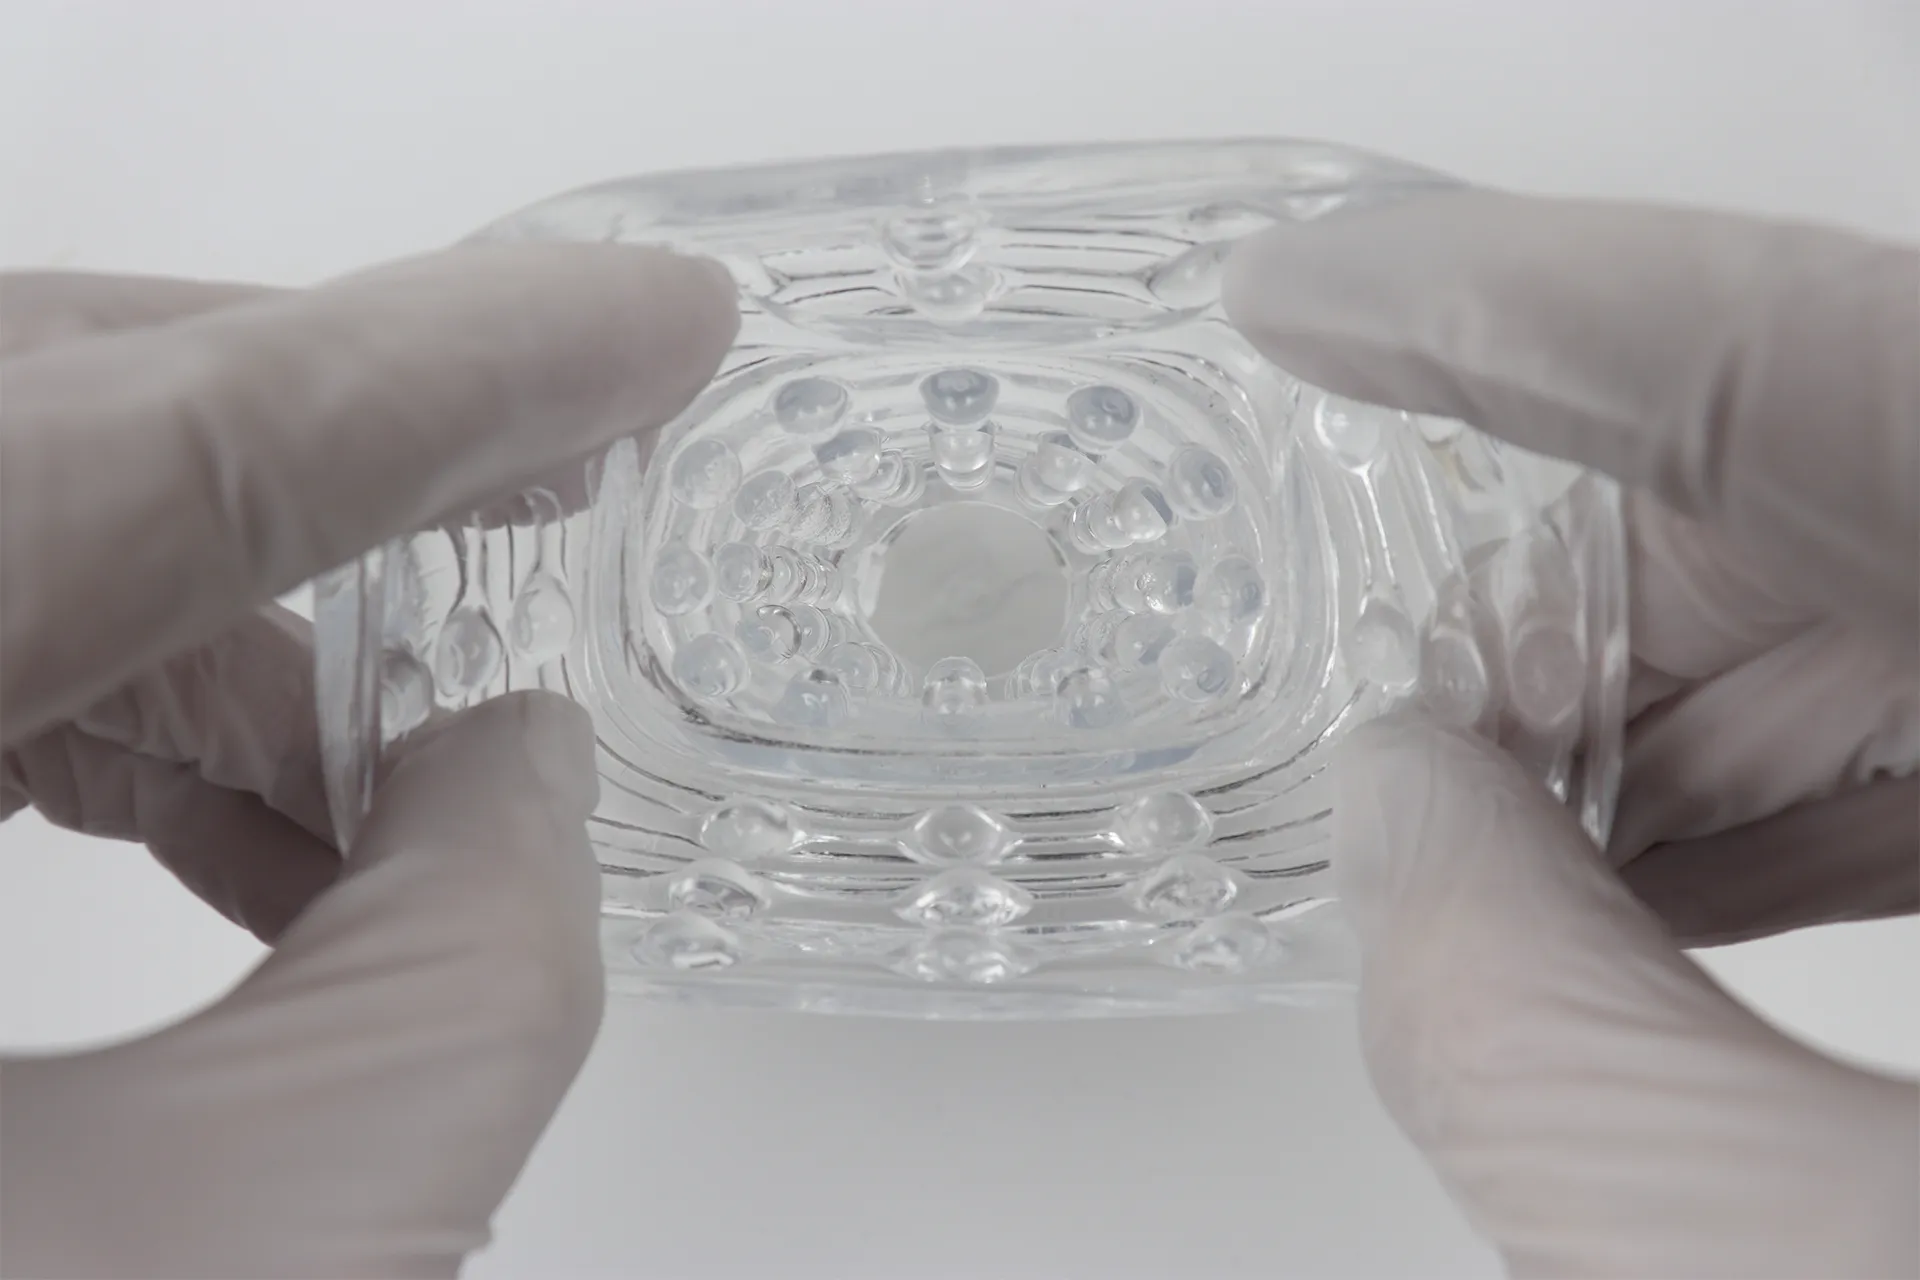
The inside is like a "The Wart male masturbator ," with round bumps lined up in an orderly fashion.
Follow these steps to attach the holder to the main unit.
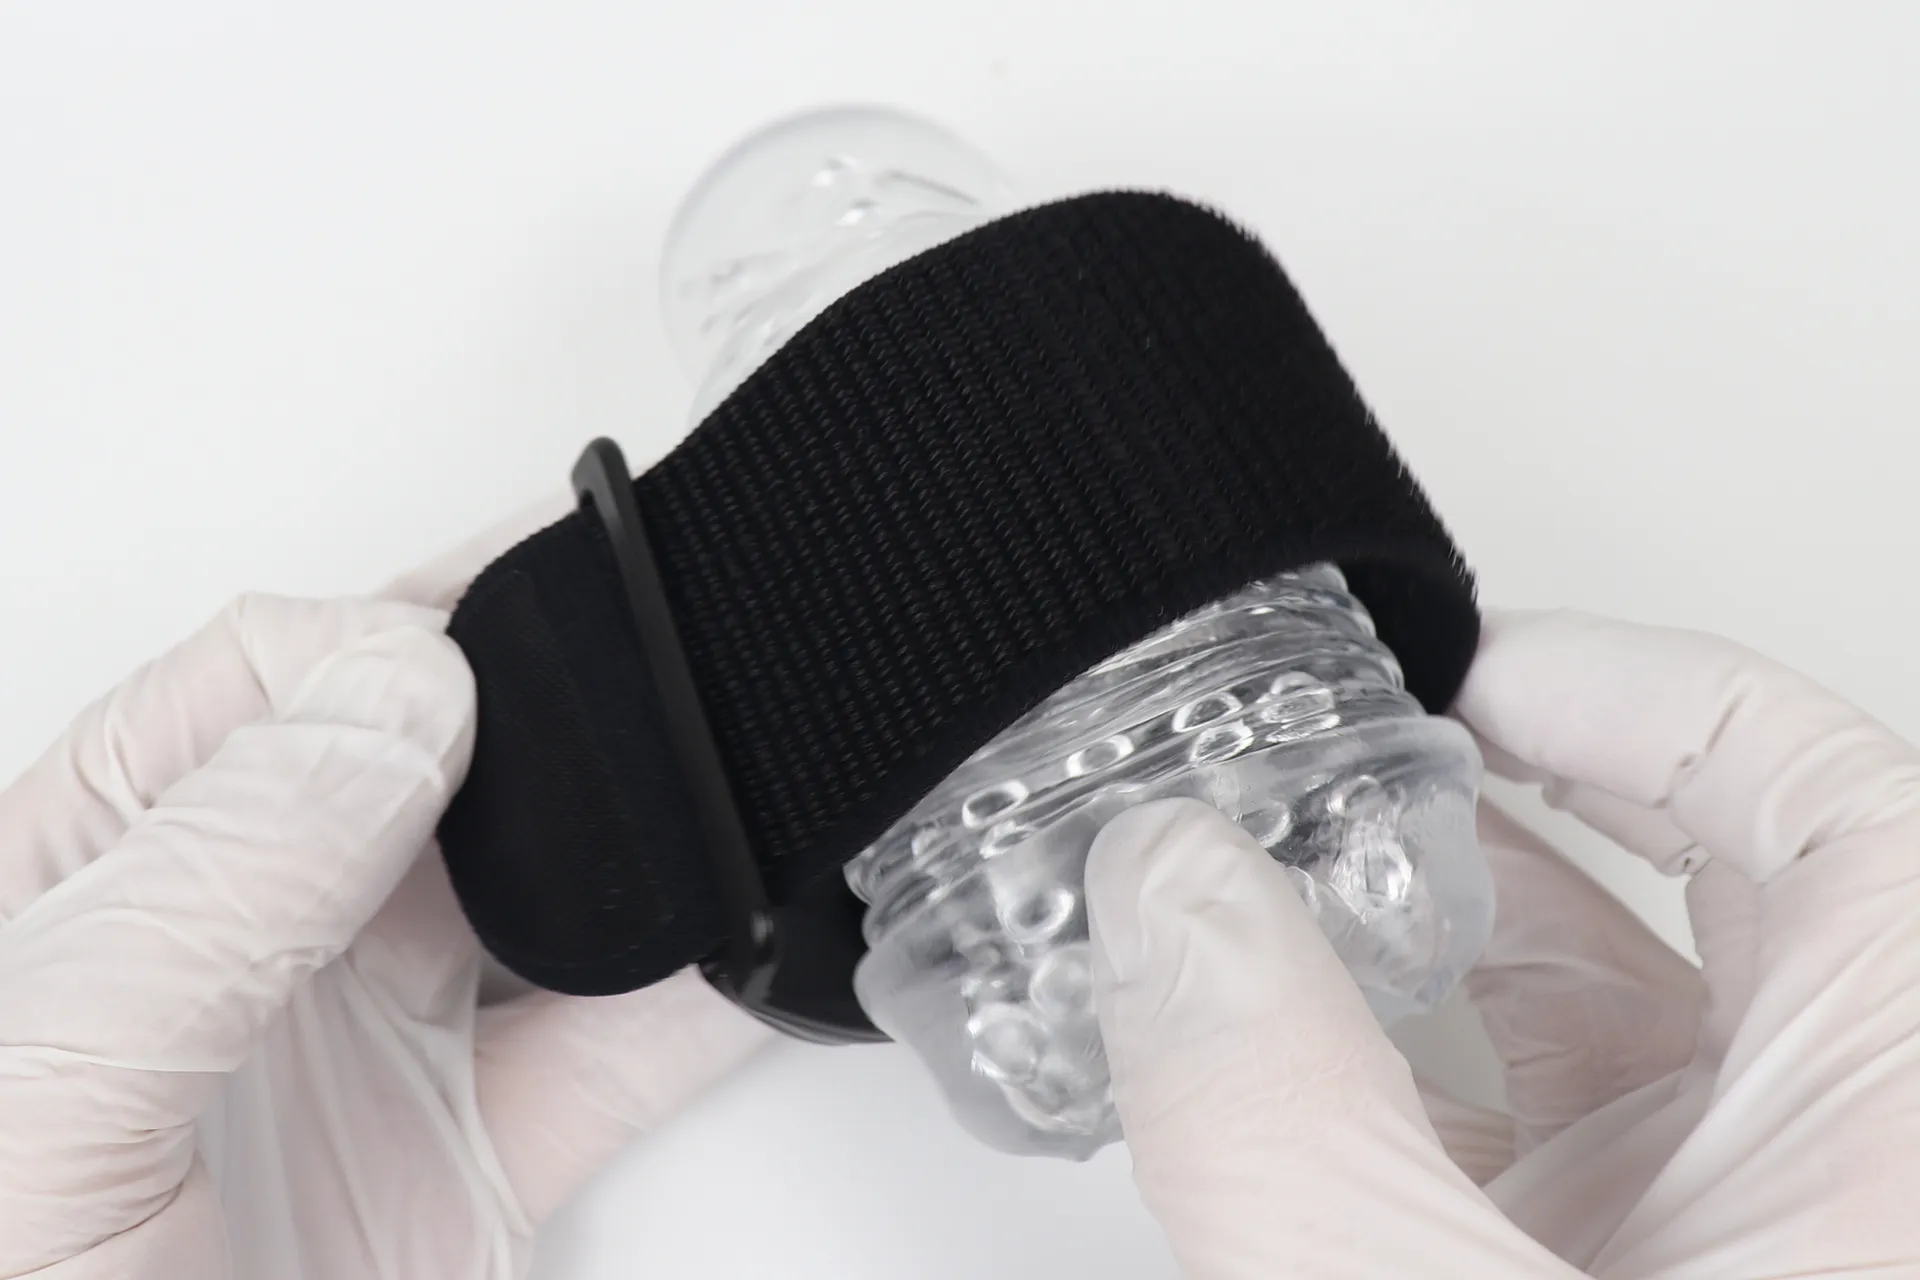
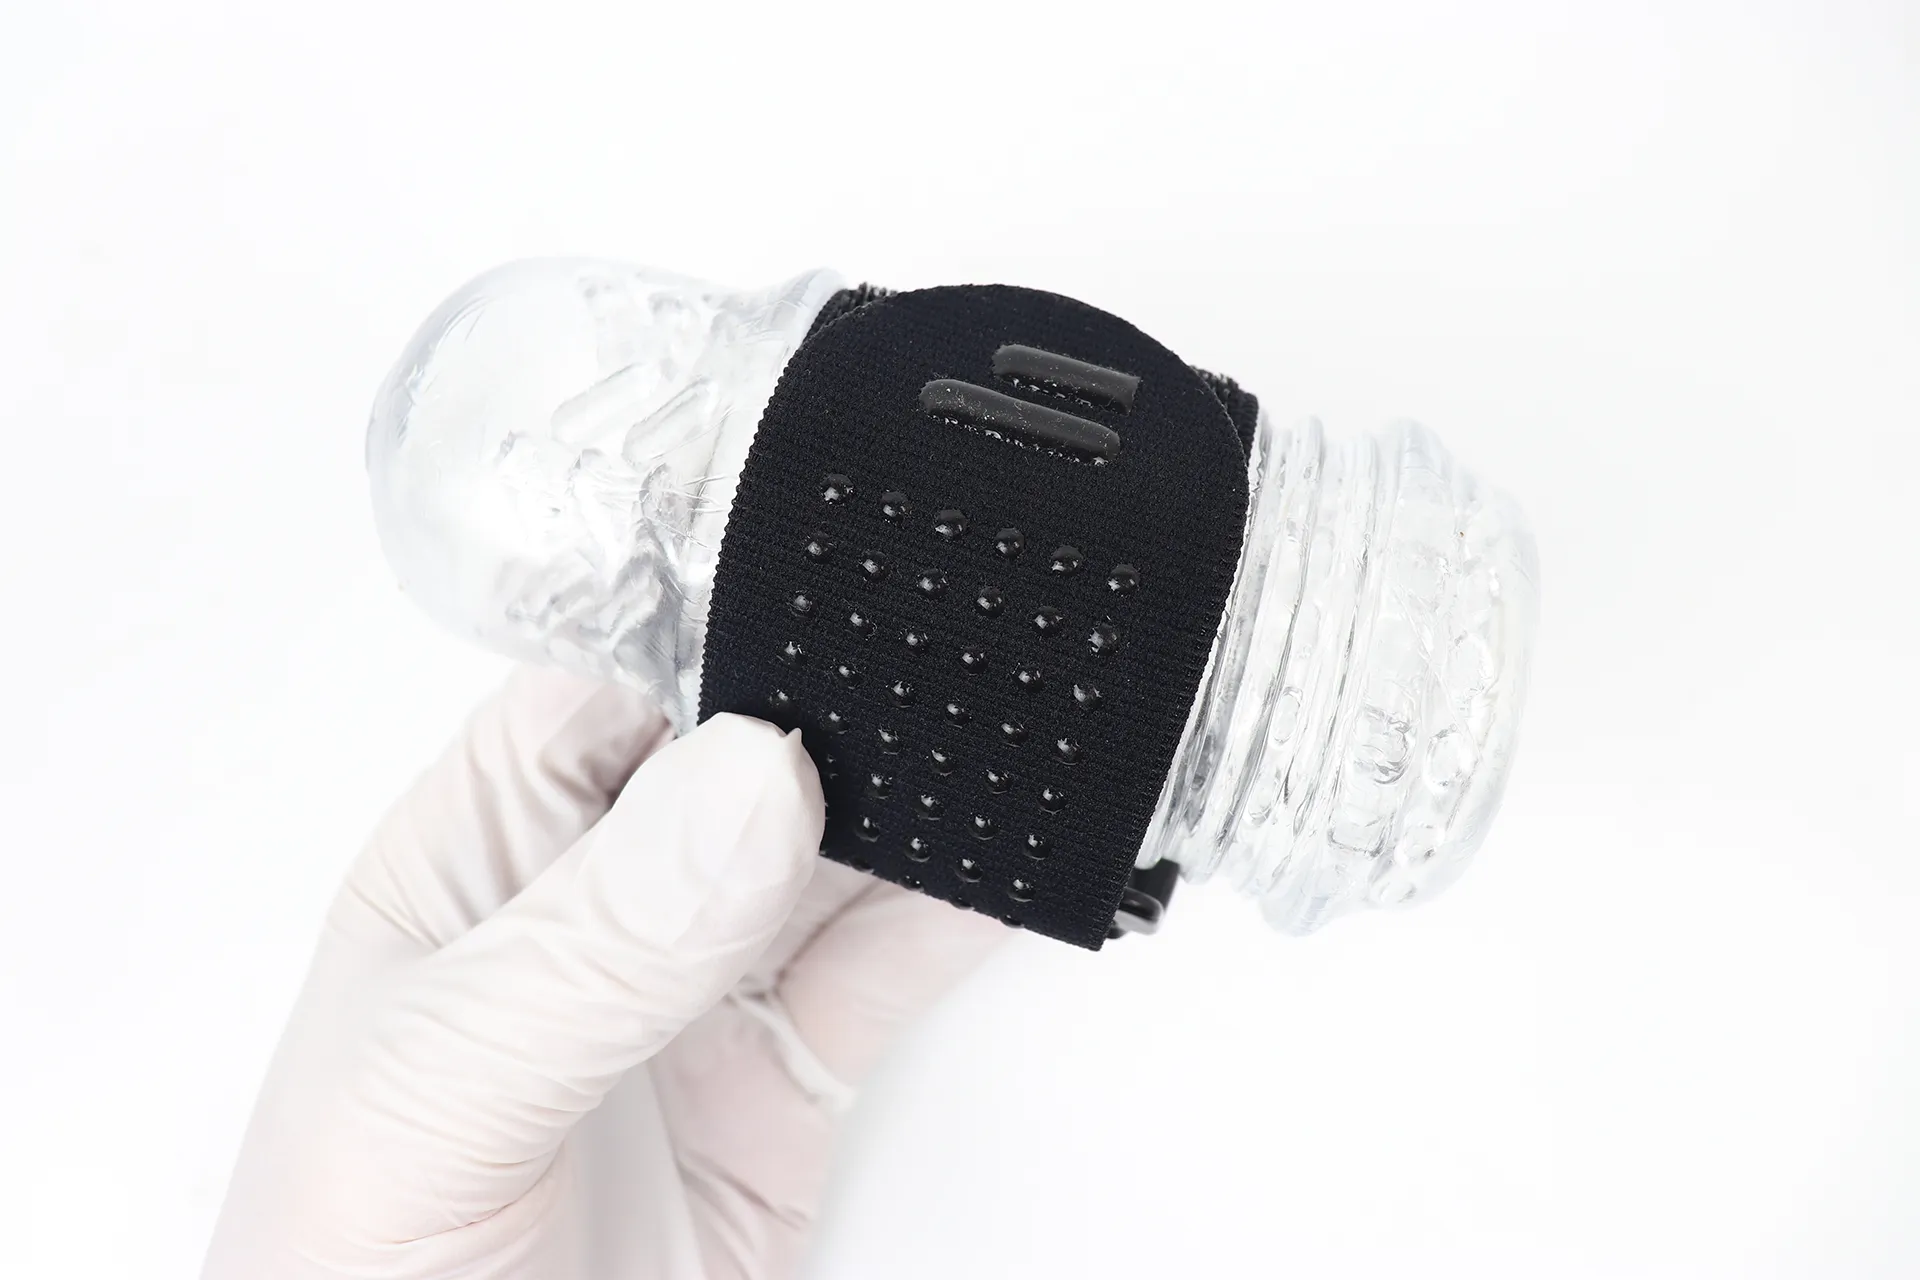
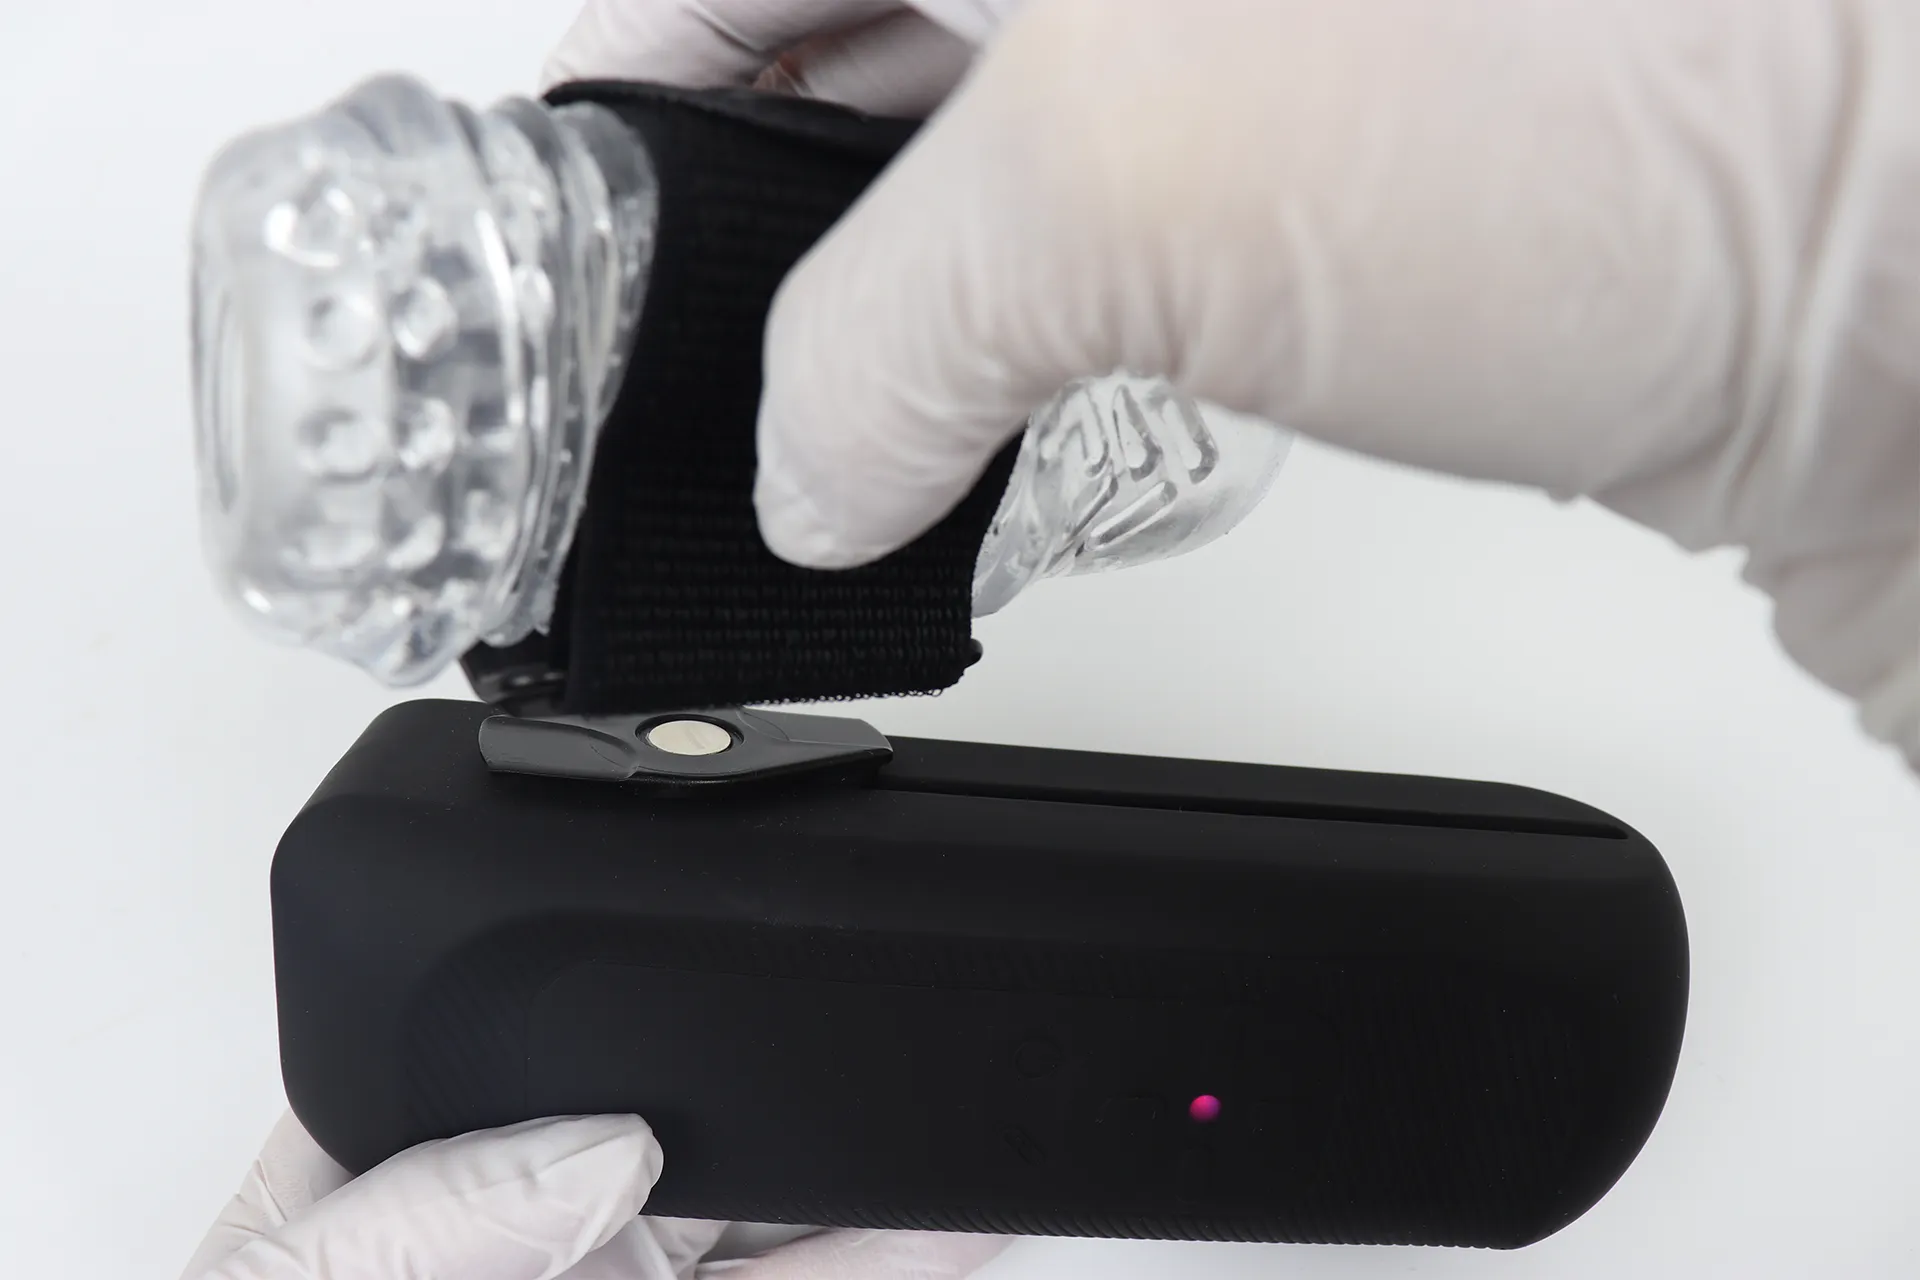
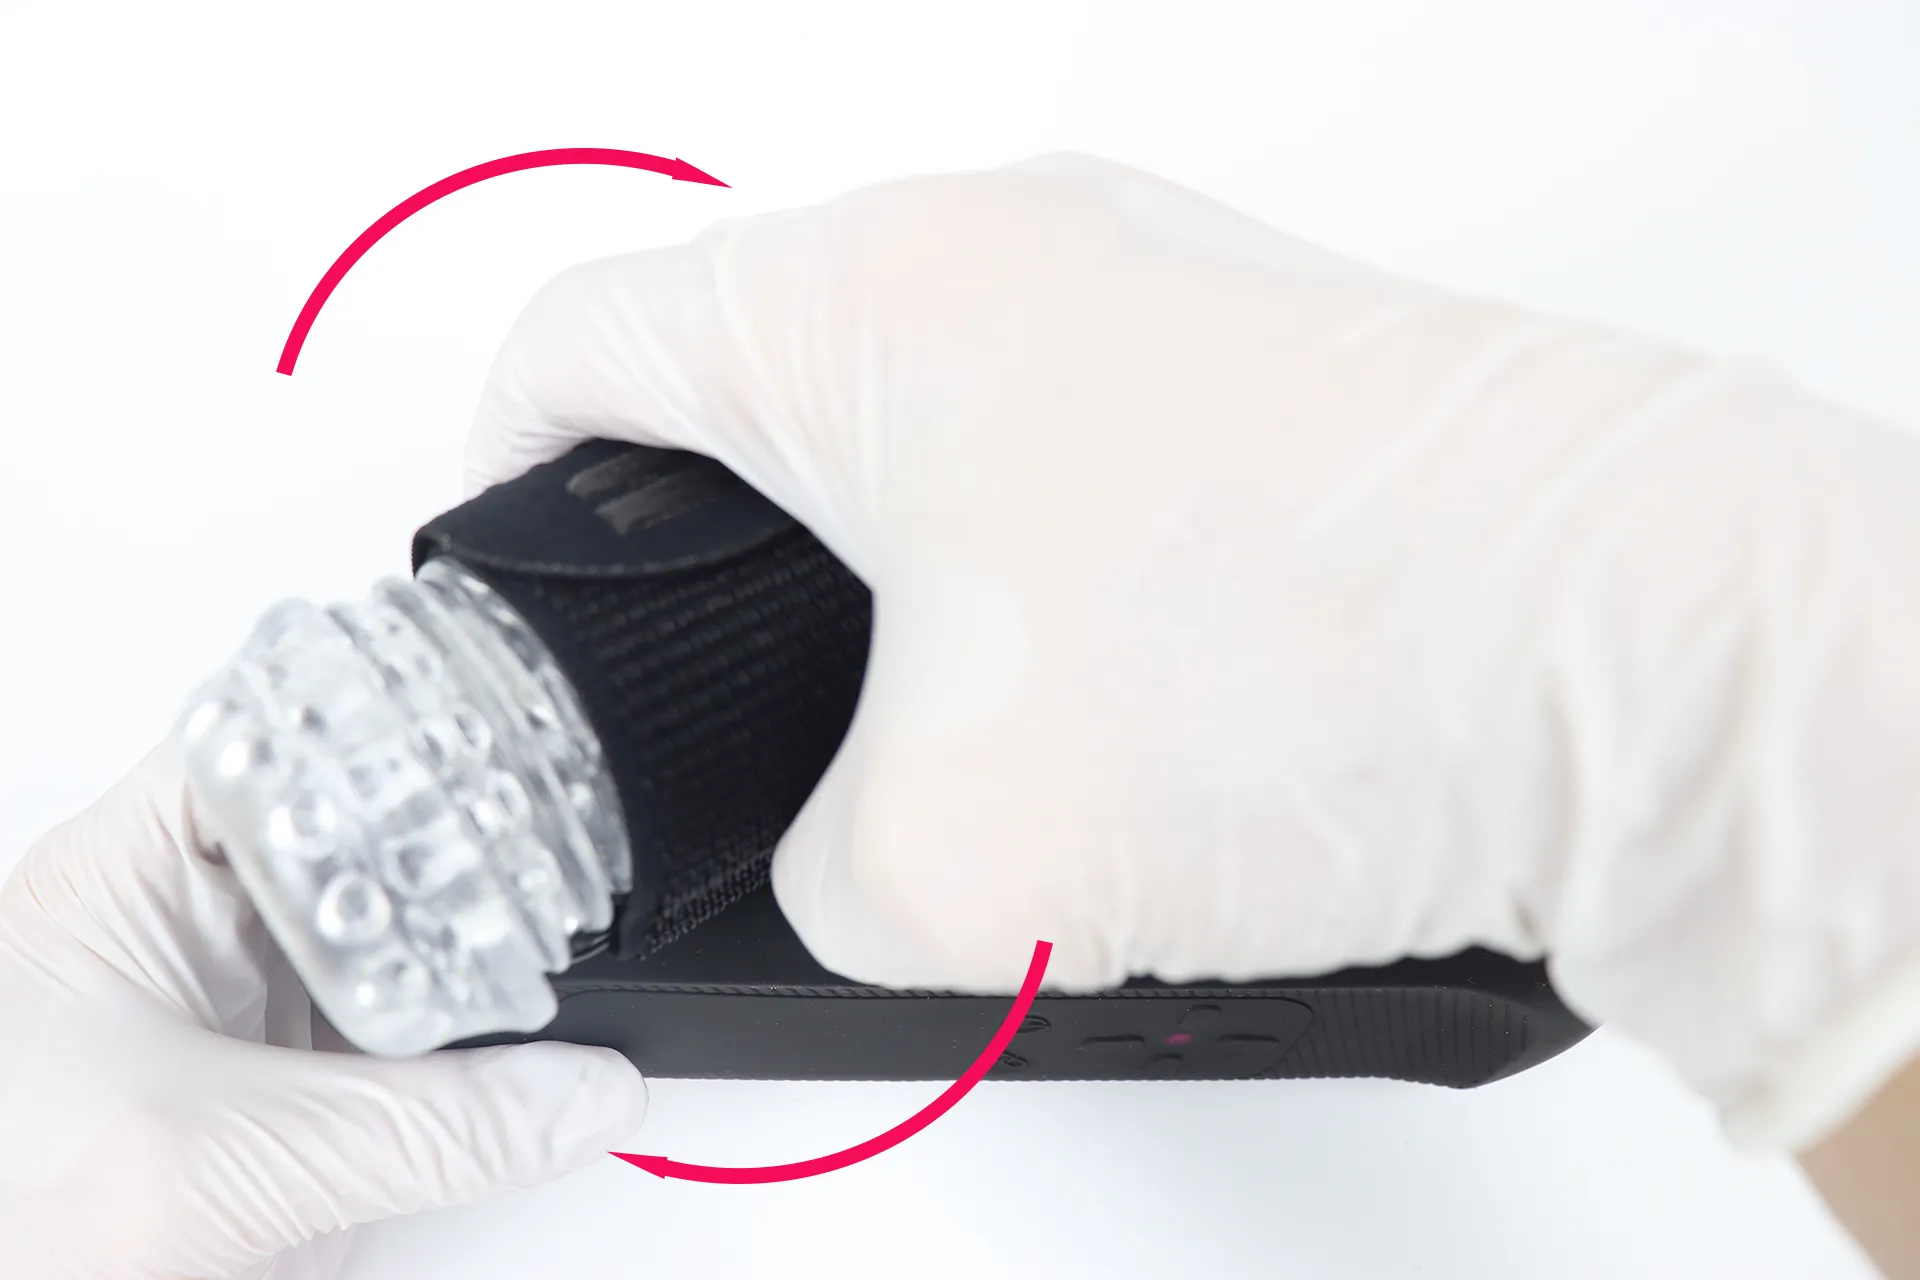
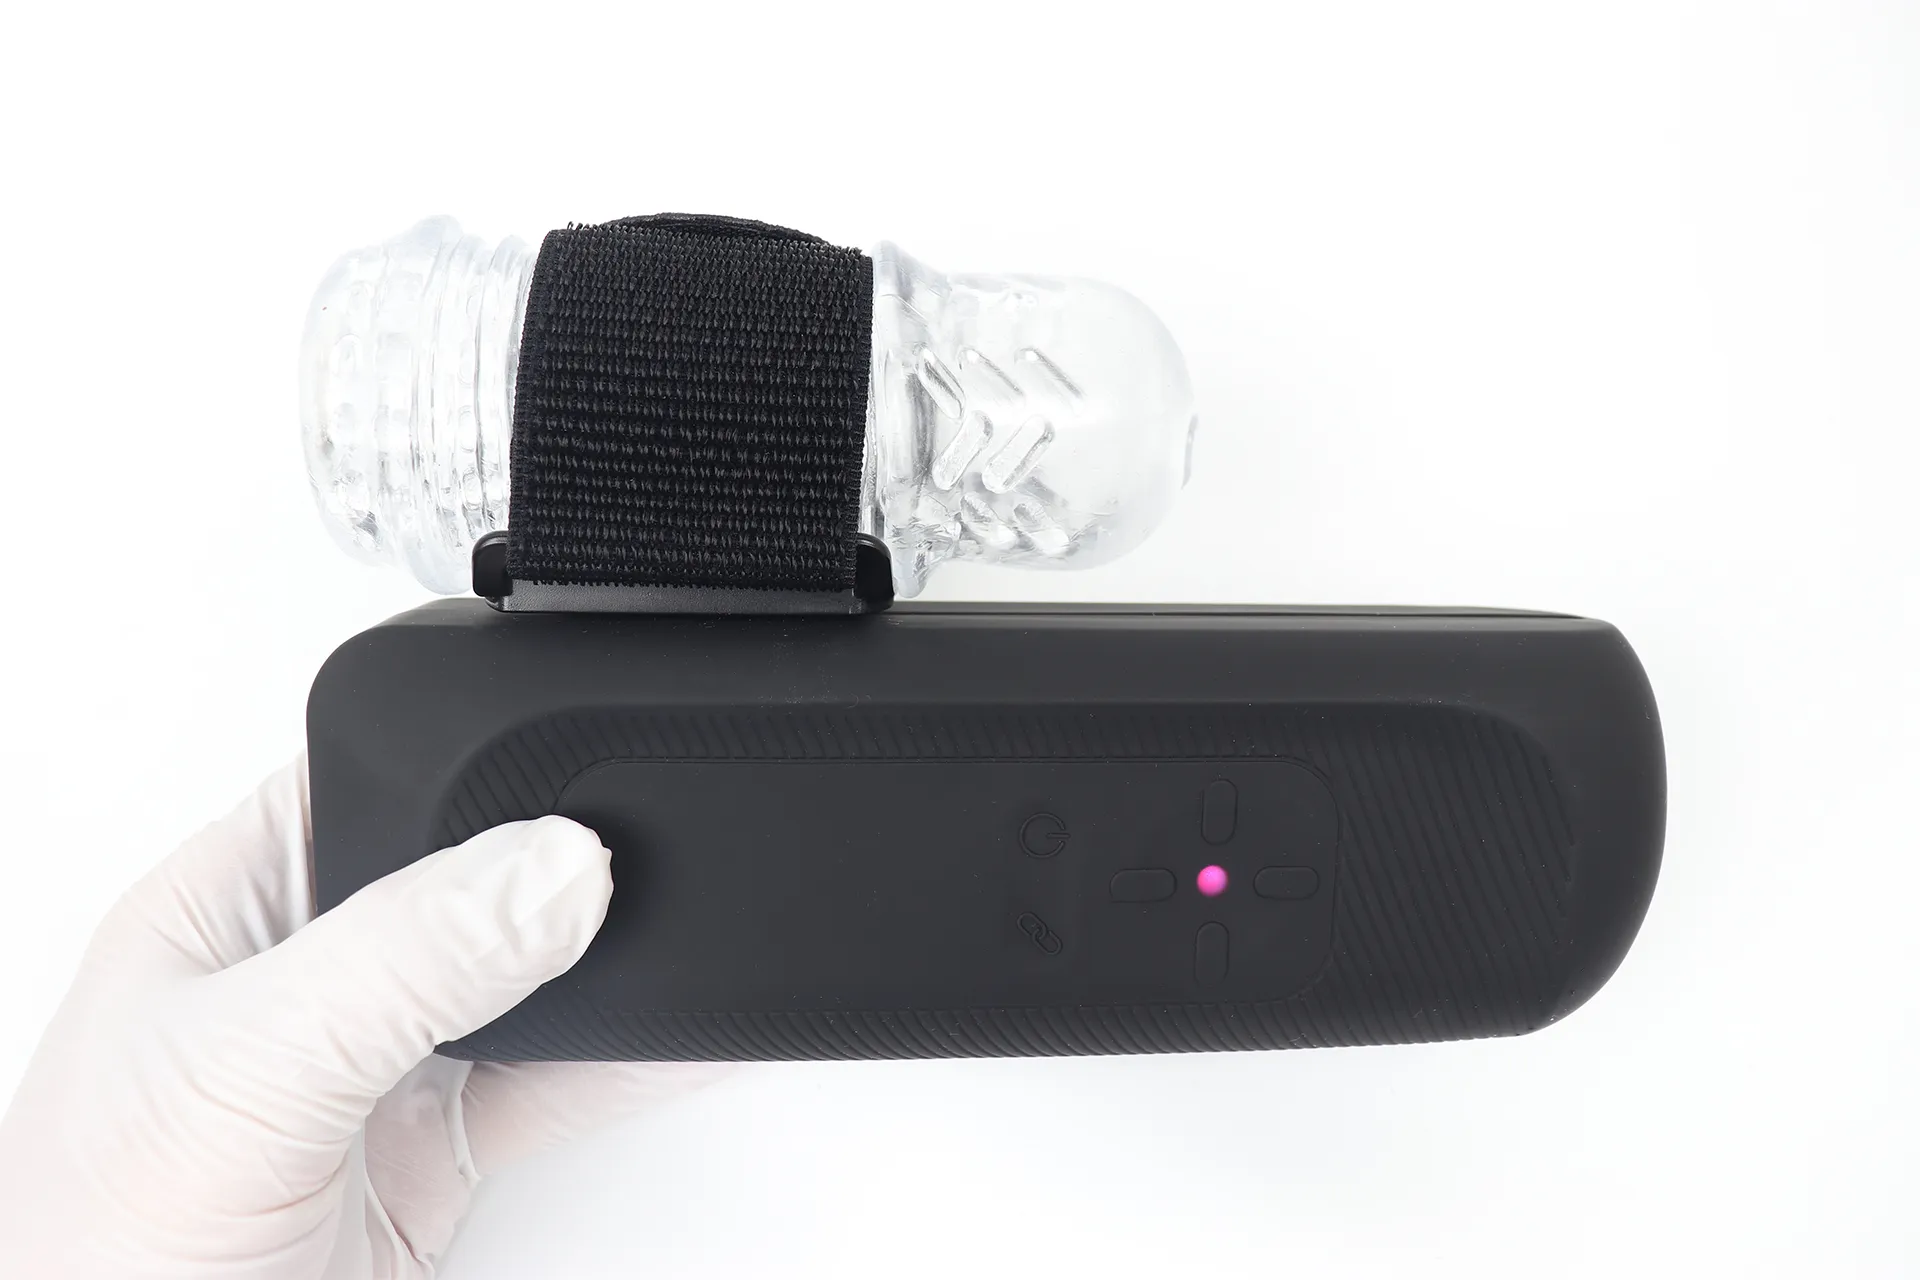
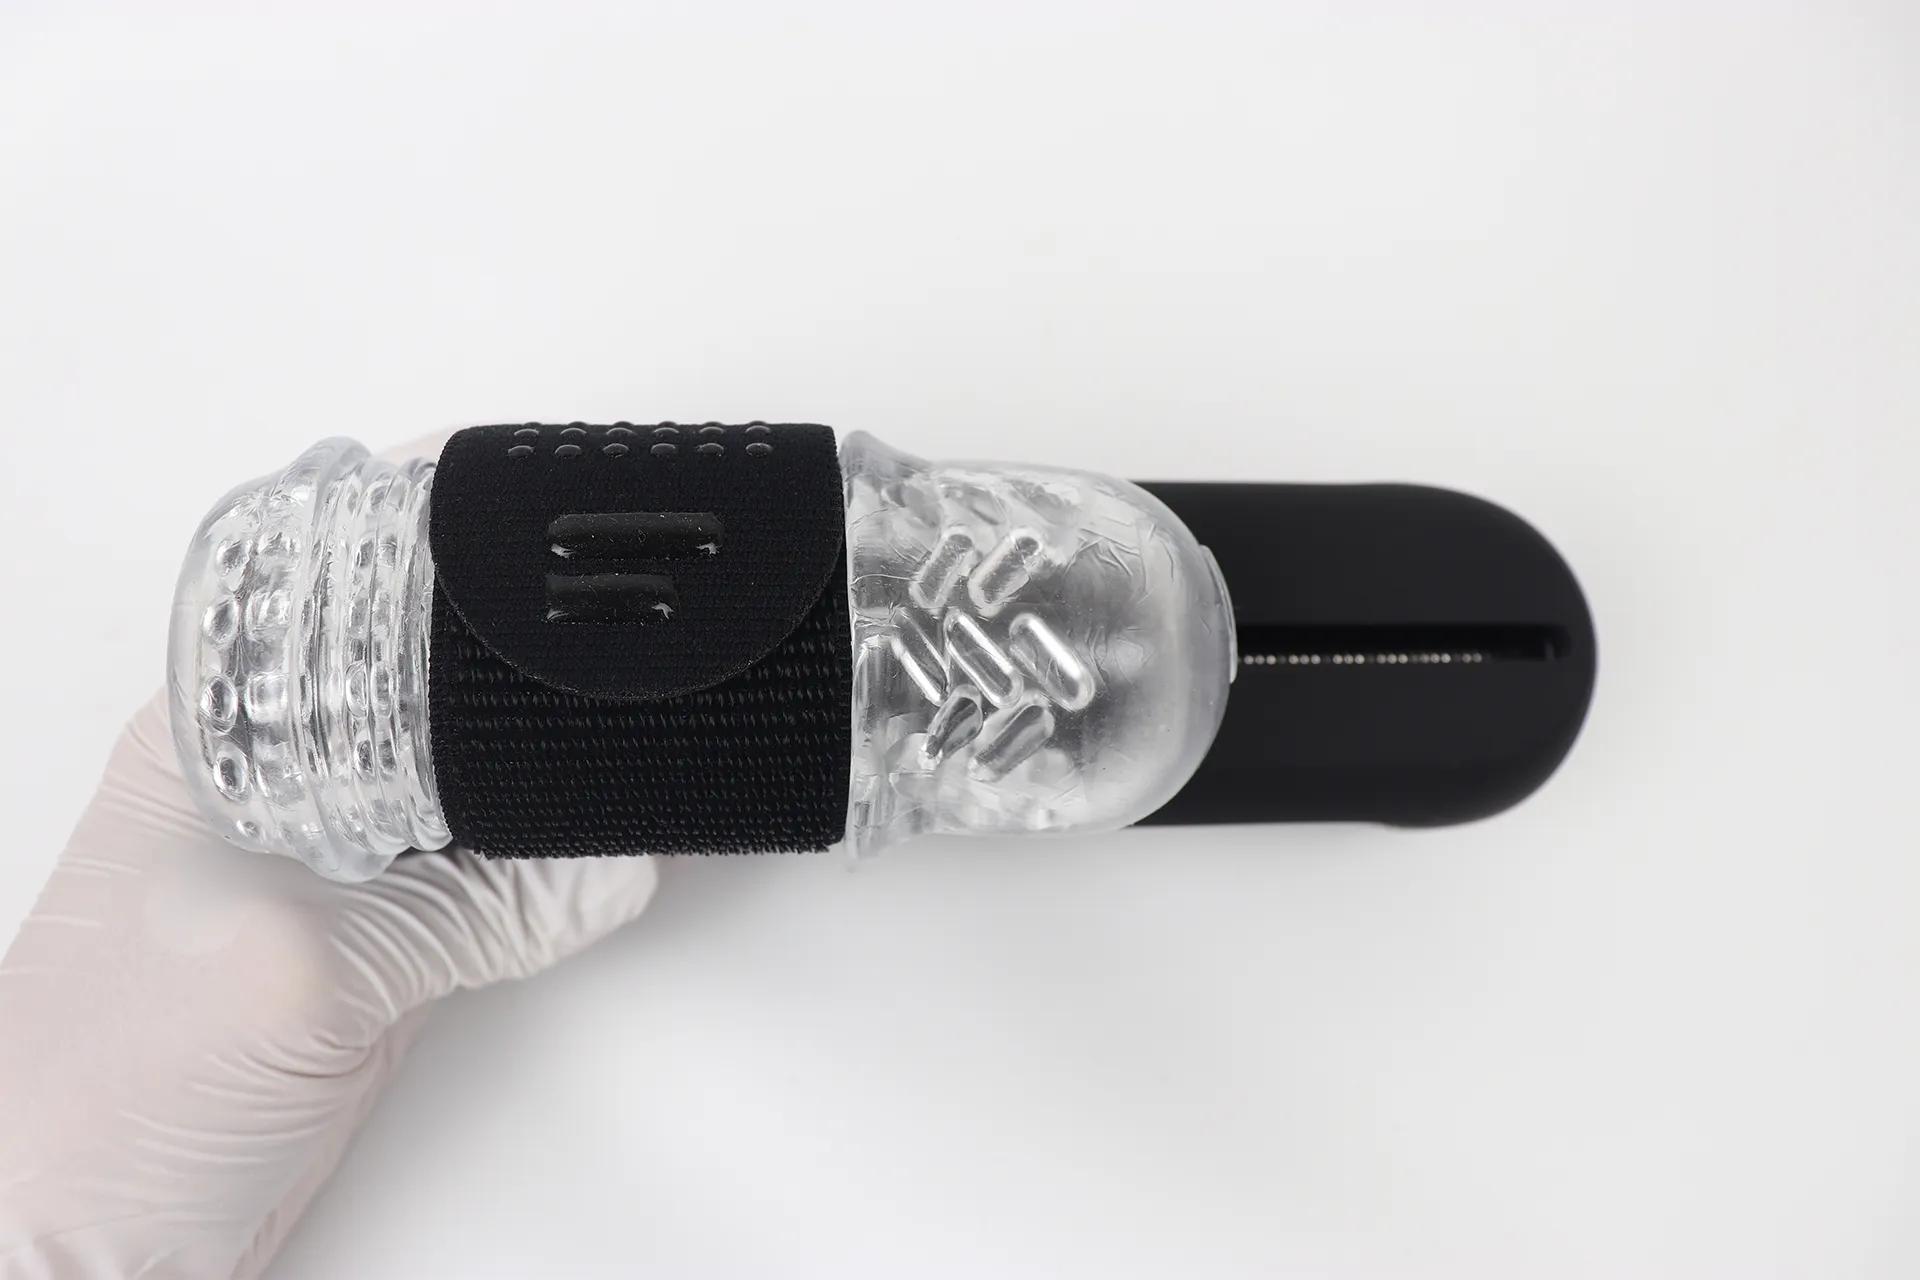
The color and flashing pattern of the LED light on the main unit indicate the following states:
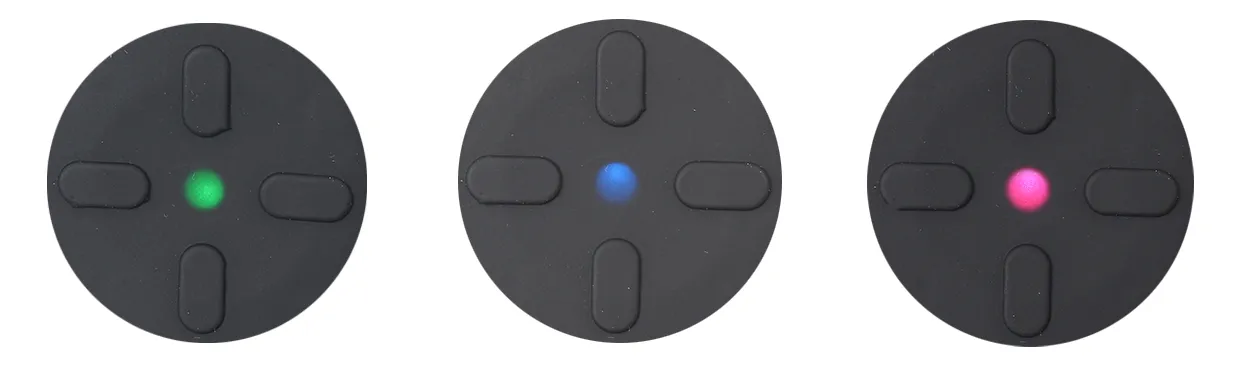
| Green | On (Ready) |
|---|---|
| Blue | Bluetooth mode |
| Magenta | Wi-Fi mode |
| Green, flashing (G→G→G) | Calibration in progress (adjustment in progress) |
|---|---|
| Red and Magenta (R→M→R) | Wi-Fi error |
| Red, flashing (K→R→K) | Safety error (safety stop) |
| Orange and red (O→R→O) | Temperature error (device temperature rise) |
| White and Red (W→R→W) | Calibration error |
It is operated using the physical buttons on the device. (Corresponds to the button layout on the device)
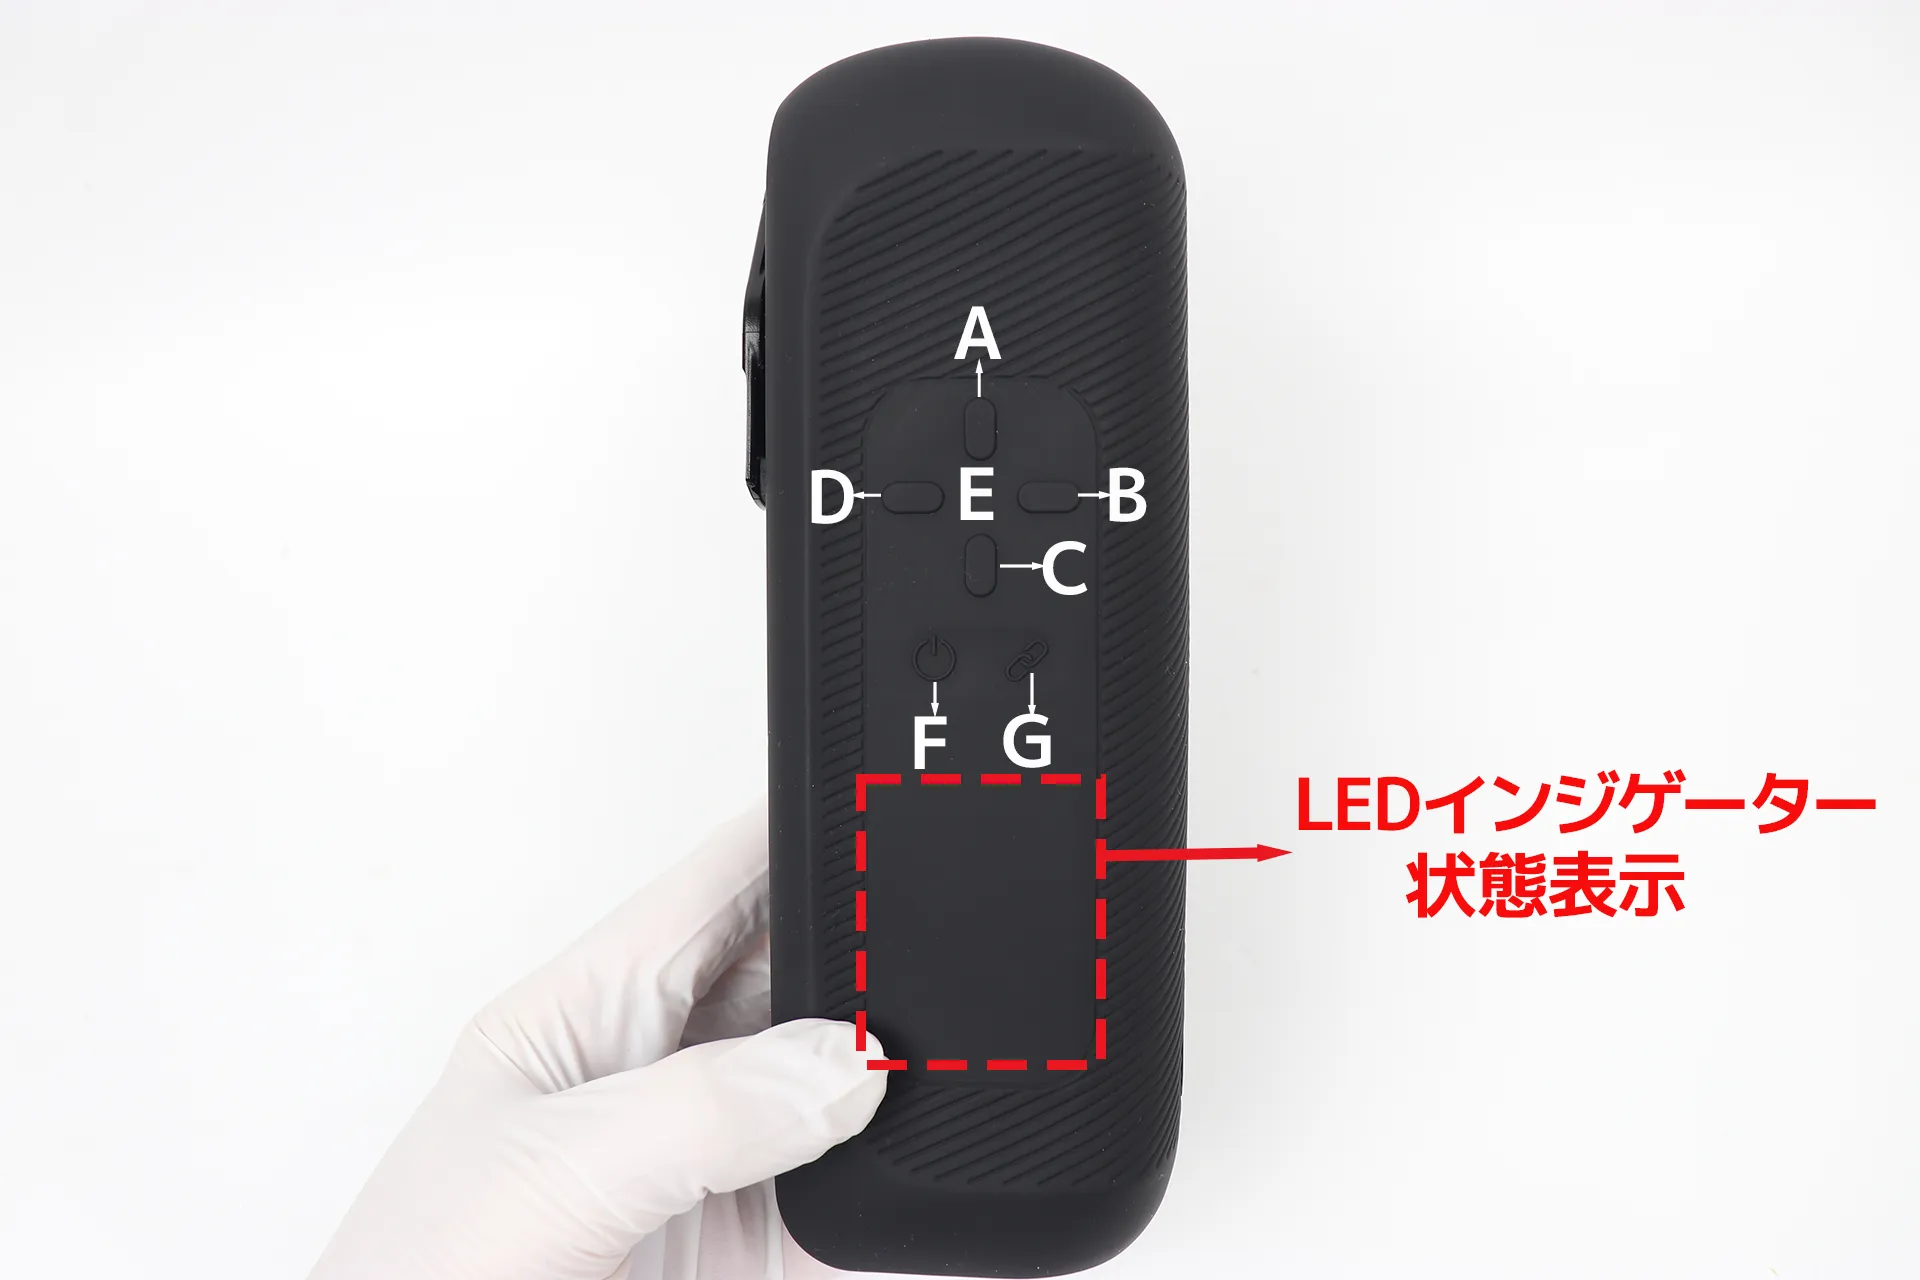
| button | Operation details |
|---|---|
| A | Increased stroke length |
| B | Speed increase |
| C | Reduced stroke length |
| D | speed decrease |
| E | Status display |
| F | Power on Start/Stop |
| G | Action button |
The status will be displayed according to the operation.
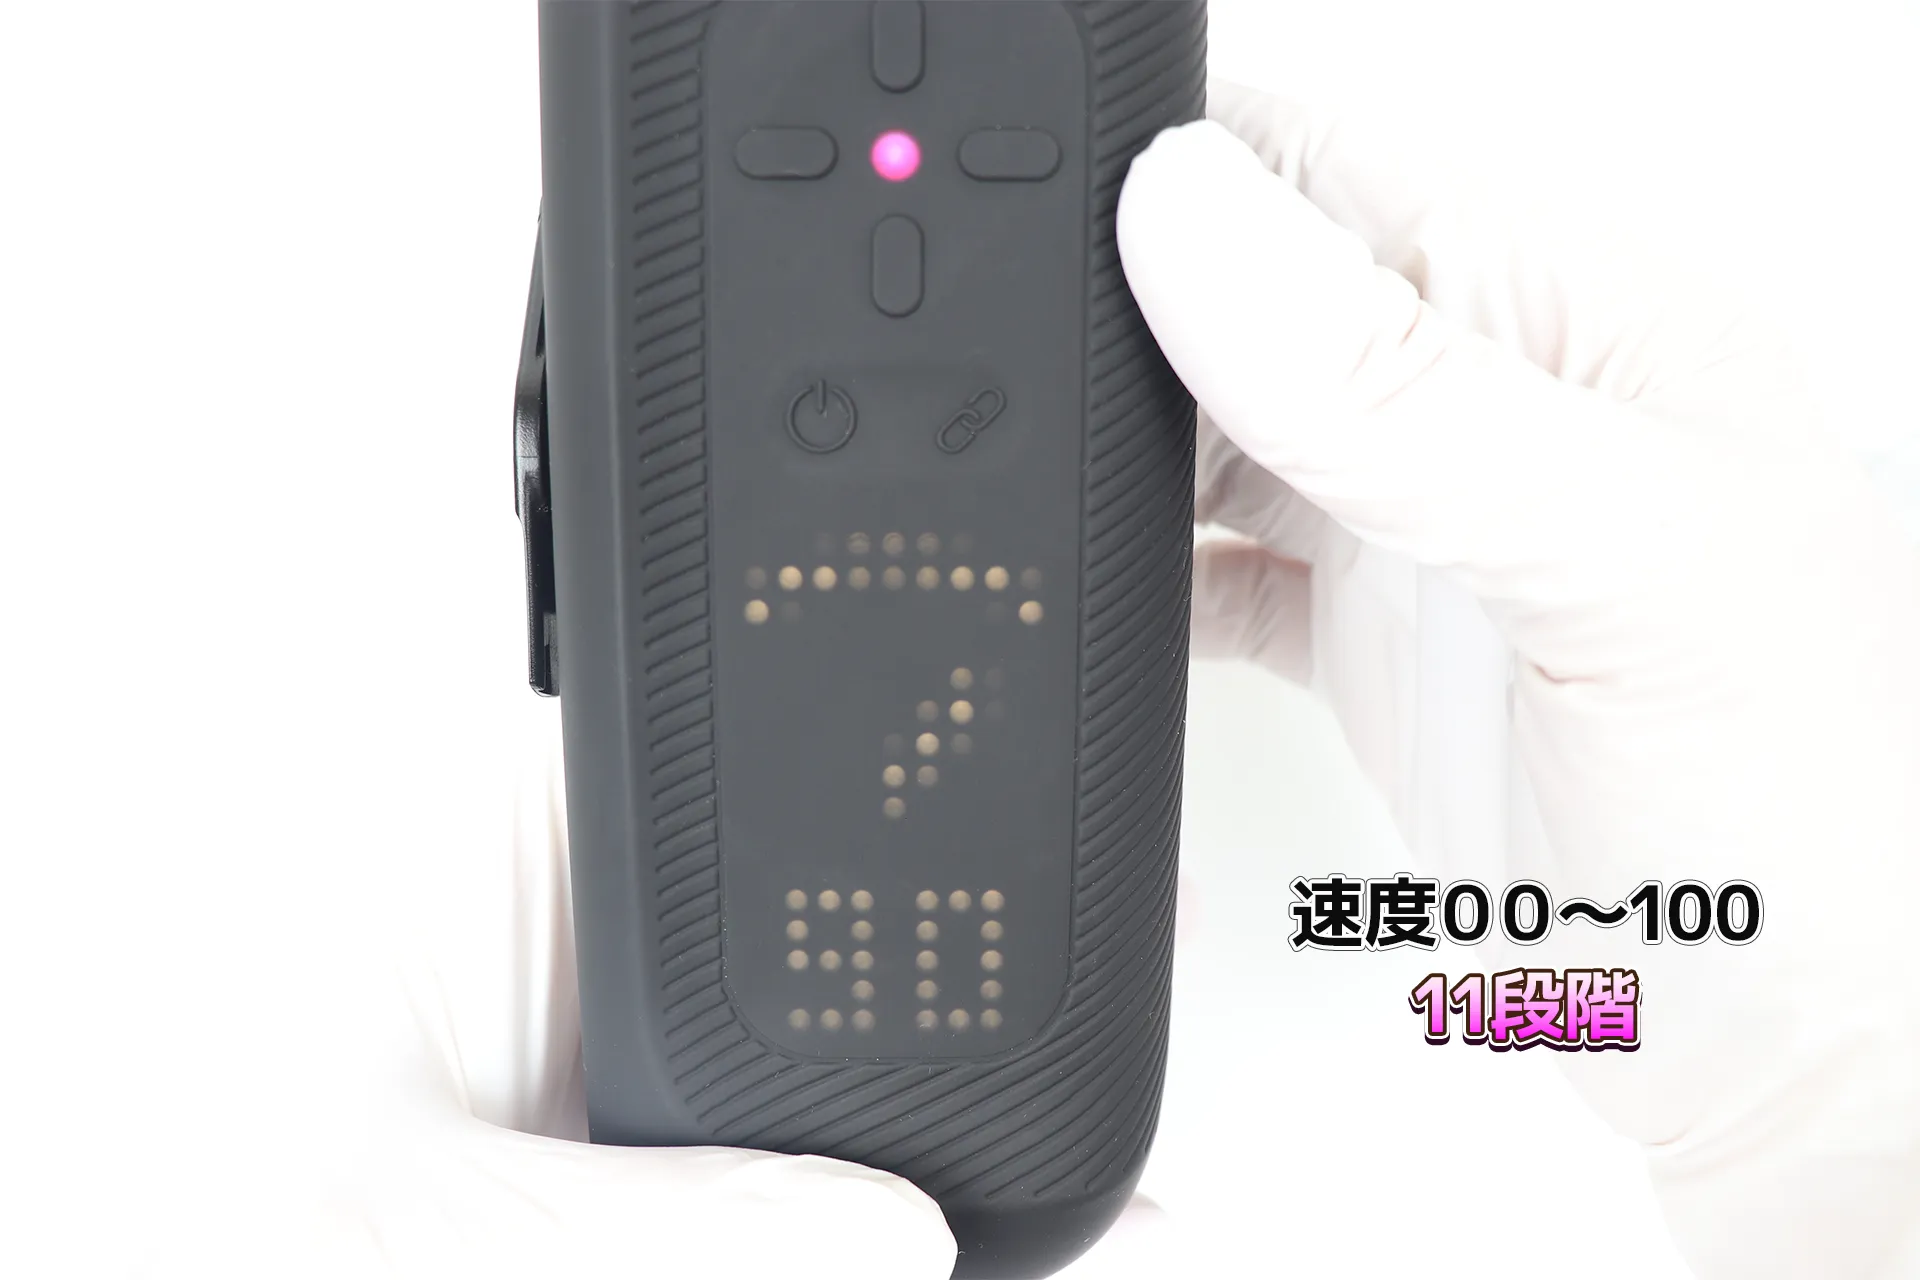
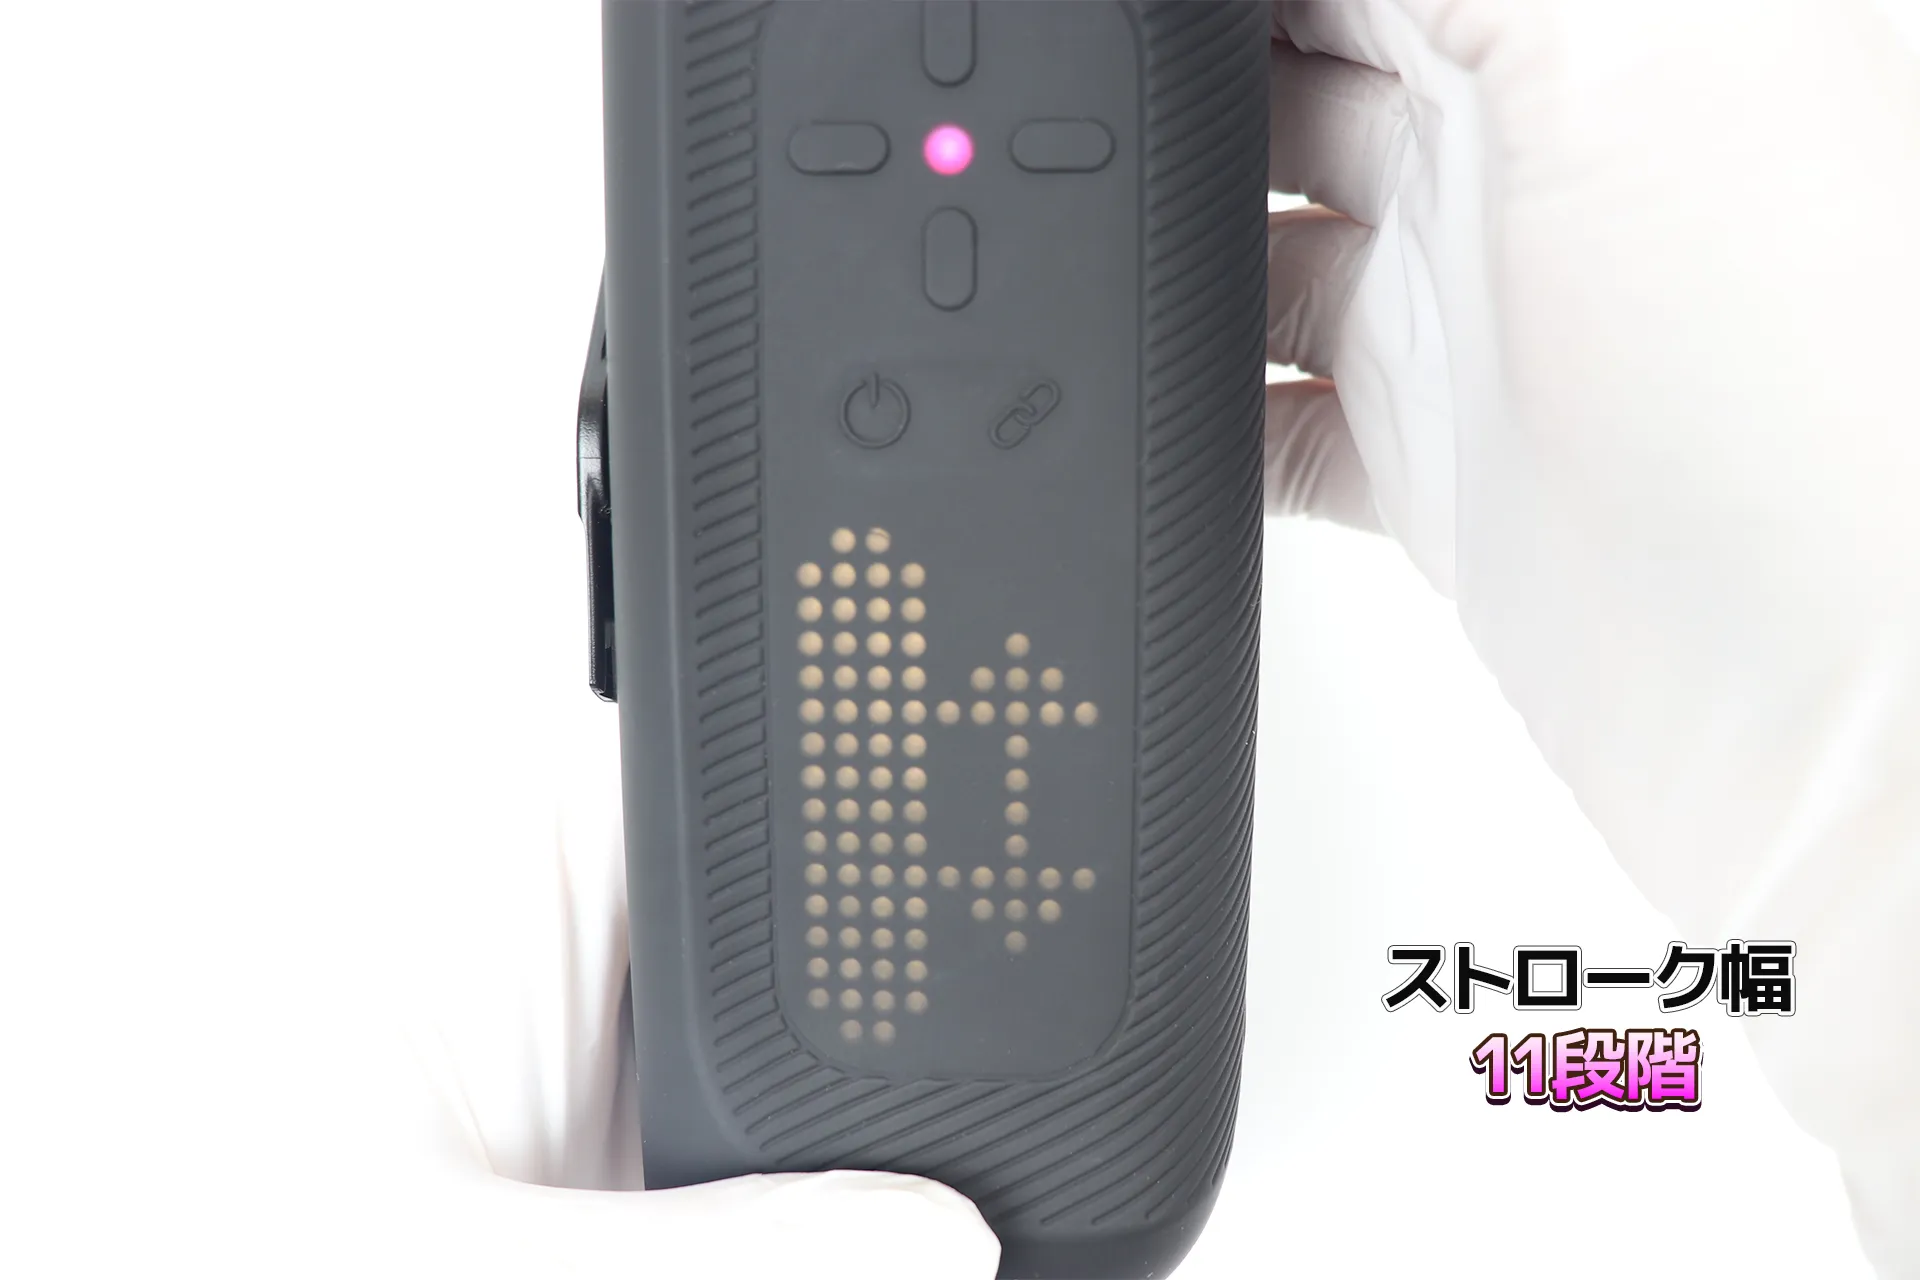
An online connection is required to use the additional features.
Please download the "Handy Onboarding" app. (You can also access it via the QR code on the product packaging.)

Handy Onboarding
Sweet tech as free posted withAppReach


After downloading the app, you'll need to go through the initial setup. It's only the first time, so it might seem a bit tedious, but let's get started.
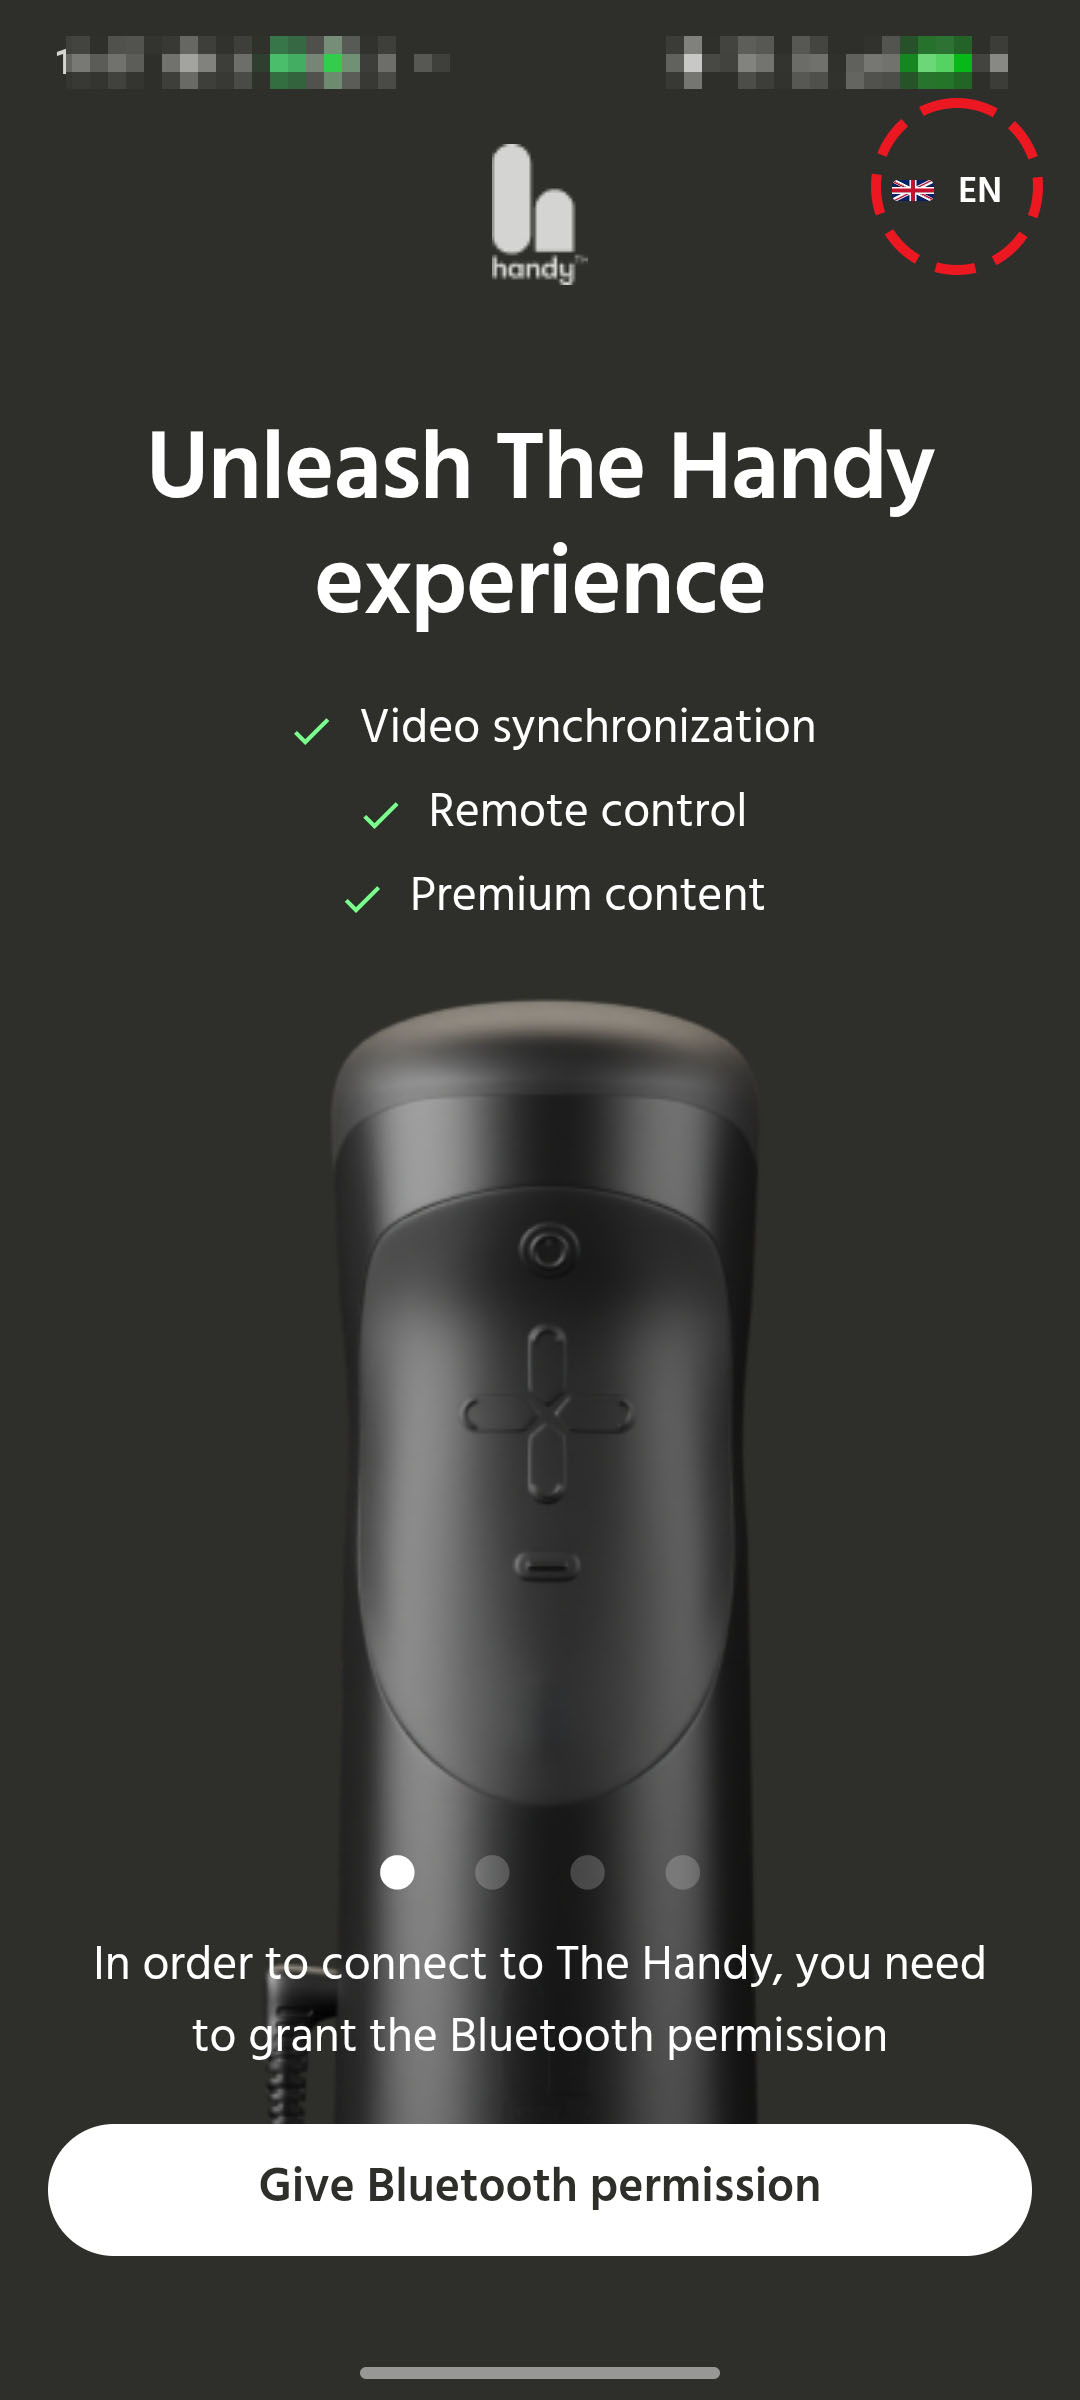
I'd like to switch to Japanese once I launch the app. There's a language selection button in the upper right corner.
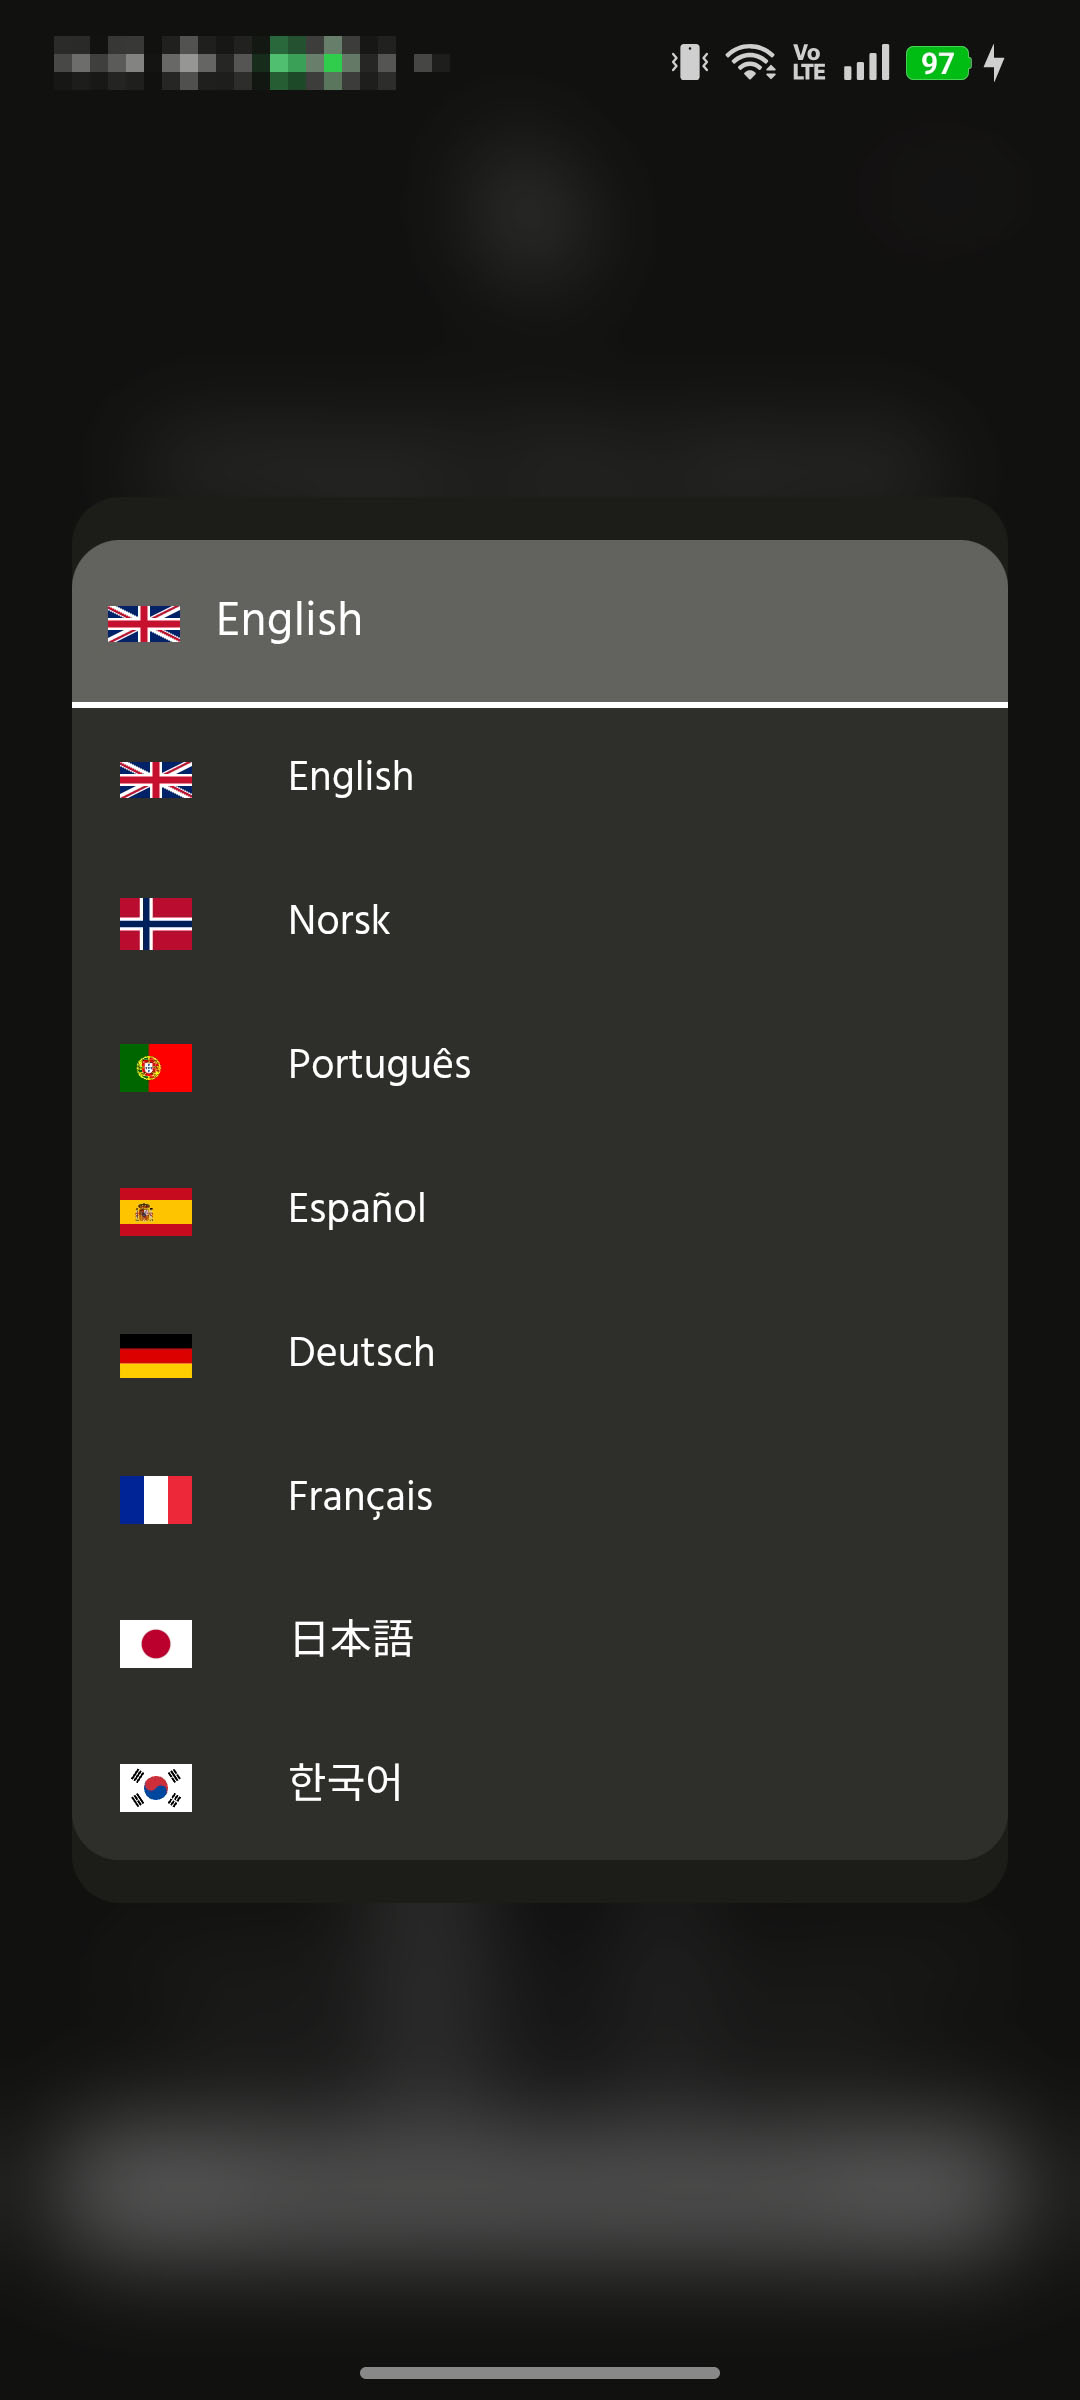
Japanese appears here, and you can select it, but when I tried this, changing it to Japanese didn't change anything. The language reverts back to English when the page changes. Therefore, if you can't change it to Japanese, please use your smartphone's translation function.
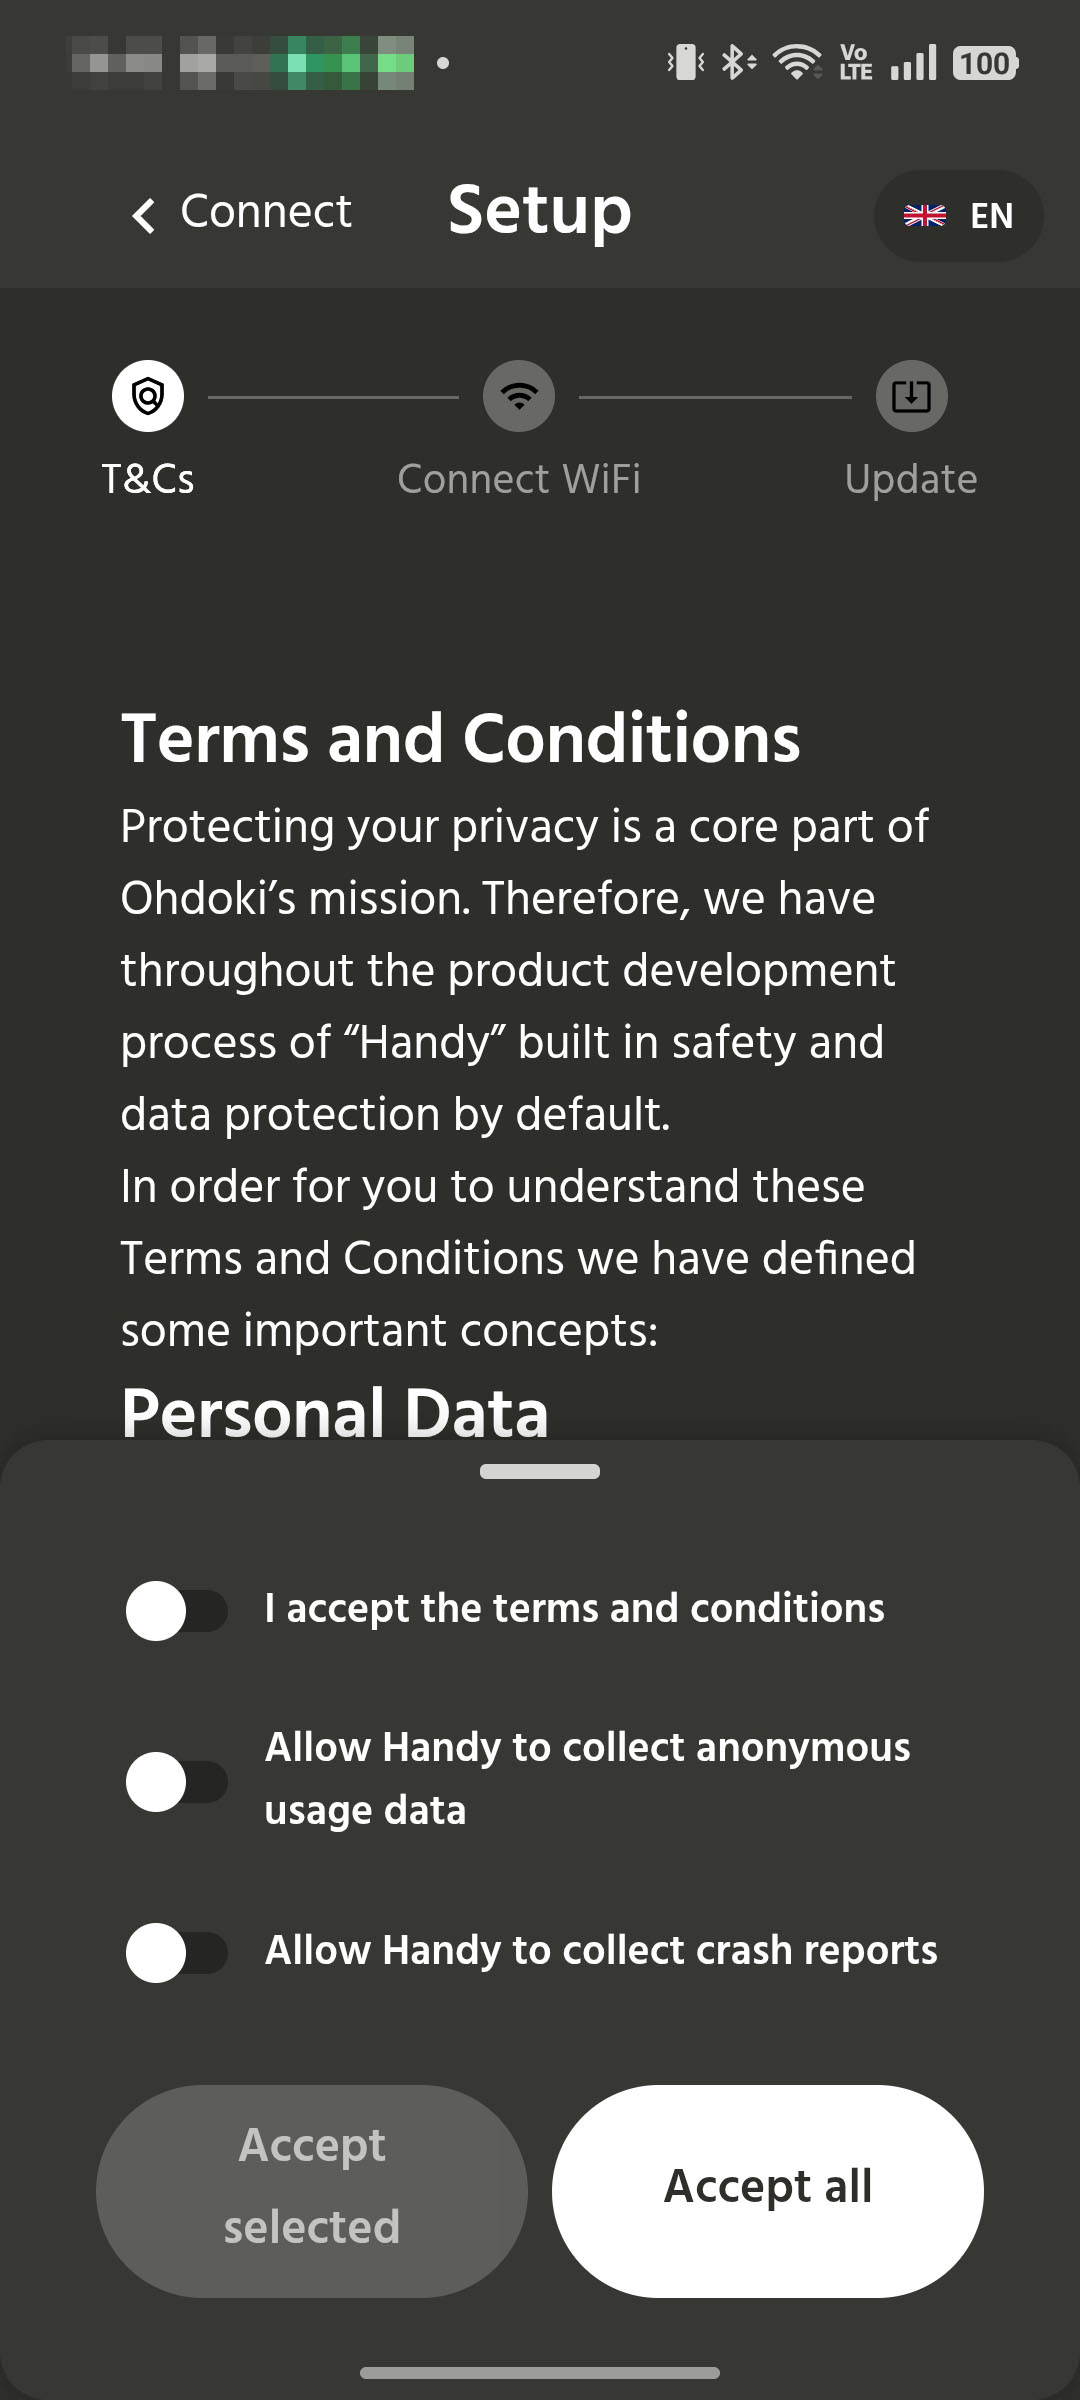
It will ask for your permission to use the terms of service and data collection, so proceed by selecting "Accept all".
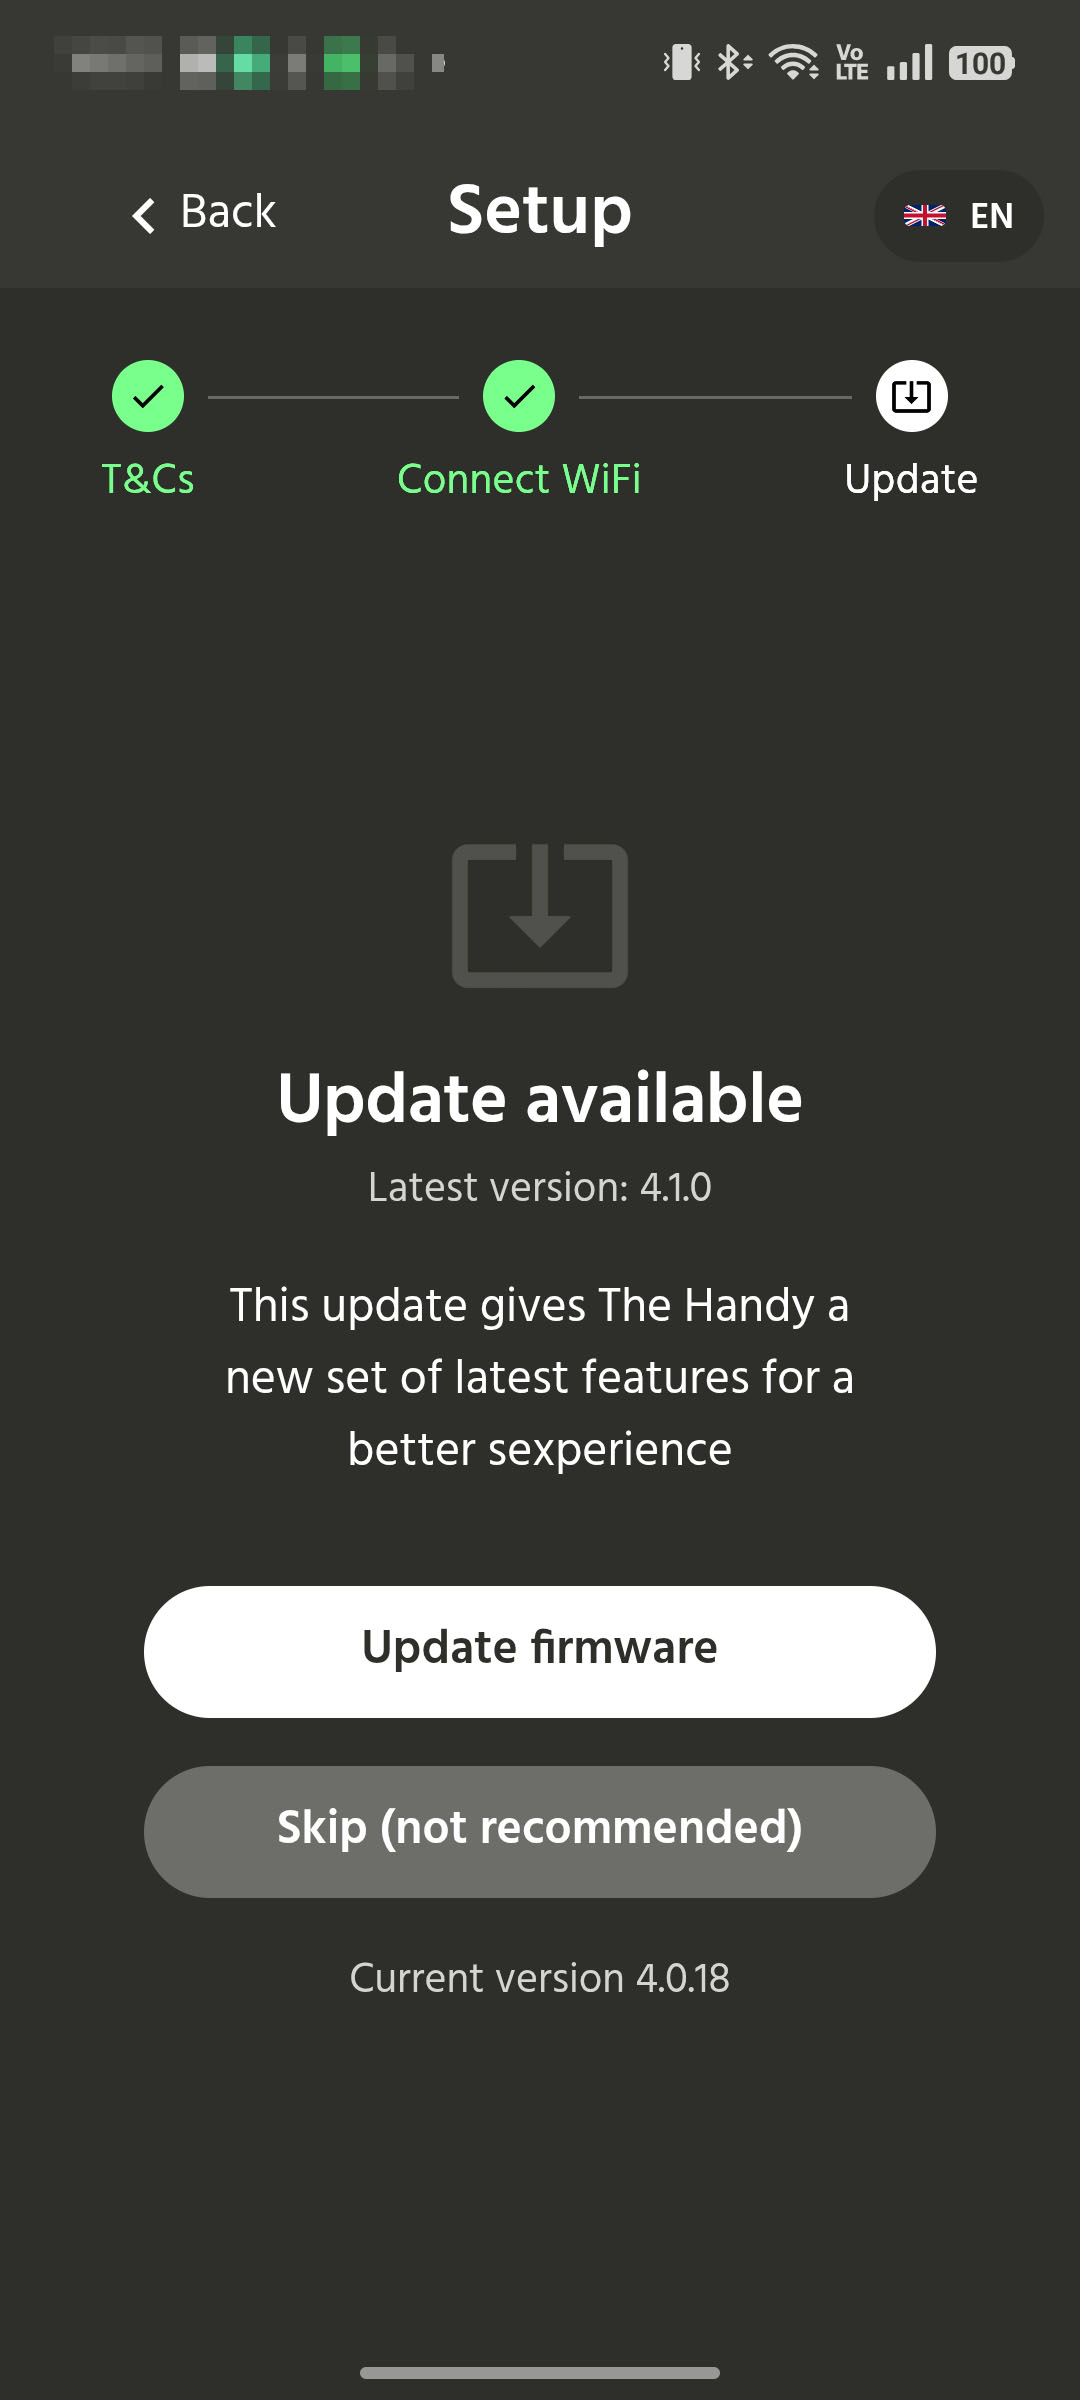
It will ask if you want to update the firmware. If you're already using it and it's stable, you can skip it, but since this was my first time using the app, I updated it.
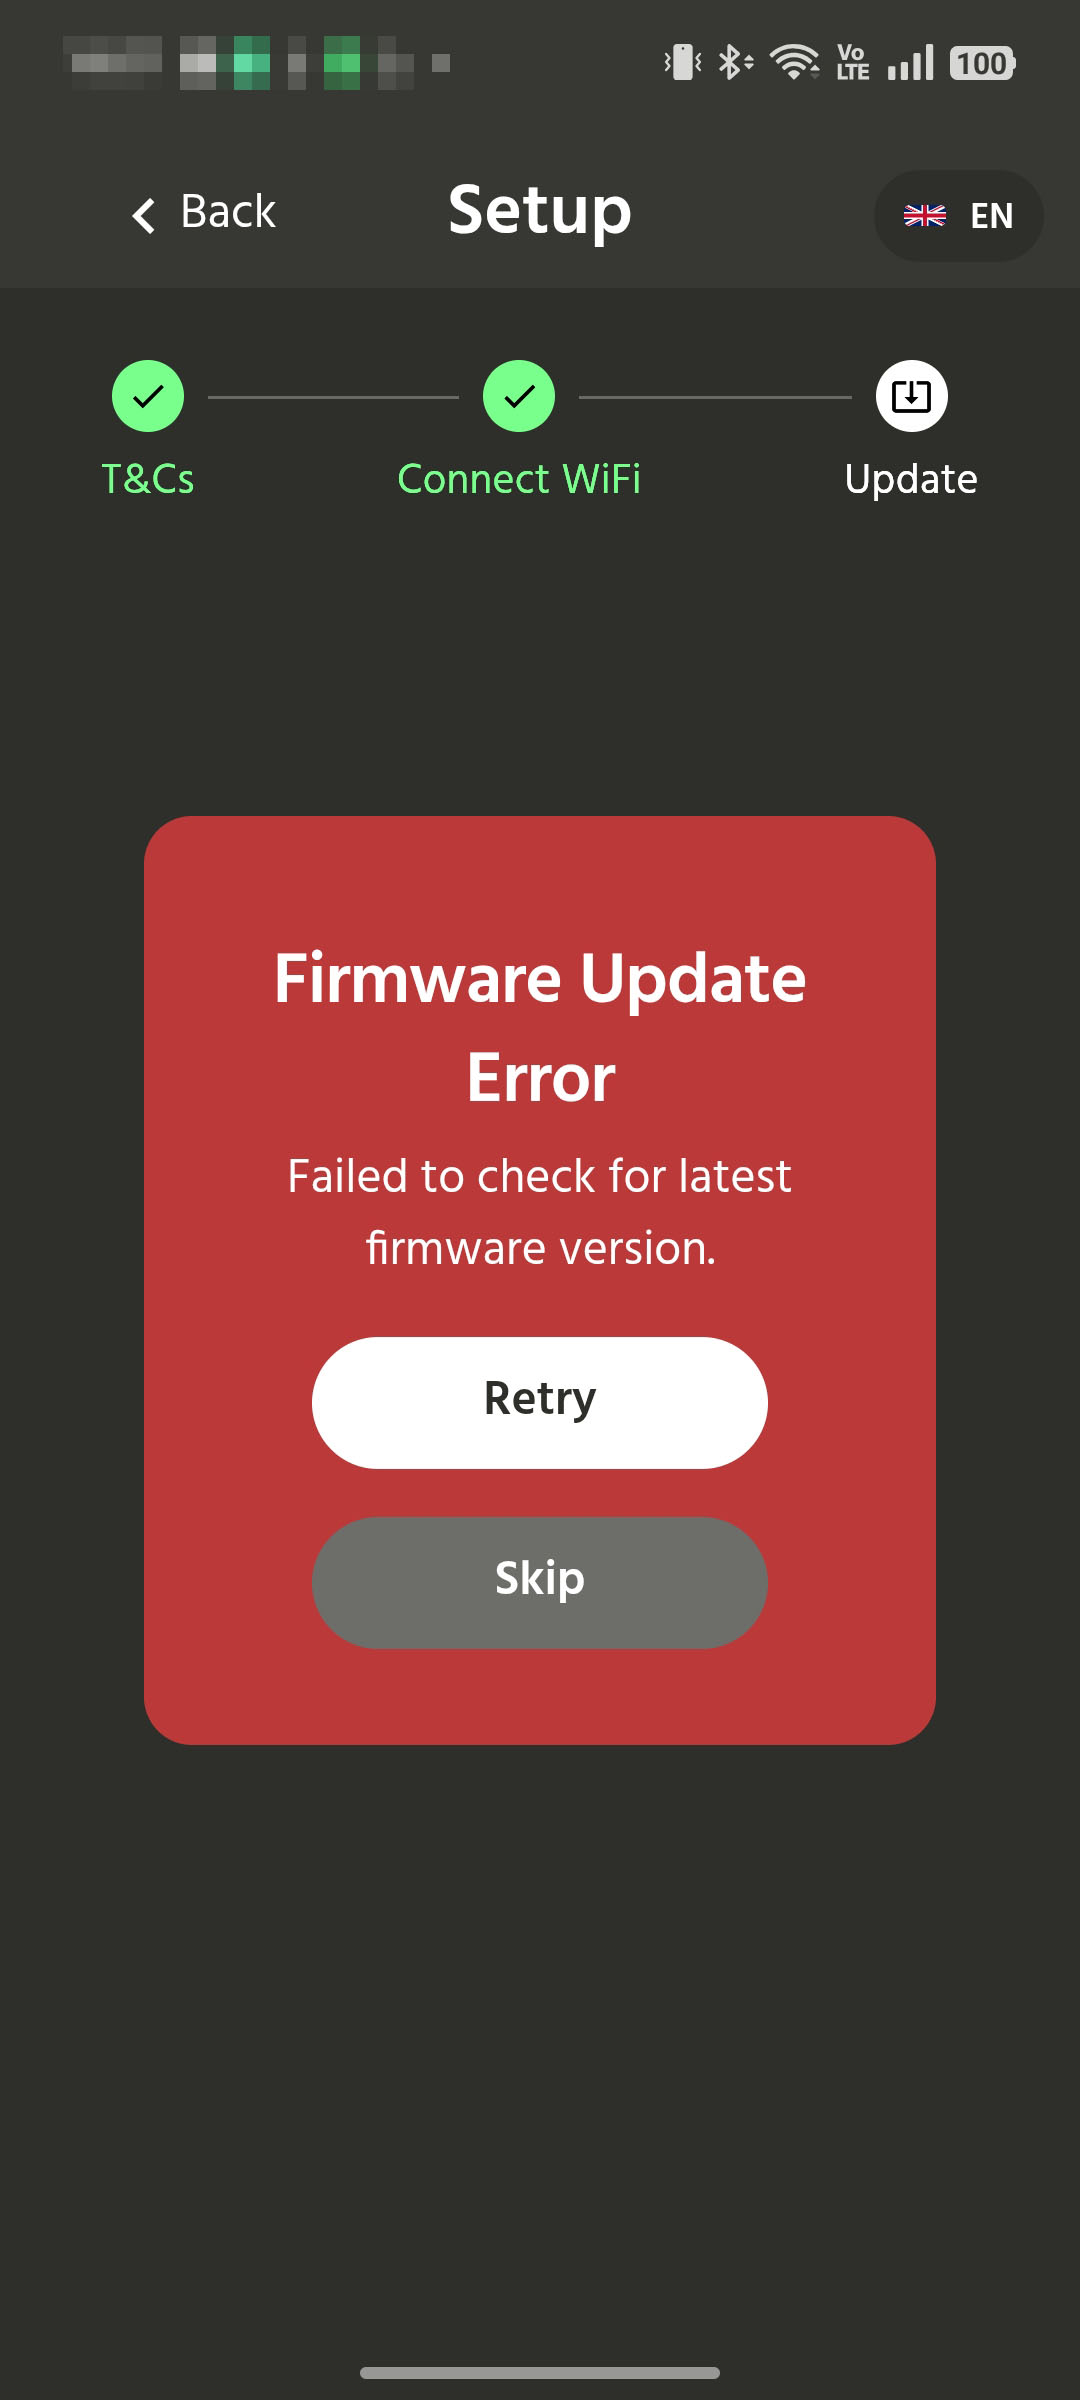
If this screen appears, it means there's an update error and you'll have to start over. In my case, I'm not sure if it's due to my environment or a problem with the app, but I've encountered the error several times.
The connection will be established via Bluetooth. Please follow the on-screen instructions in the app to complete the connection.
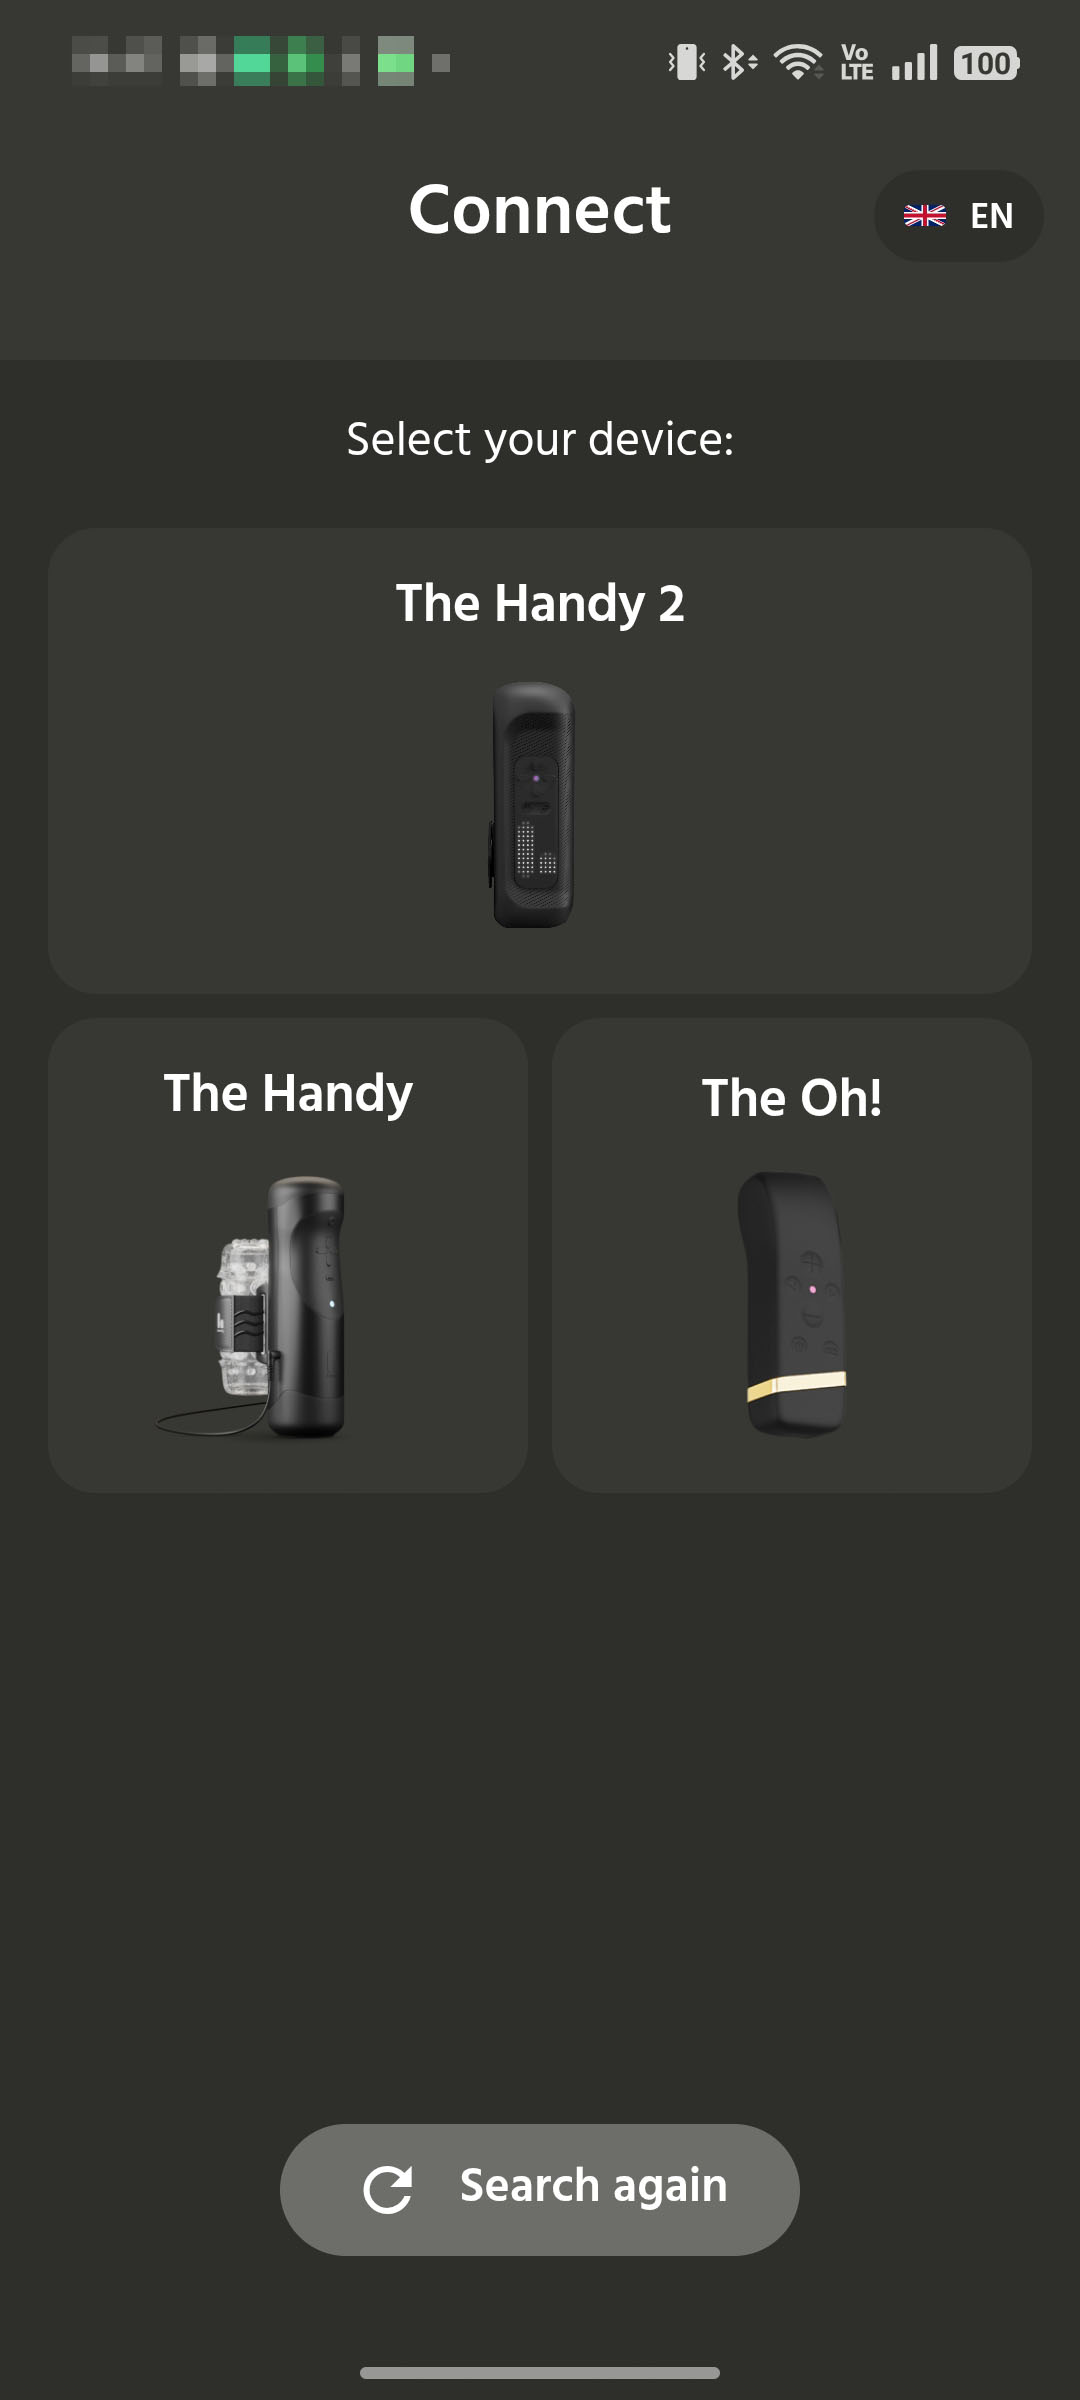
If the device is powered on, launch the app. Select The Handy2 from the selection screen.
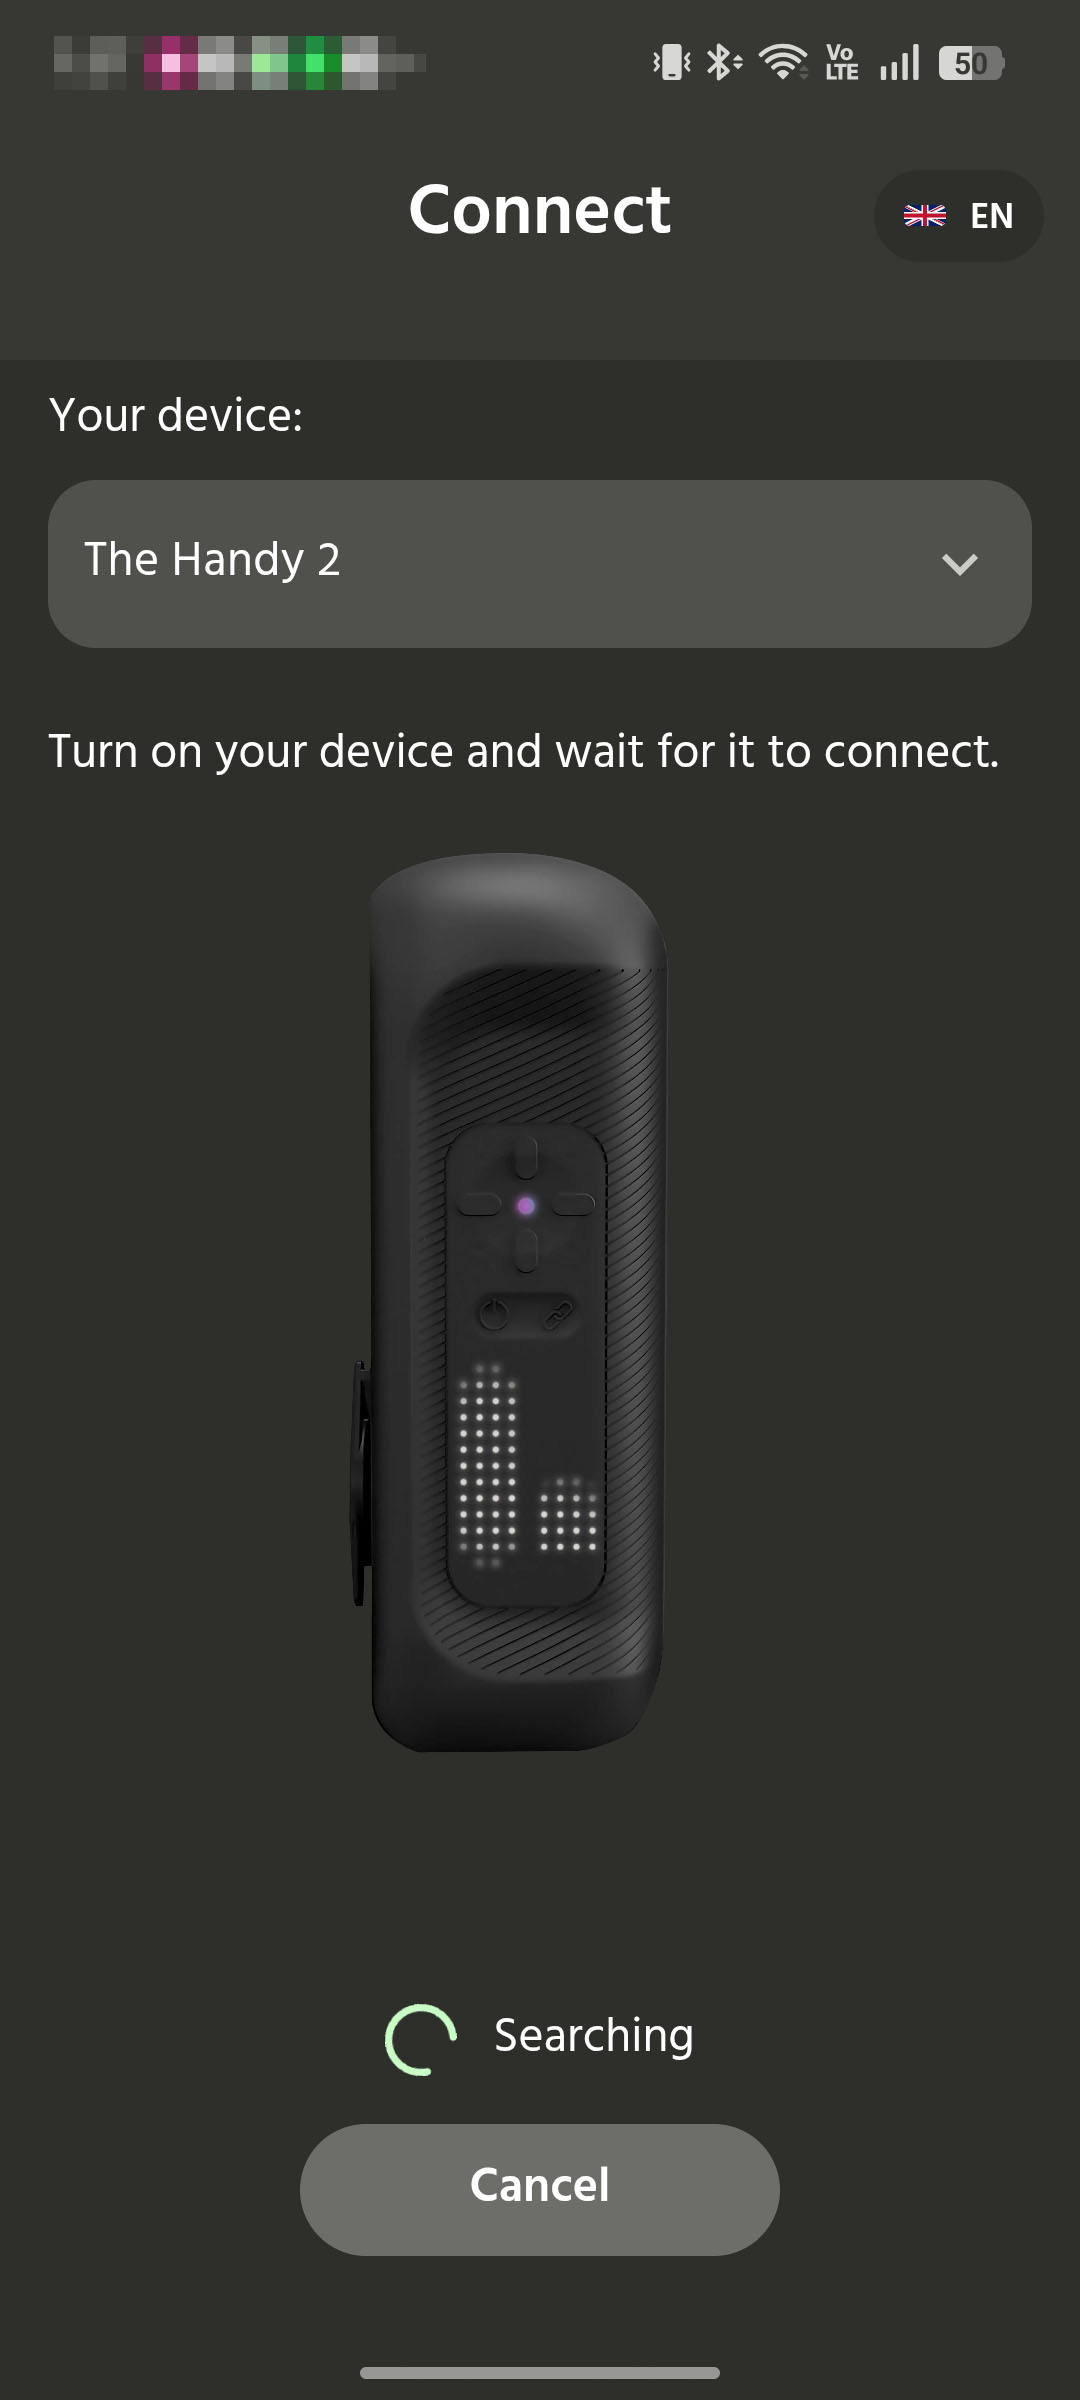
The search will begin.
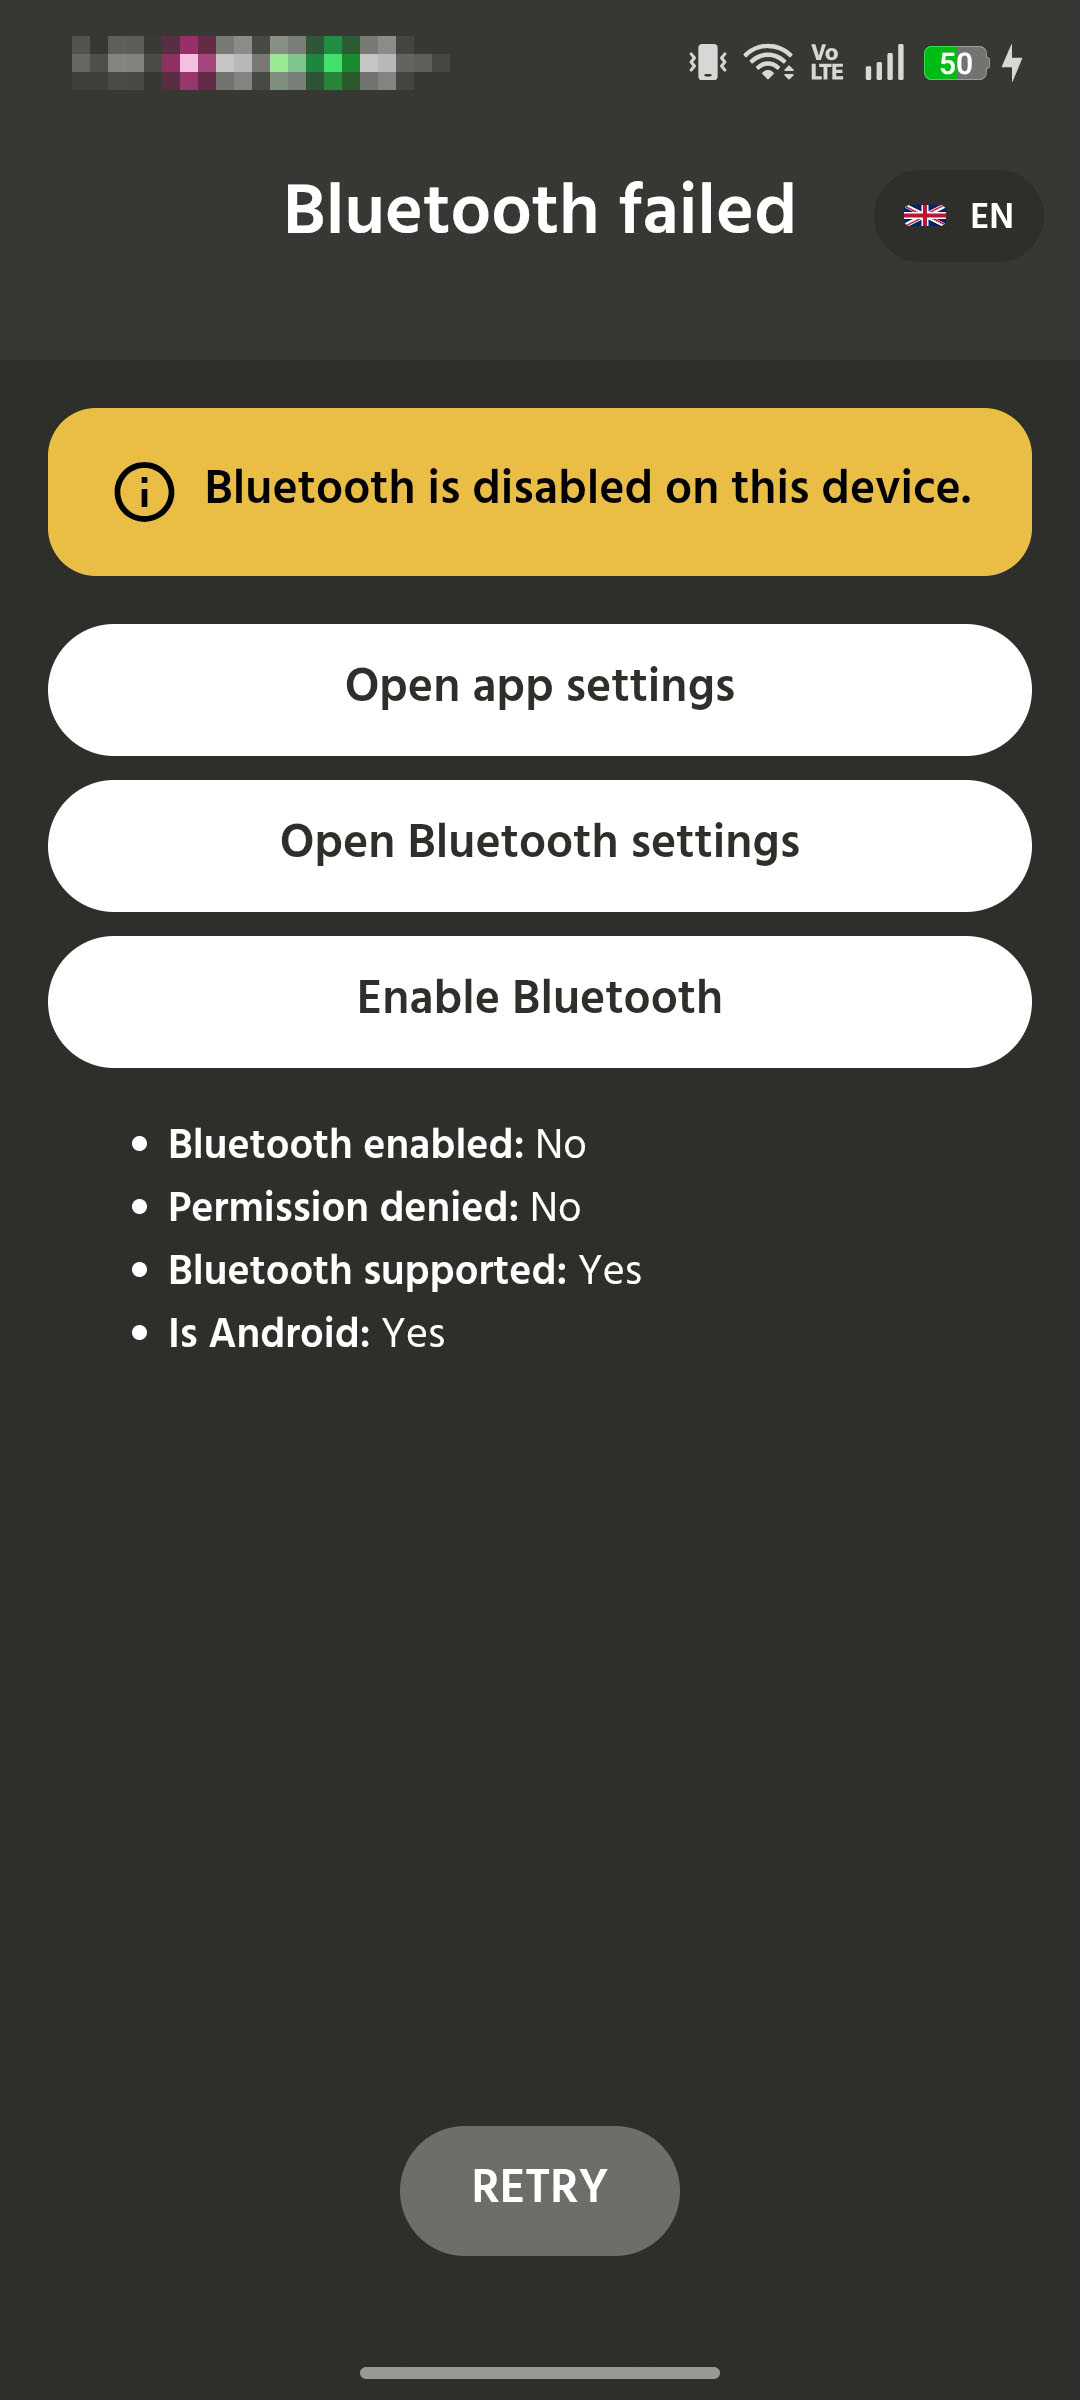
An error will occur if the device's Bluetooth is not enabled.
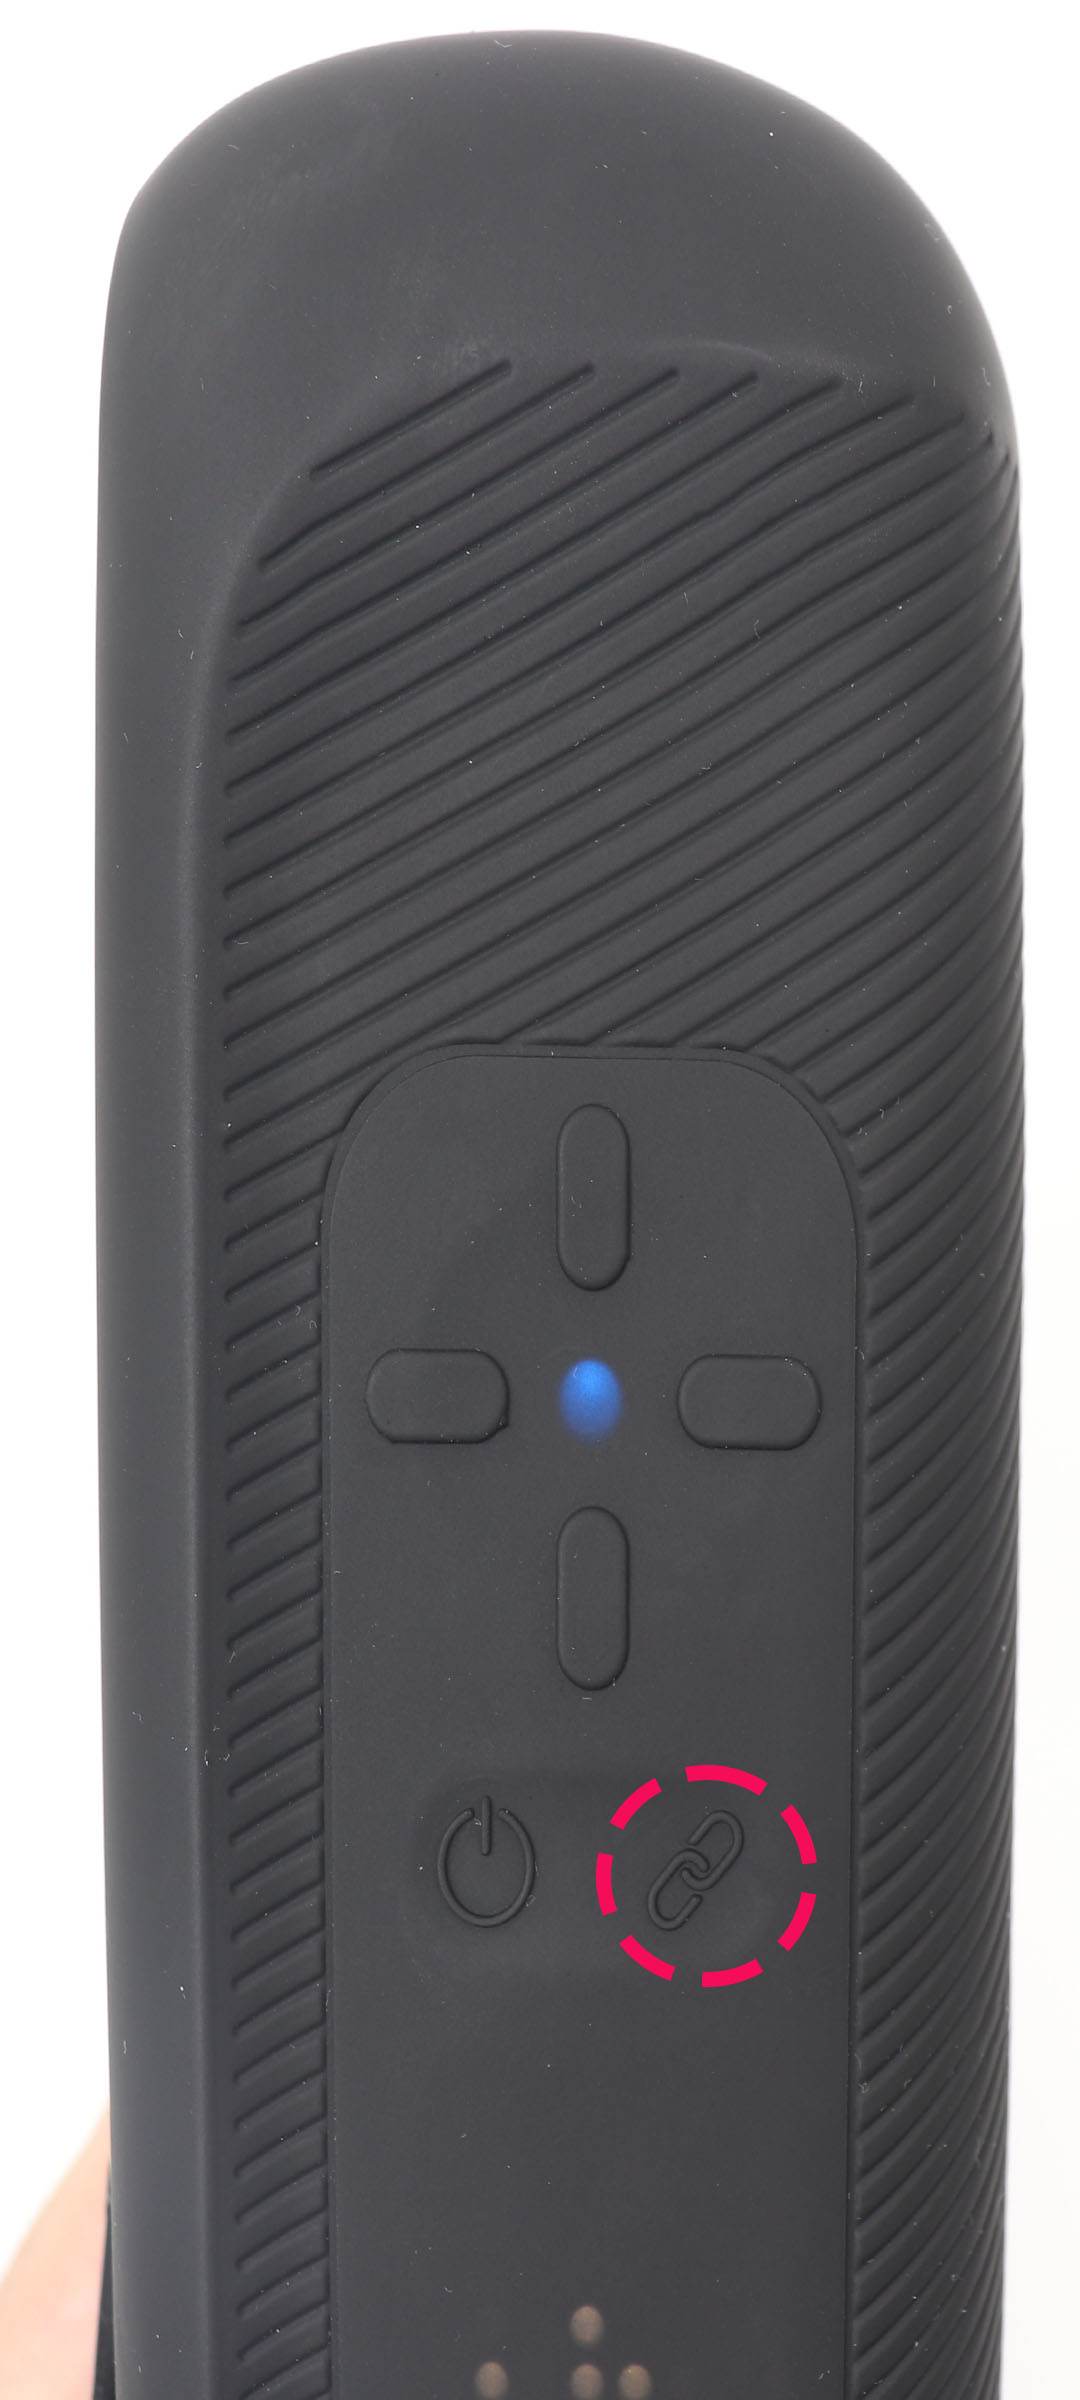
Press the action button on the device to turn it blue, then establish a Bluetooth connection.
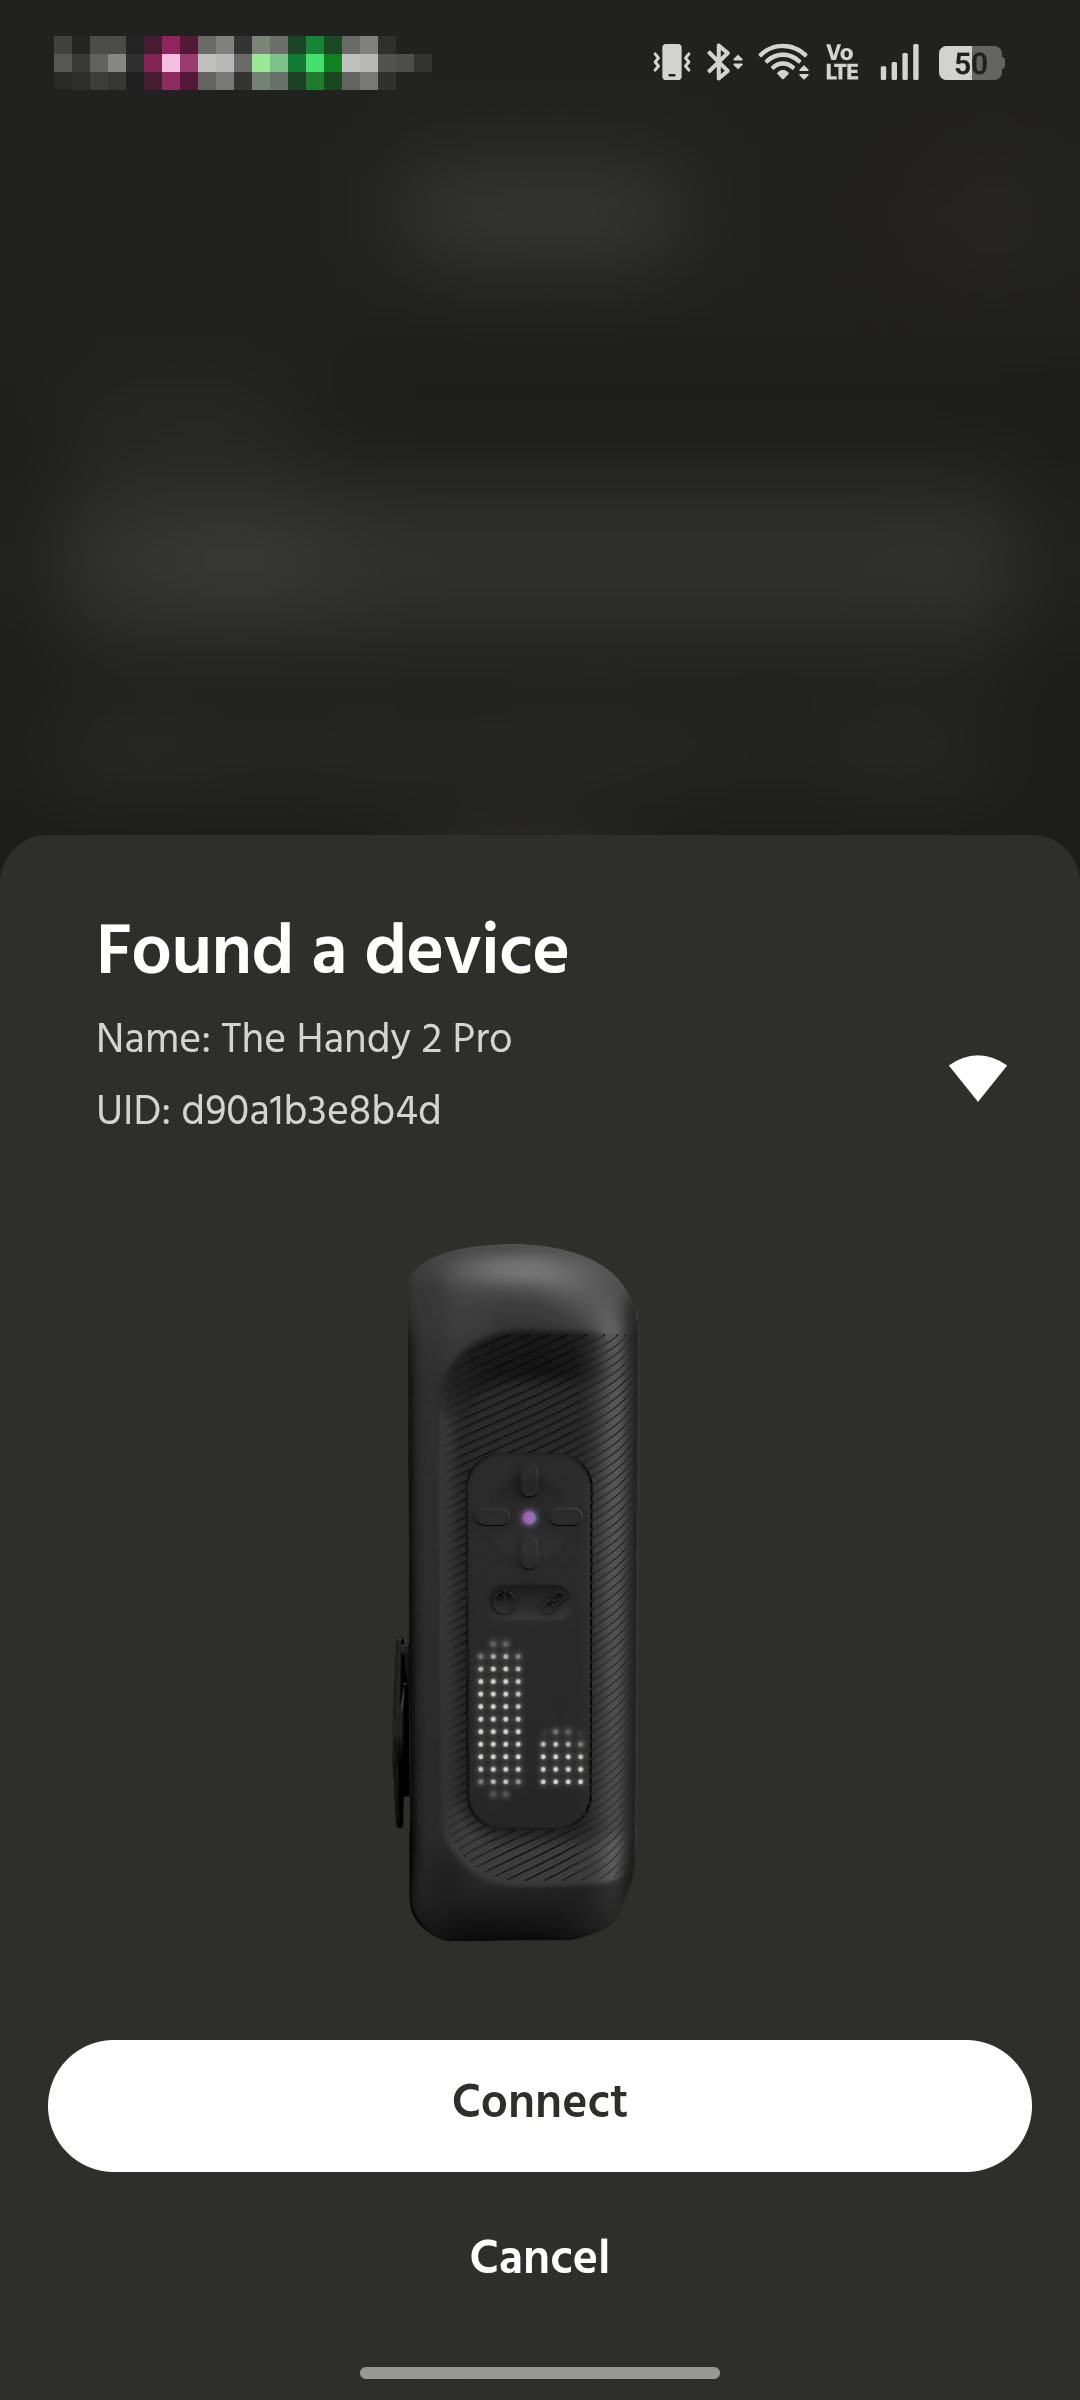
The device has been found, so press Connect.
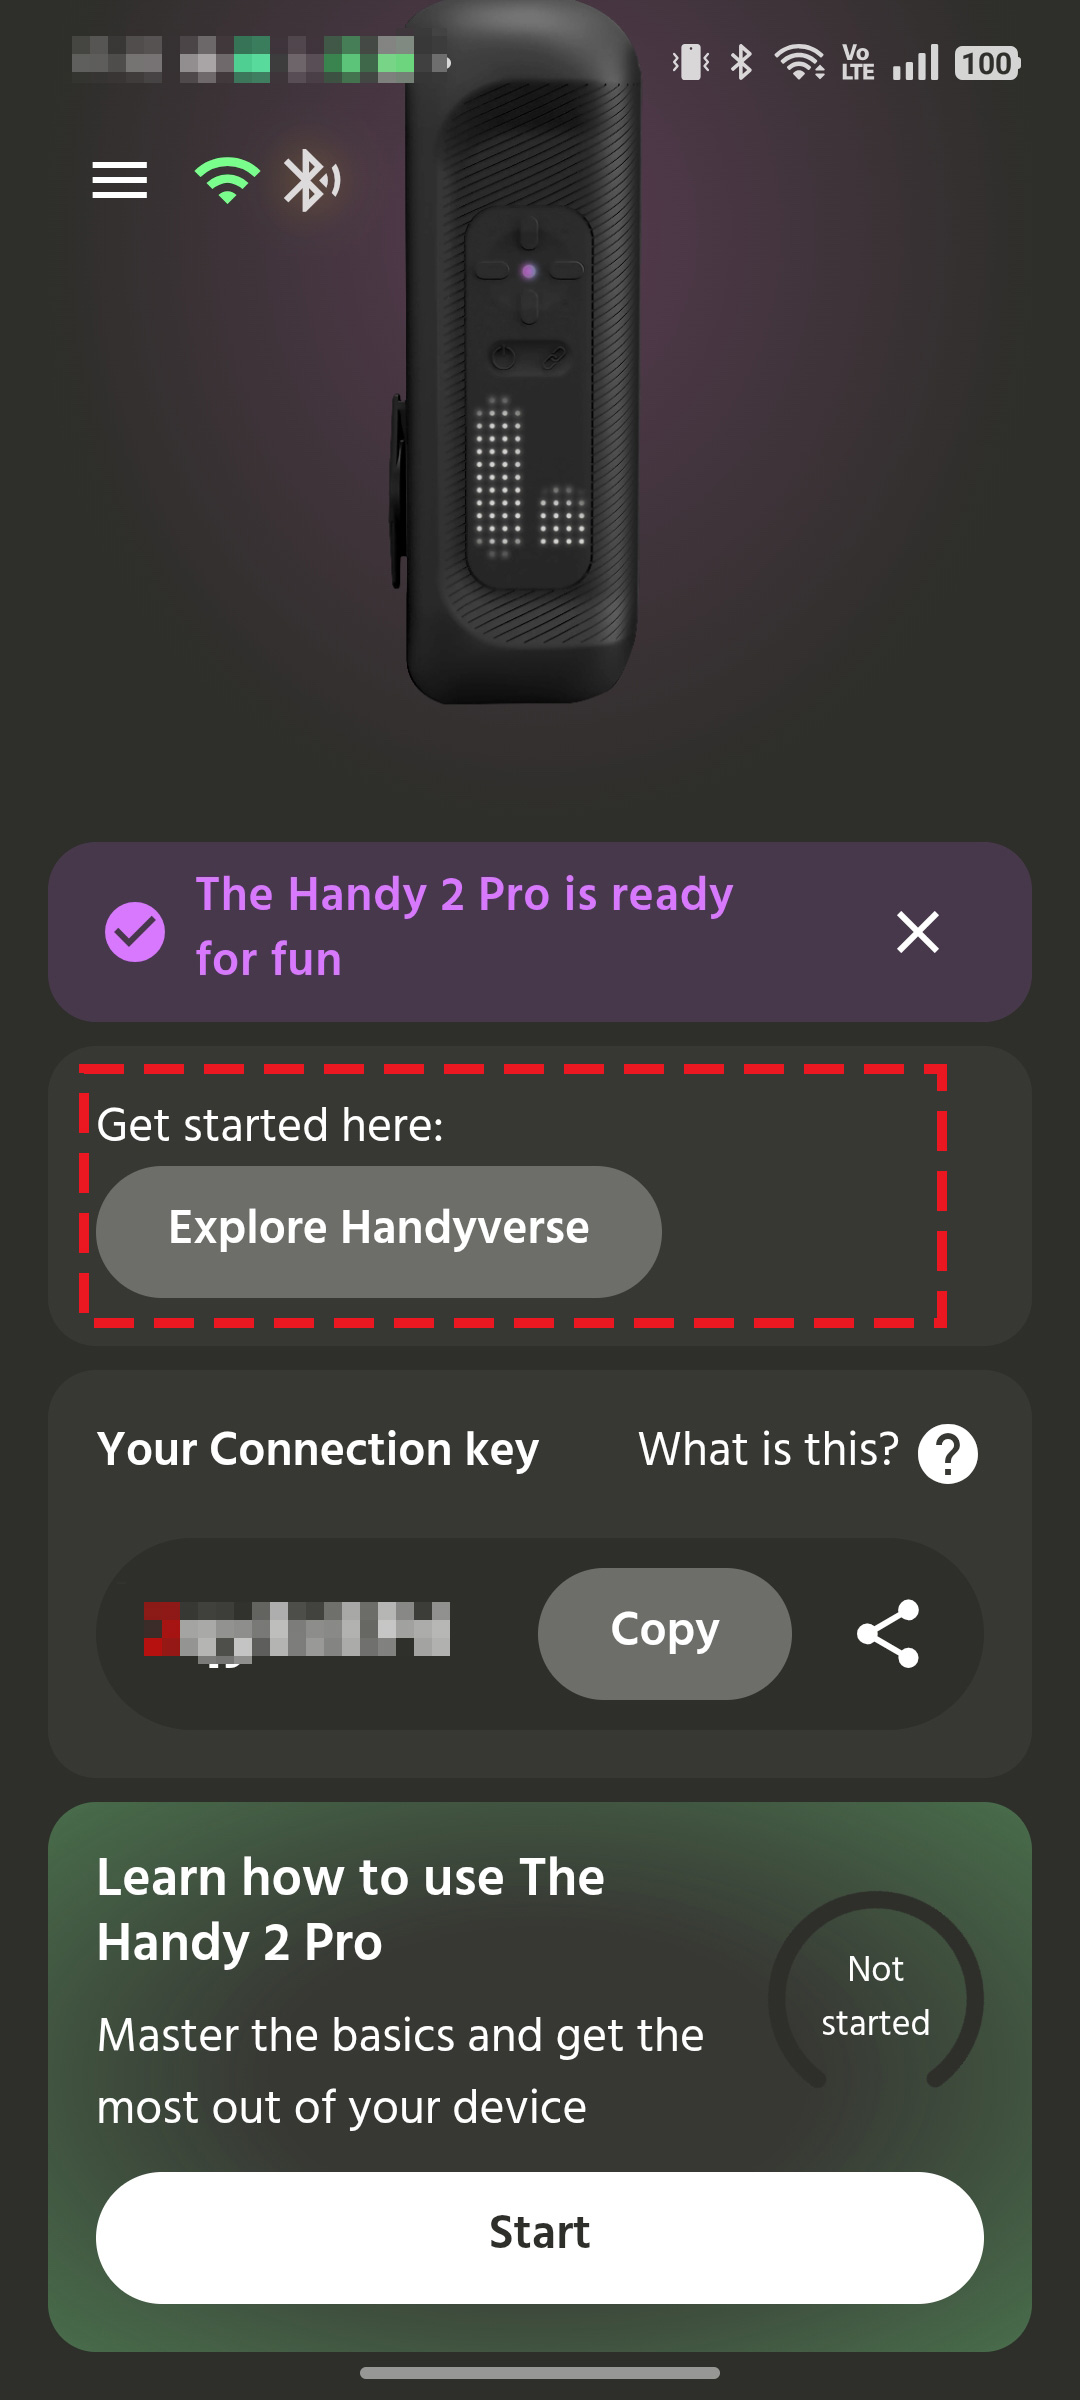
From the red partHandyverseThis will take you to the next page.
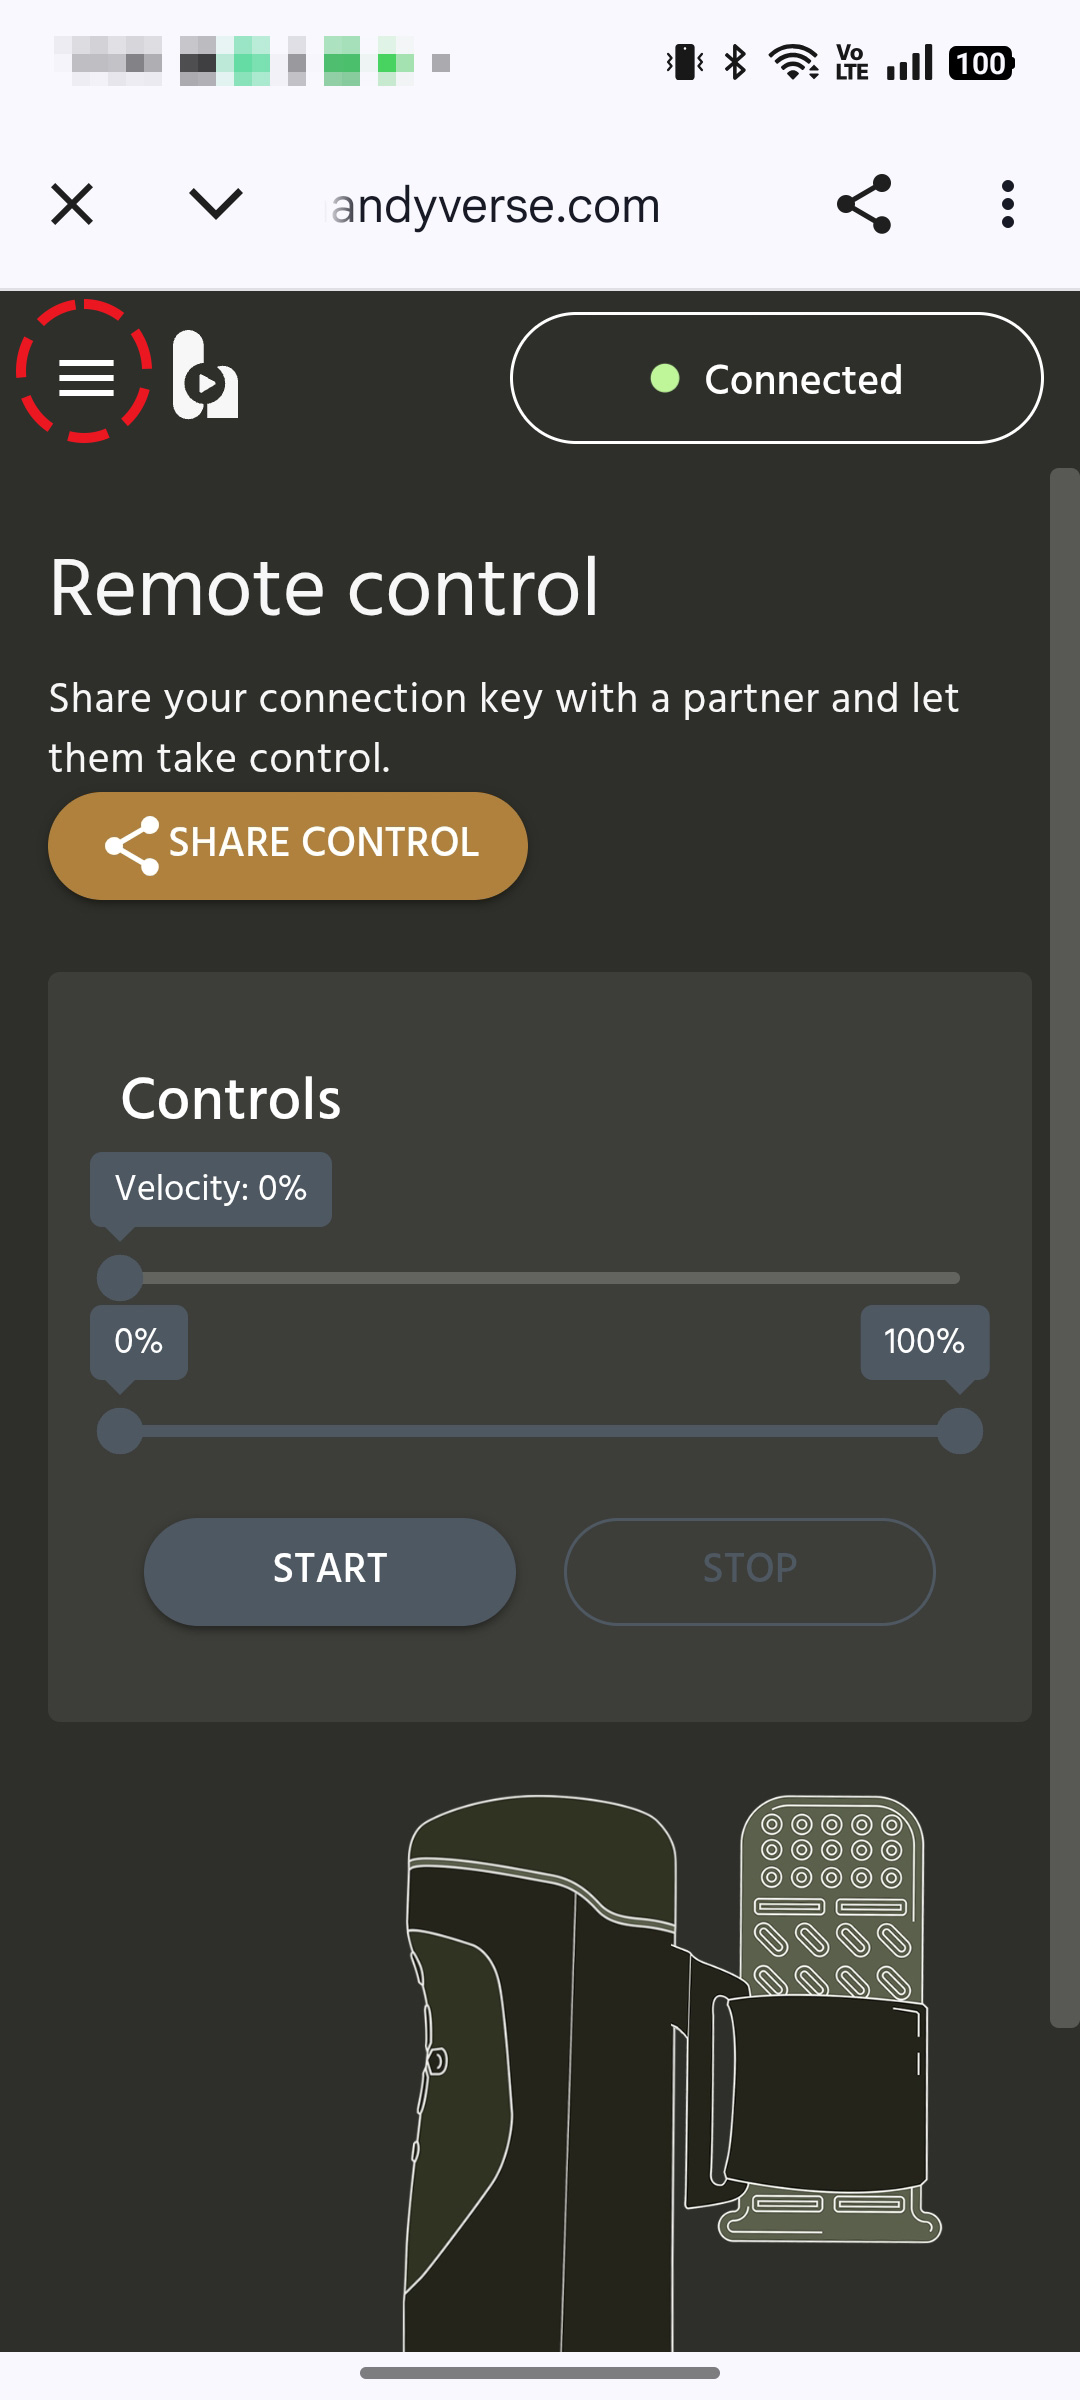
I went to Handyverse, which I've been using since the first generation. I pressed the menu button in the upper left corner.
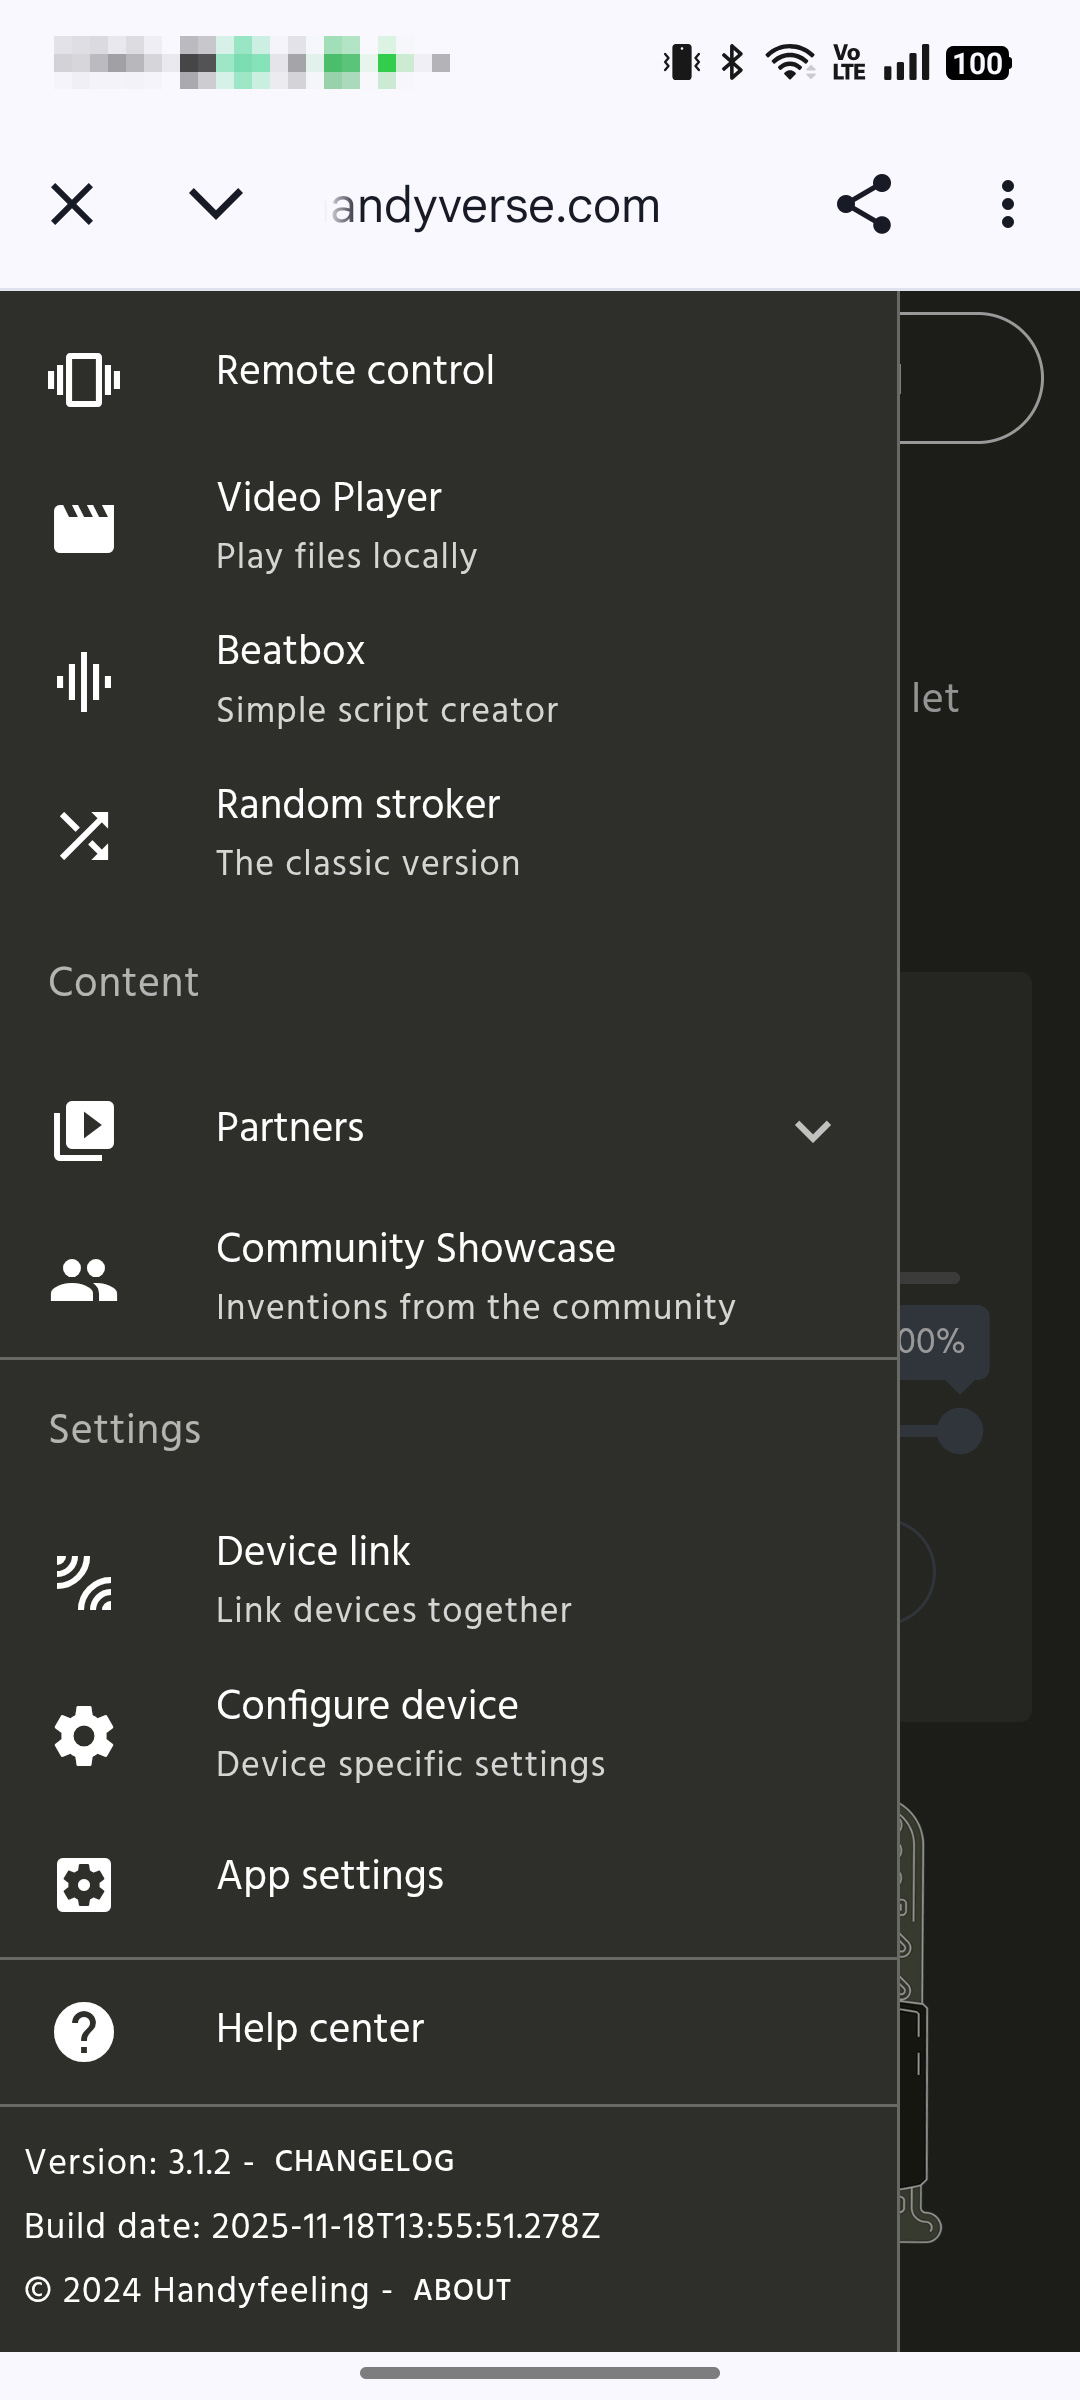
Here you can use various menus to operate handy2.
As of January 2026, pre-orders are already being accepted on the official website. (Shipping is scheduled to begin in February.)
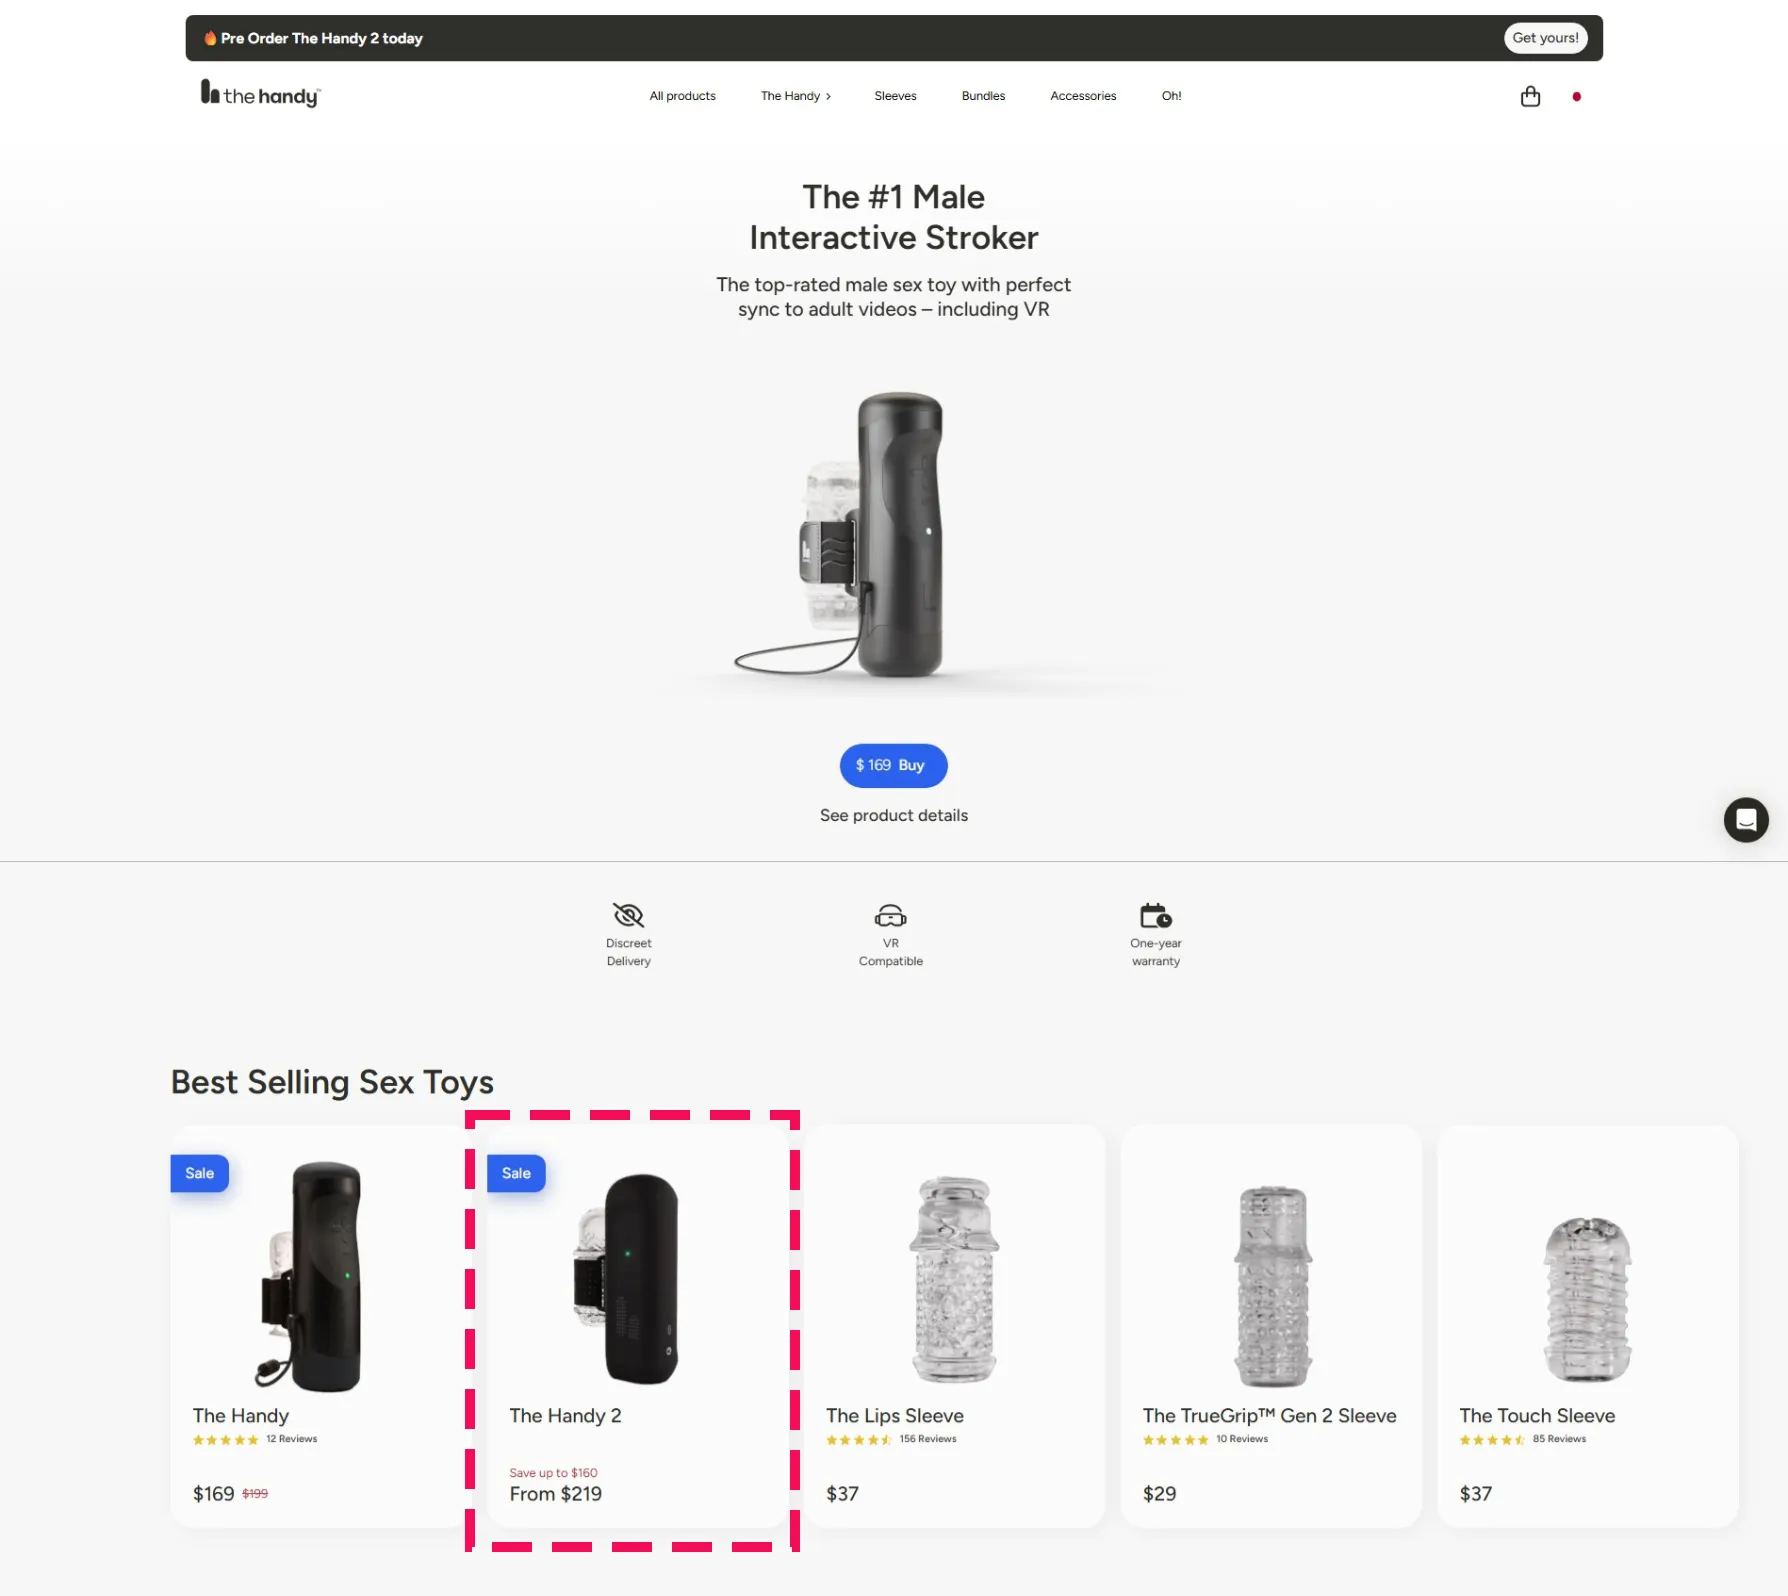
handy official homepageNext, click on The Handy2.
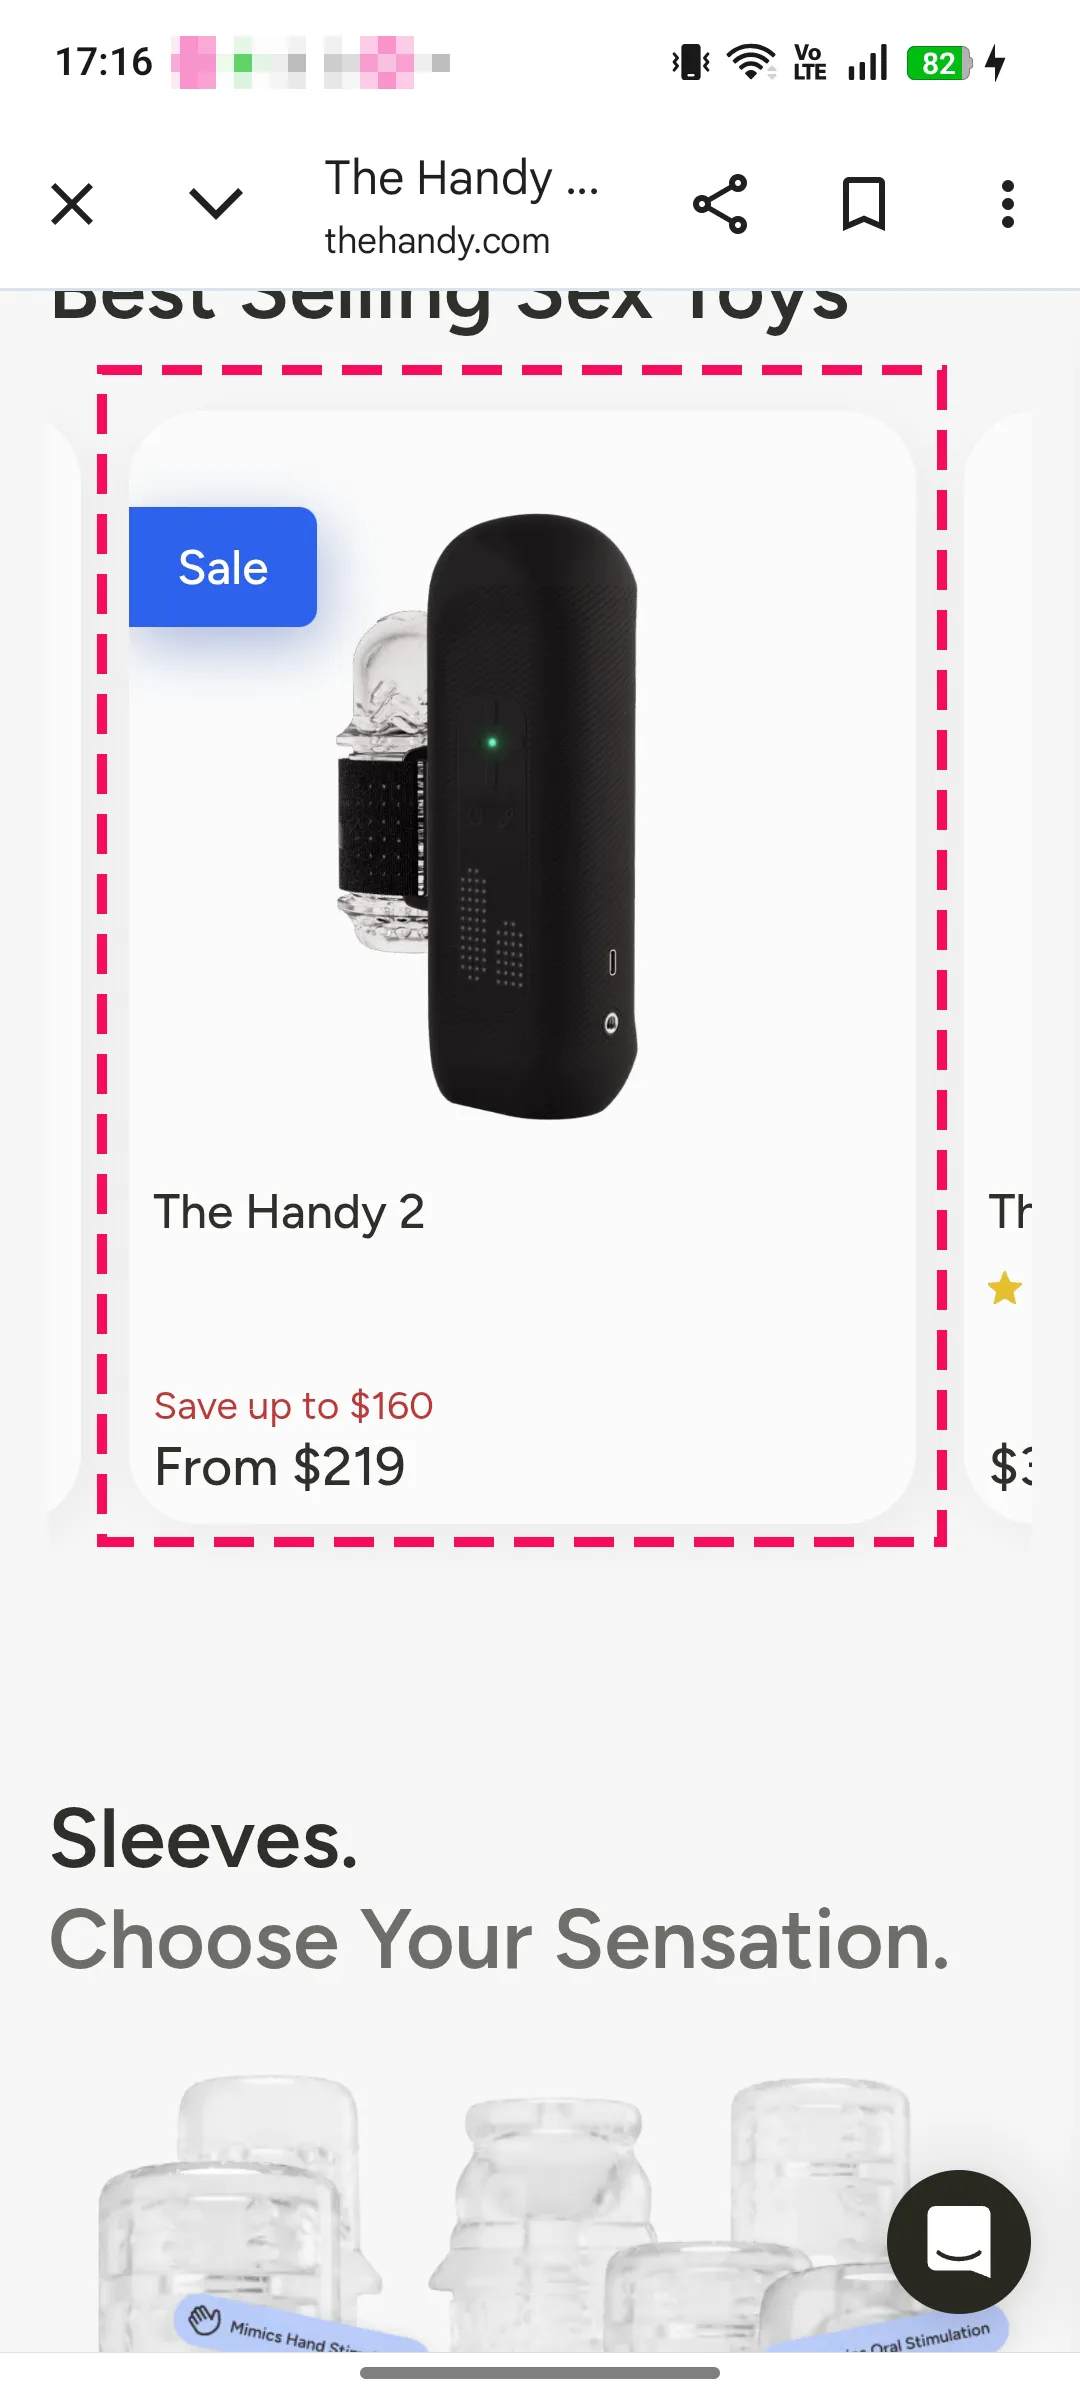
handy official homepageNext, tap The Handy2.
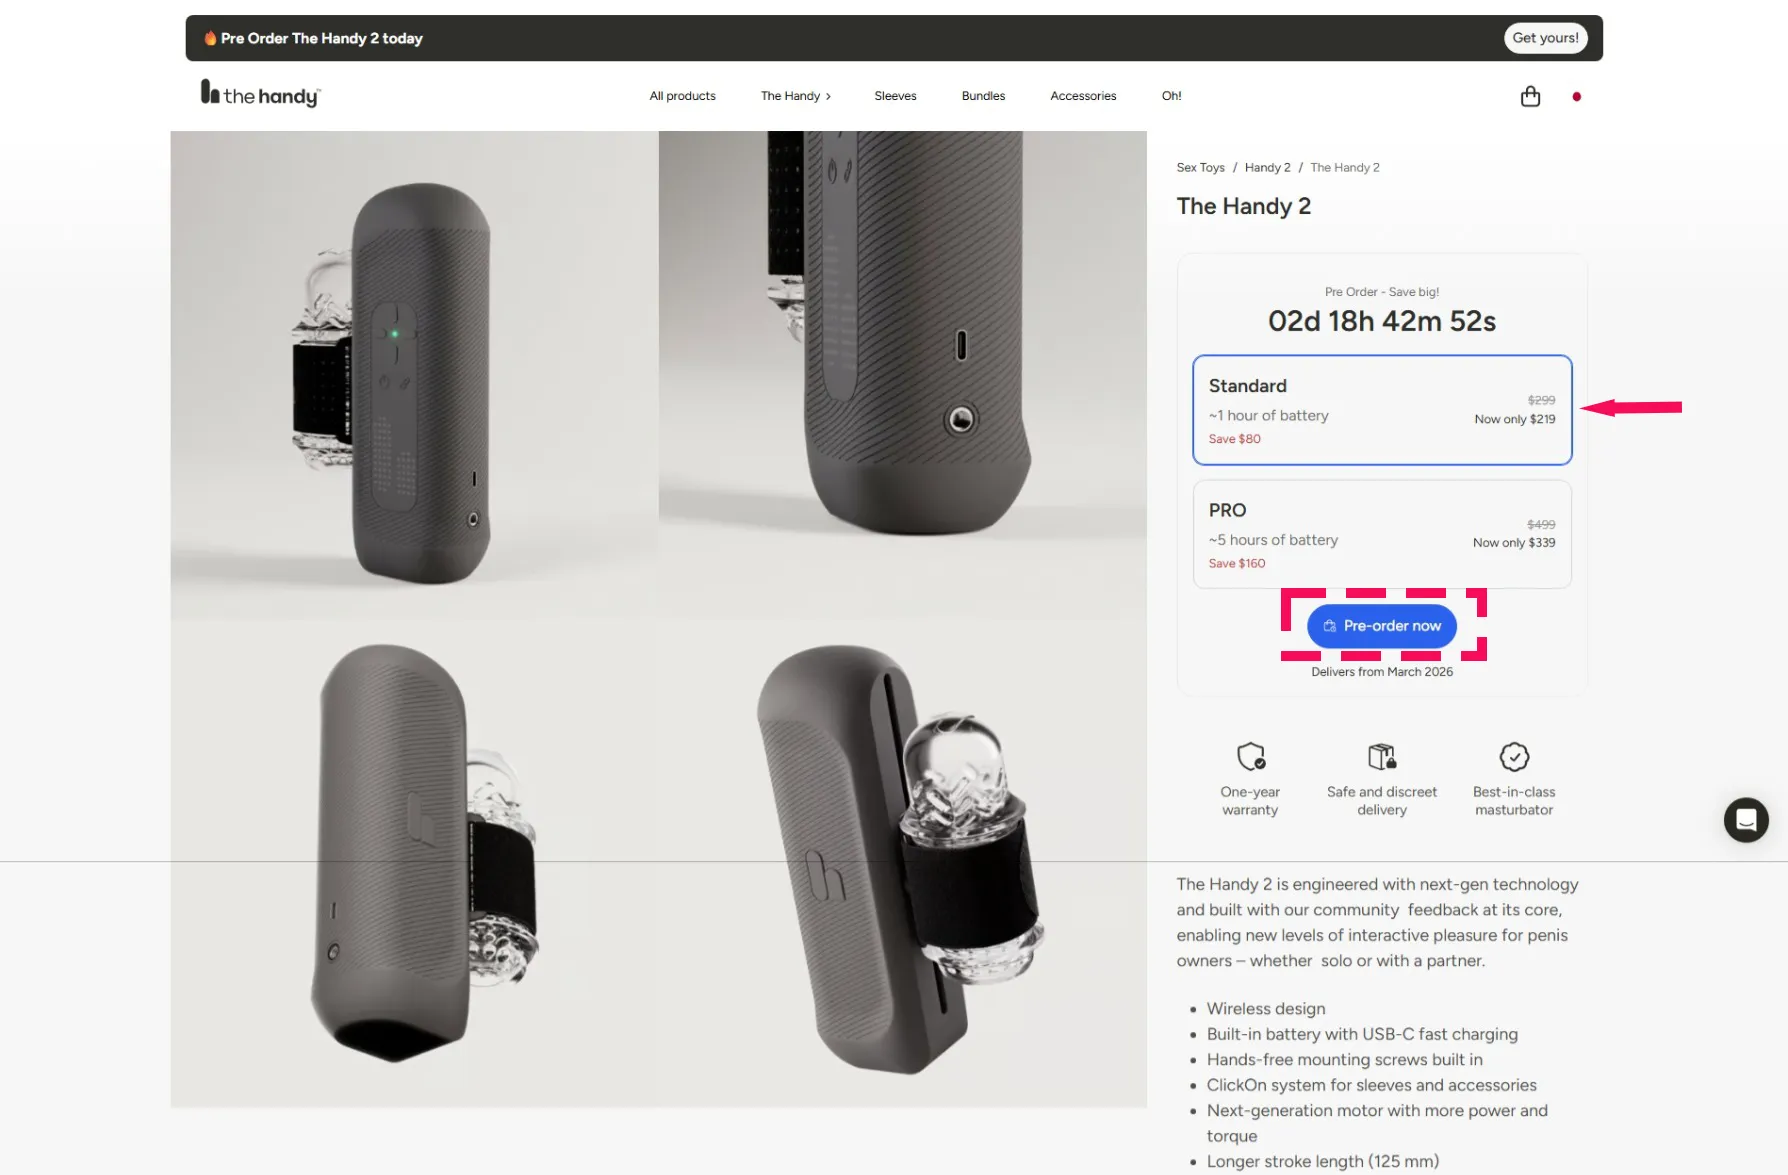
Choose your preferred option from Standard and PRO , then click Pre-order now.
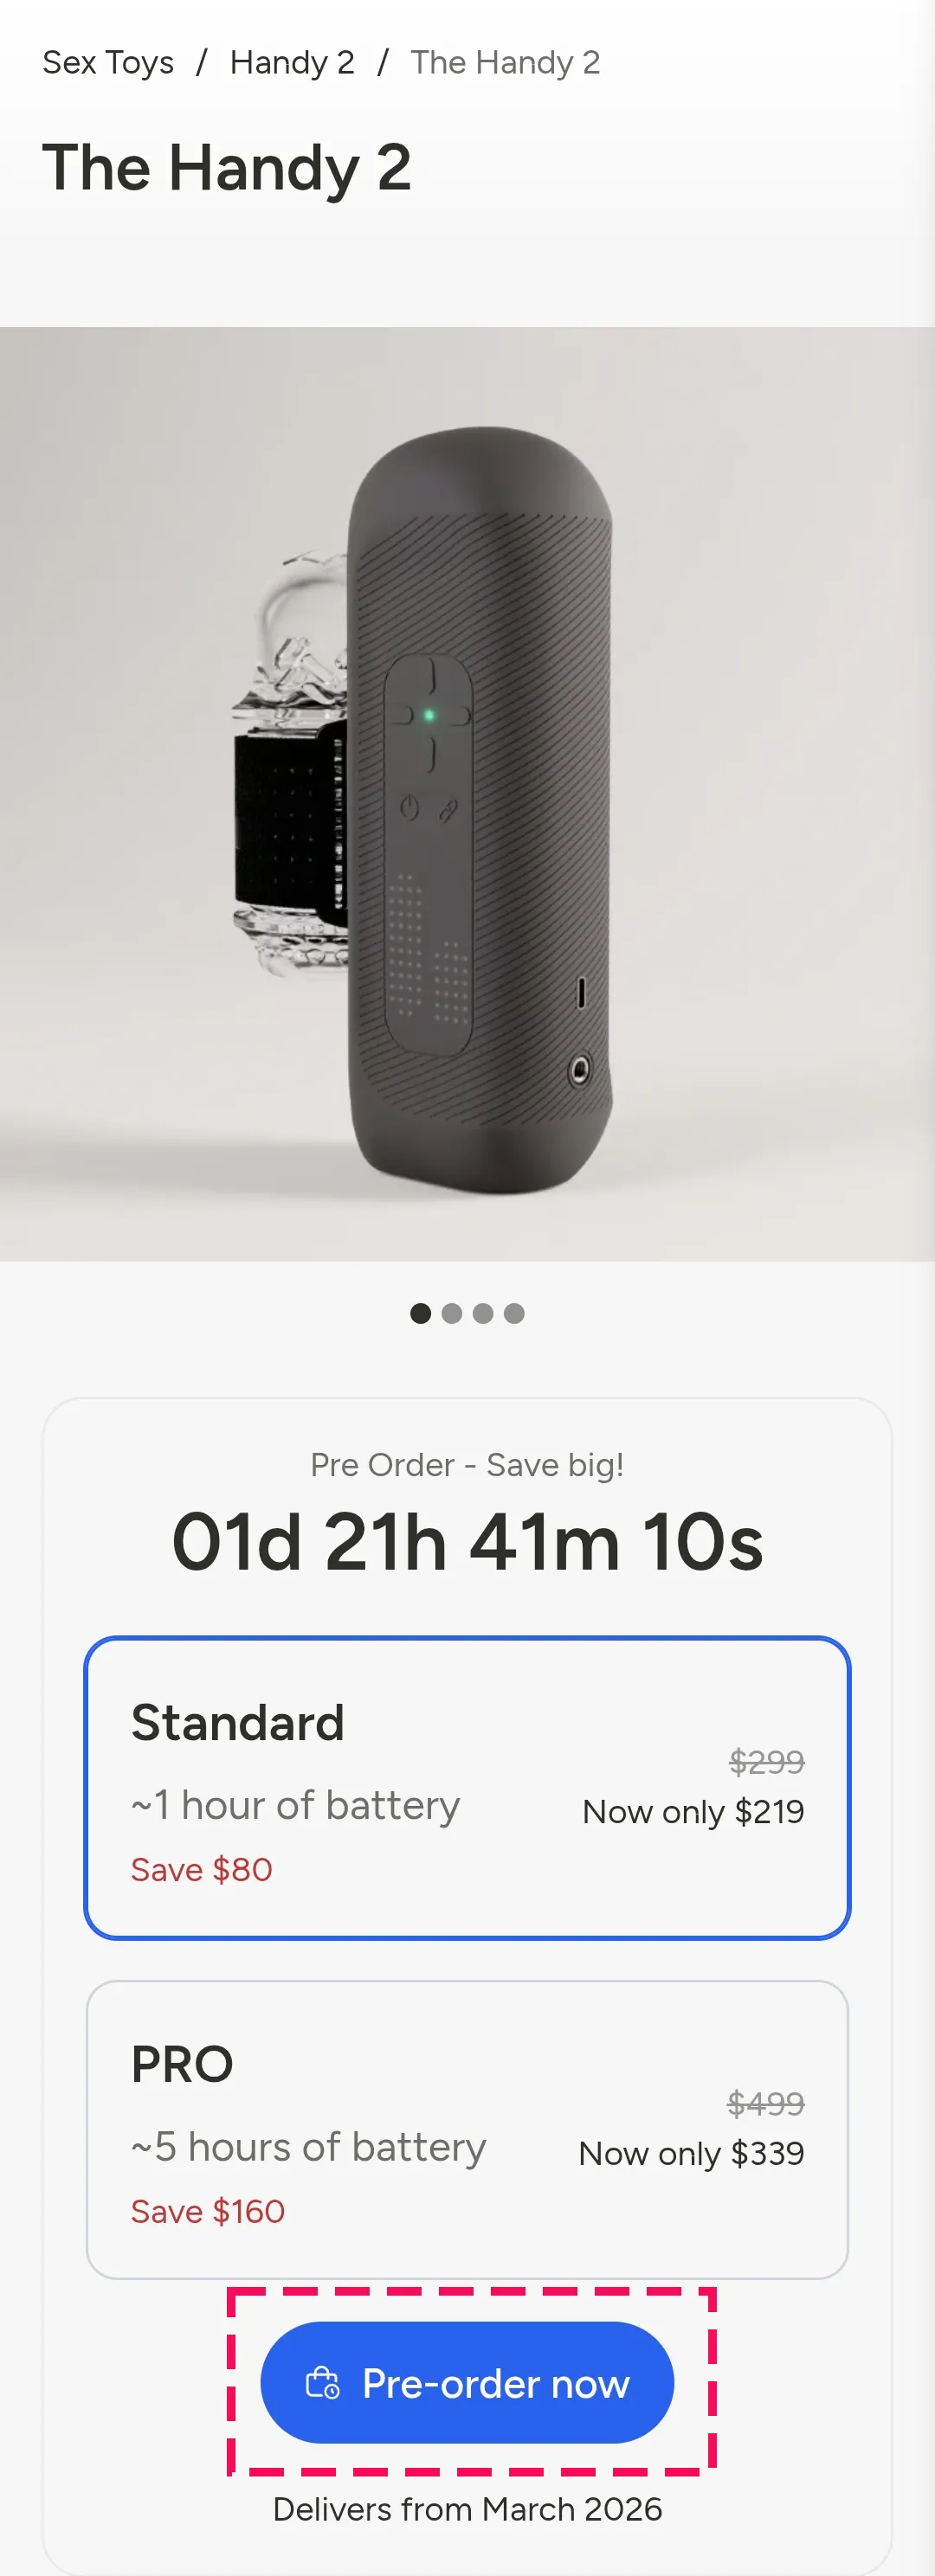
Choose your preferred option from Standard or PRO , then tap Pre-order now.
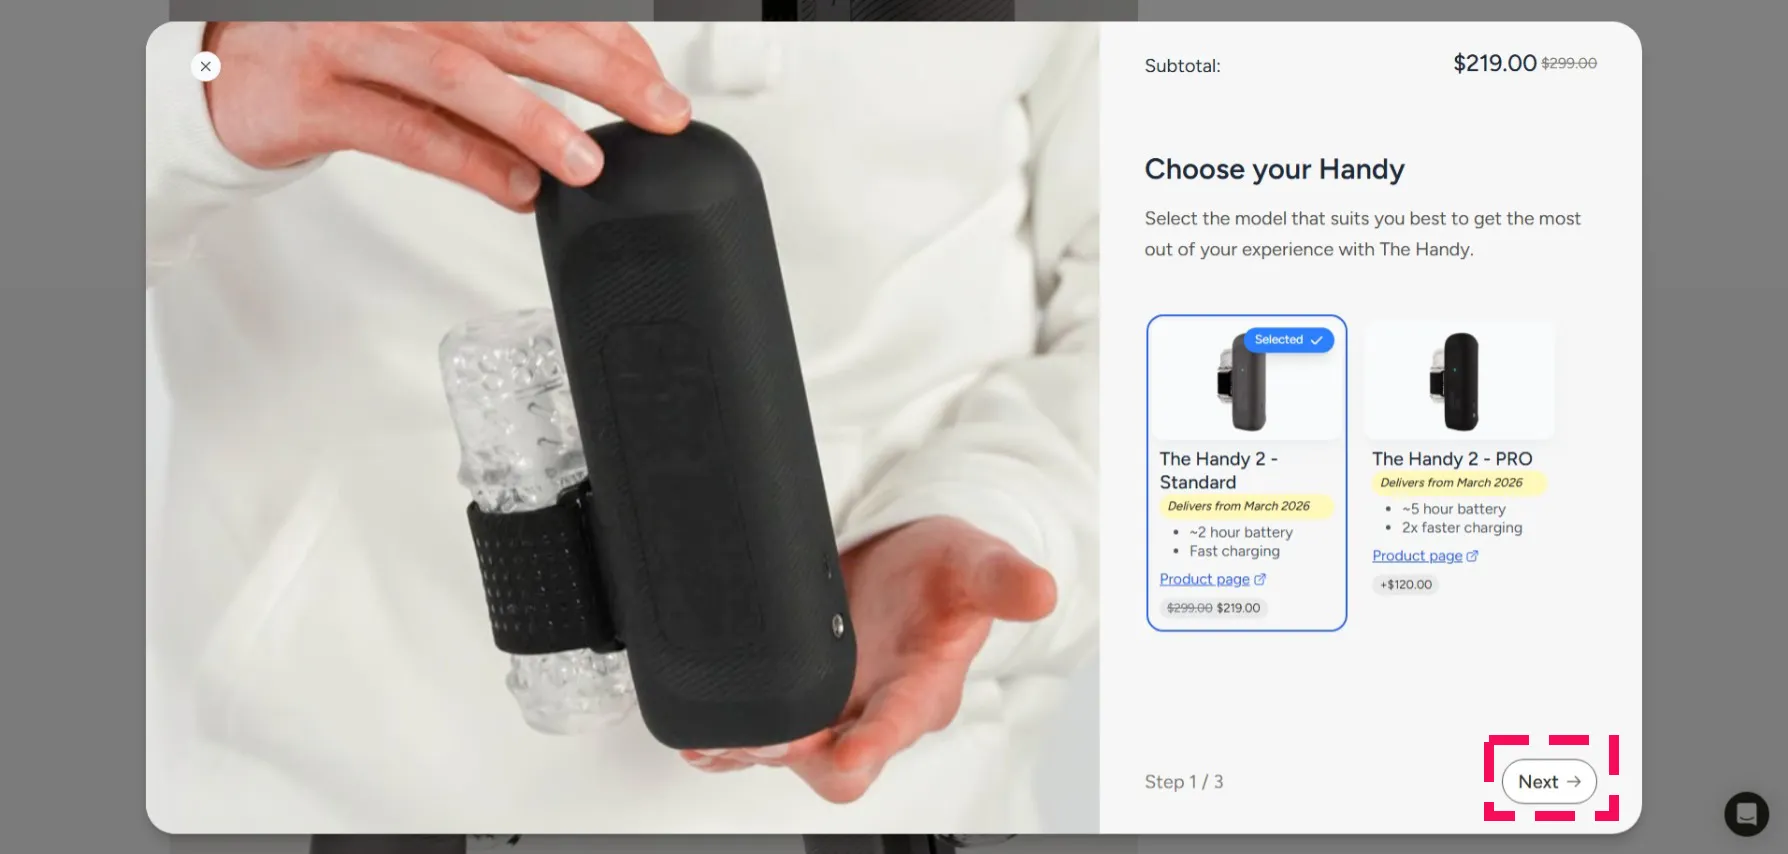
Once you've confirmed the correct selection, click Next.
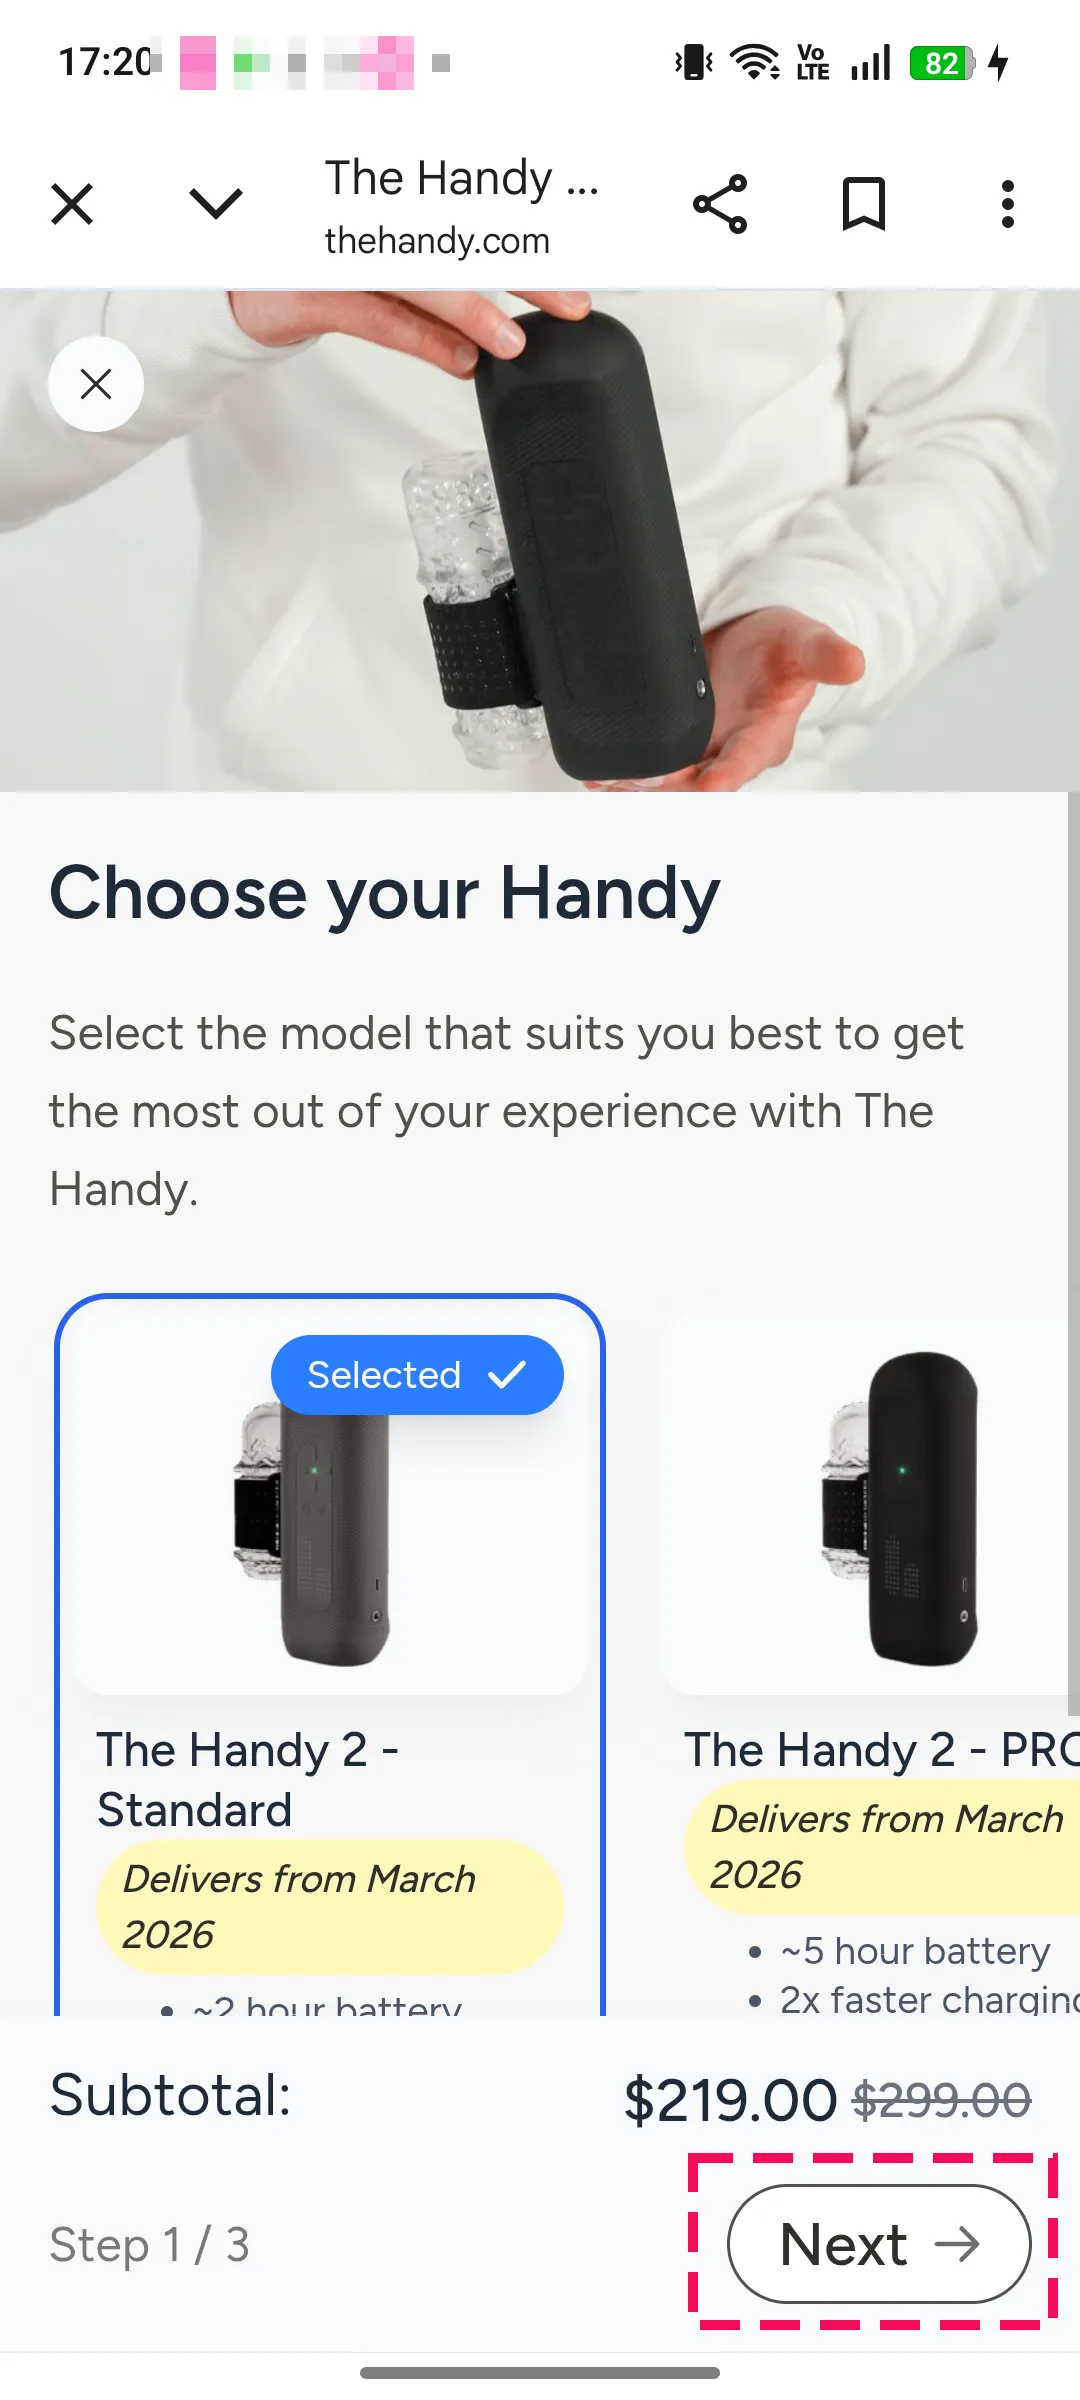
Once you've confirmed the correct selection, tap Next.
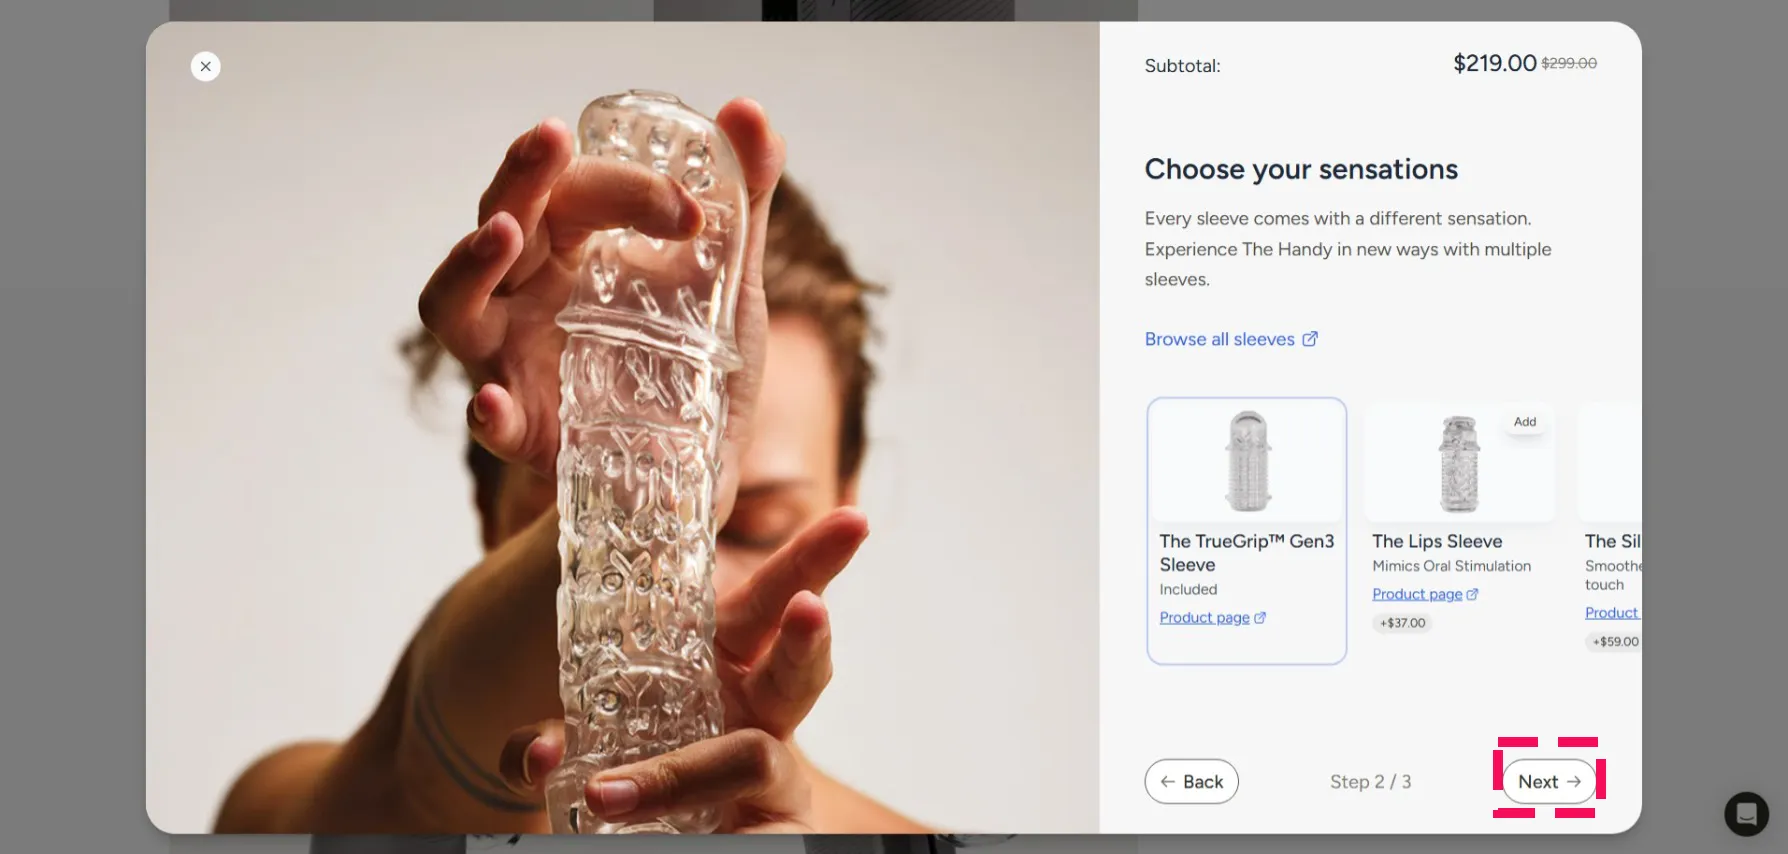
You will be prompted to add accessories. Click Next if you do not wish to add any.
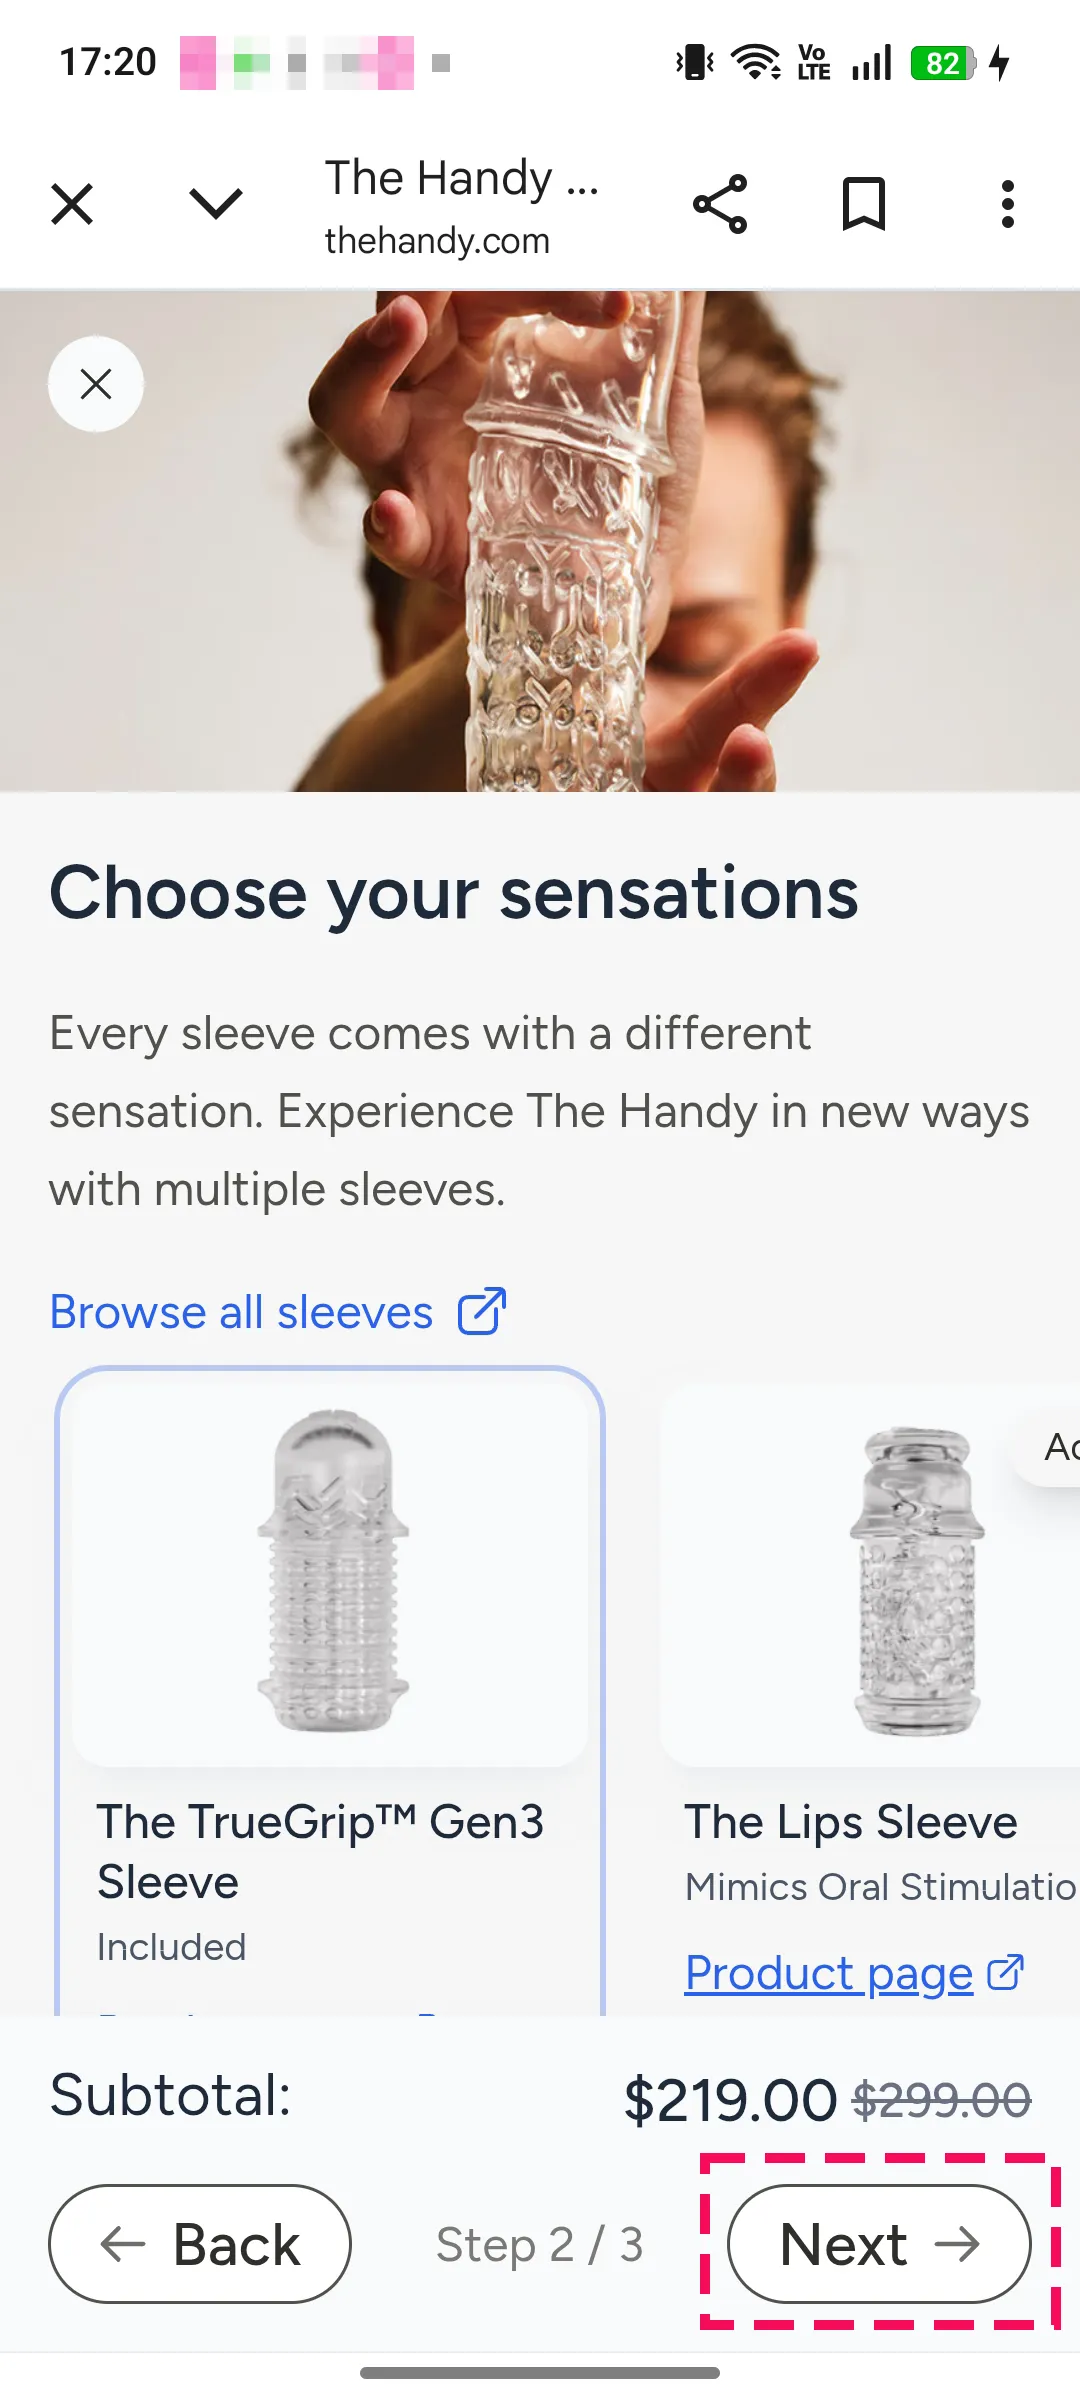
You will be prompted to add accessories. If you do not wish to add any, tap Next.
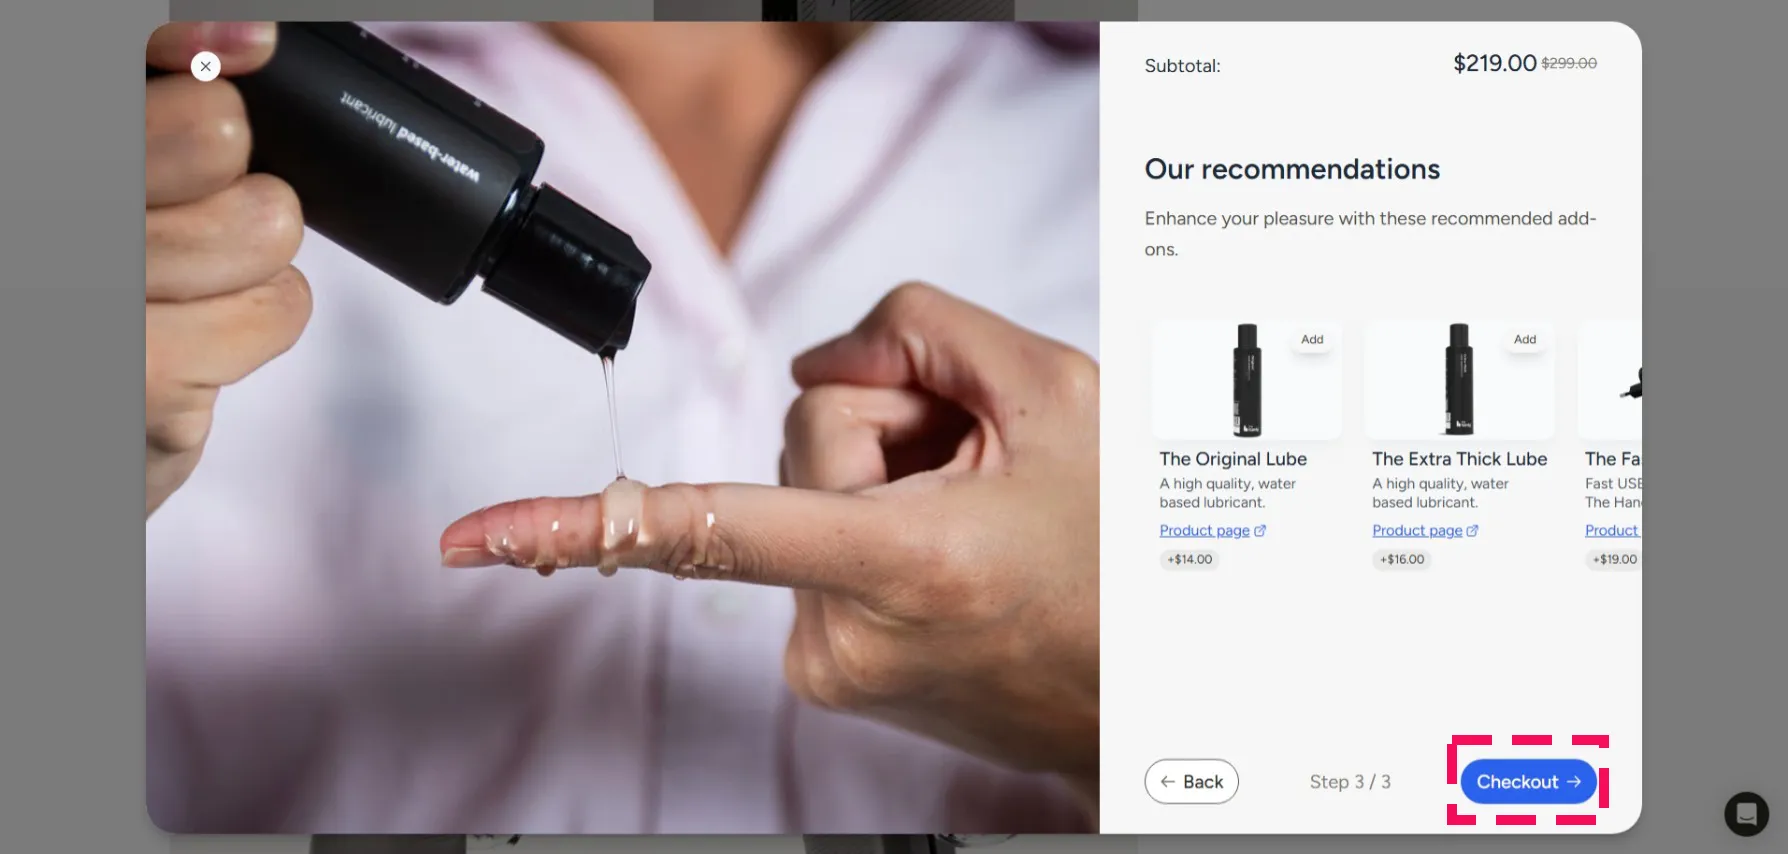
You will be prompted to add accessories. Click Next if you do not wish to add any.
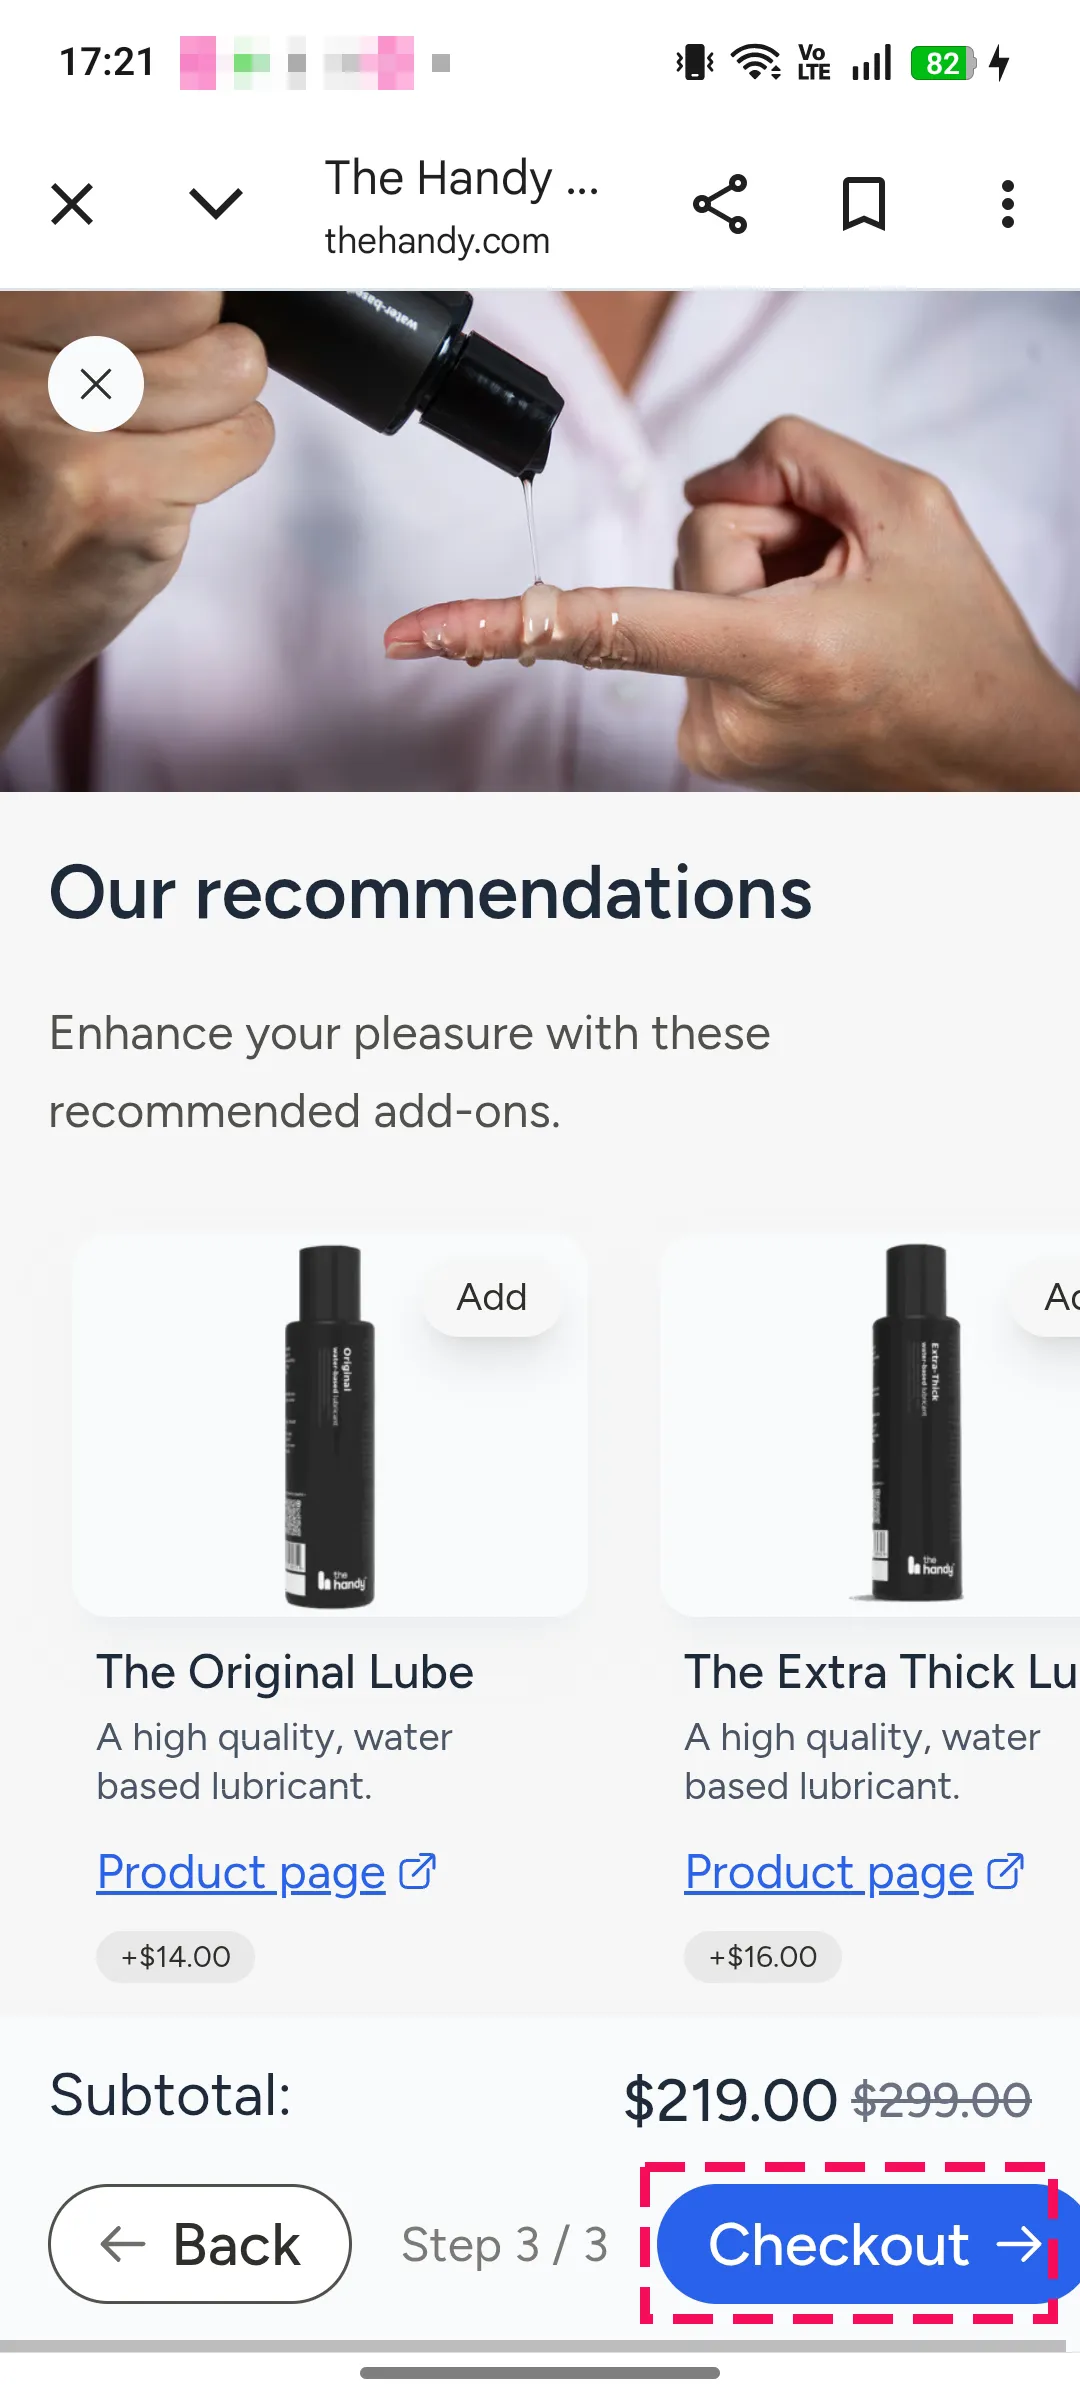
You will be prompted to add accessories. If you do not wish to add any, tap Next.
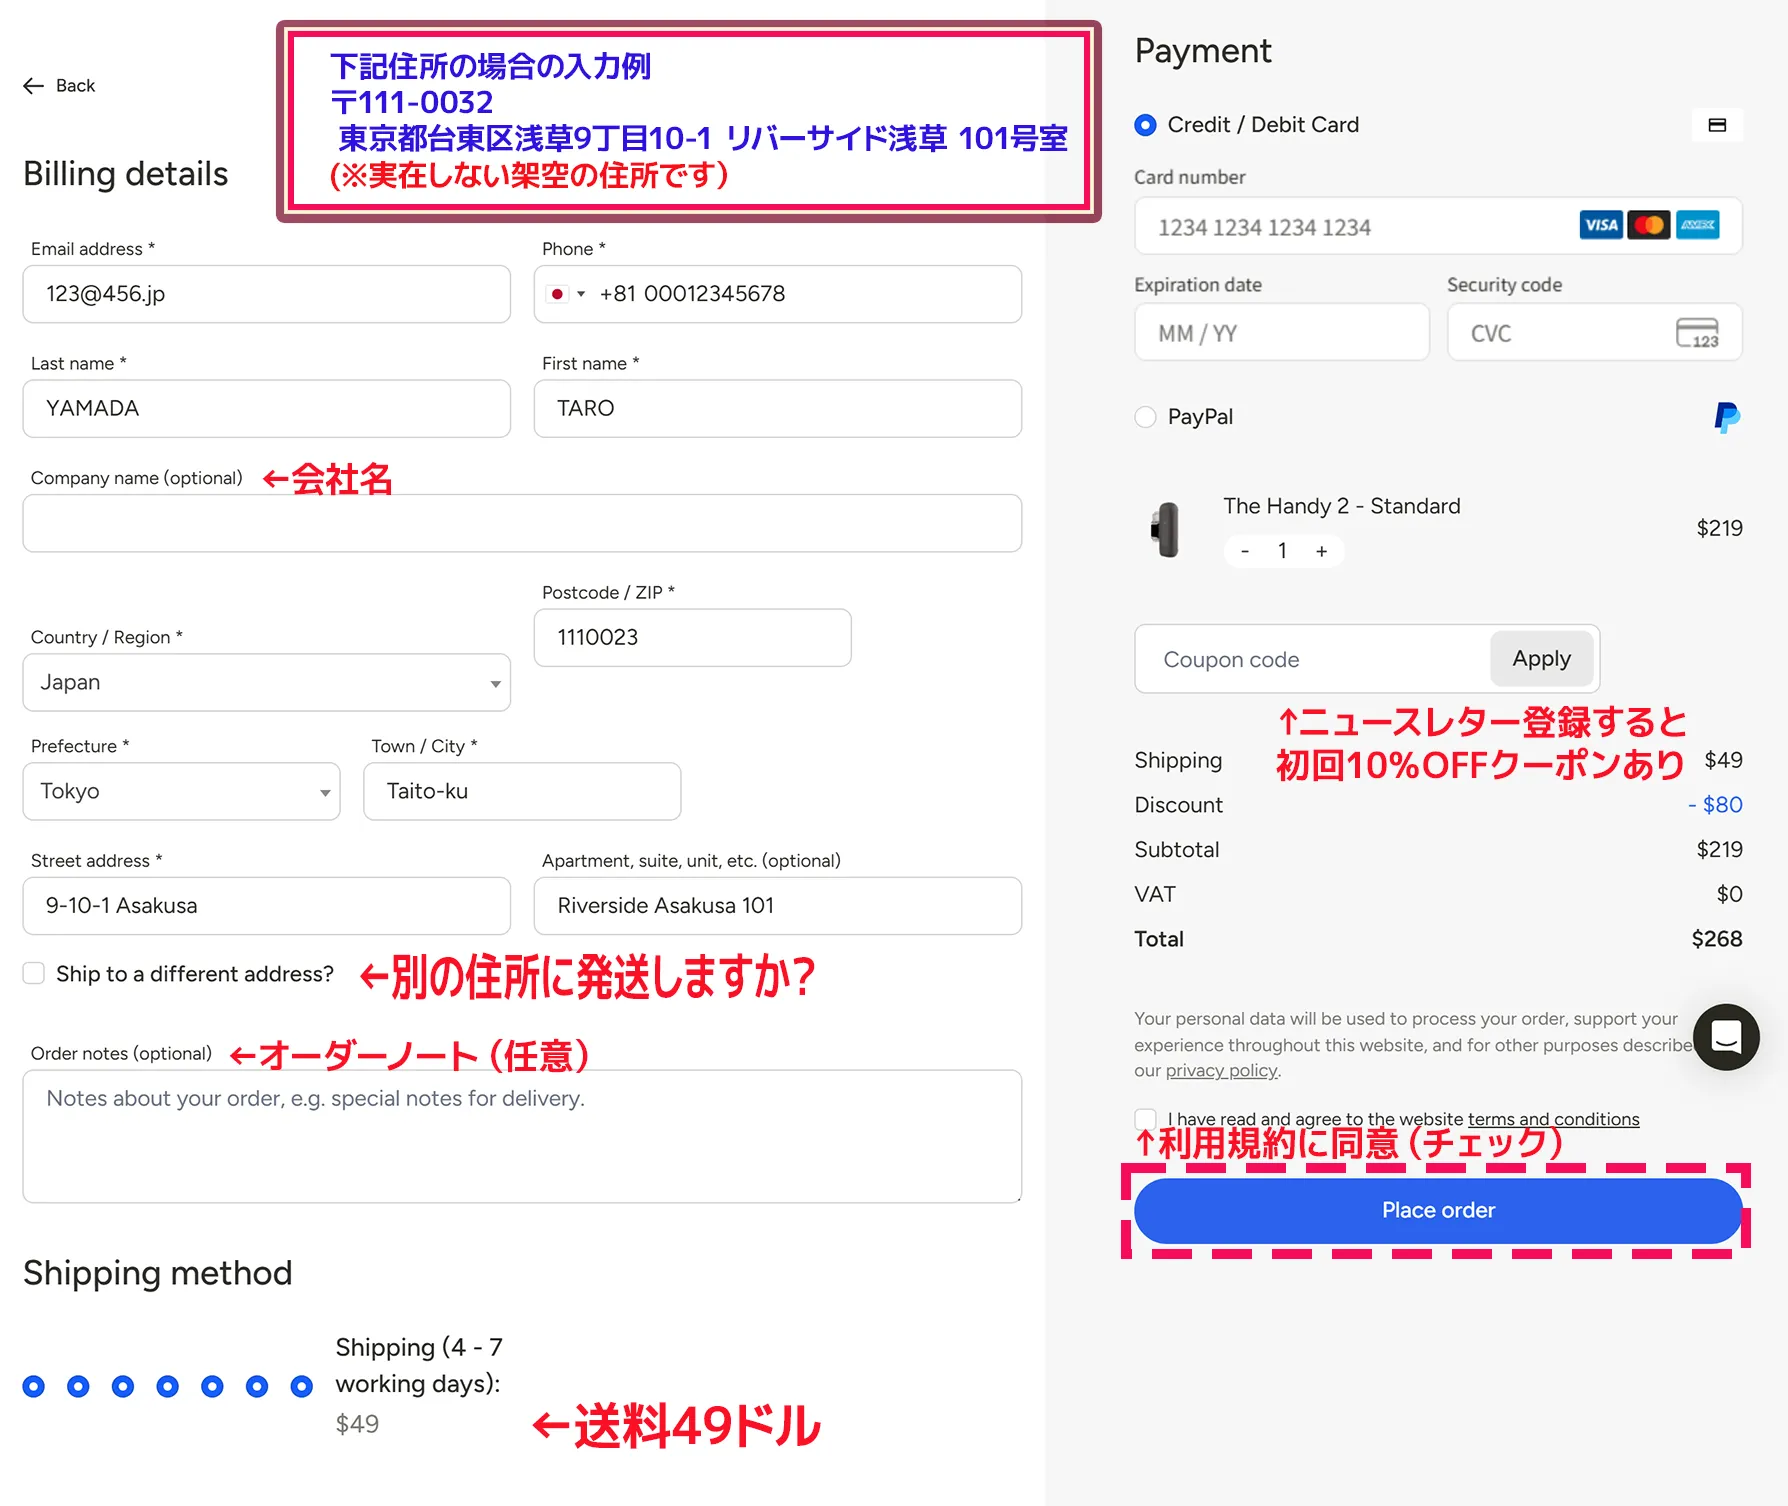
This is an example of entering a non-existent address. The following website is very useful for converting addresses to English!
⇒Easily convert your address to English - Deliver it to you!
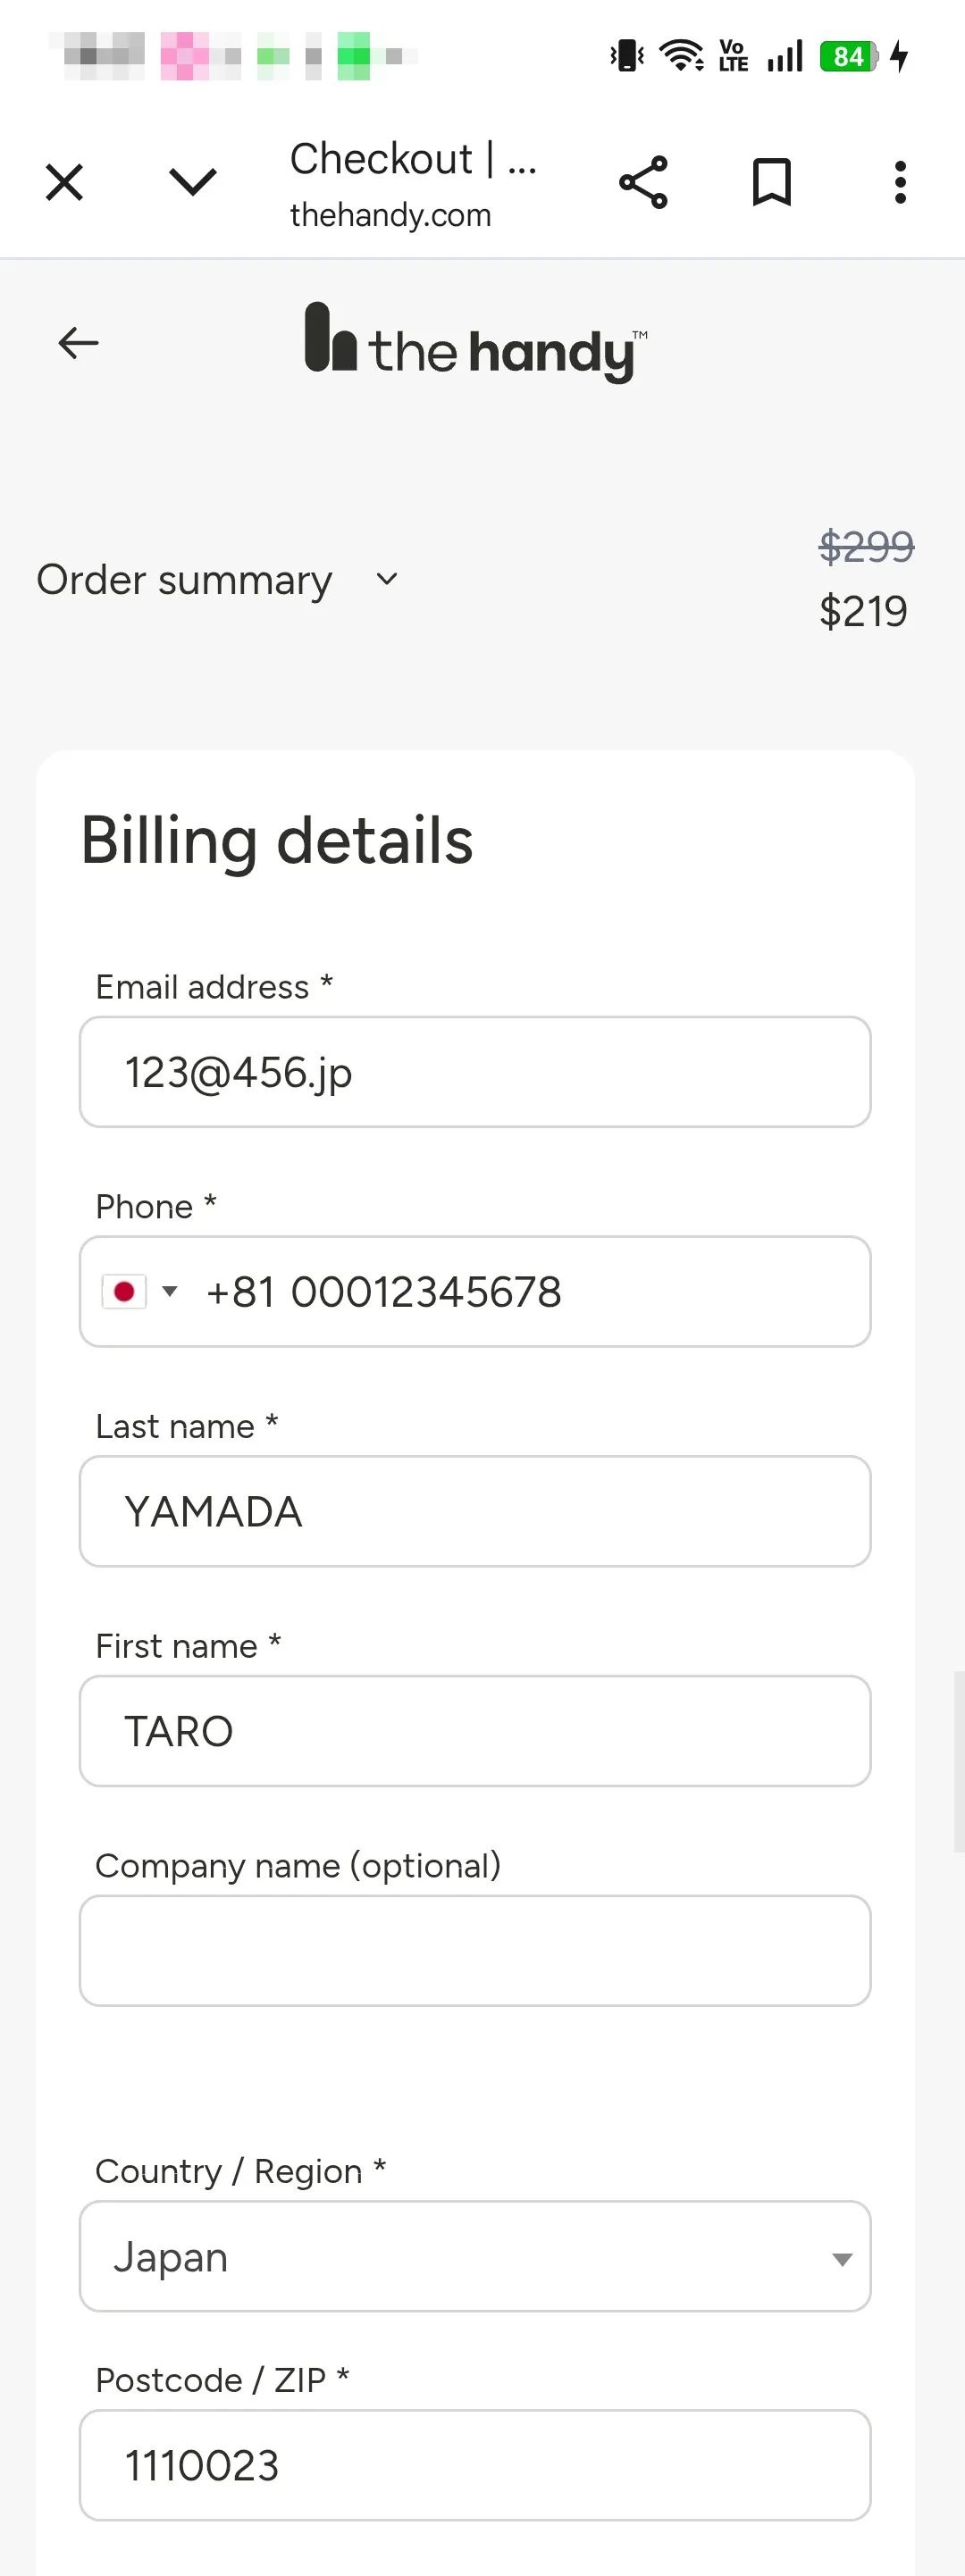
Riverside Asakusa, Room 101, 9-10-1 Asakusa, Taito-ku, Tokyo 111-0032, Japan *This is an example of entering a non-existent address.The following website is very useful for converting addresses to English!
⇒Easily convert your address to English - Deliver it to you!
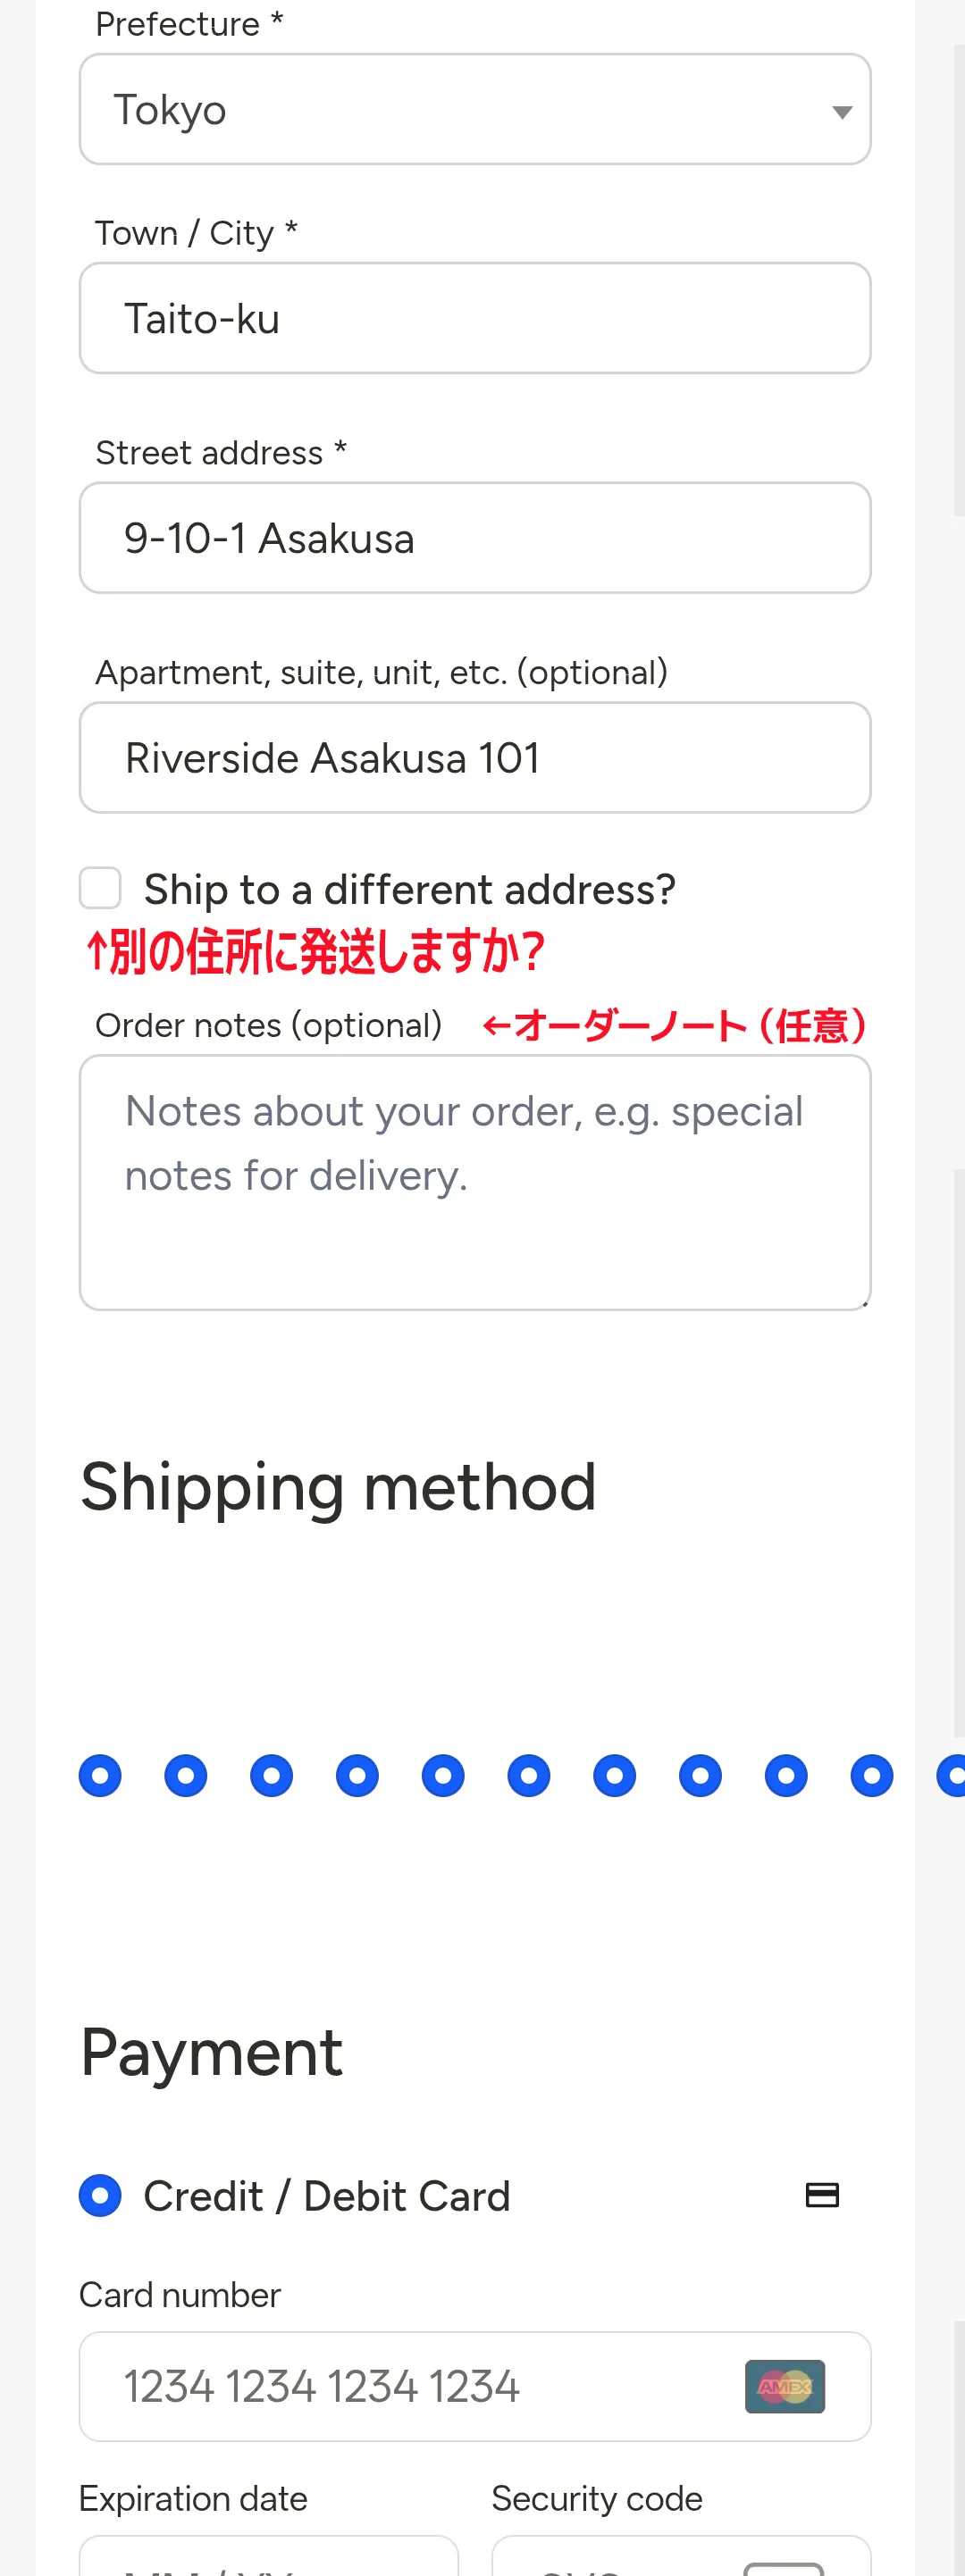
Should I ship to a different address? If you don't have any specific requests, you can leave the order notes blank.
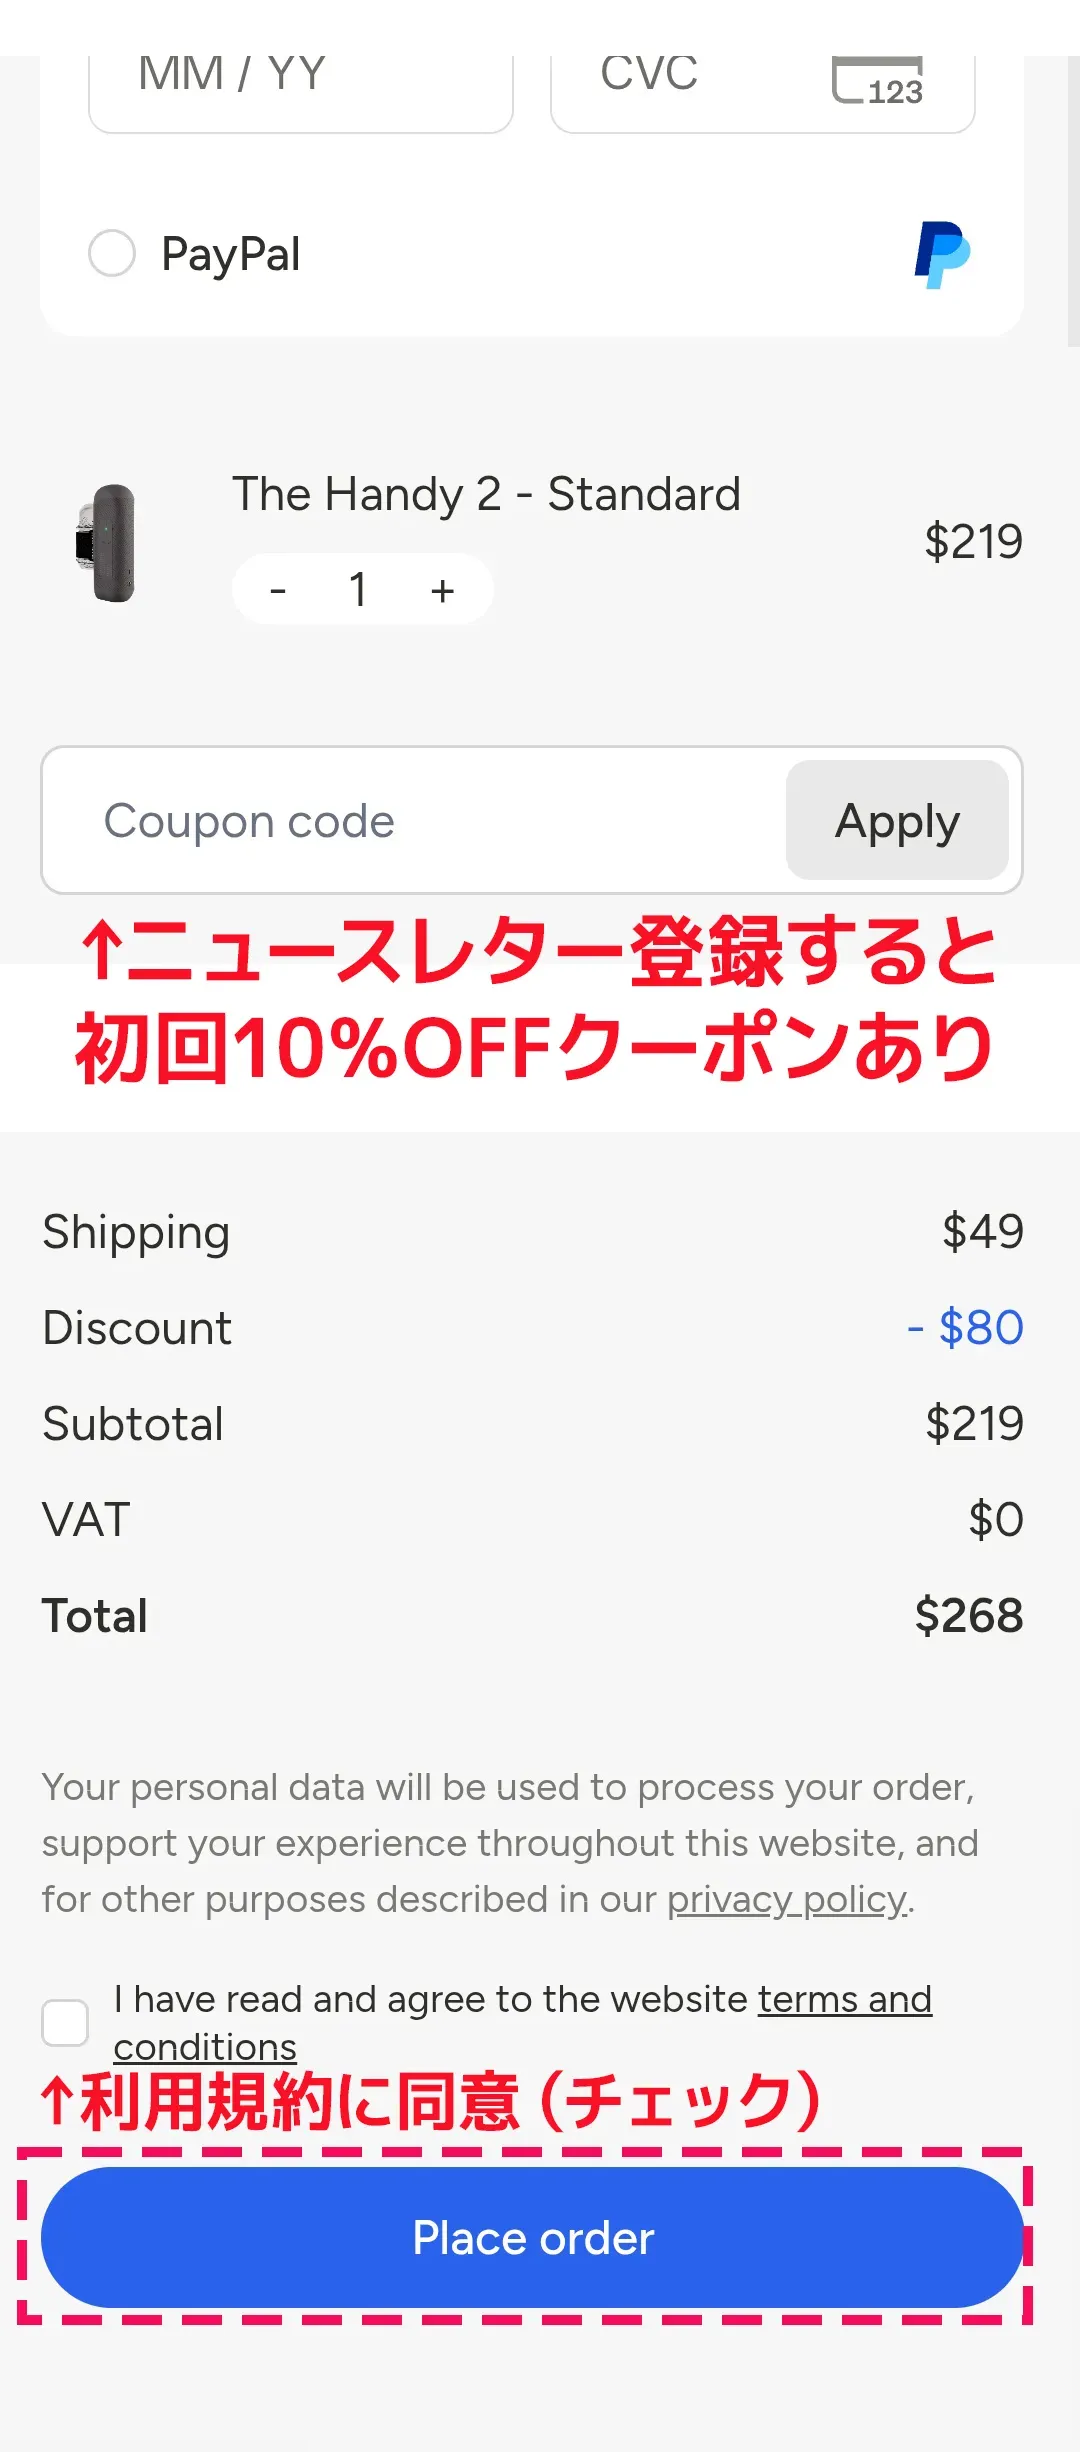
Please be careful not to leave any fields blank or make any input errors, and once you agree to the terms and conditions, tap "Place order".
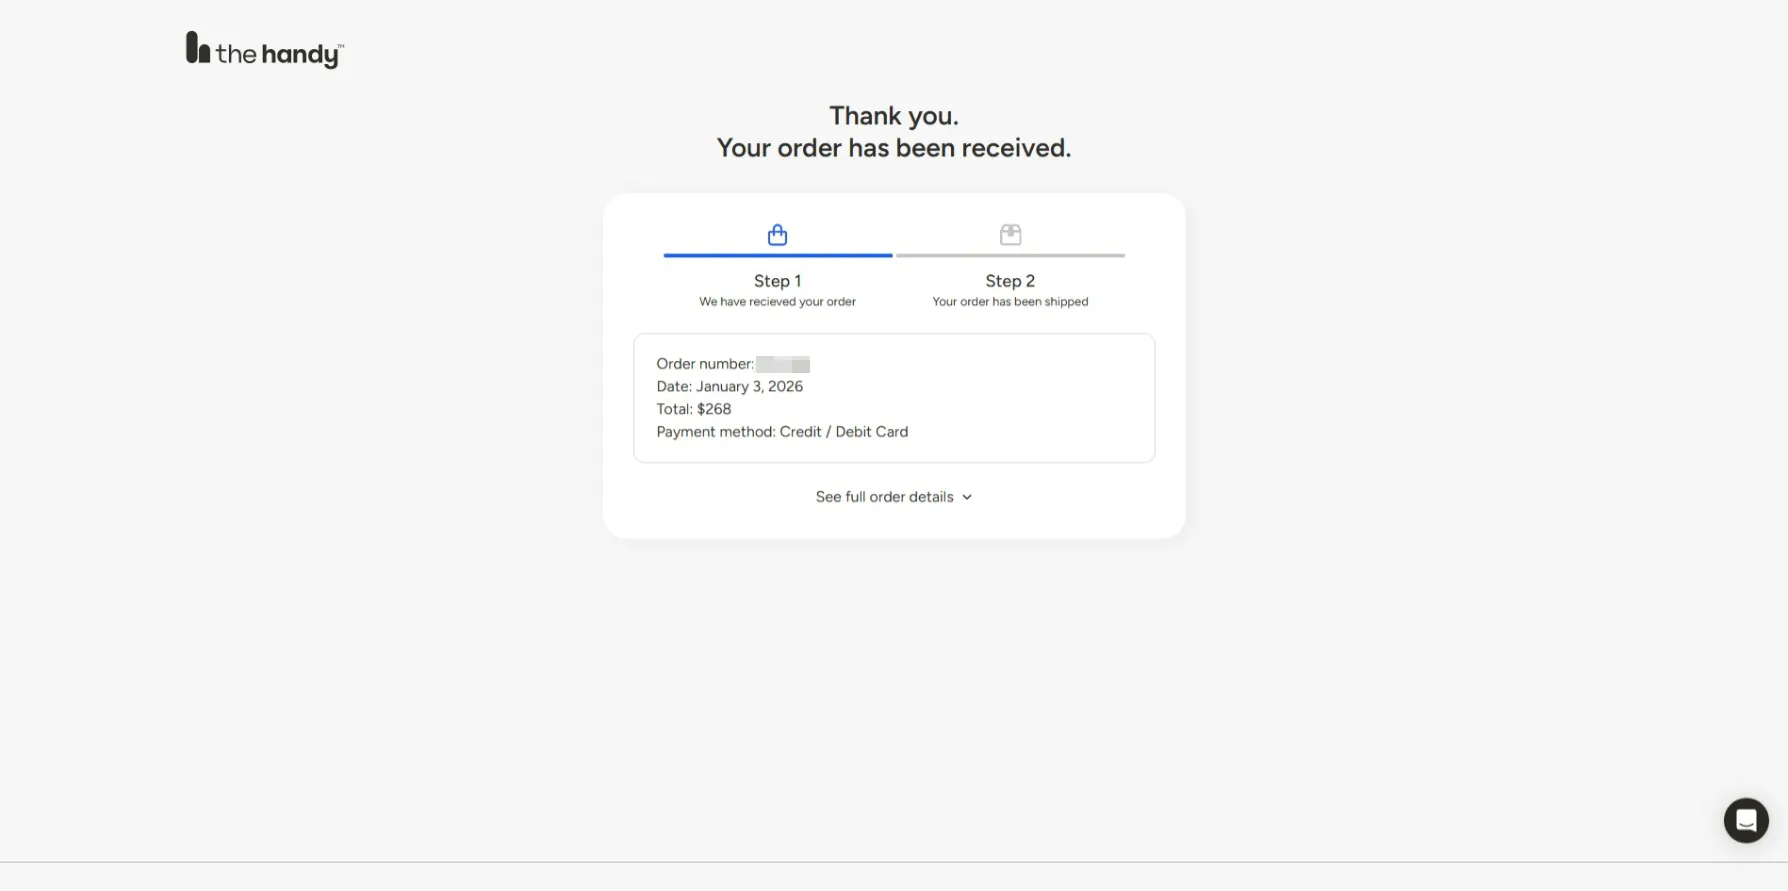
This is the actual order completion screen.
How to attach it to a standard tripod and points to note
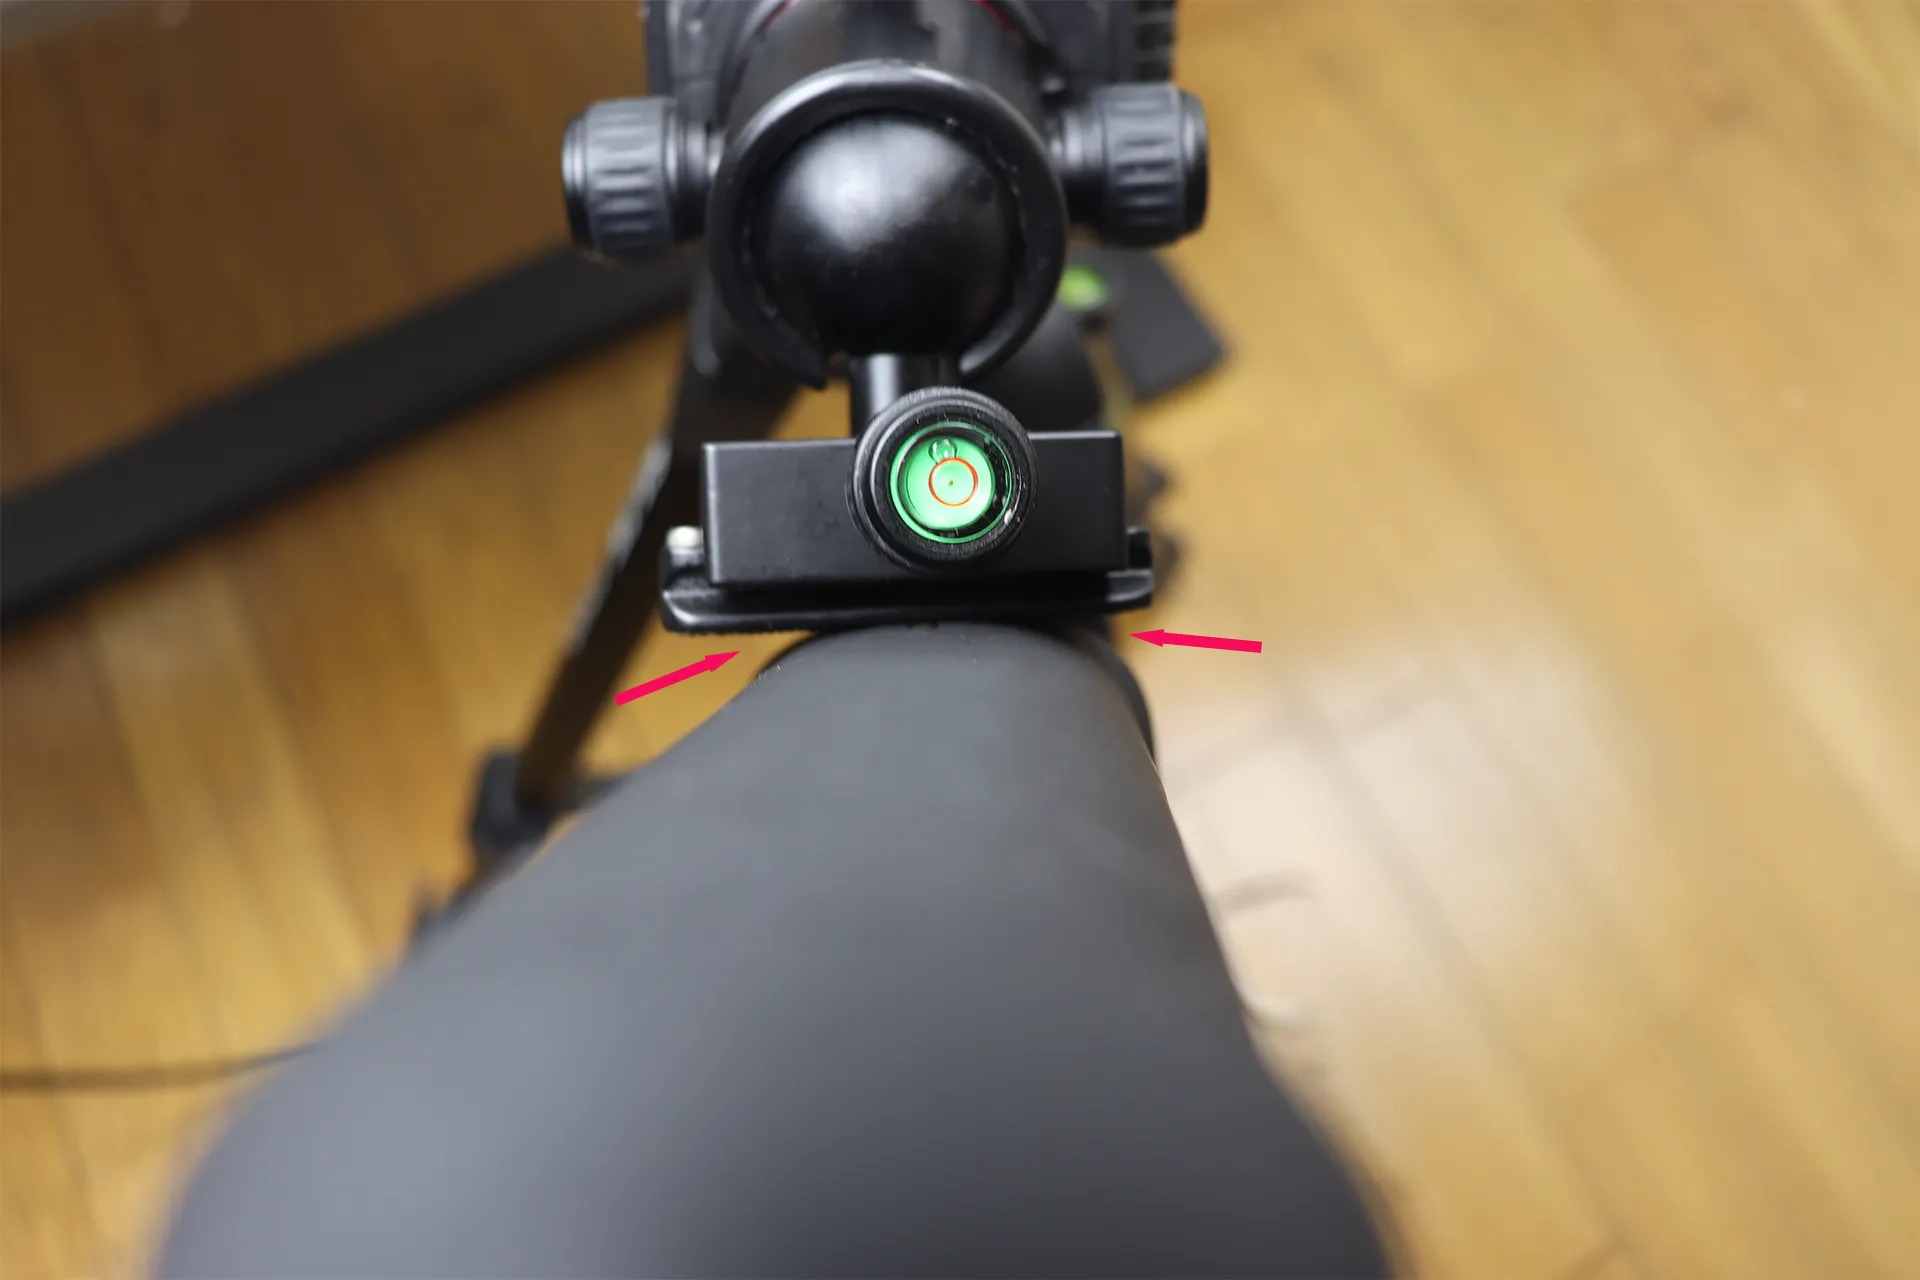
The handy2 has two screw holes. One is on the back, but if you attach the quick release plate to this hole, a gap will be created as you can see. This is because the handy2 pro's body is rounded.
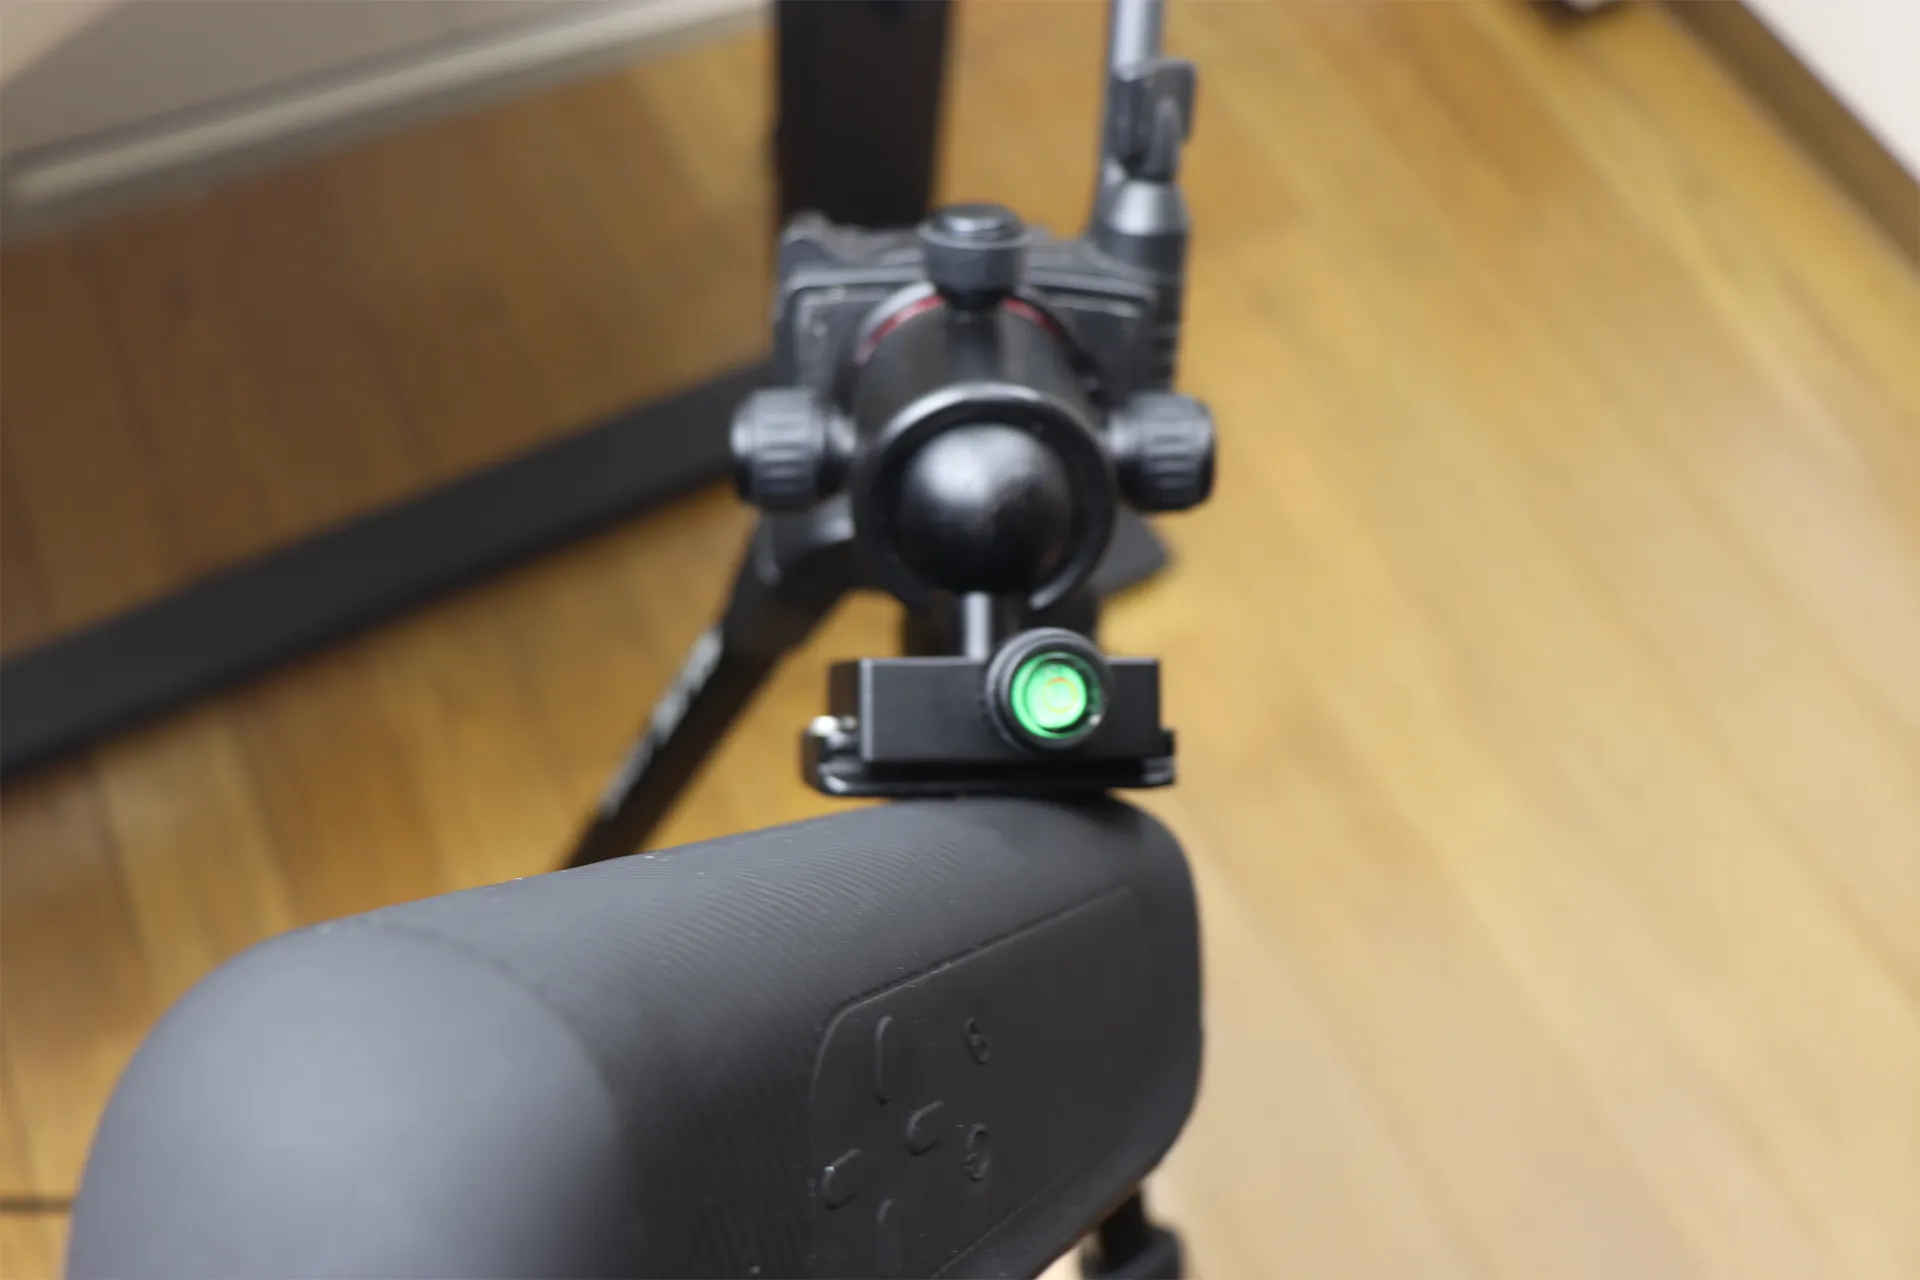
Therefore, no matter how tightly I tightened it, it easily shifted like this and couldn't be secured. So, the only option for attaching the quick release plate is the screw hole on the bottom.
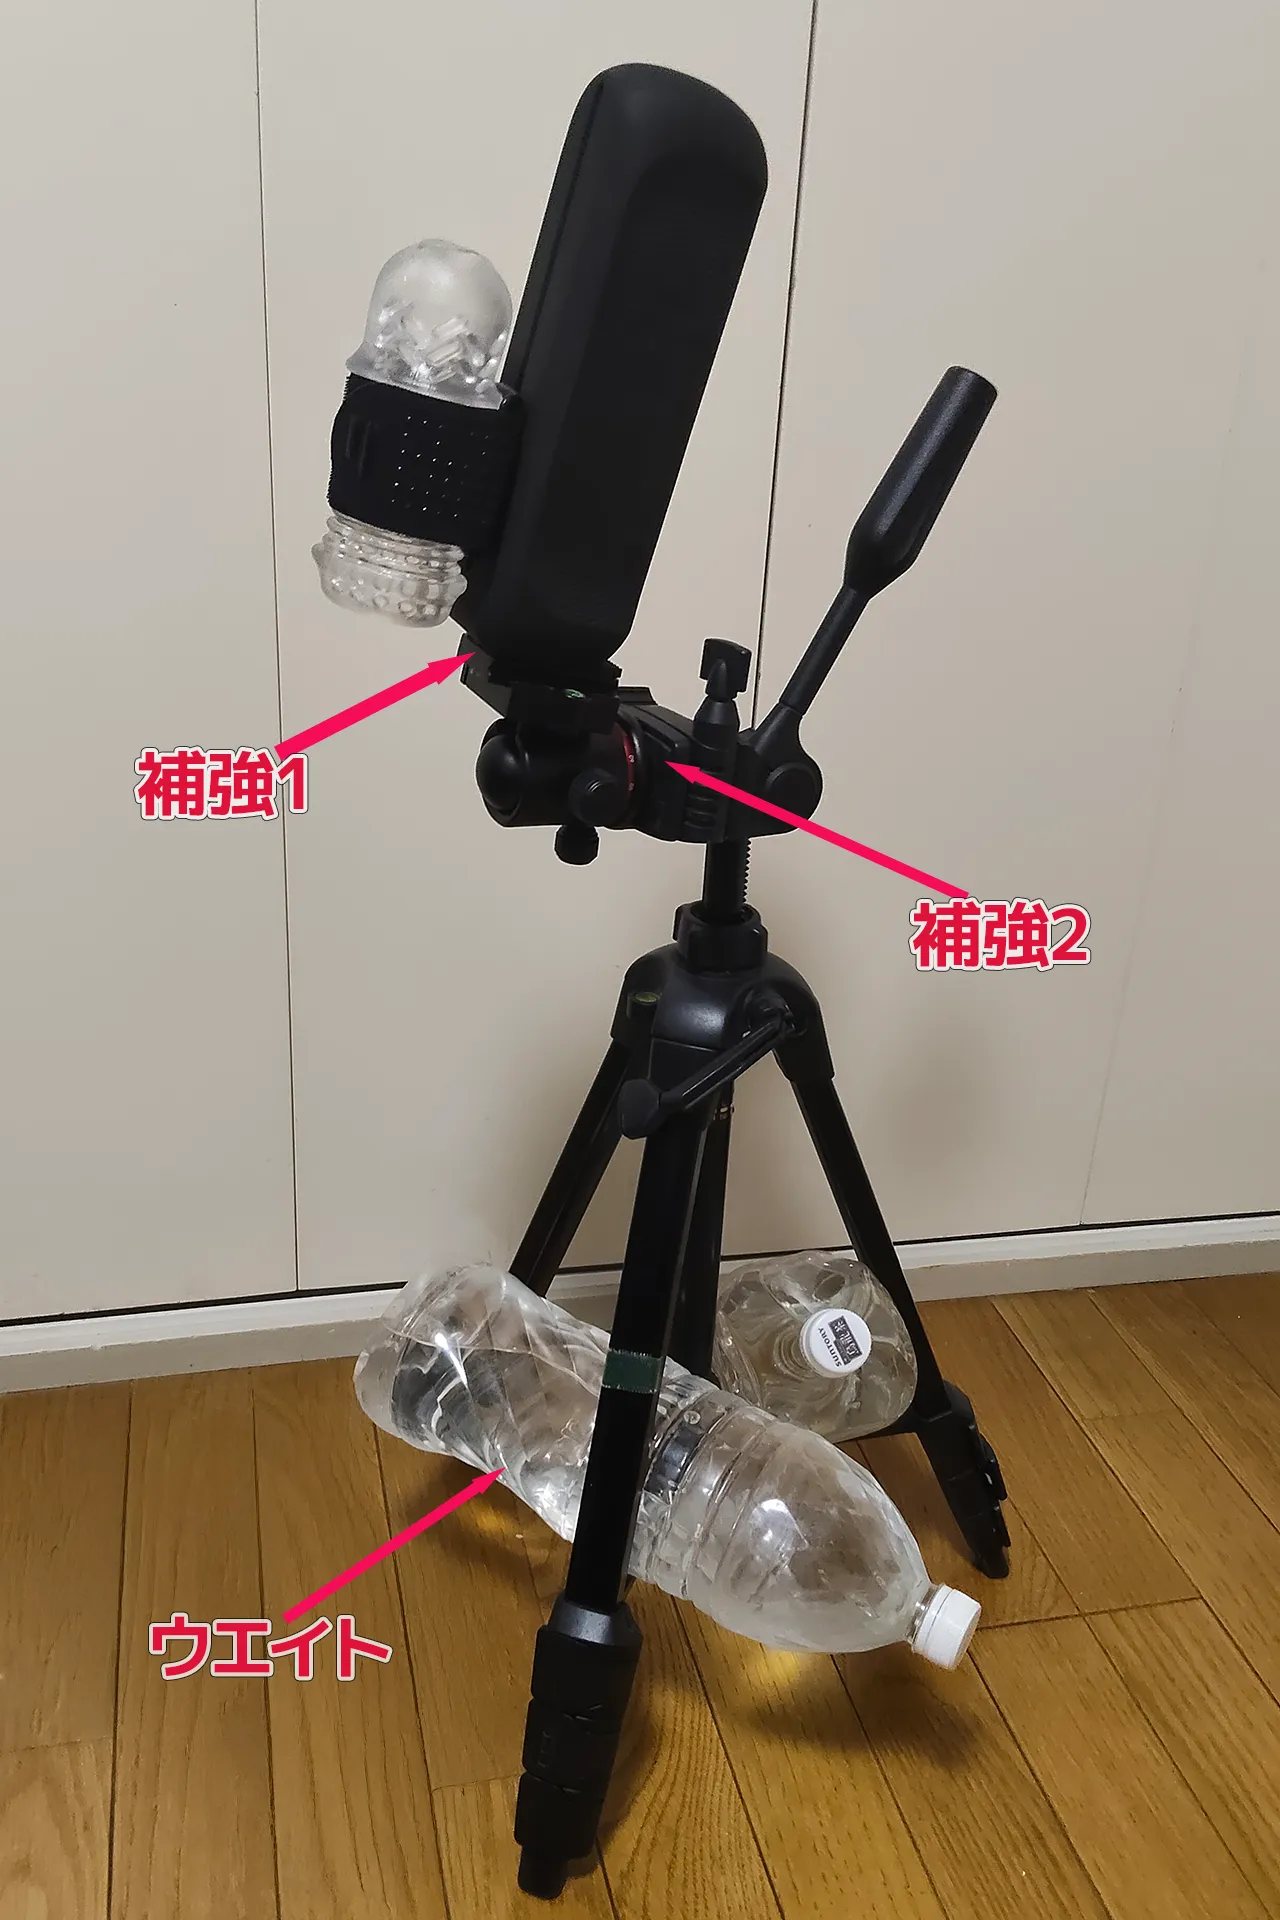
It can be attached to a tripod like this by securing it to the hole at the bottom. However, there are two places that need reinforcement, and weights need to be placed on the tripod legs for stability.
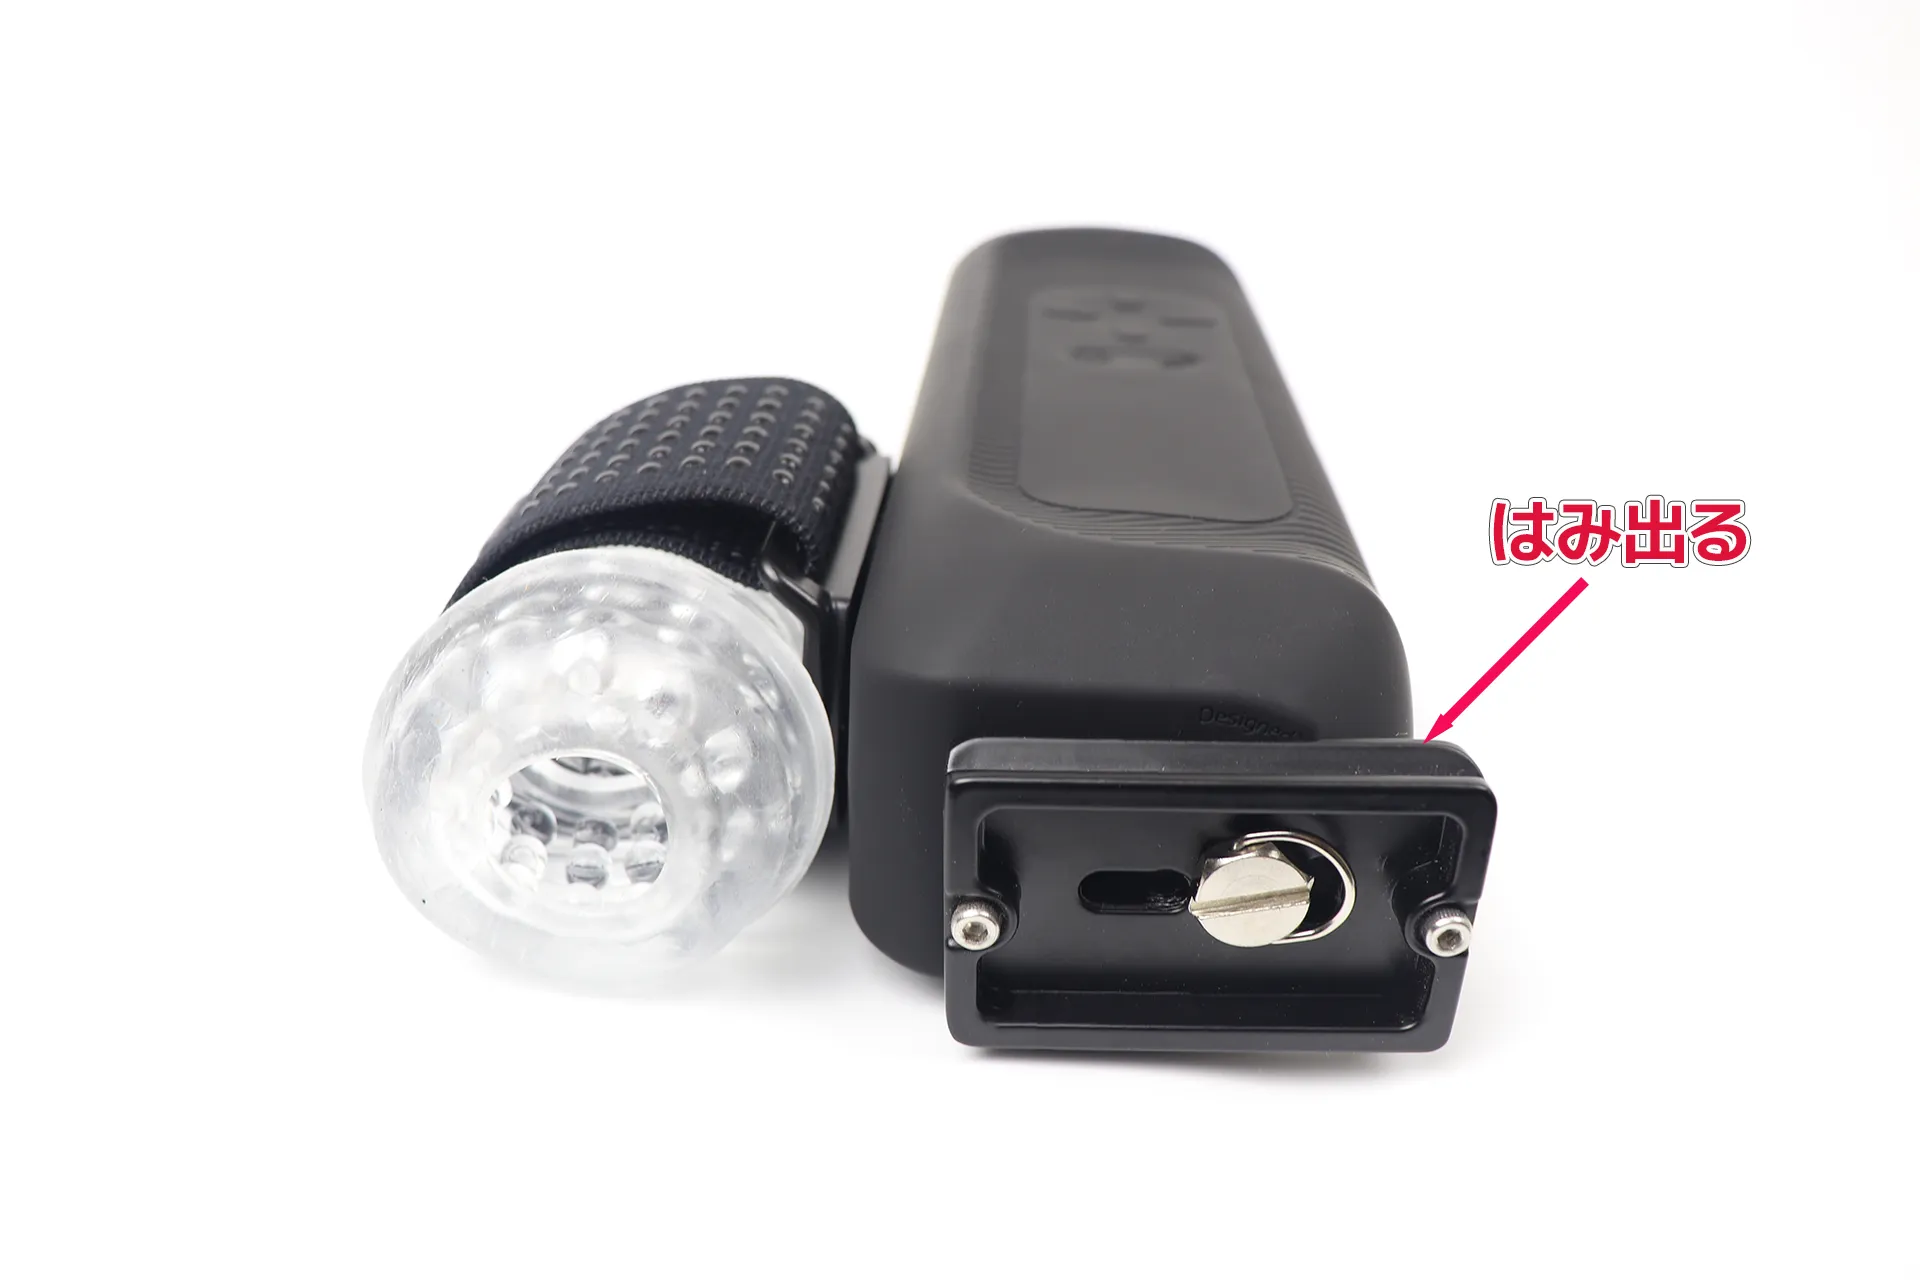
I attached a quick release plate to the bottom. A rectangular quick release plate like this sticks out a little.
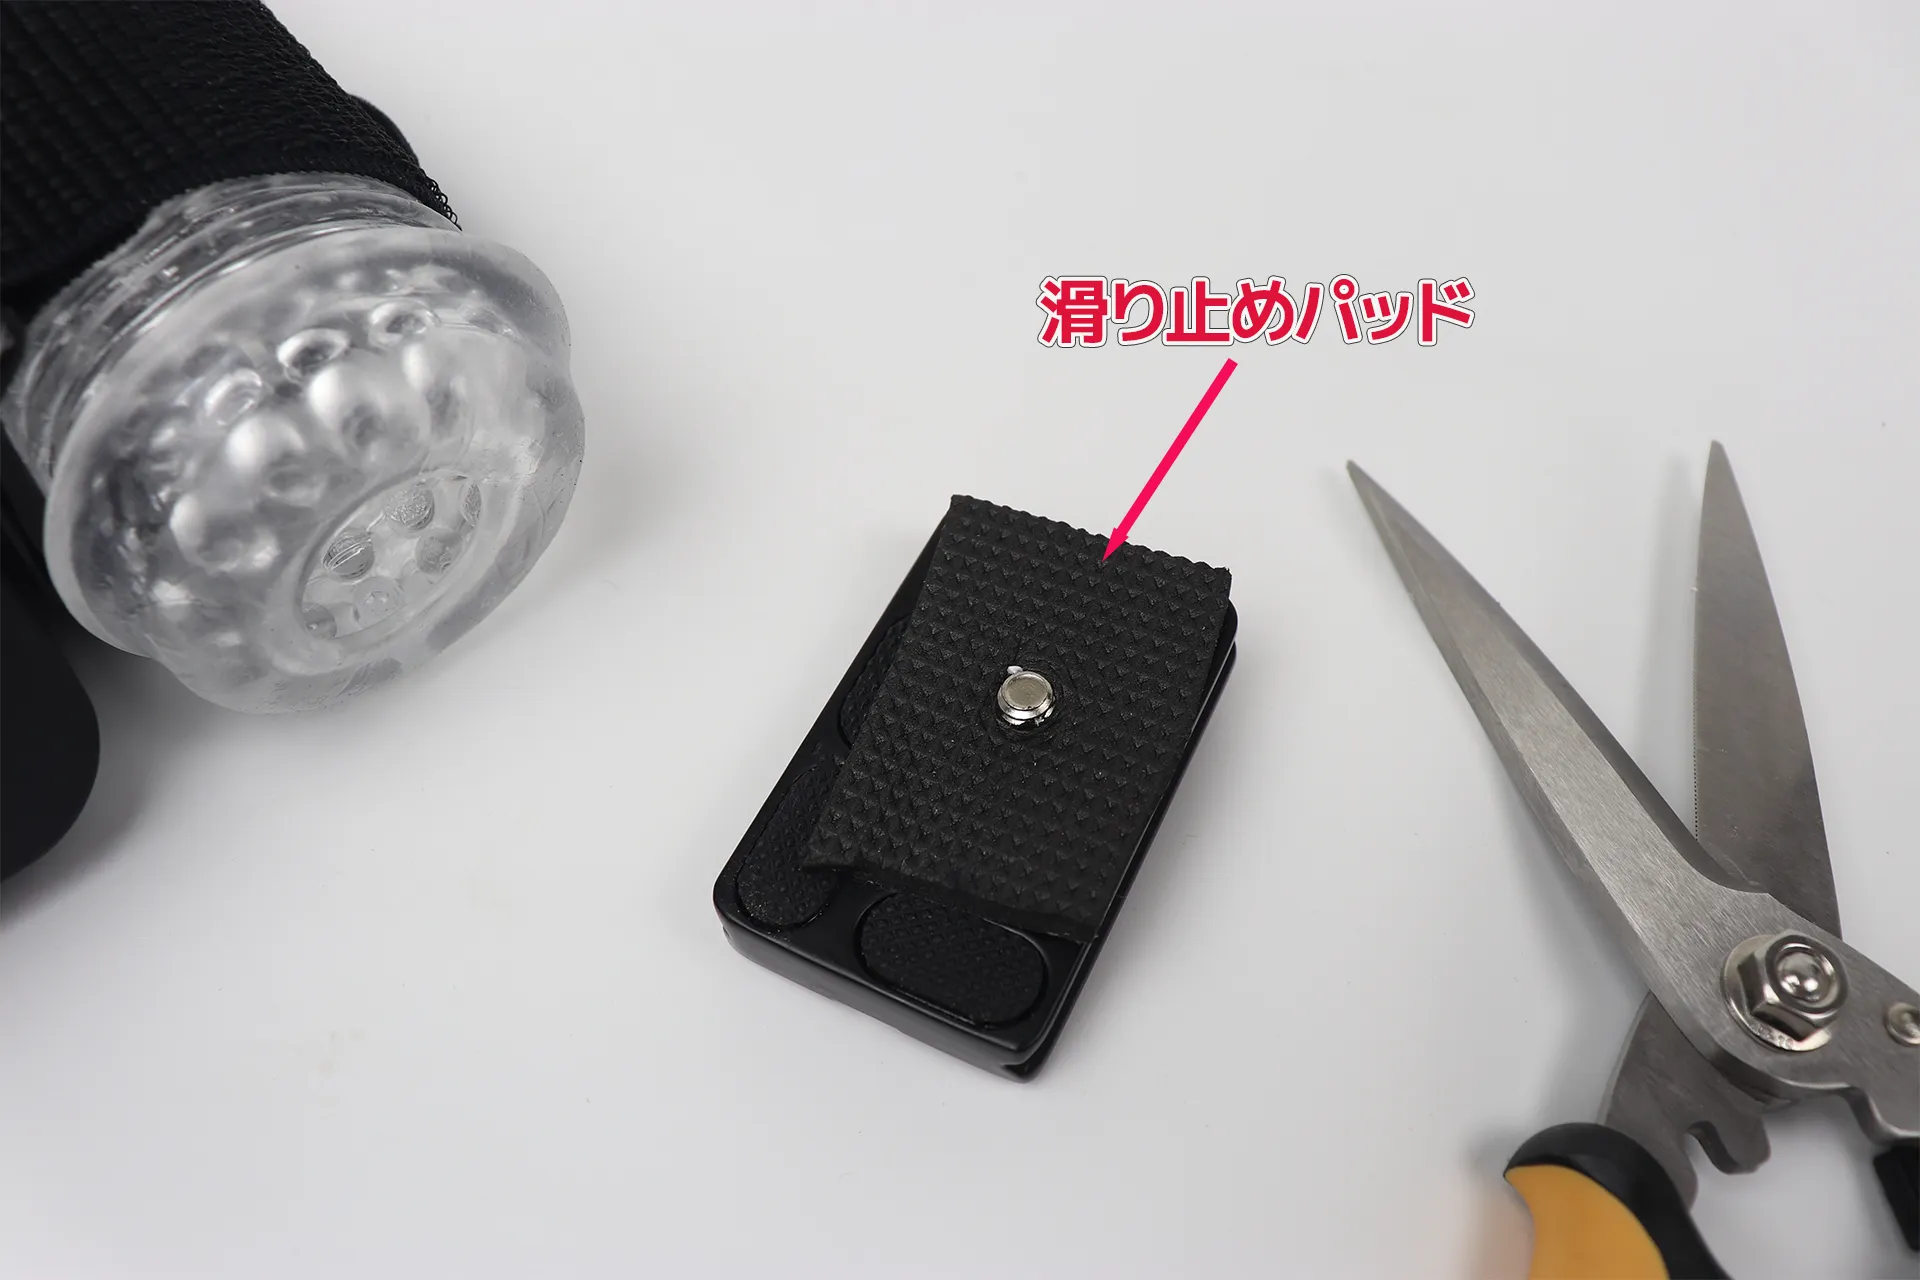
Insert the anti-slip pad between the quick release plate and the screw hole on the main body. Cut the anti-slip pad to the appropriate size, make a hole in it, and insert it.
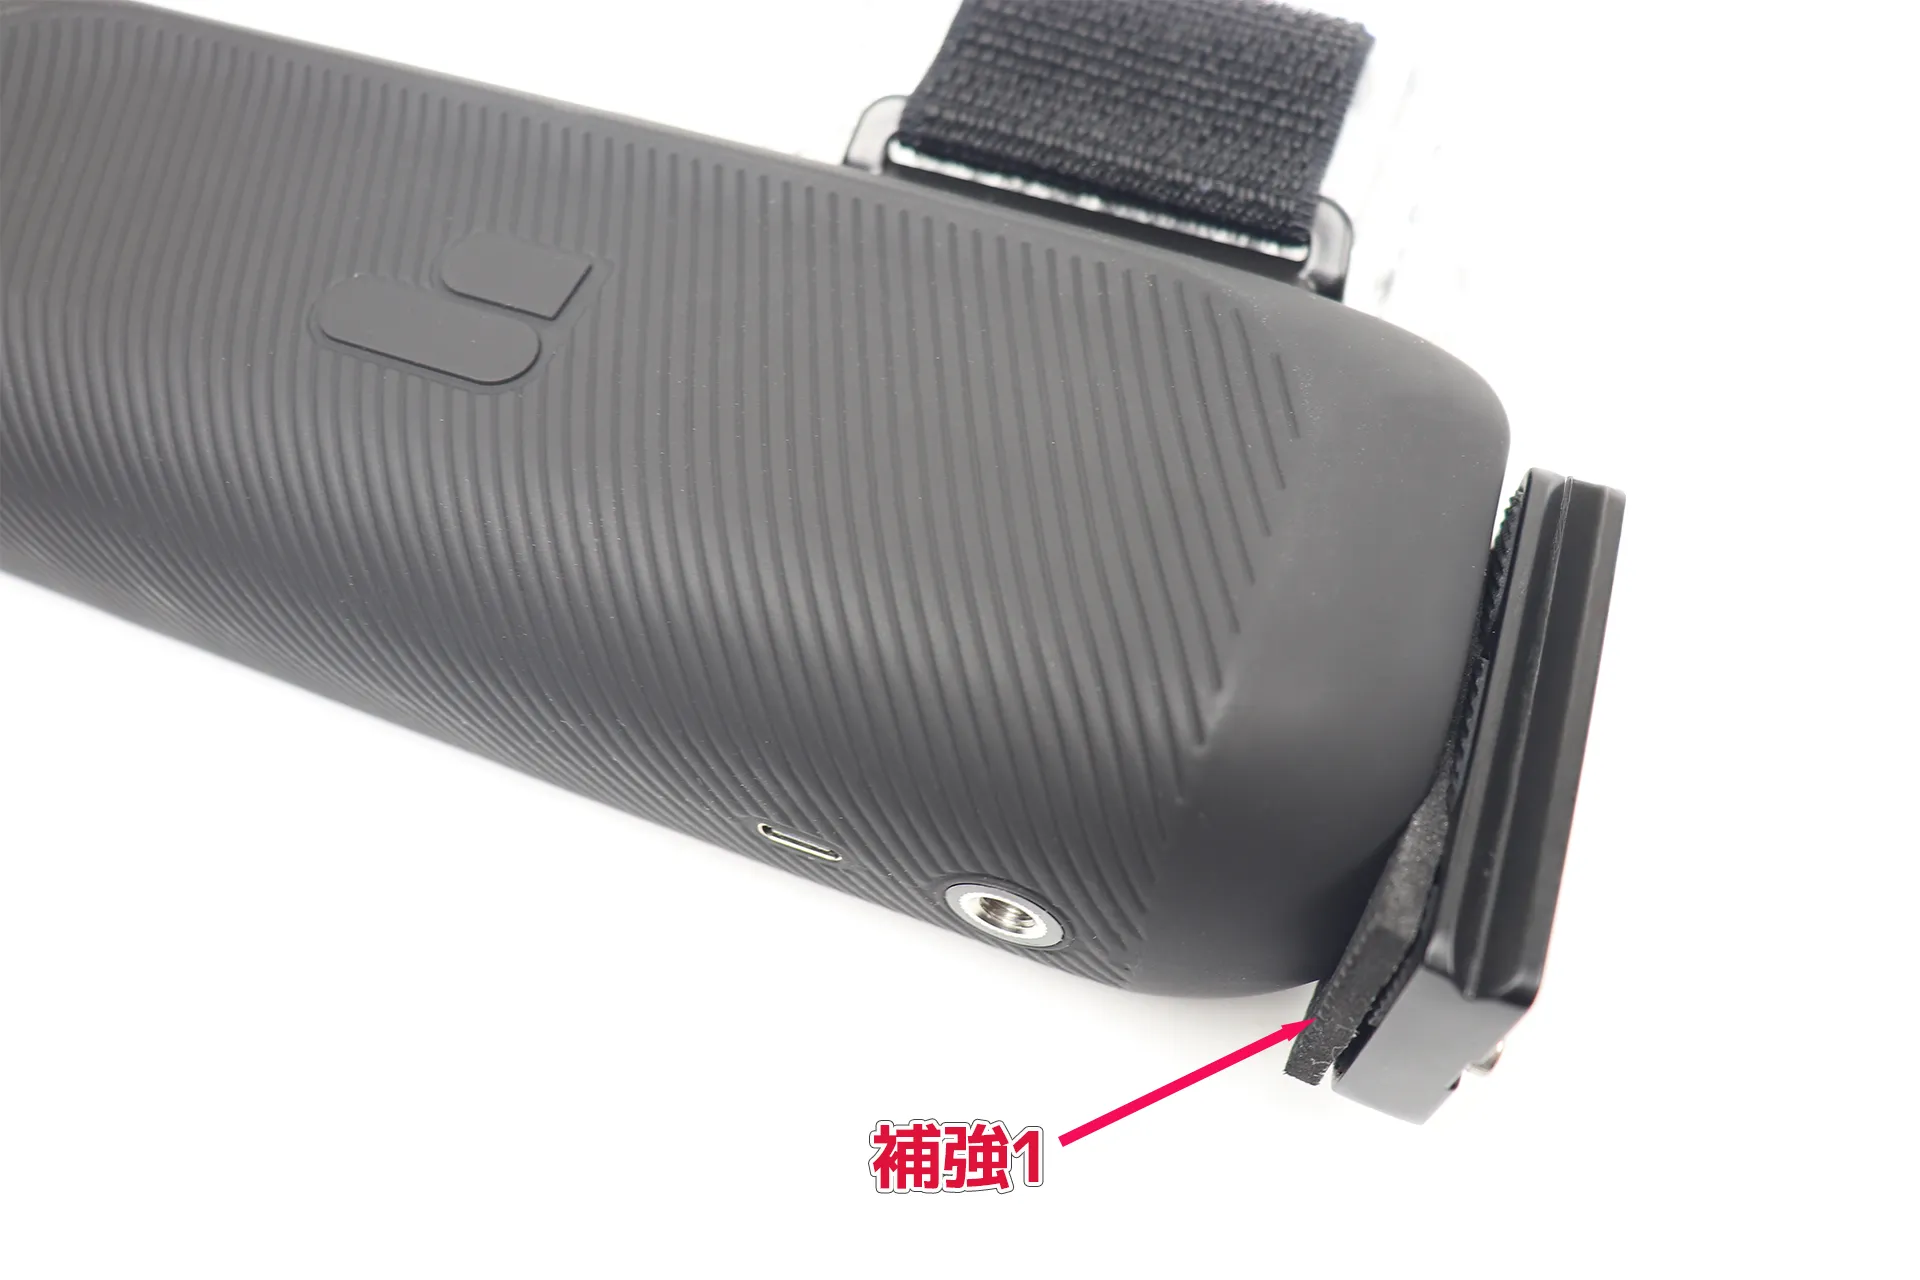
This will secure it firmly and prevent the screws from coming loose.
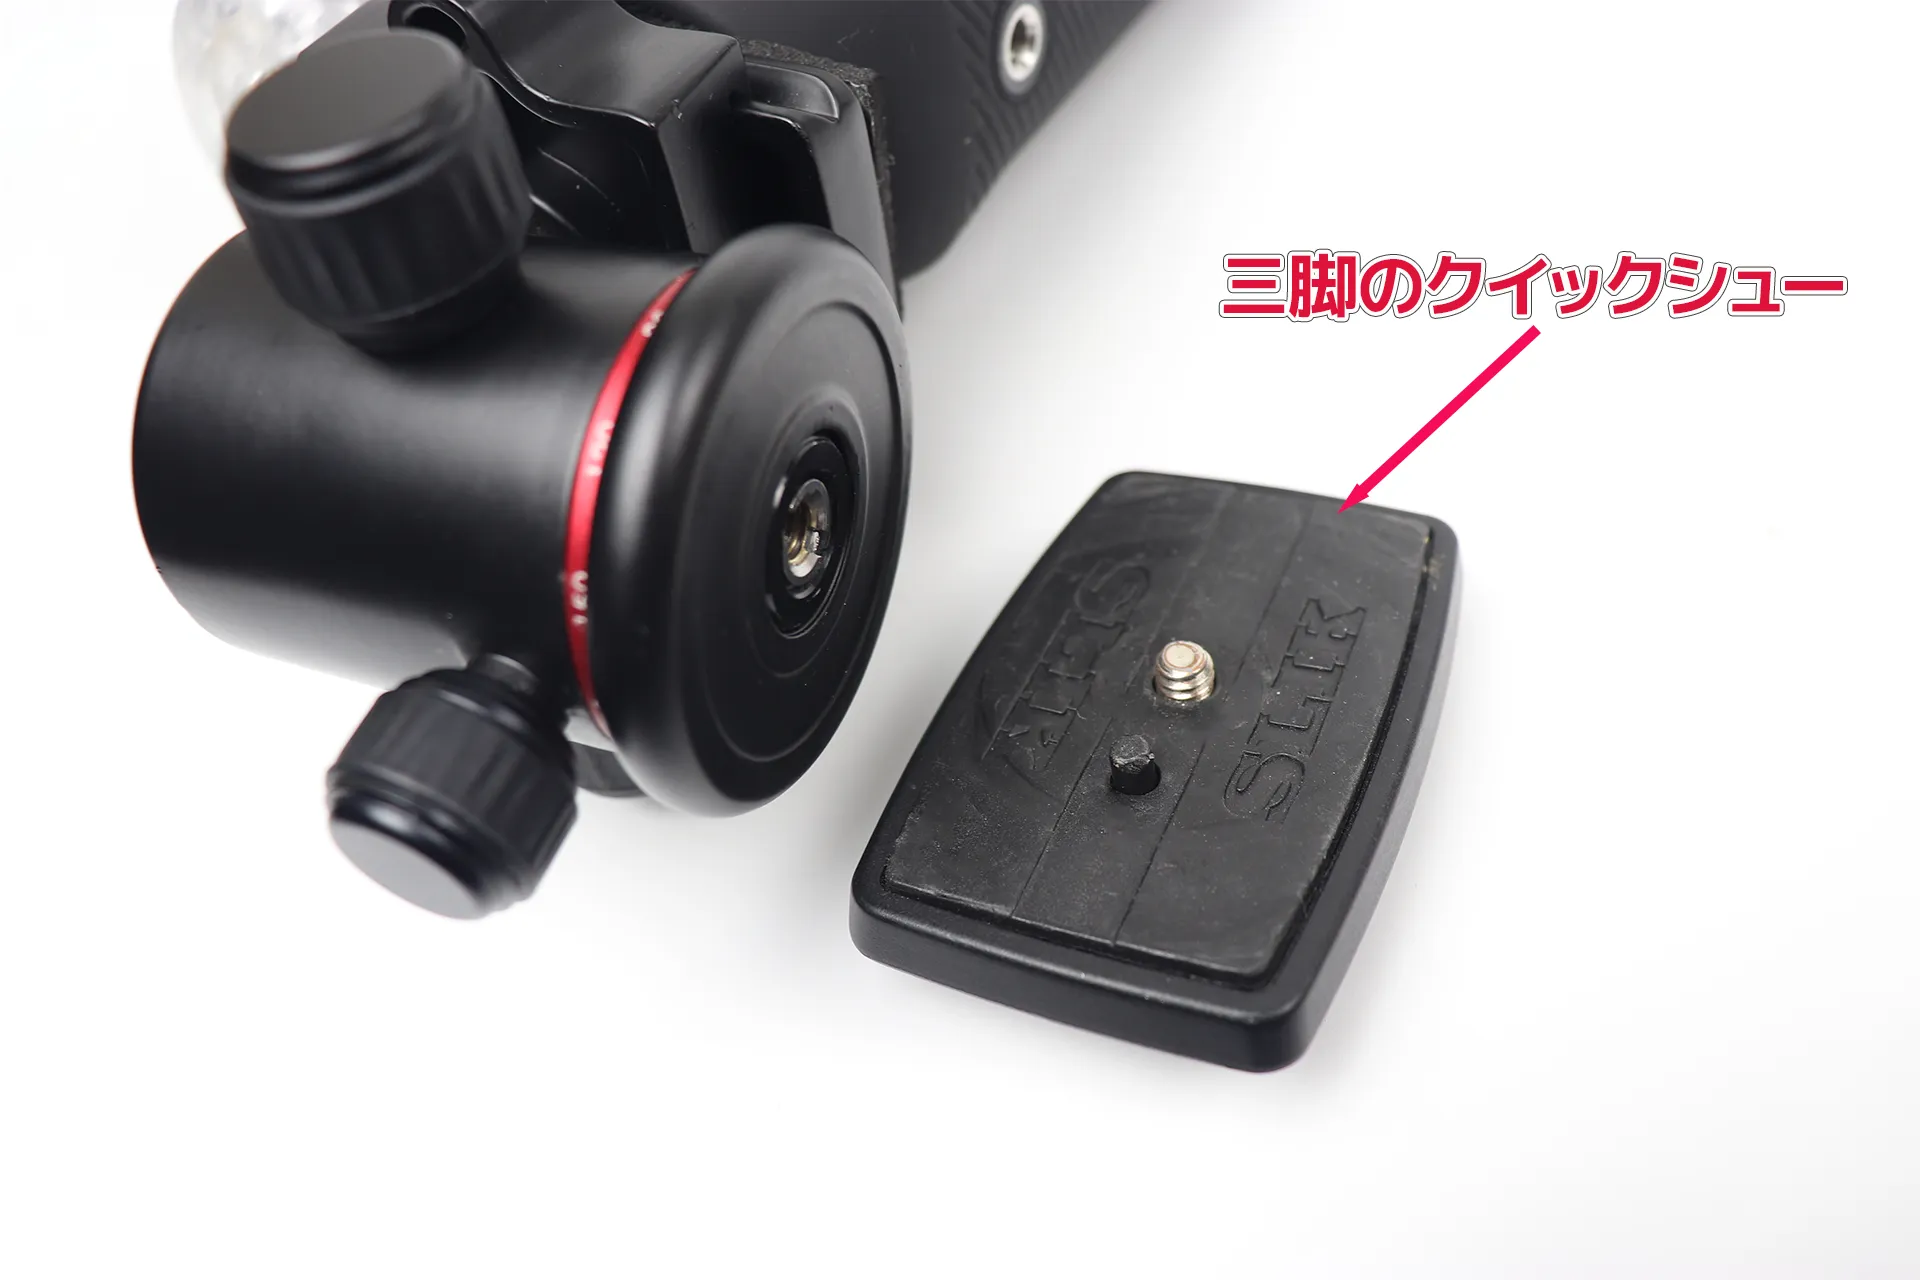
This is the second point of reinforcement. The screws on the ball head that attaches to the tripod and the quick release plate on the tripod tend to loosen, so we'll reinforce these.
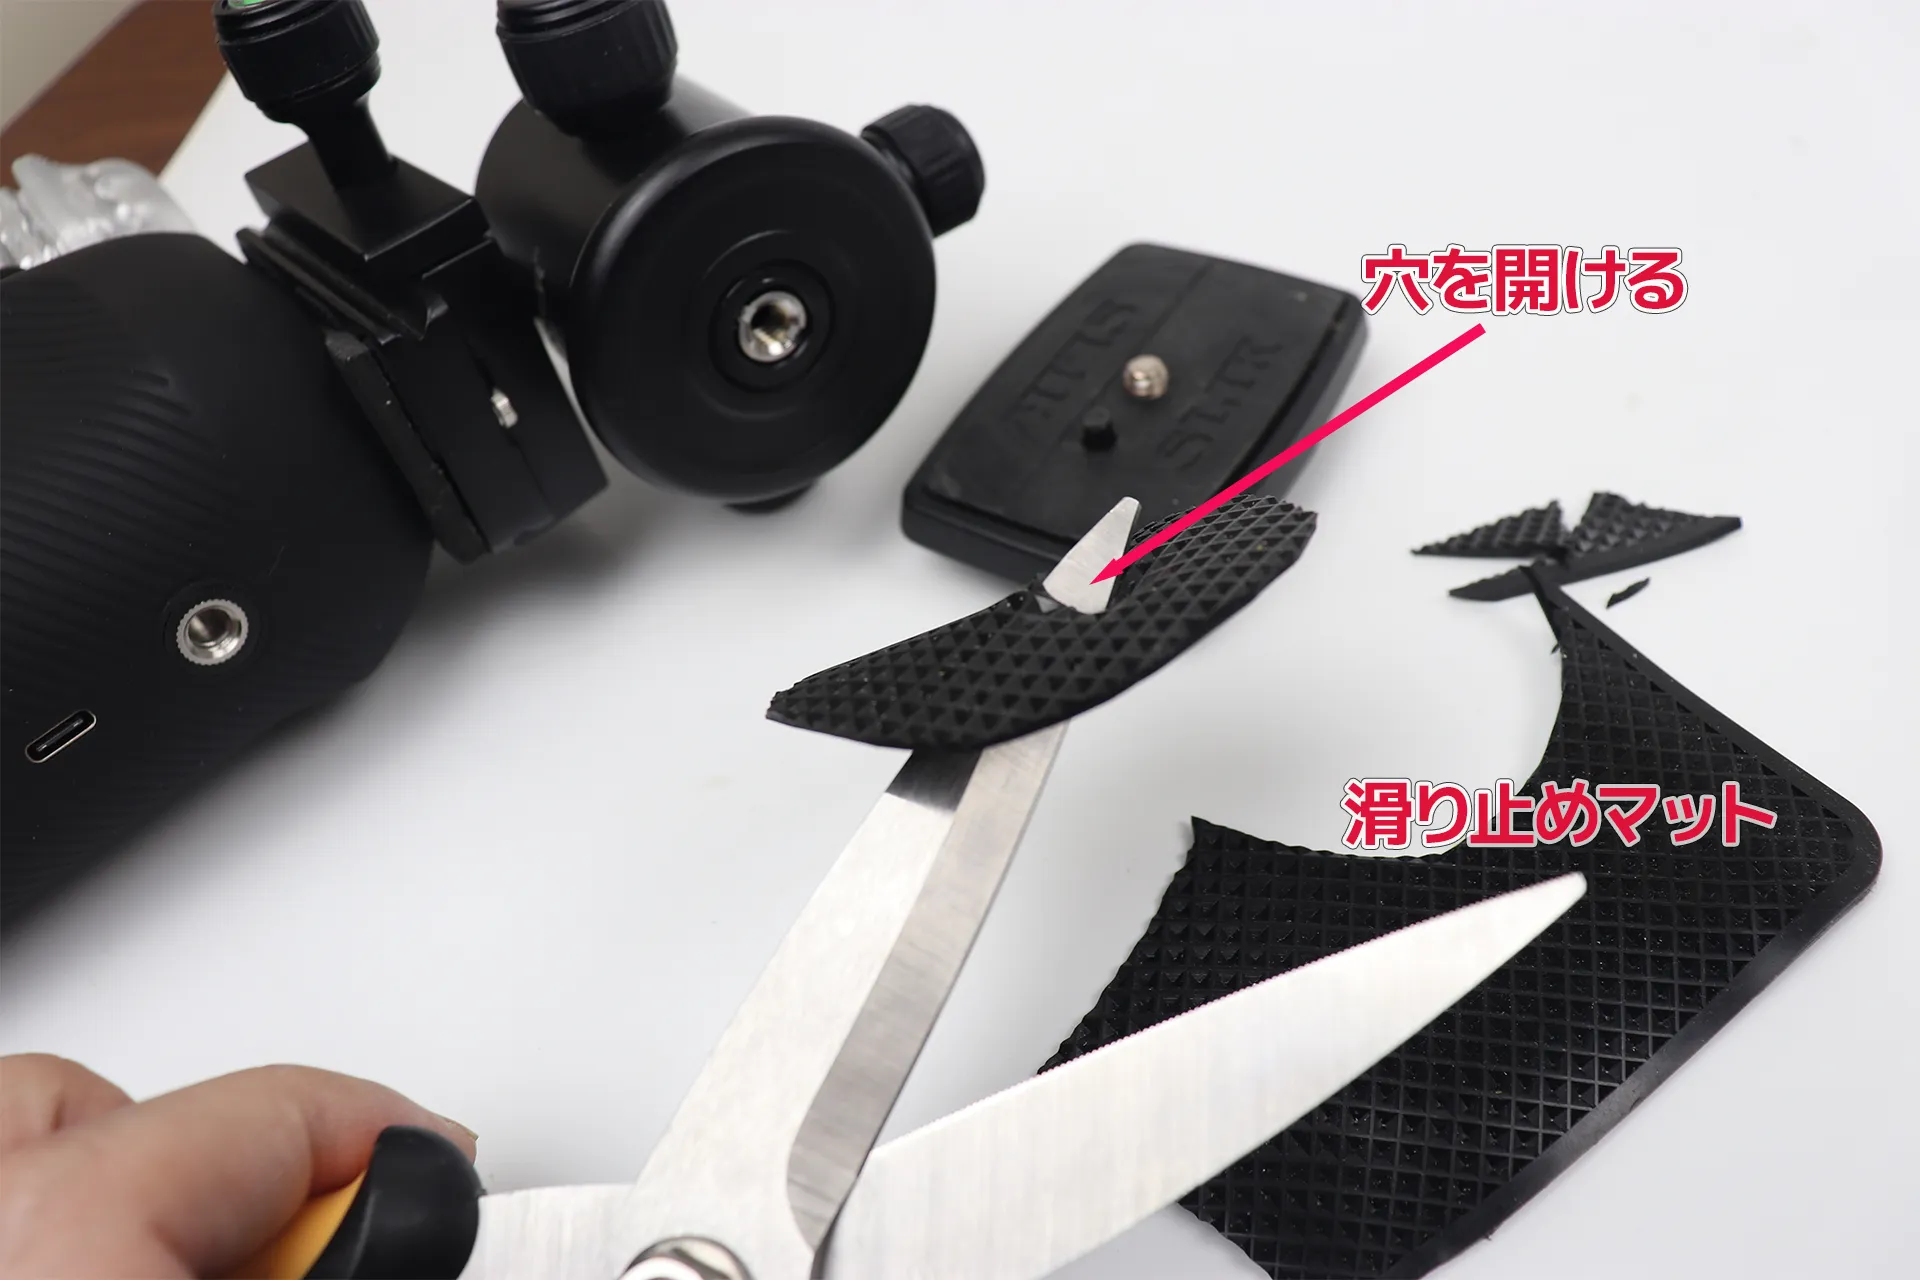
The screws are too short, so a regular pad would be too thick. Instead, I used a non-slip mat. Similarly, you just drill holes and insert it.
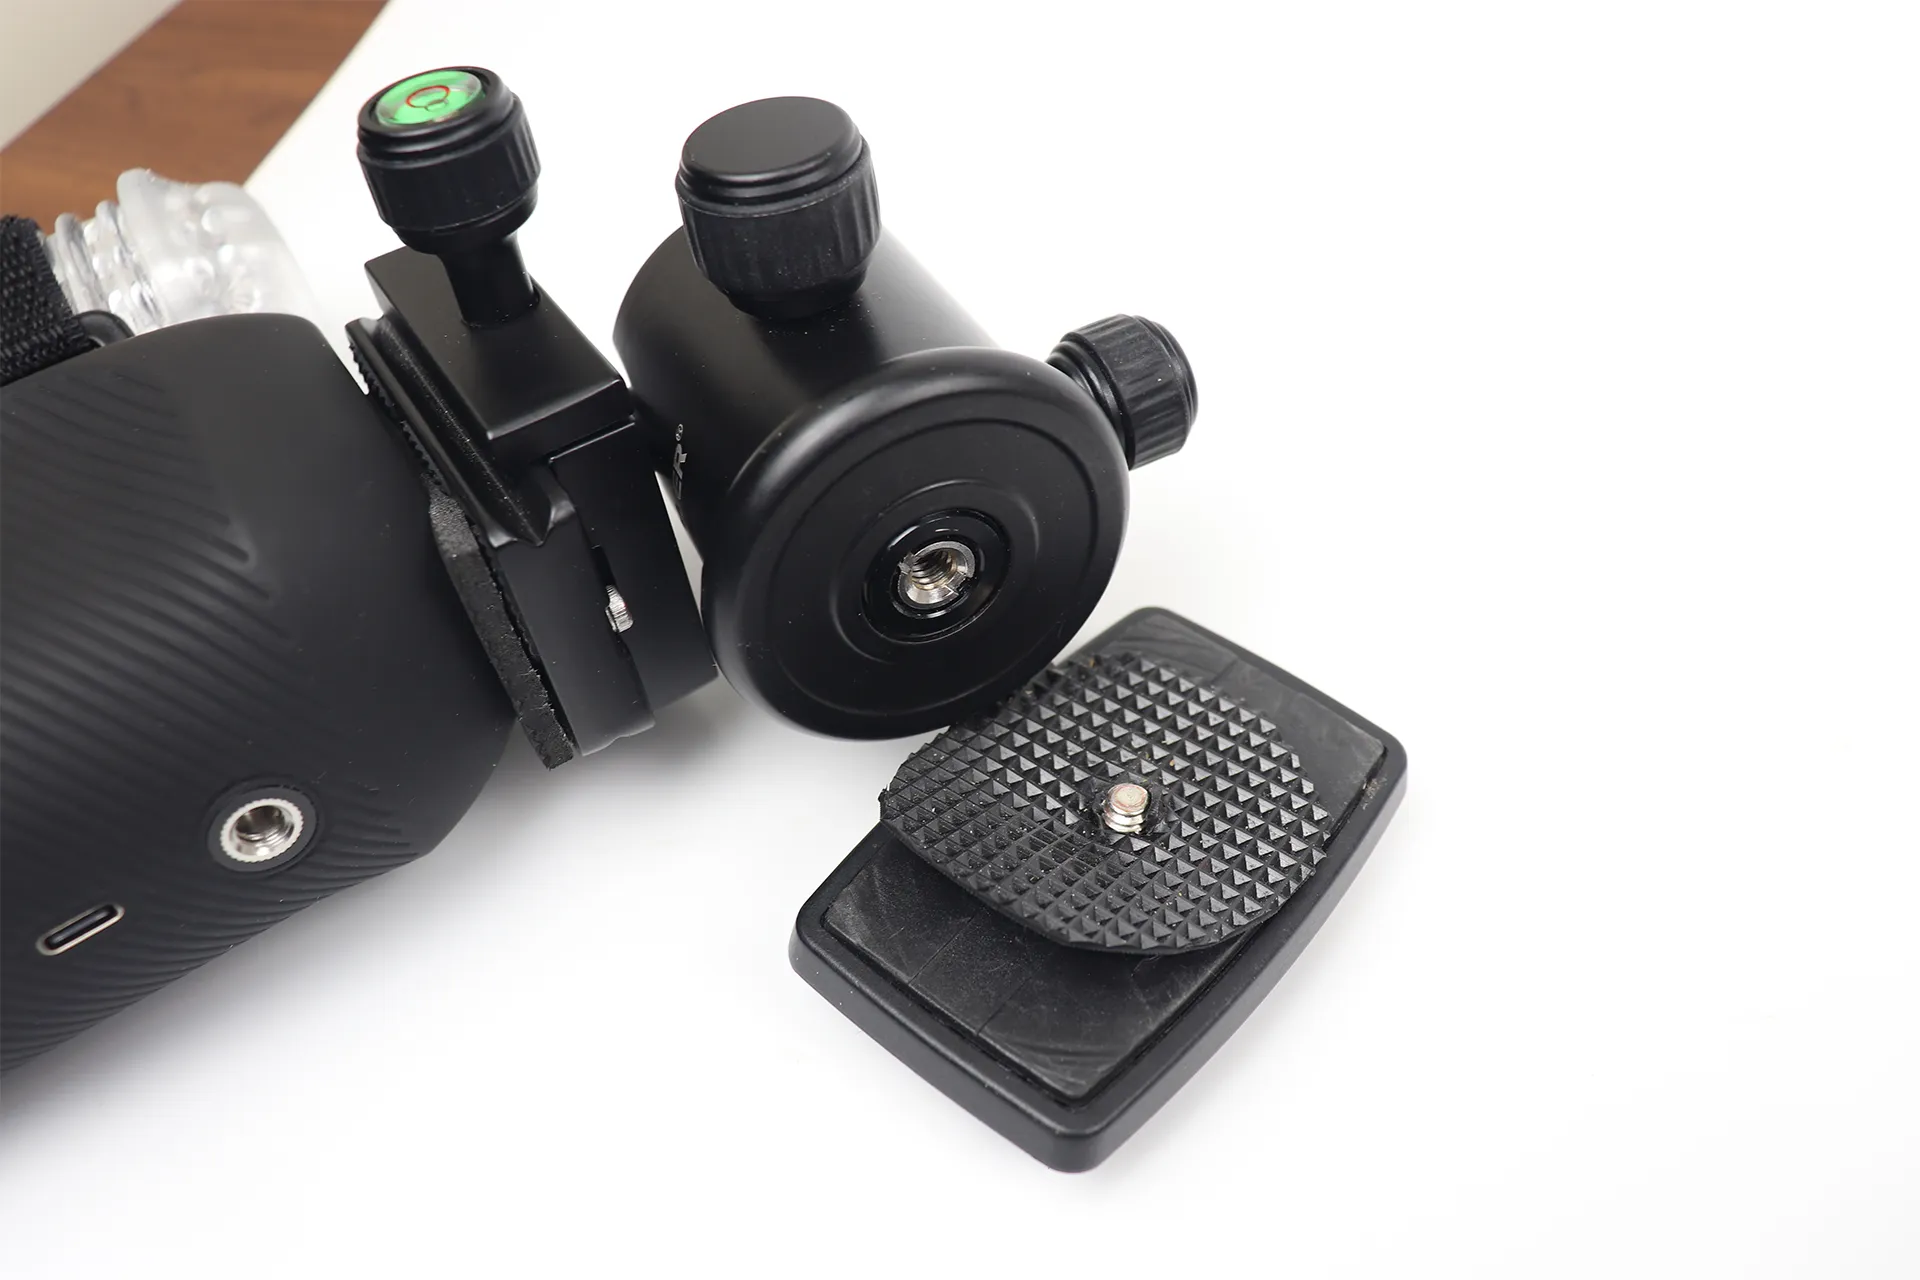
Cut the mat to fit the shape of the ball head and insert it like this. The mat does not need to be glued; simply inserting it is enough for it to be effective.
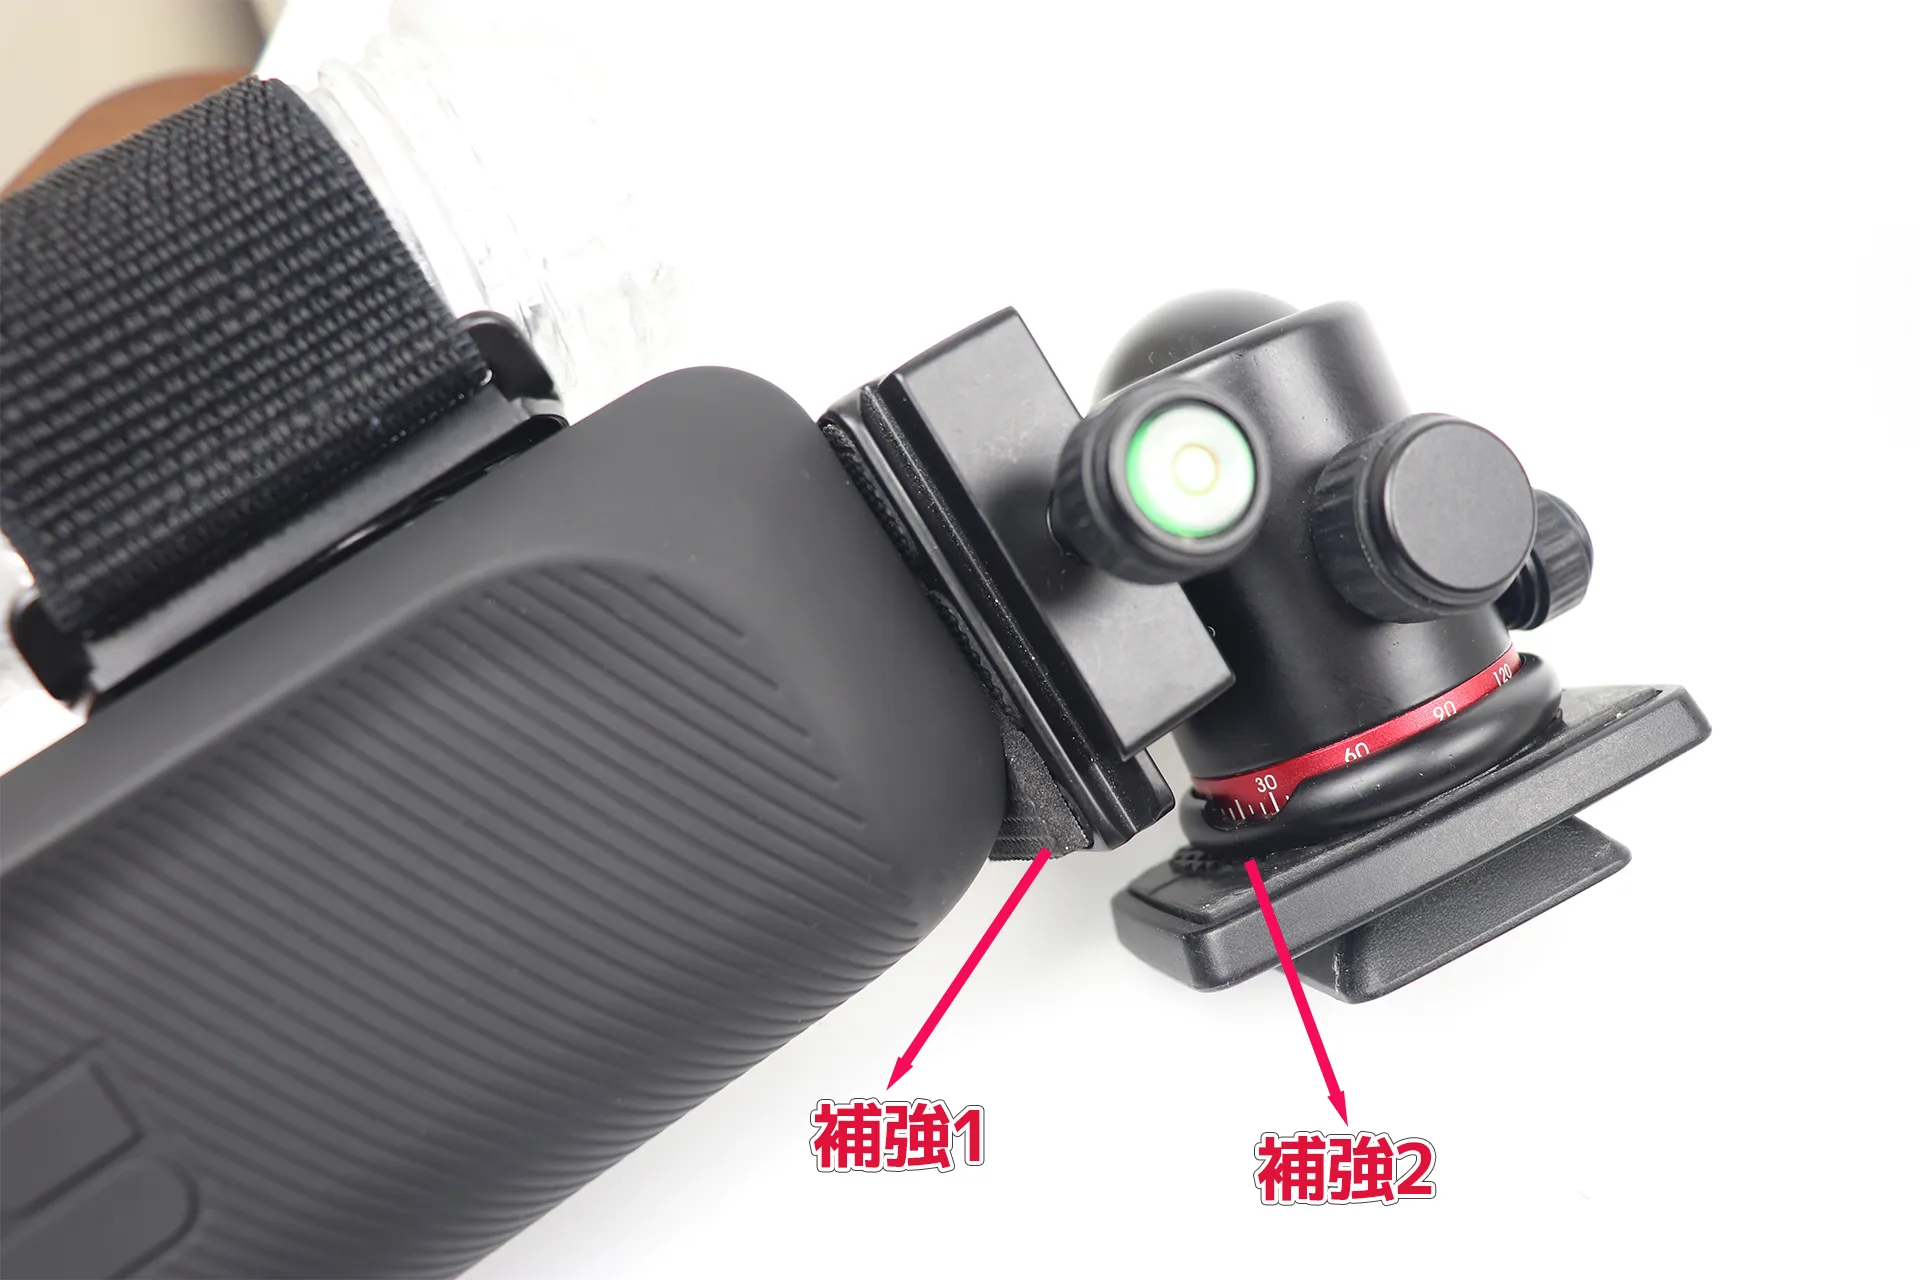
With the reinforcements in these two places complete, the screws are less likely to loosen.
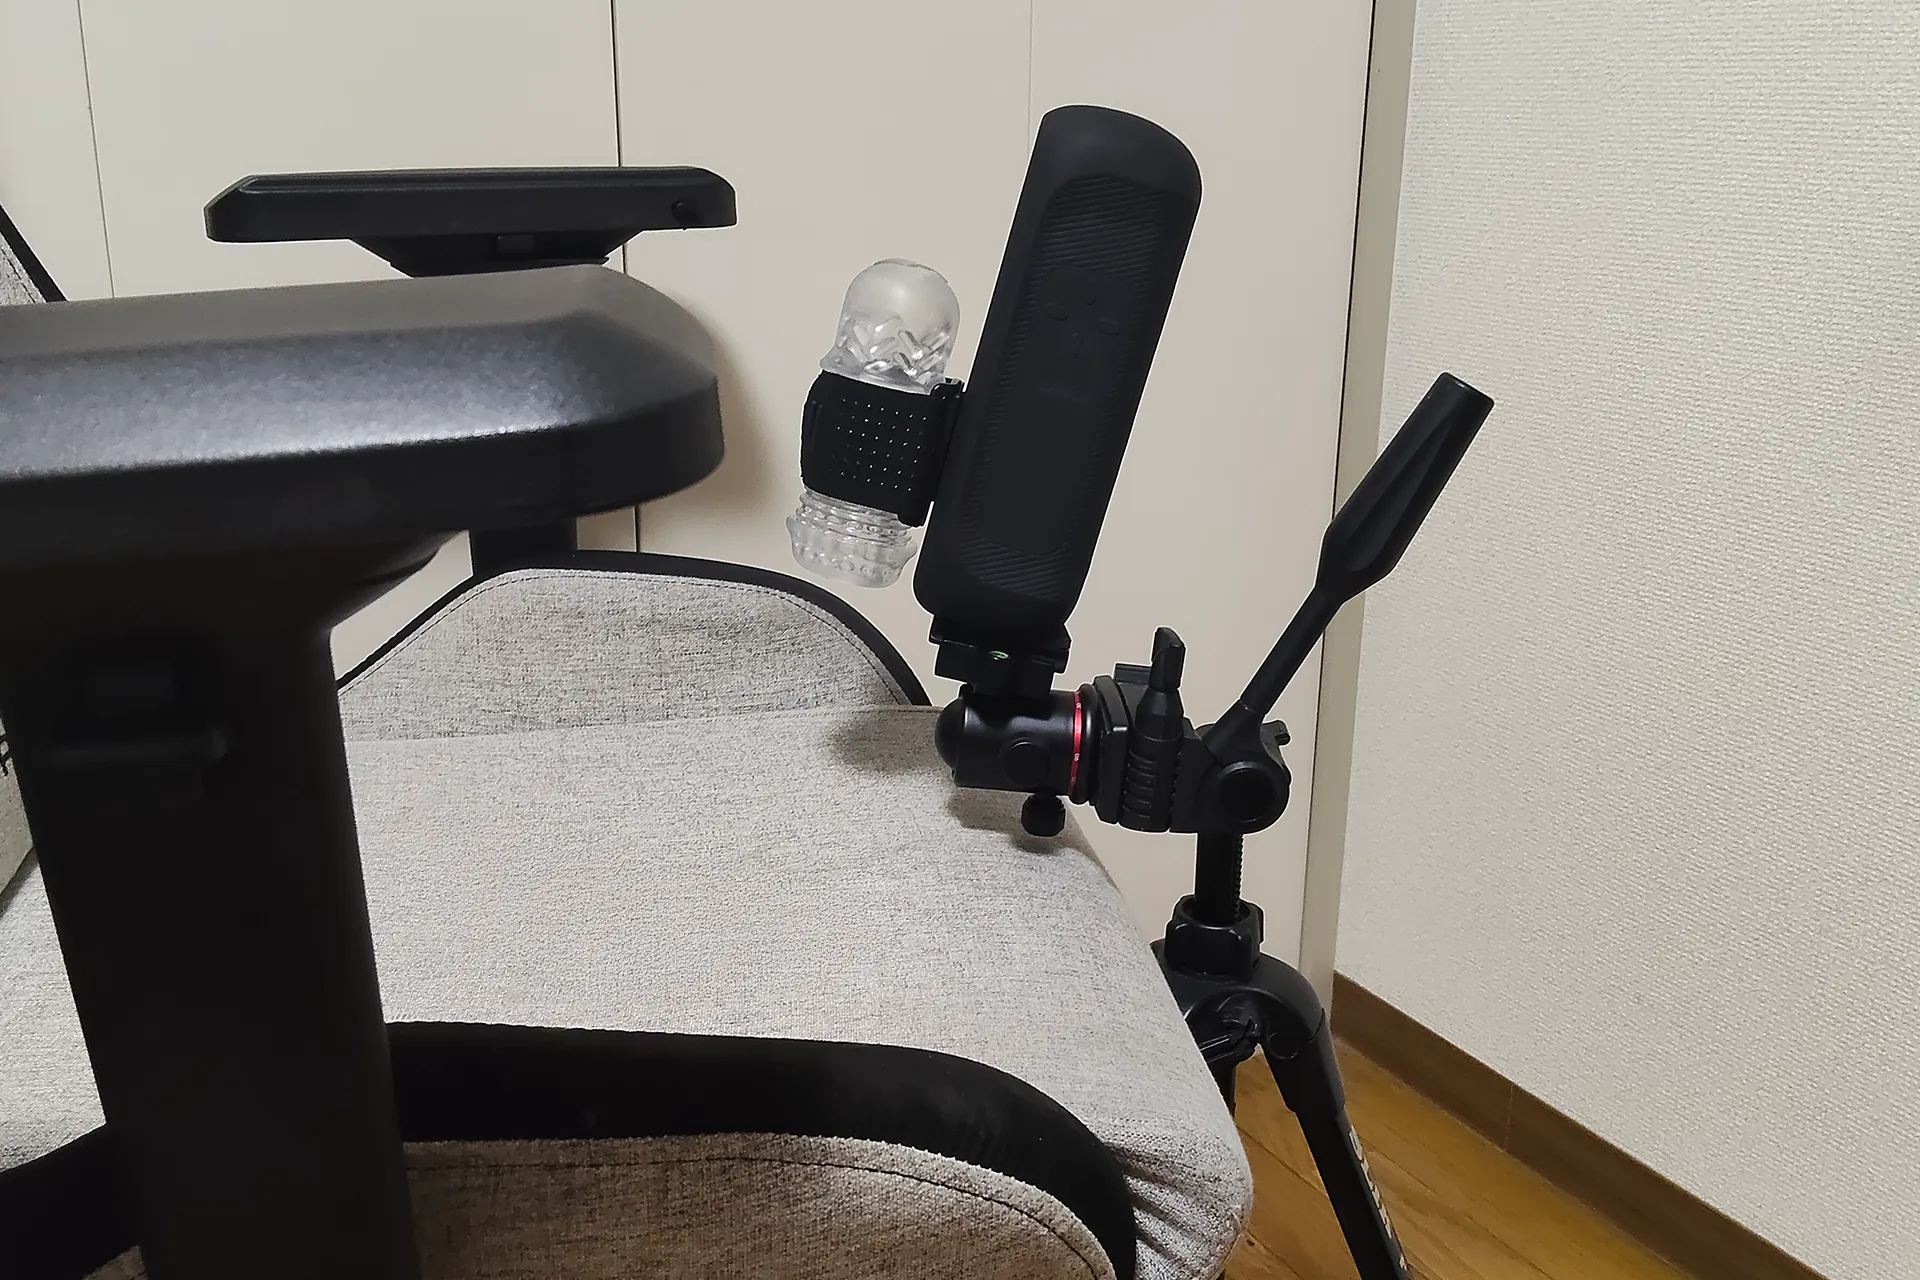
Because it has a ball head, it extends forward to a comfortable position when sitting in a chair. Without the ball head, this distance cannot be achieved, making it difficult to use.
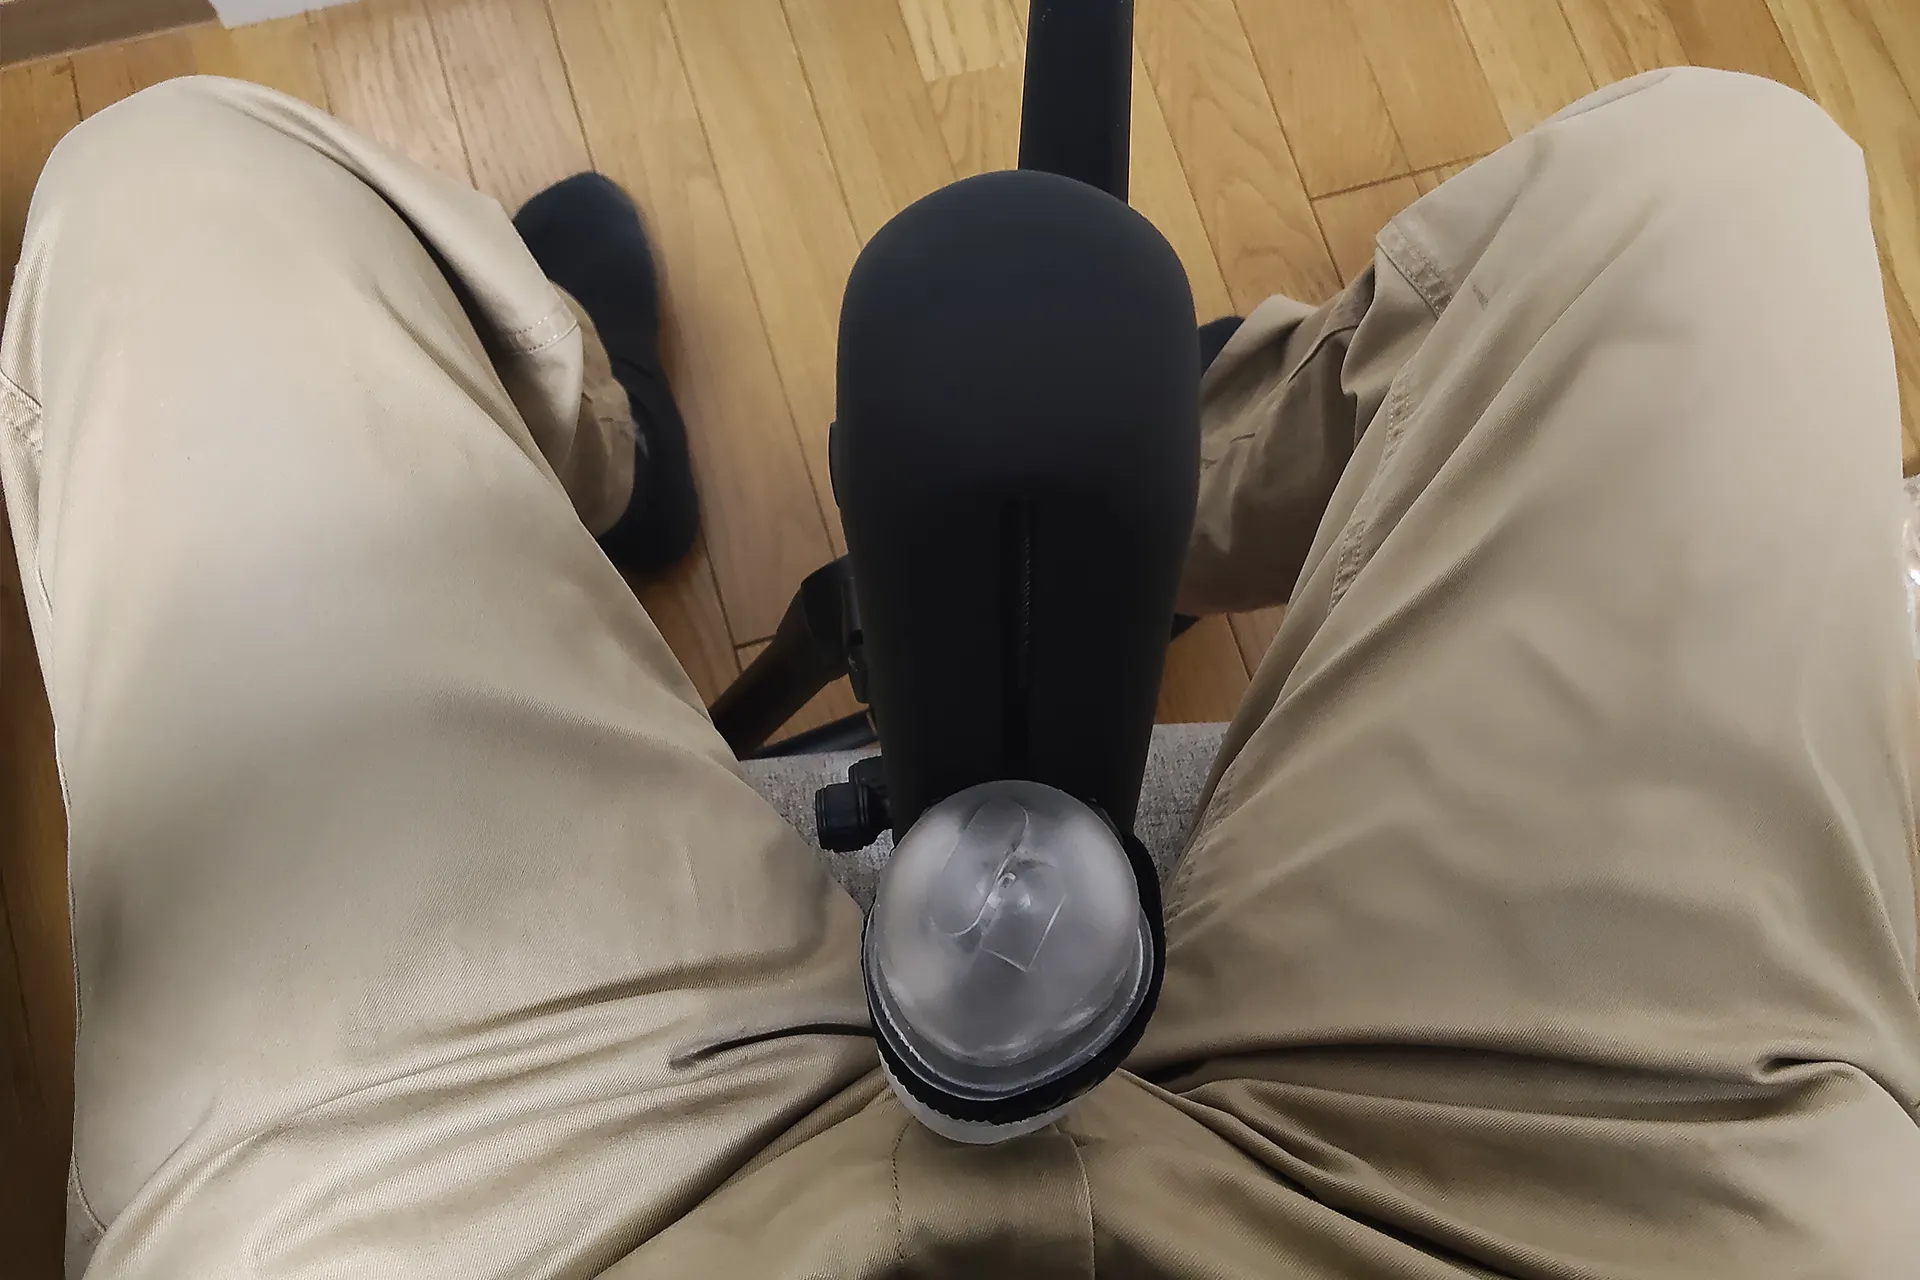
This is what it looks like when you're sitting down. The ball head allows for precise position adjustments.
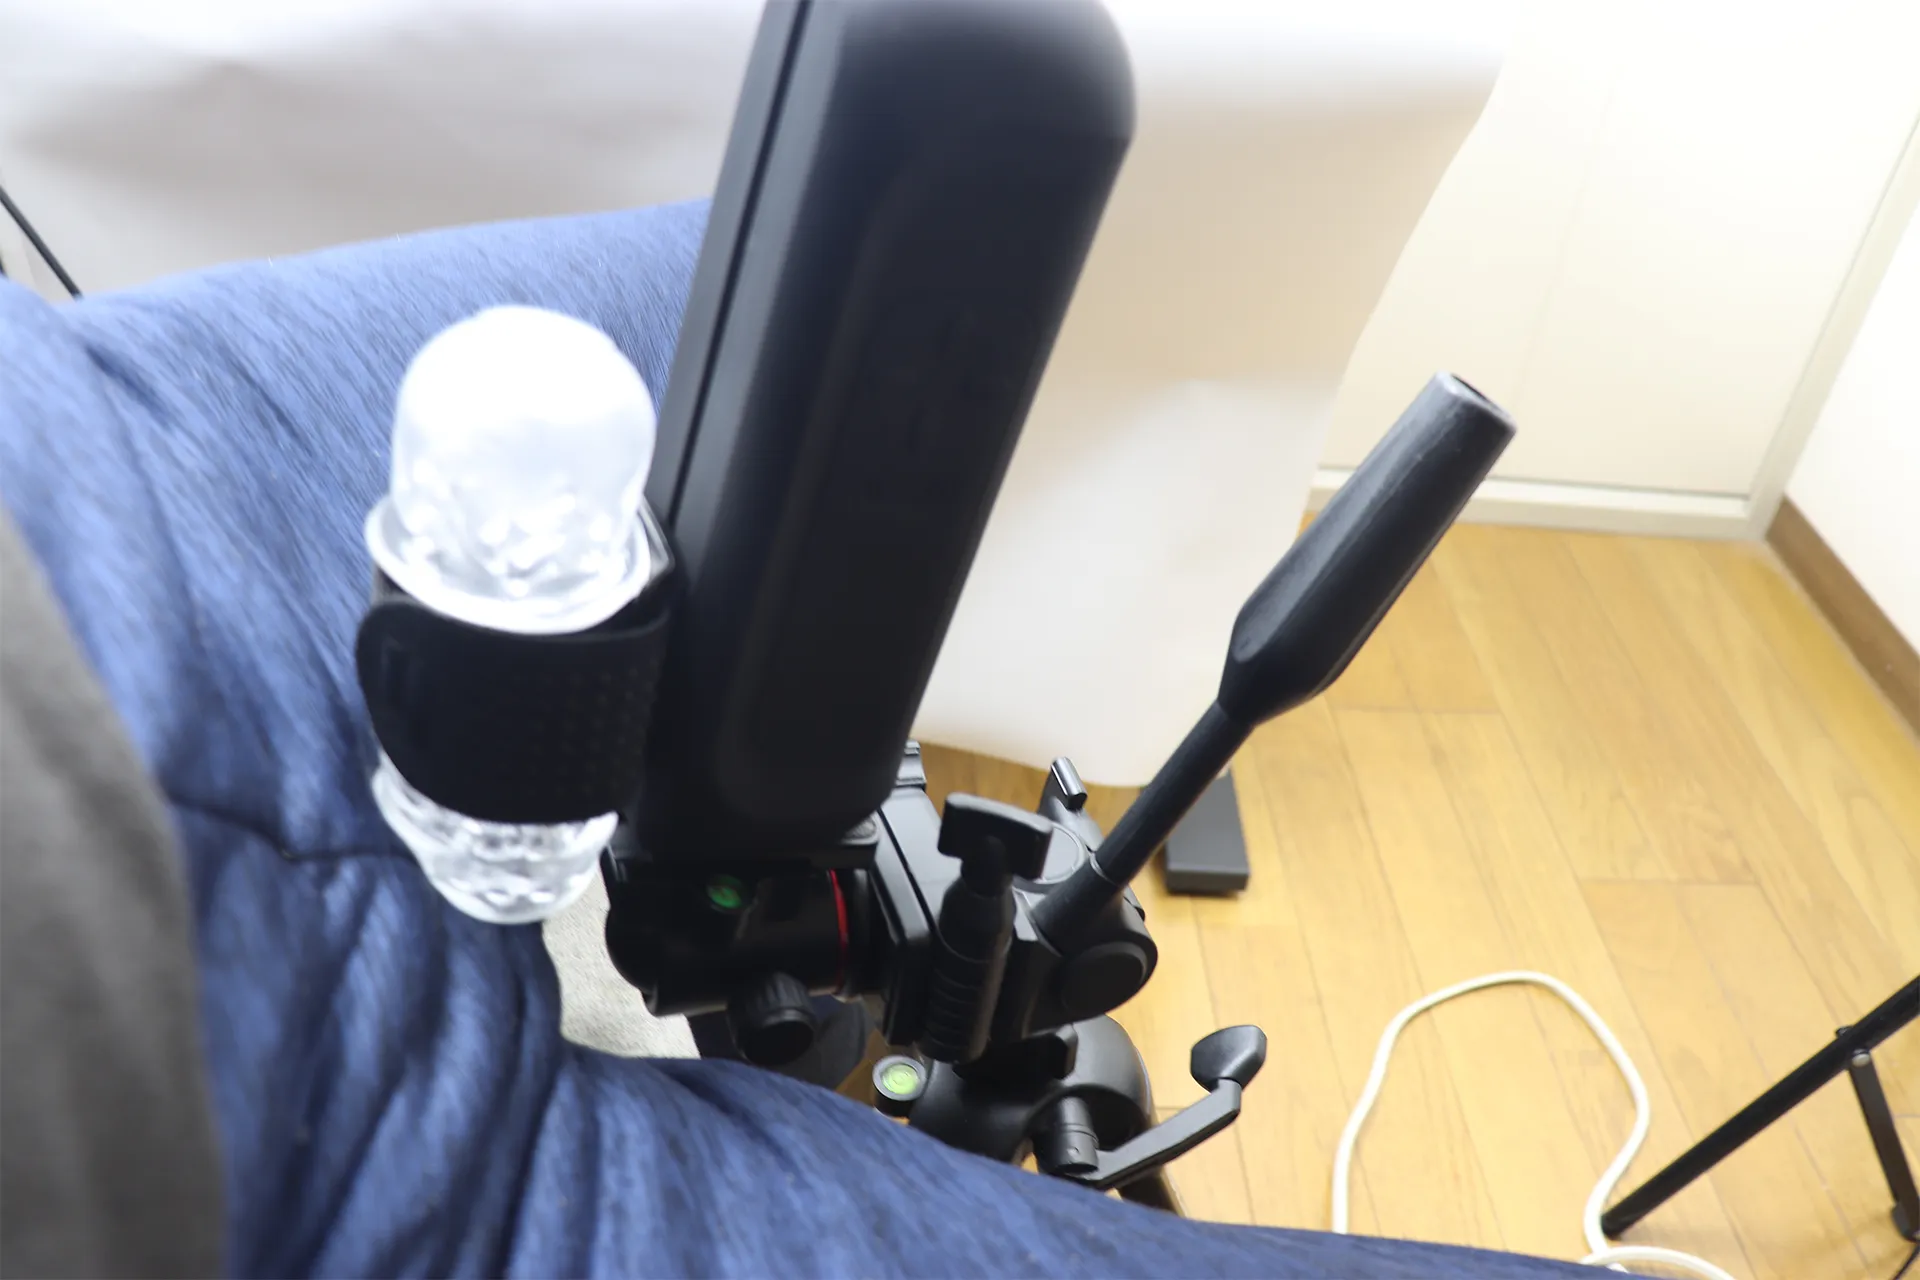
Sitting image #2
| Product name | SLIK Smartphone Tripod GX-S 6400 |
|---|---|
| retailers | |
| price | 5,980 yen (tax included) |
| Product name | NEEWER 36MM Tripod Ball Head |
|---|---|
| retailers | |
| price | 4,399 yen (tax included) |
| Product name | Anti-slip pads |
|---|---|
| retailers | |
| price | 718 yen (tax included) |
| Product name | Non-slip mat |
|---|---|
| retailers | |
| price | 1,610 yen (tax included) |
The arm with an even wider range of motion is very convenient!
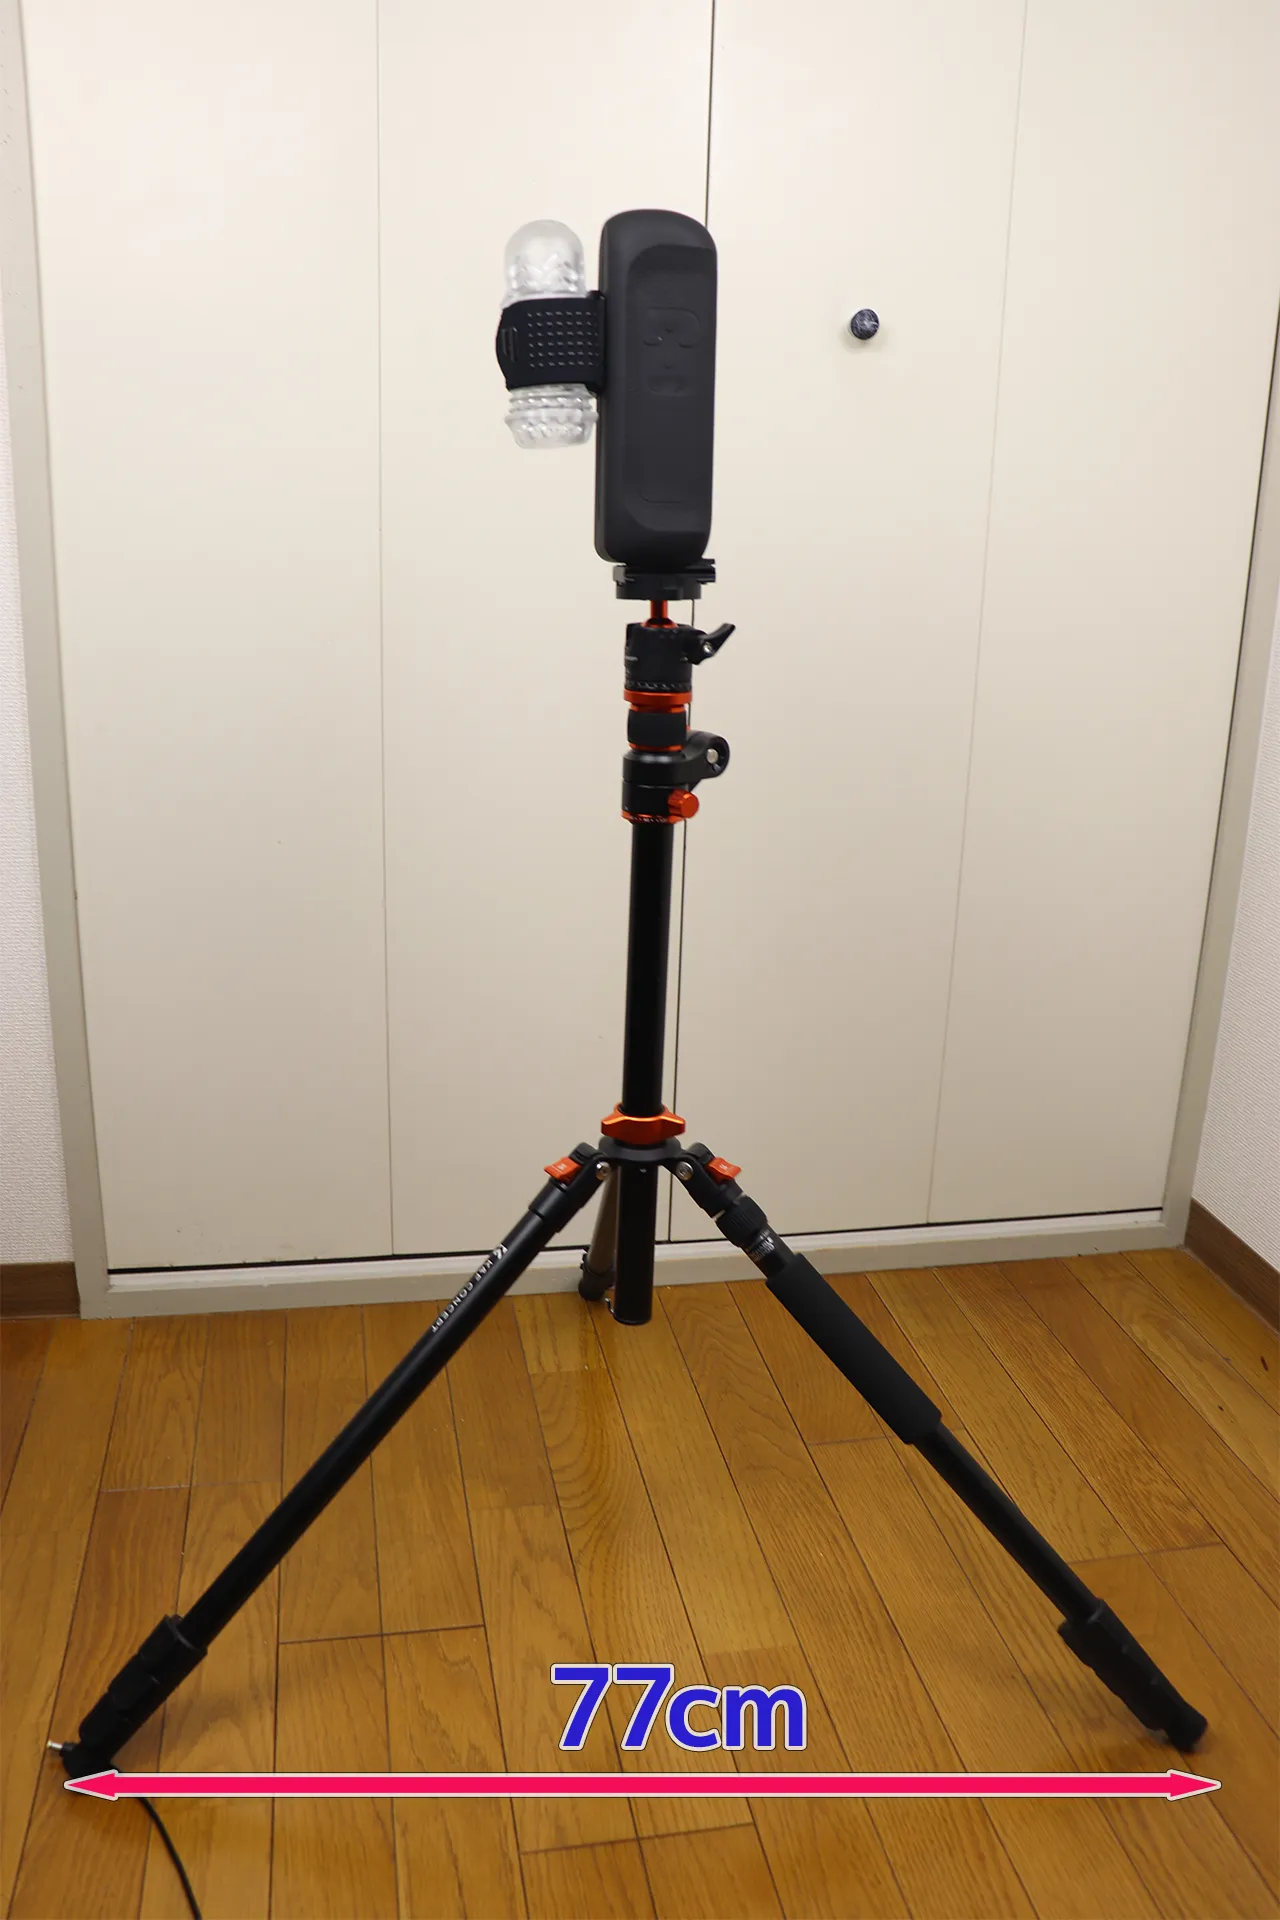
This is mounted on a tripod with an arm. This tripod has three adjustable leg angles, and this is the second angle. While it's extremely stable when extended this far, the downside is that it takes up a lot of space.
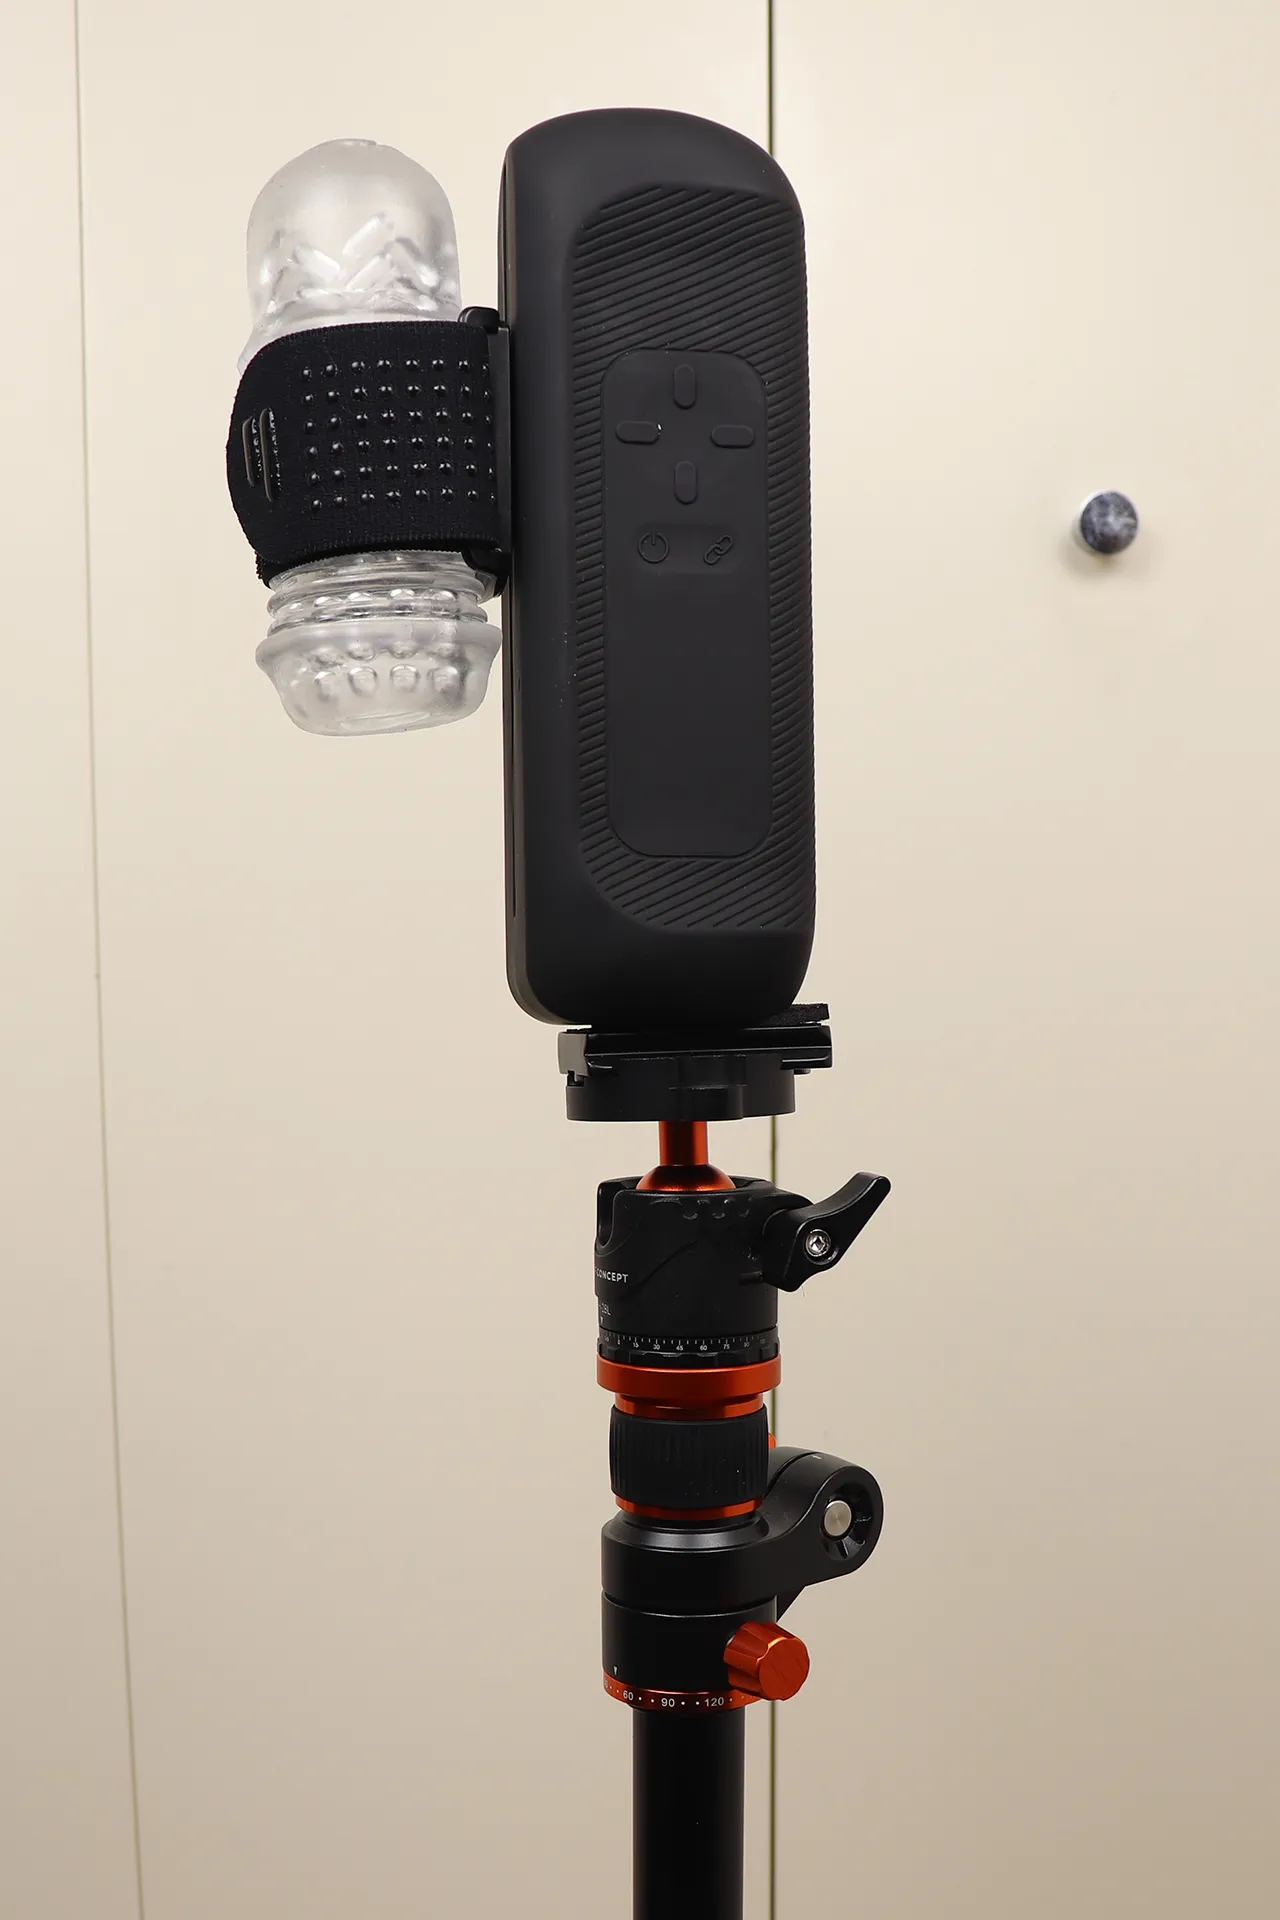
This tripod has a ball head attached to the top, so you don't need to buy one separately.
With their legs spread this wide, they're unlikely to fall over even without weights.
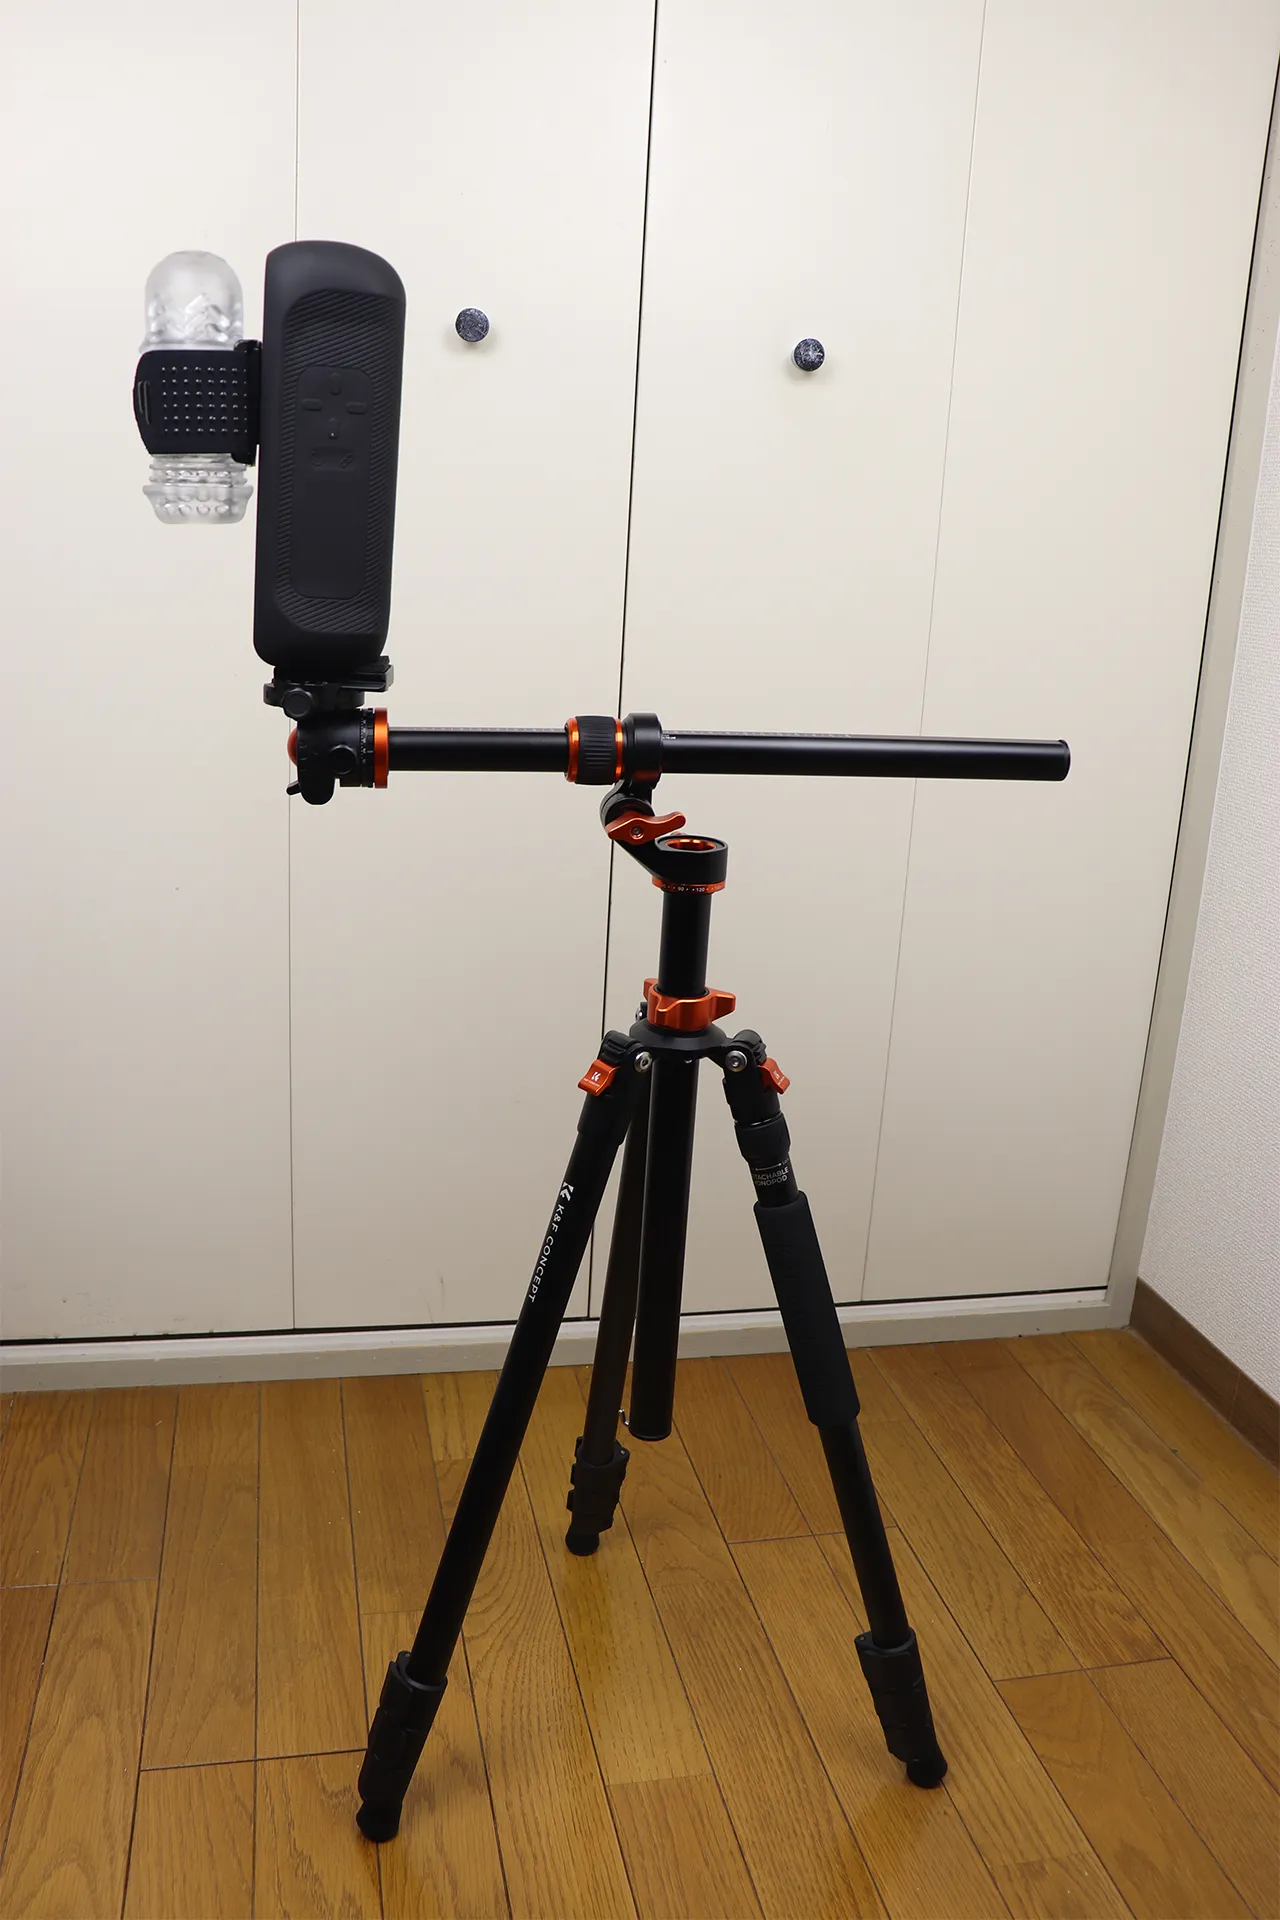
This is the first leg angle. It can be installed in a narrow space, but it lacks stability, so weights need to be added to the legs.
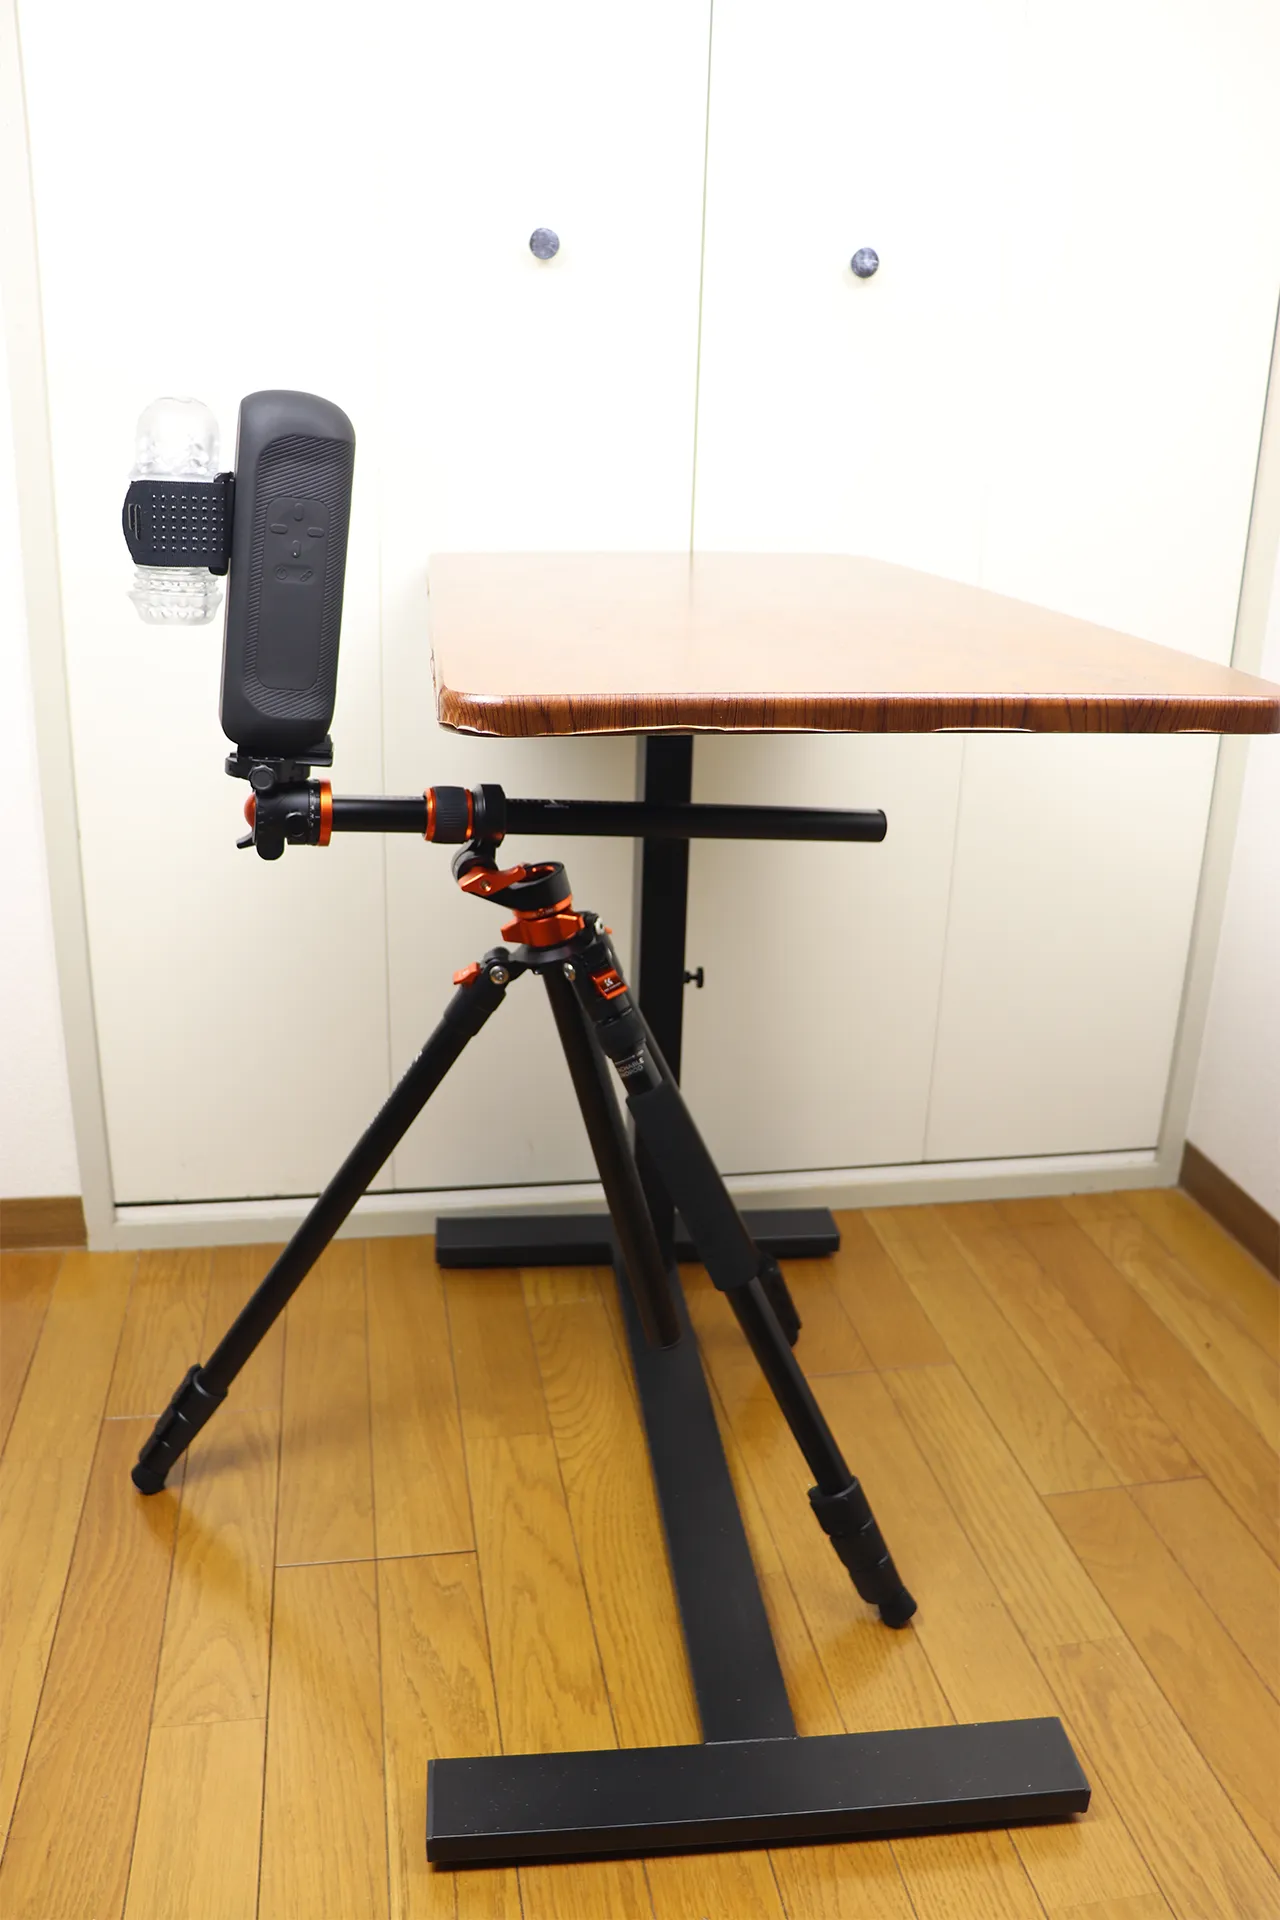
This is an image of it being installed under a desk.
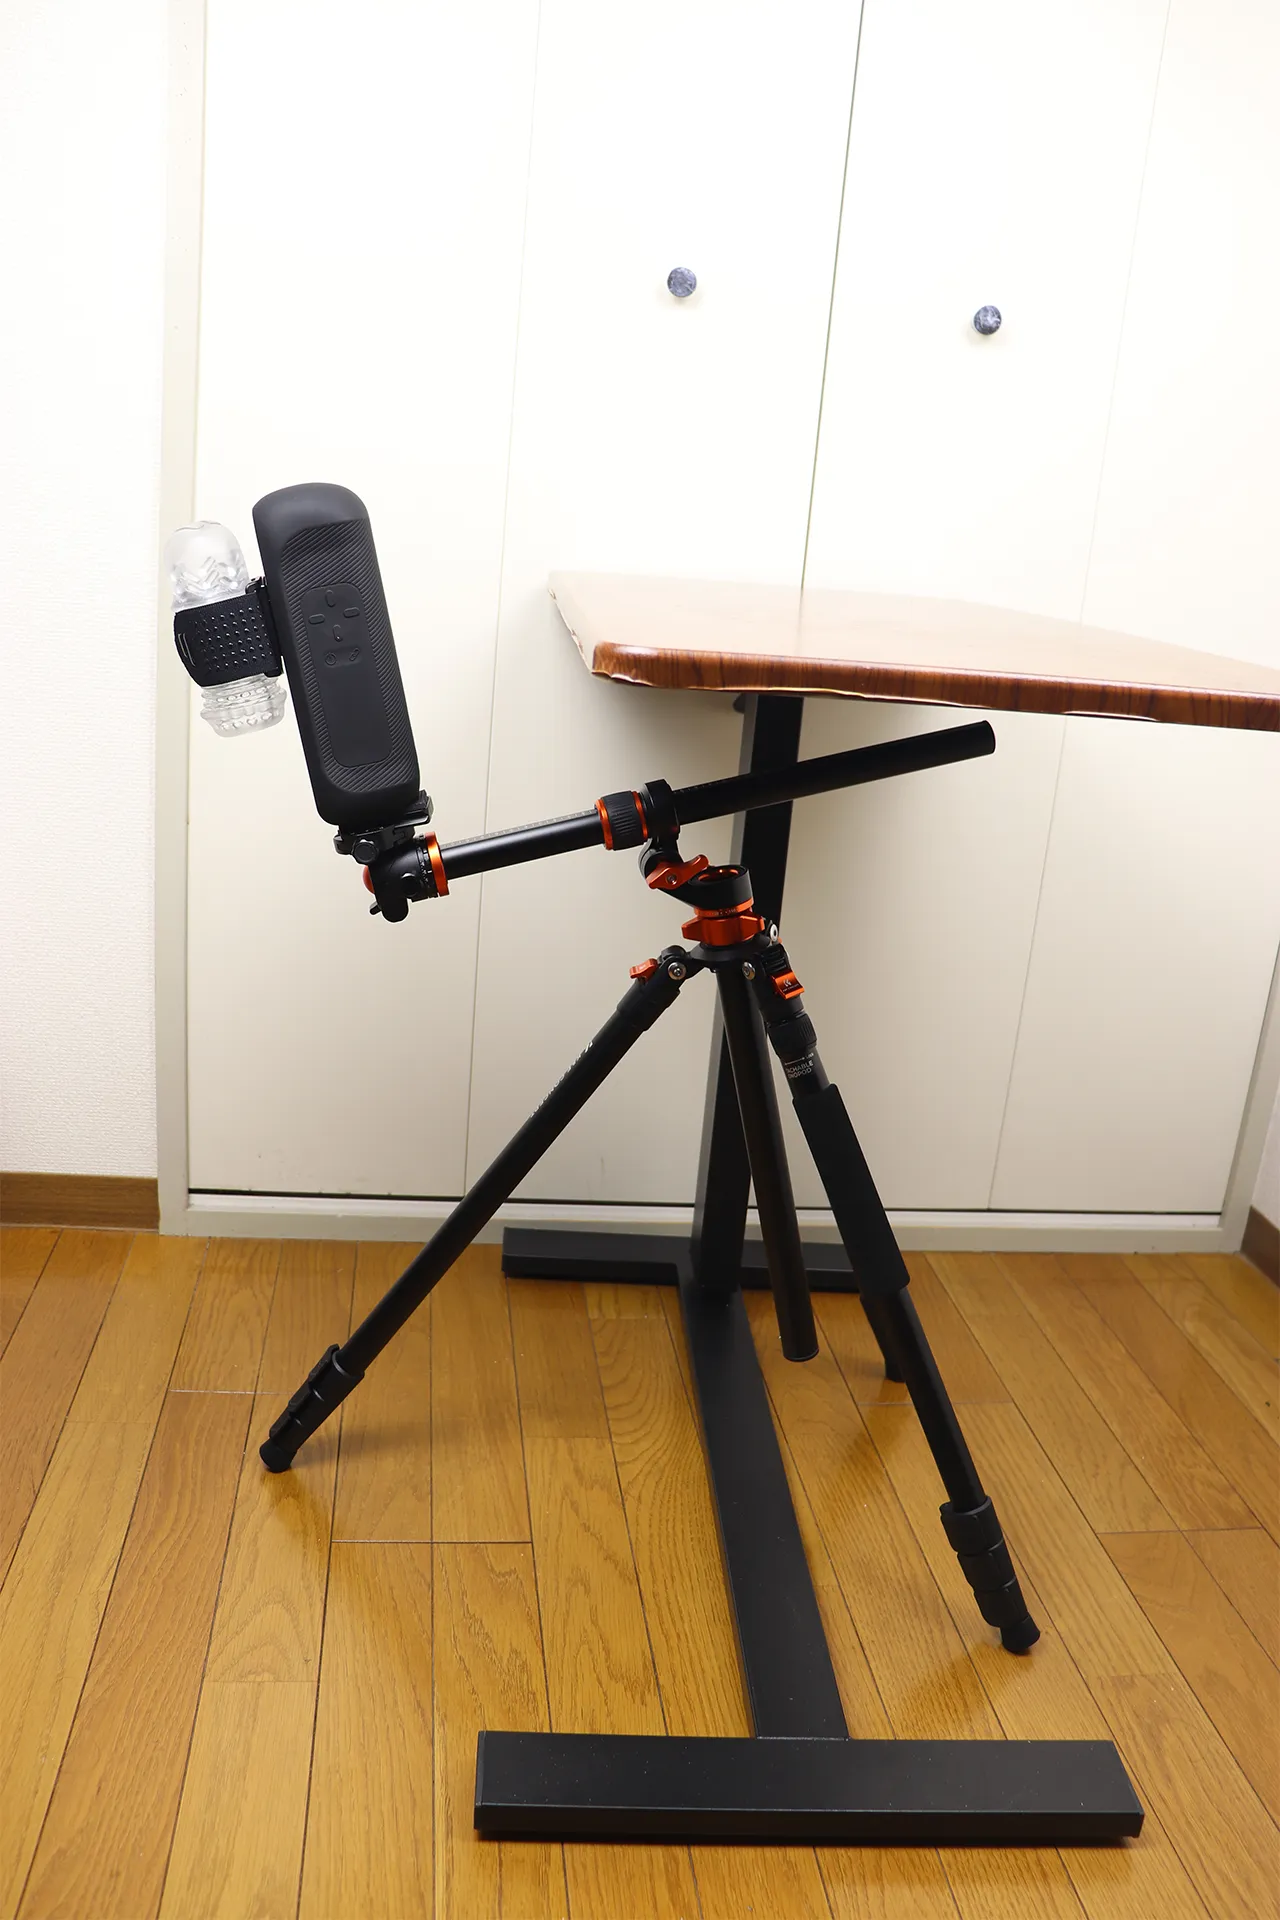
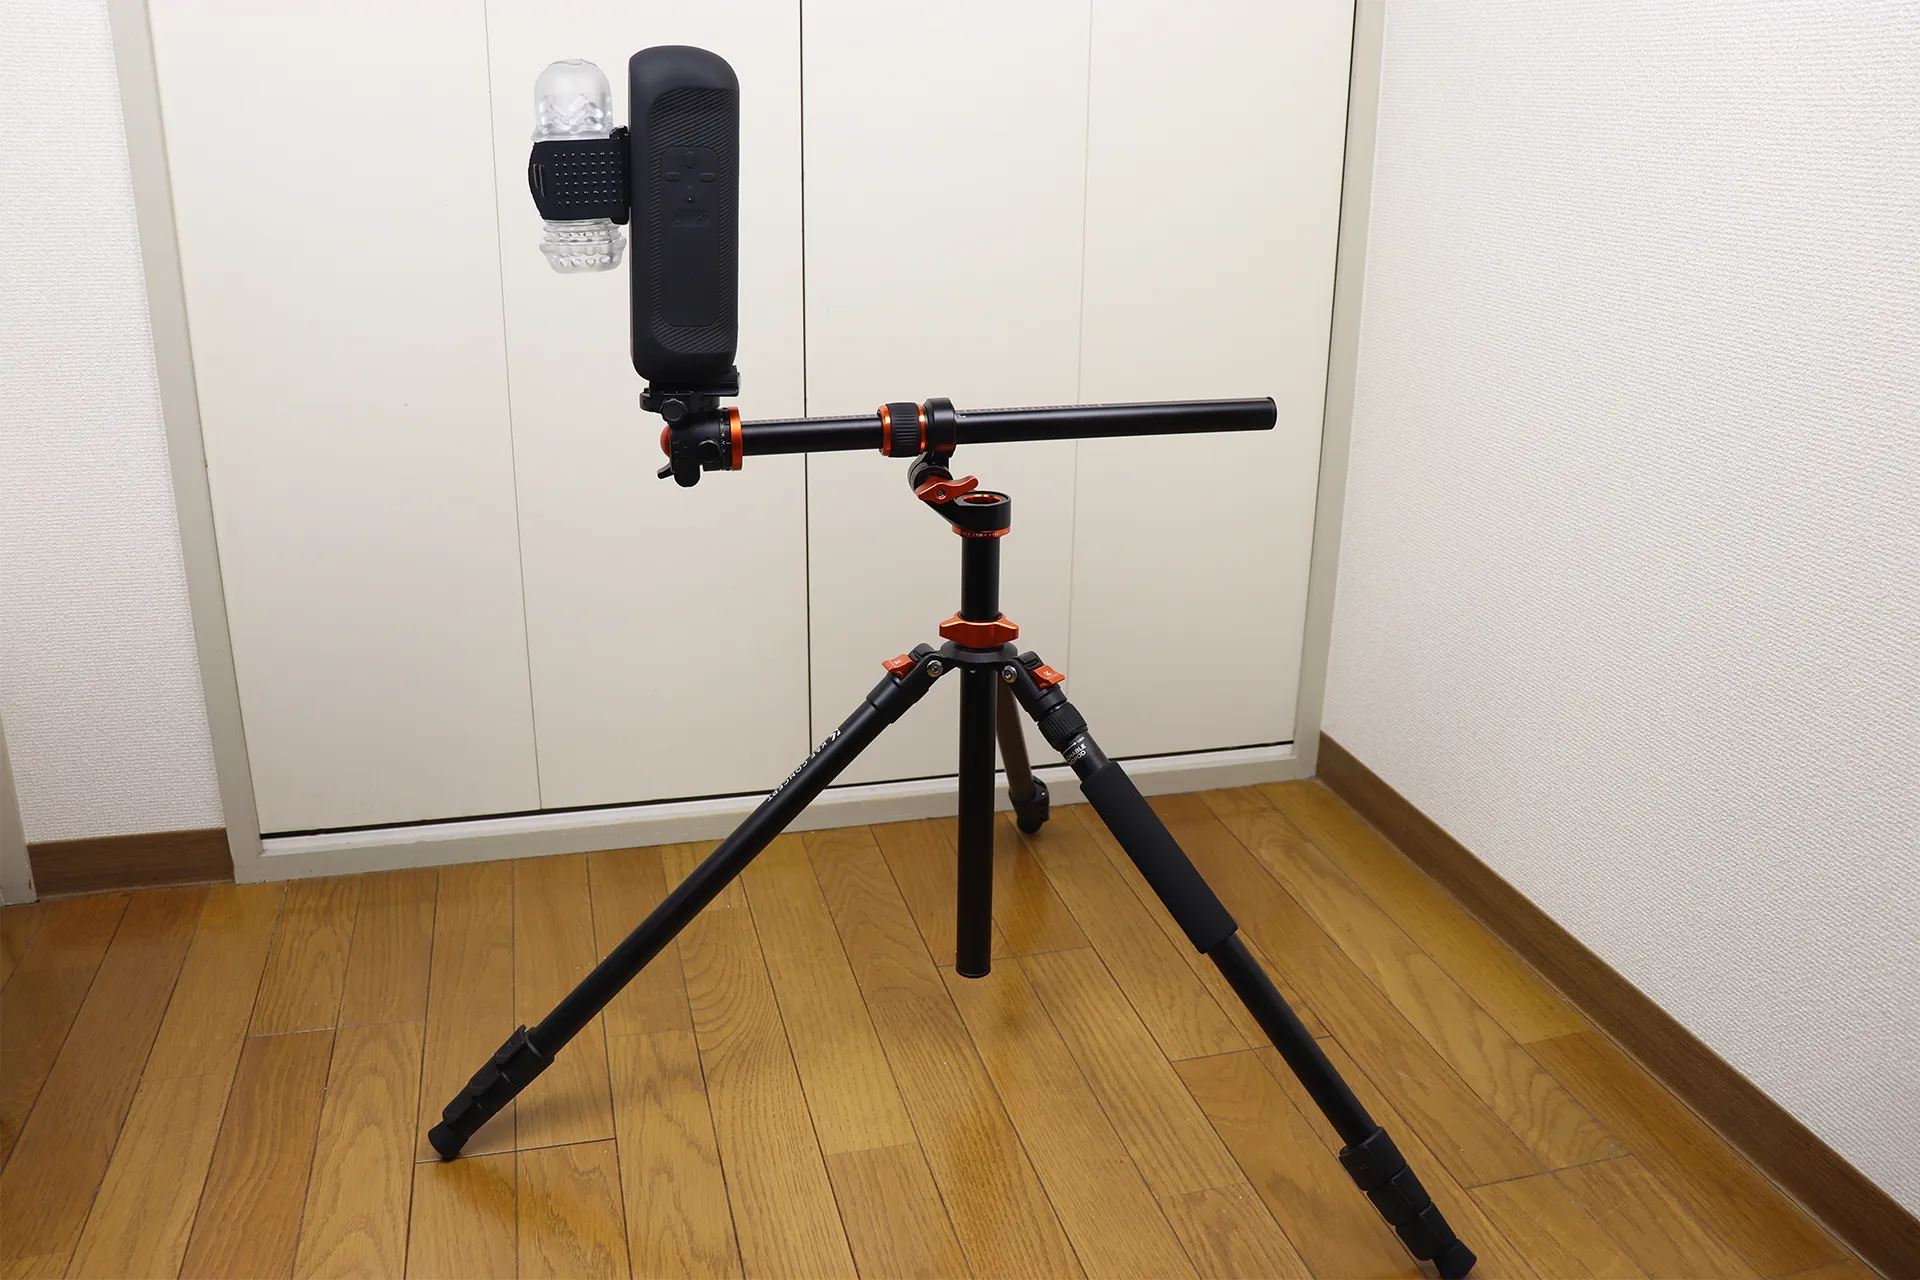
The arm section can be tilted, allowing you to freely adjust the angle, whether leaning backward or backward.
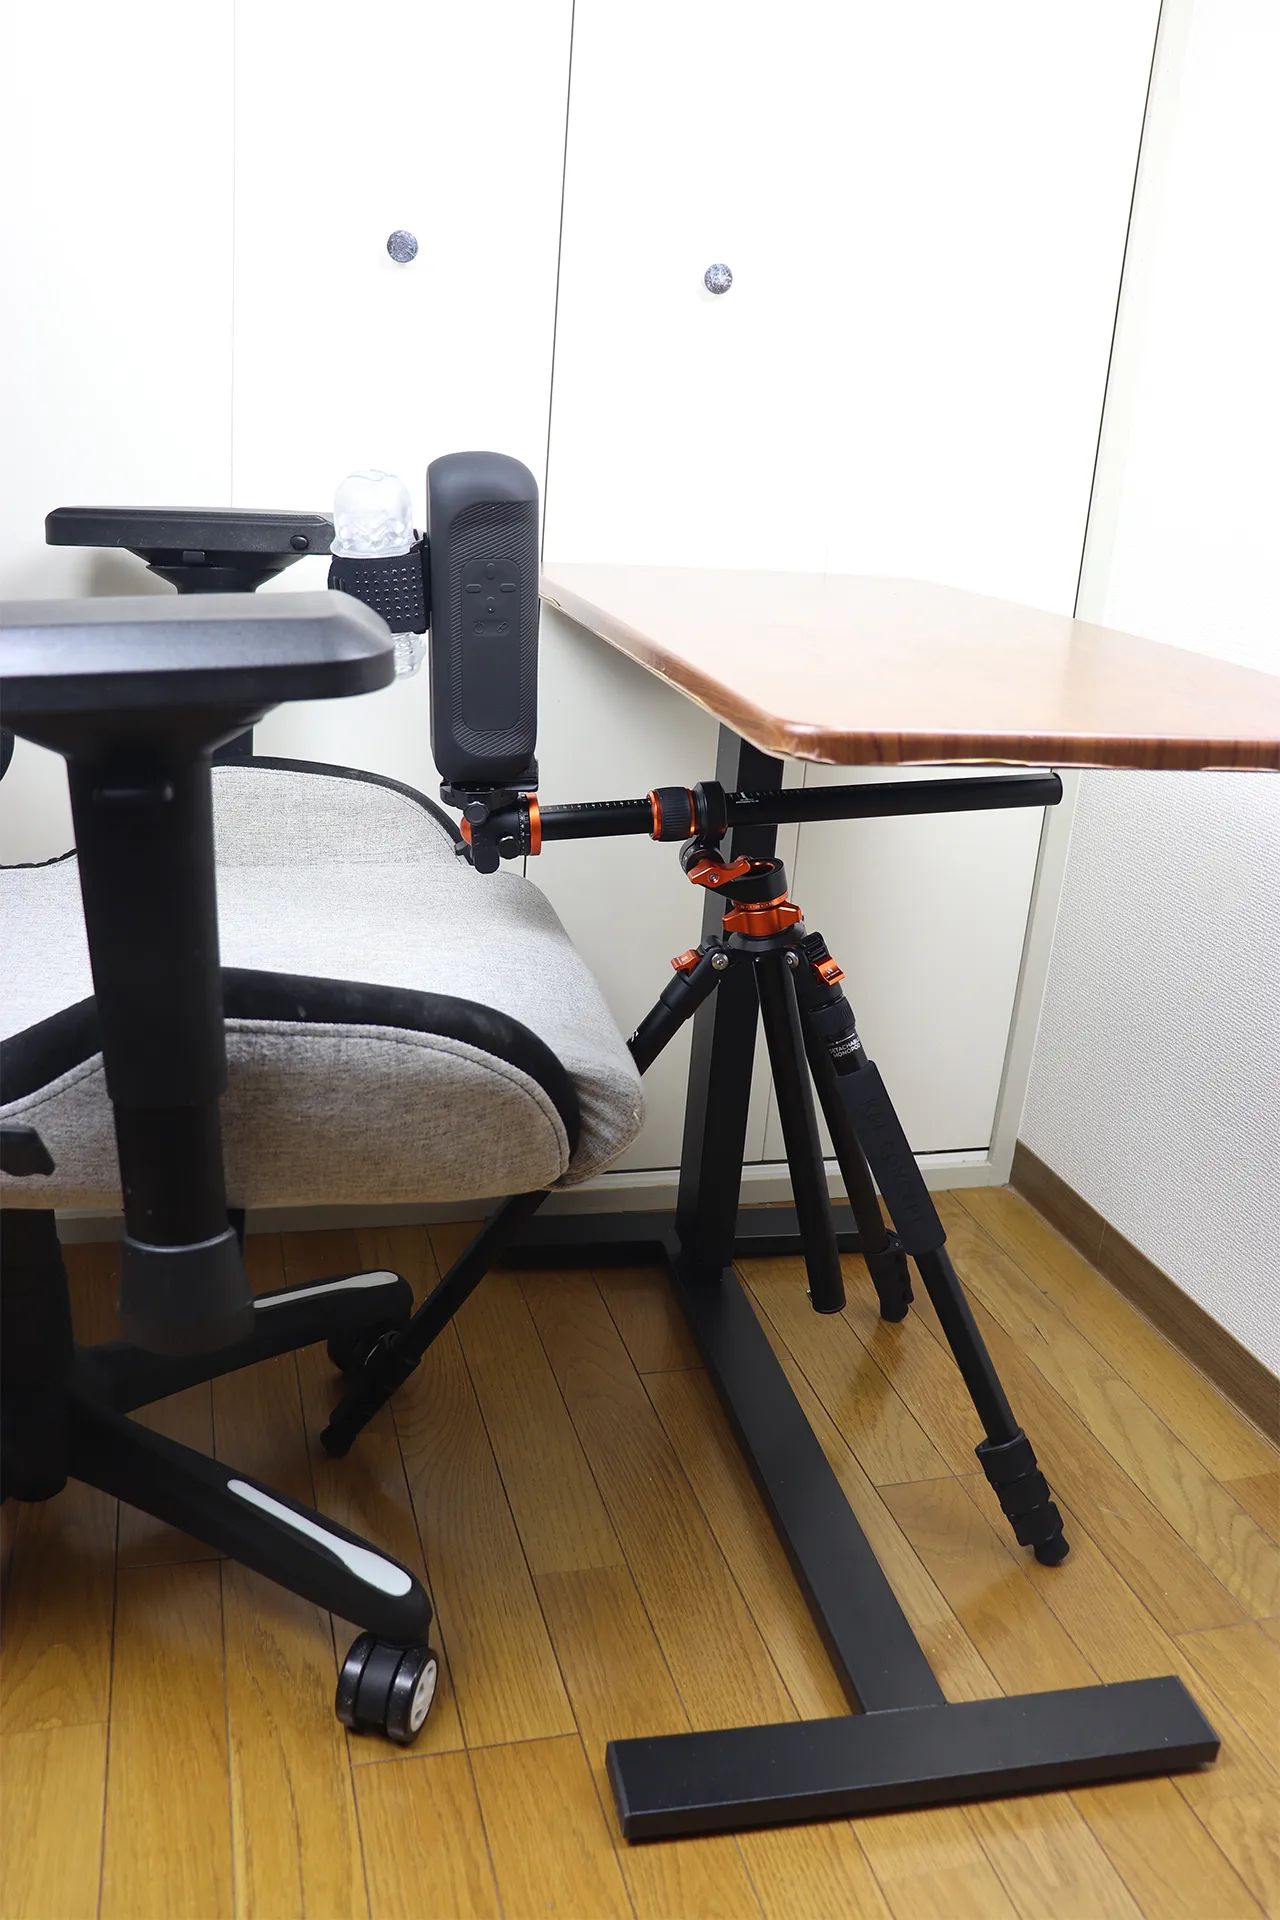
Having an arm allows for front-to-back adjustment, which is very convenient.
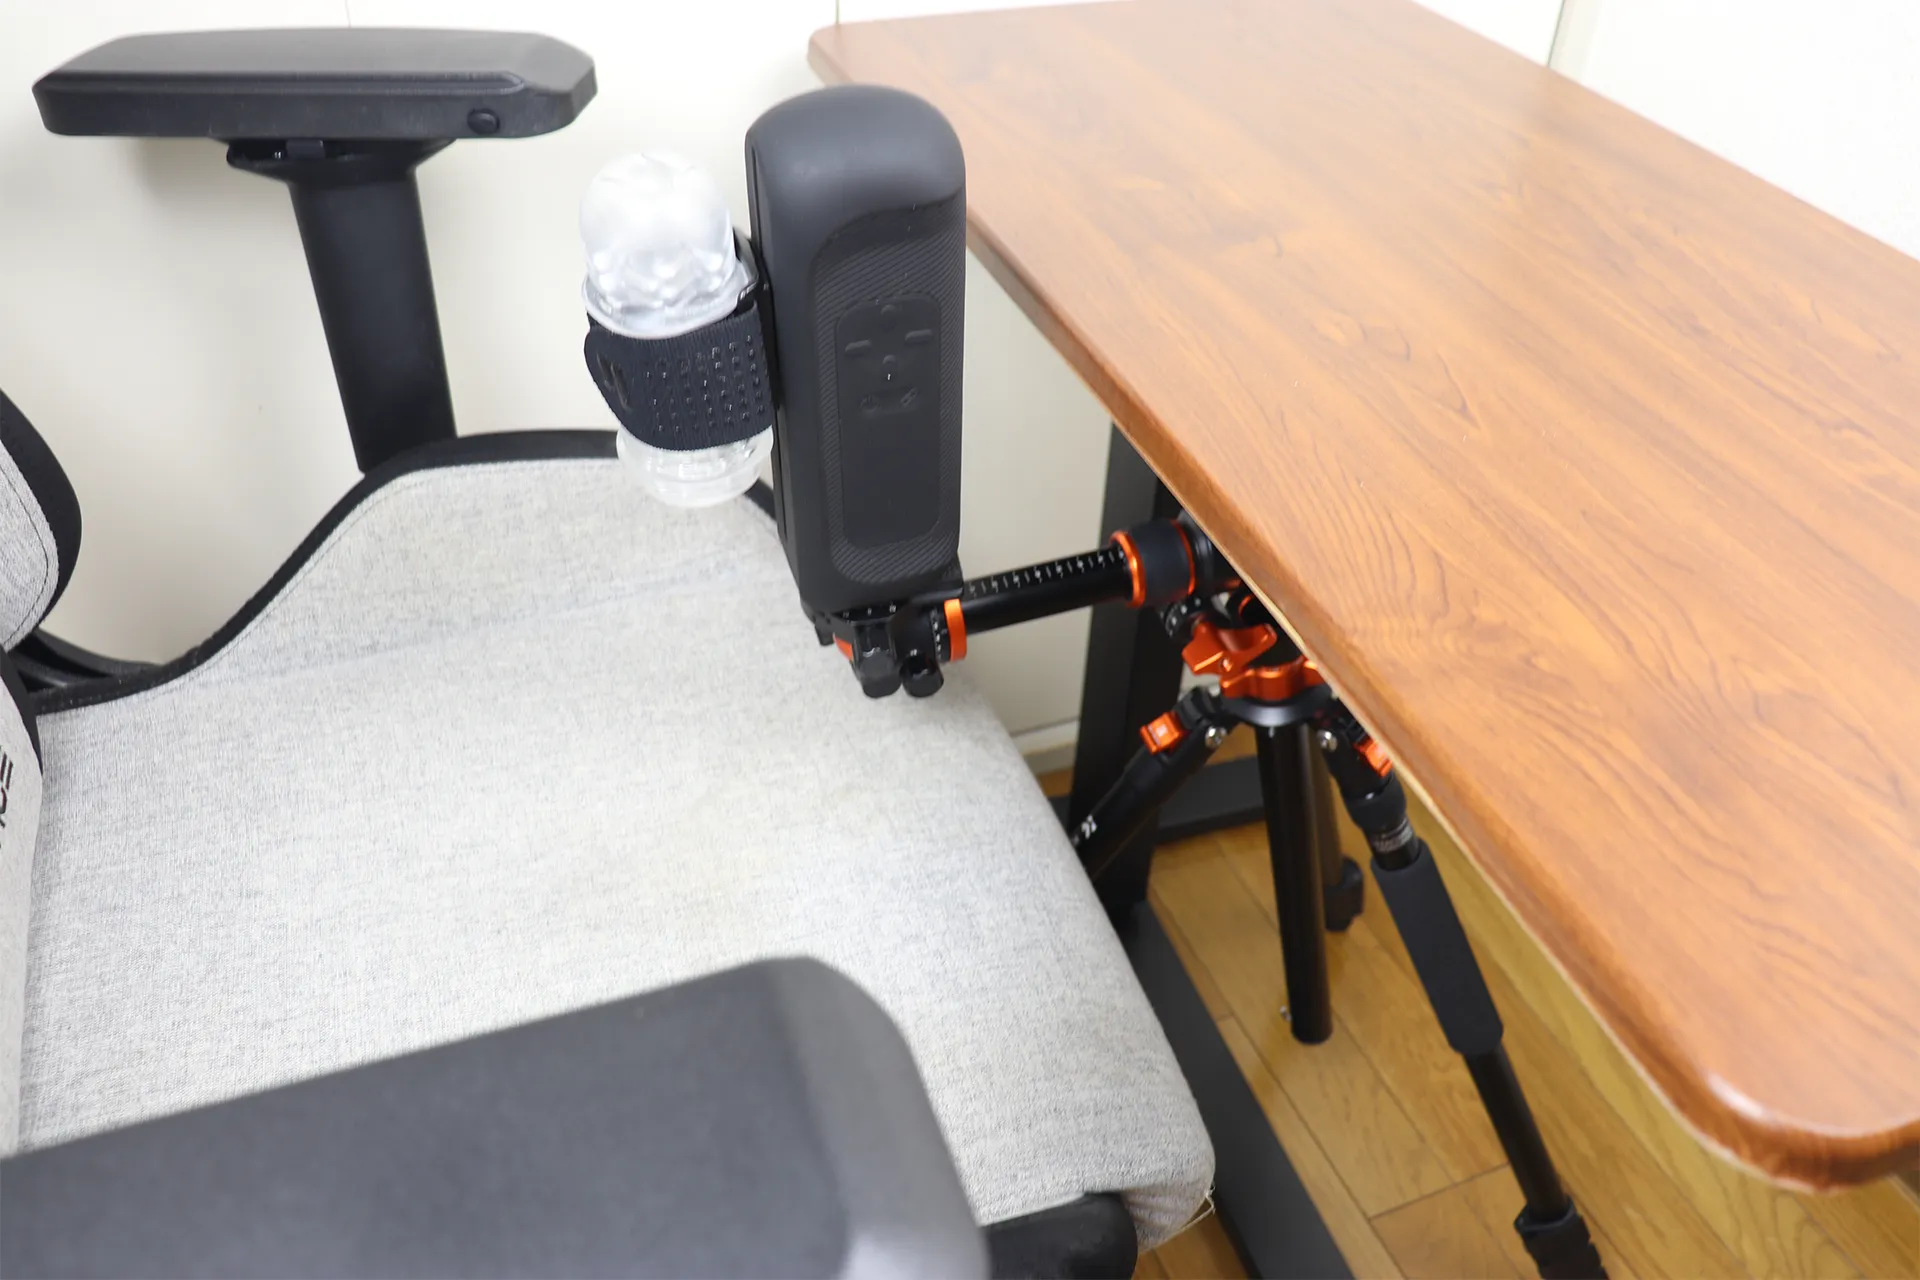
The quick-release plate makes it easy to remove the main unit.
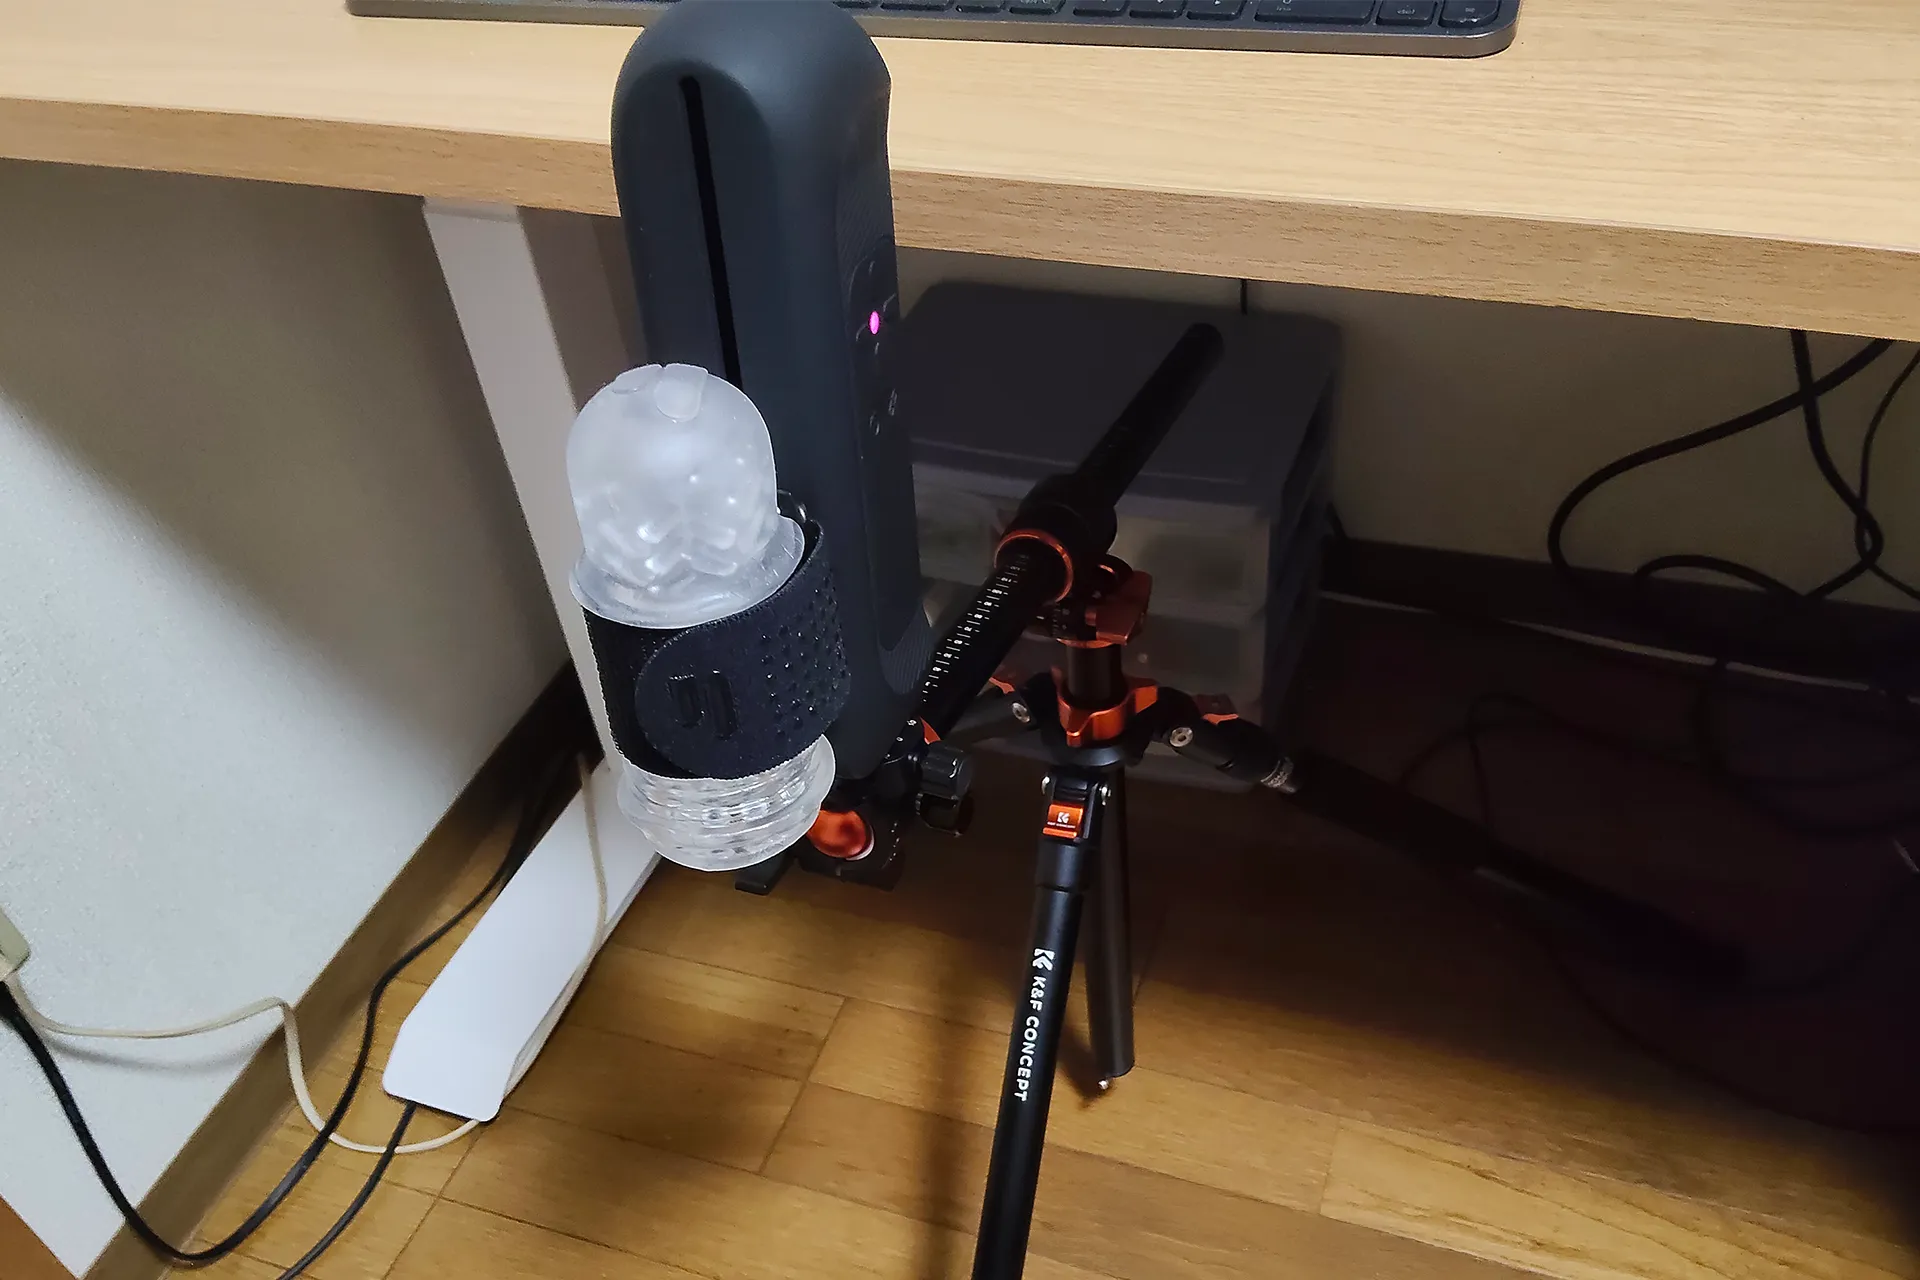
I installed it under my desk. The second angle setting requires quite a bit of space, but I managed to fit it in.
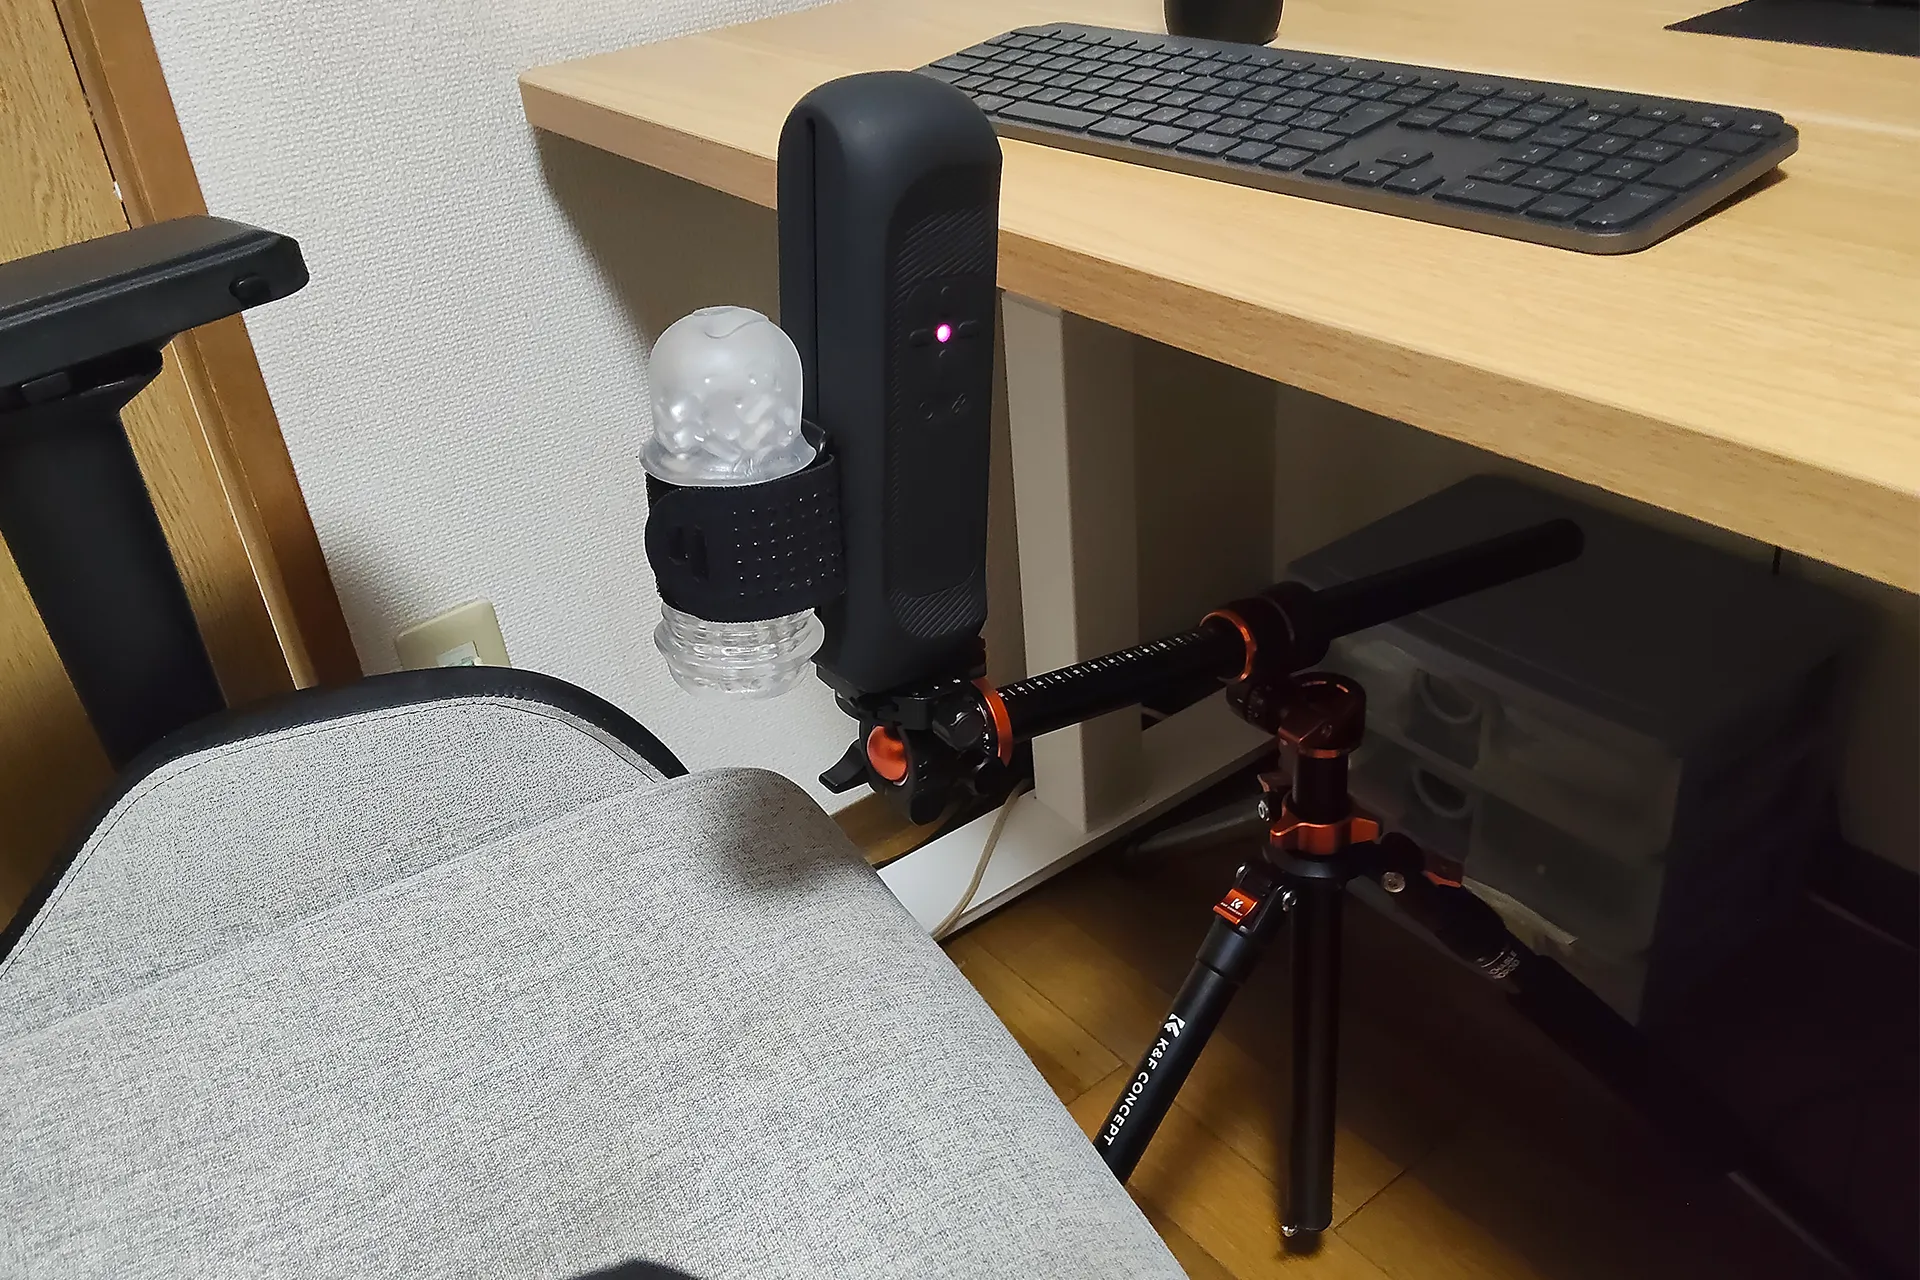
One important point to note is that it only connects to the tripod with a single screw hole, so it's not suitable for mounting the larger male masturbator . Please consider this mounting bracket specifically for the lightweight male masturbator male masturbator the official one. I think this will be more stable than buying the official mounting bracket with a thin arm.
| Product name | K&F CONCEPT 90.55 in (230 cm) tripod |
|---|---|
| retailers | |
| price | 13,000 yen including tax |
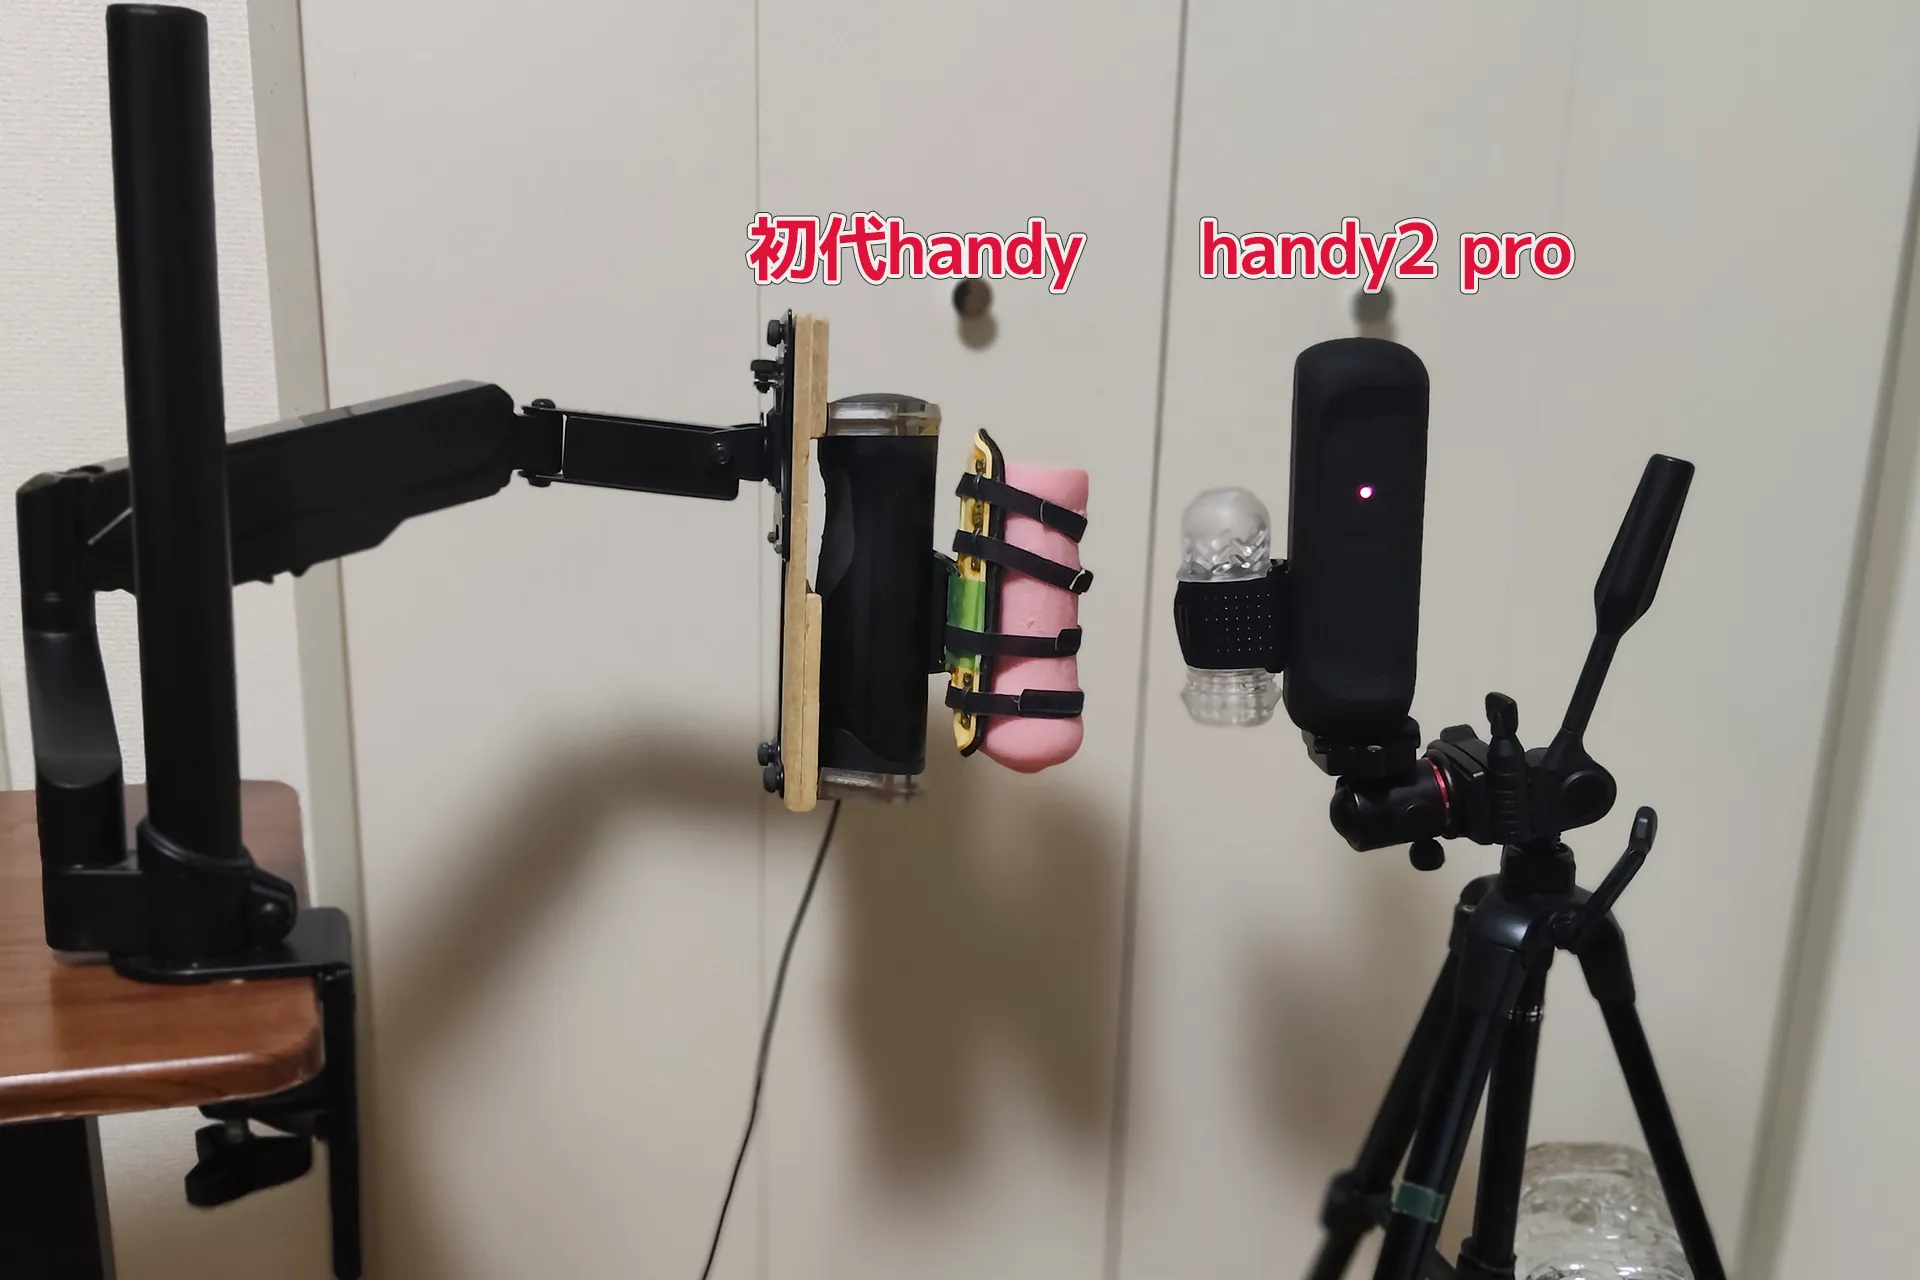
I placed the original handy and the handy2 pro side by side. The pro is slightly larger and heavier.
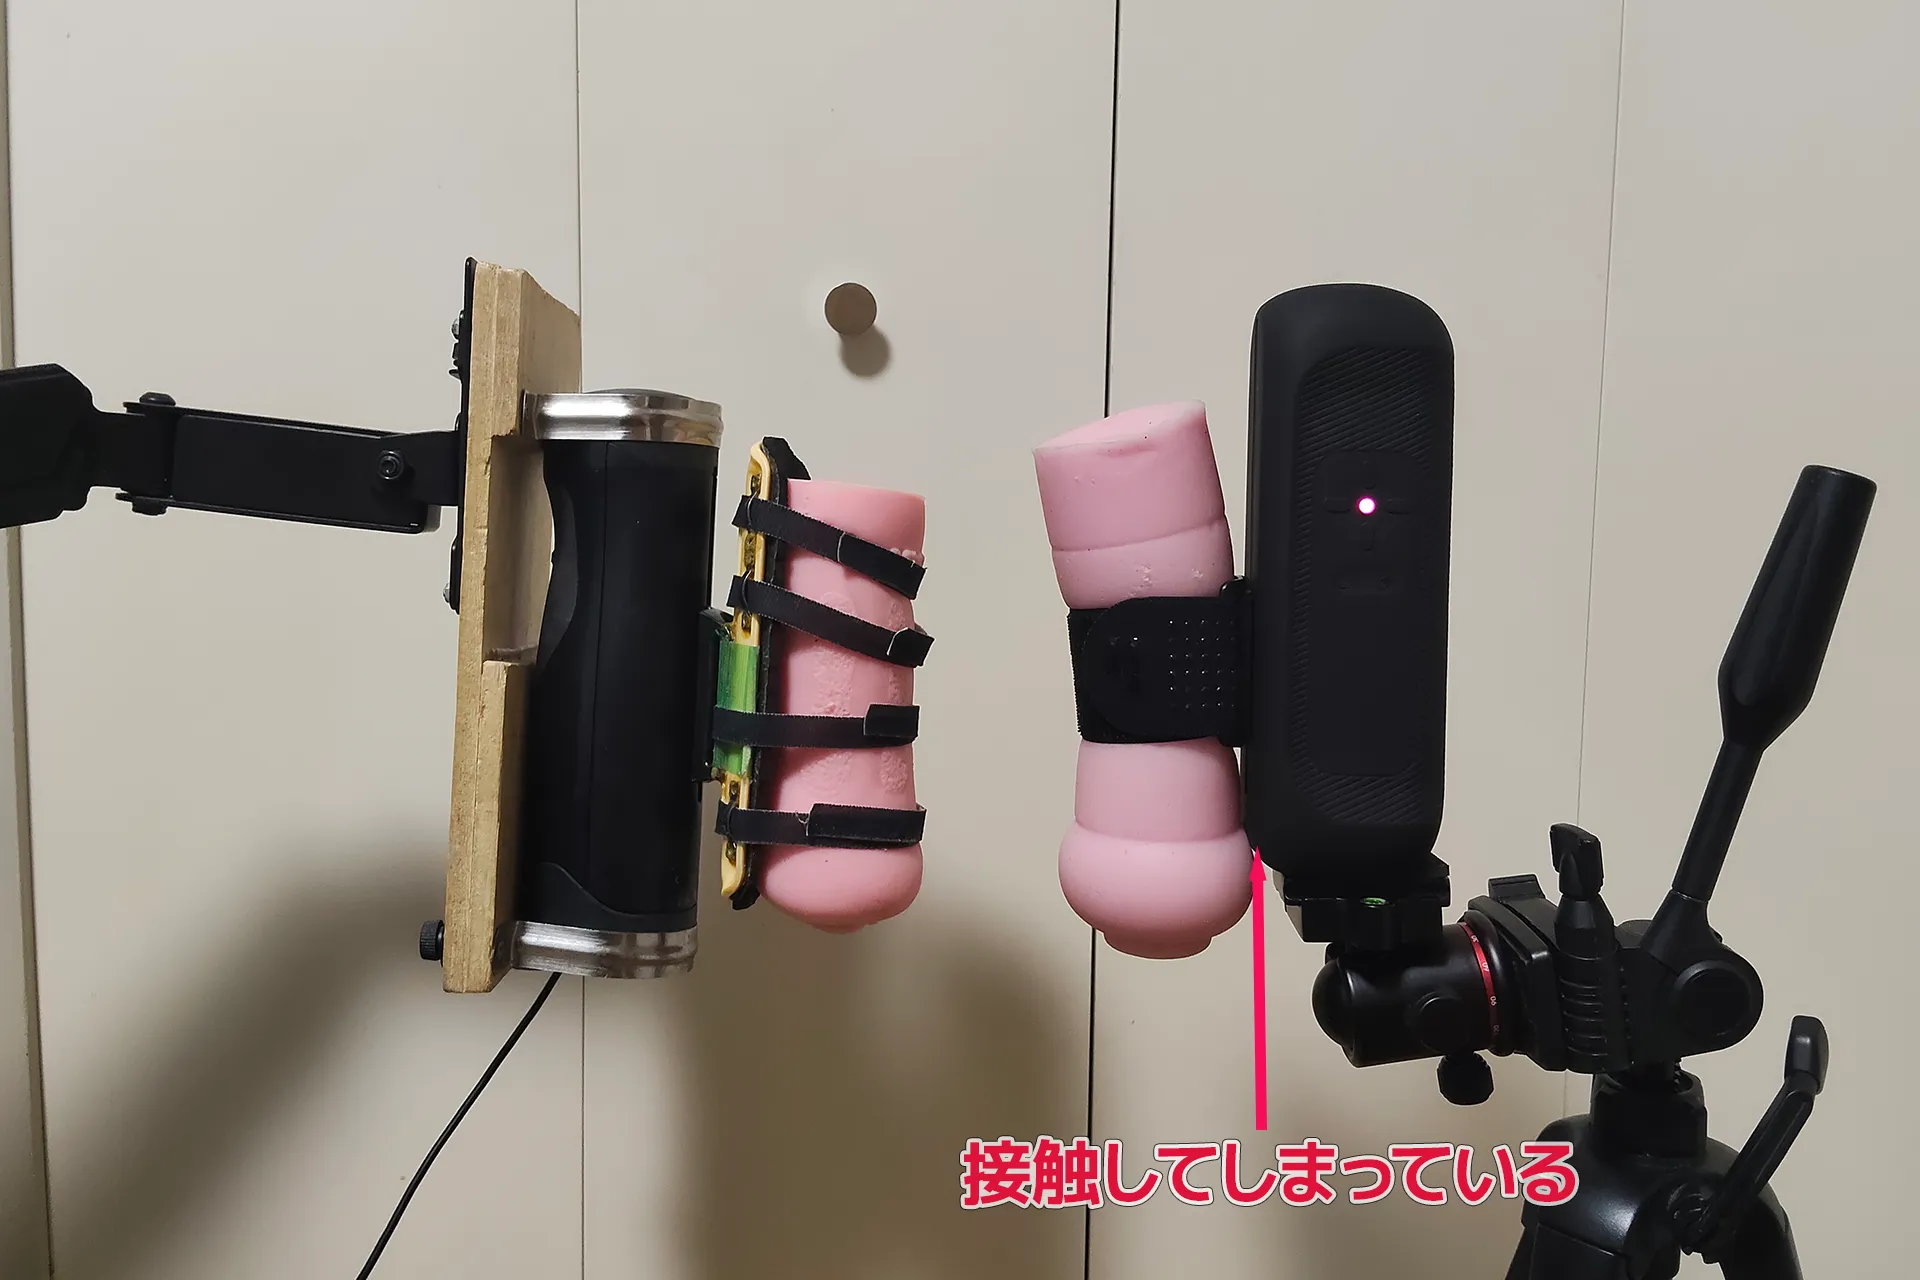
I tried installing the relatively large 7.09 in (18 cm) hopper. male masturbator touches the main unit. It seems that if you want to install the large male masturbator , you need to install a tray like the handy model.
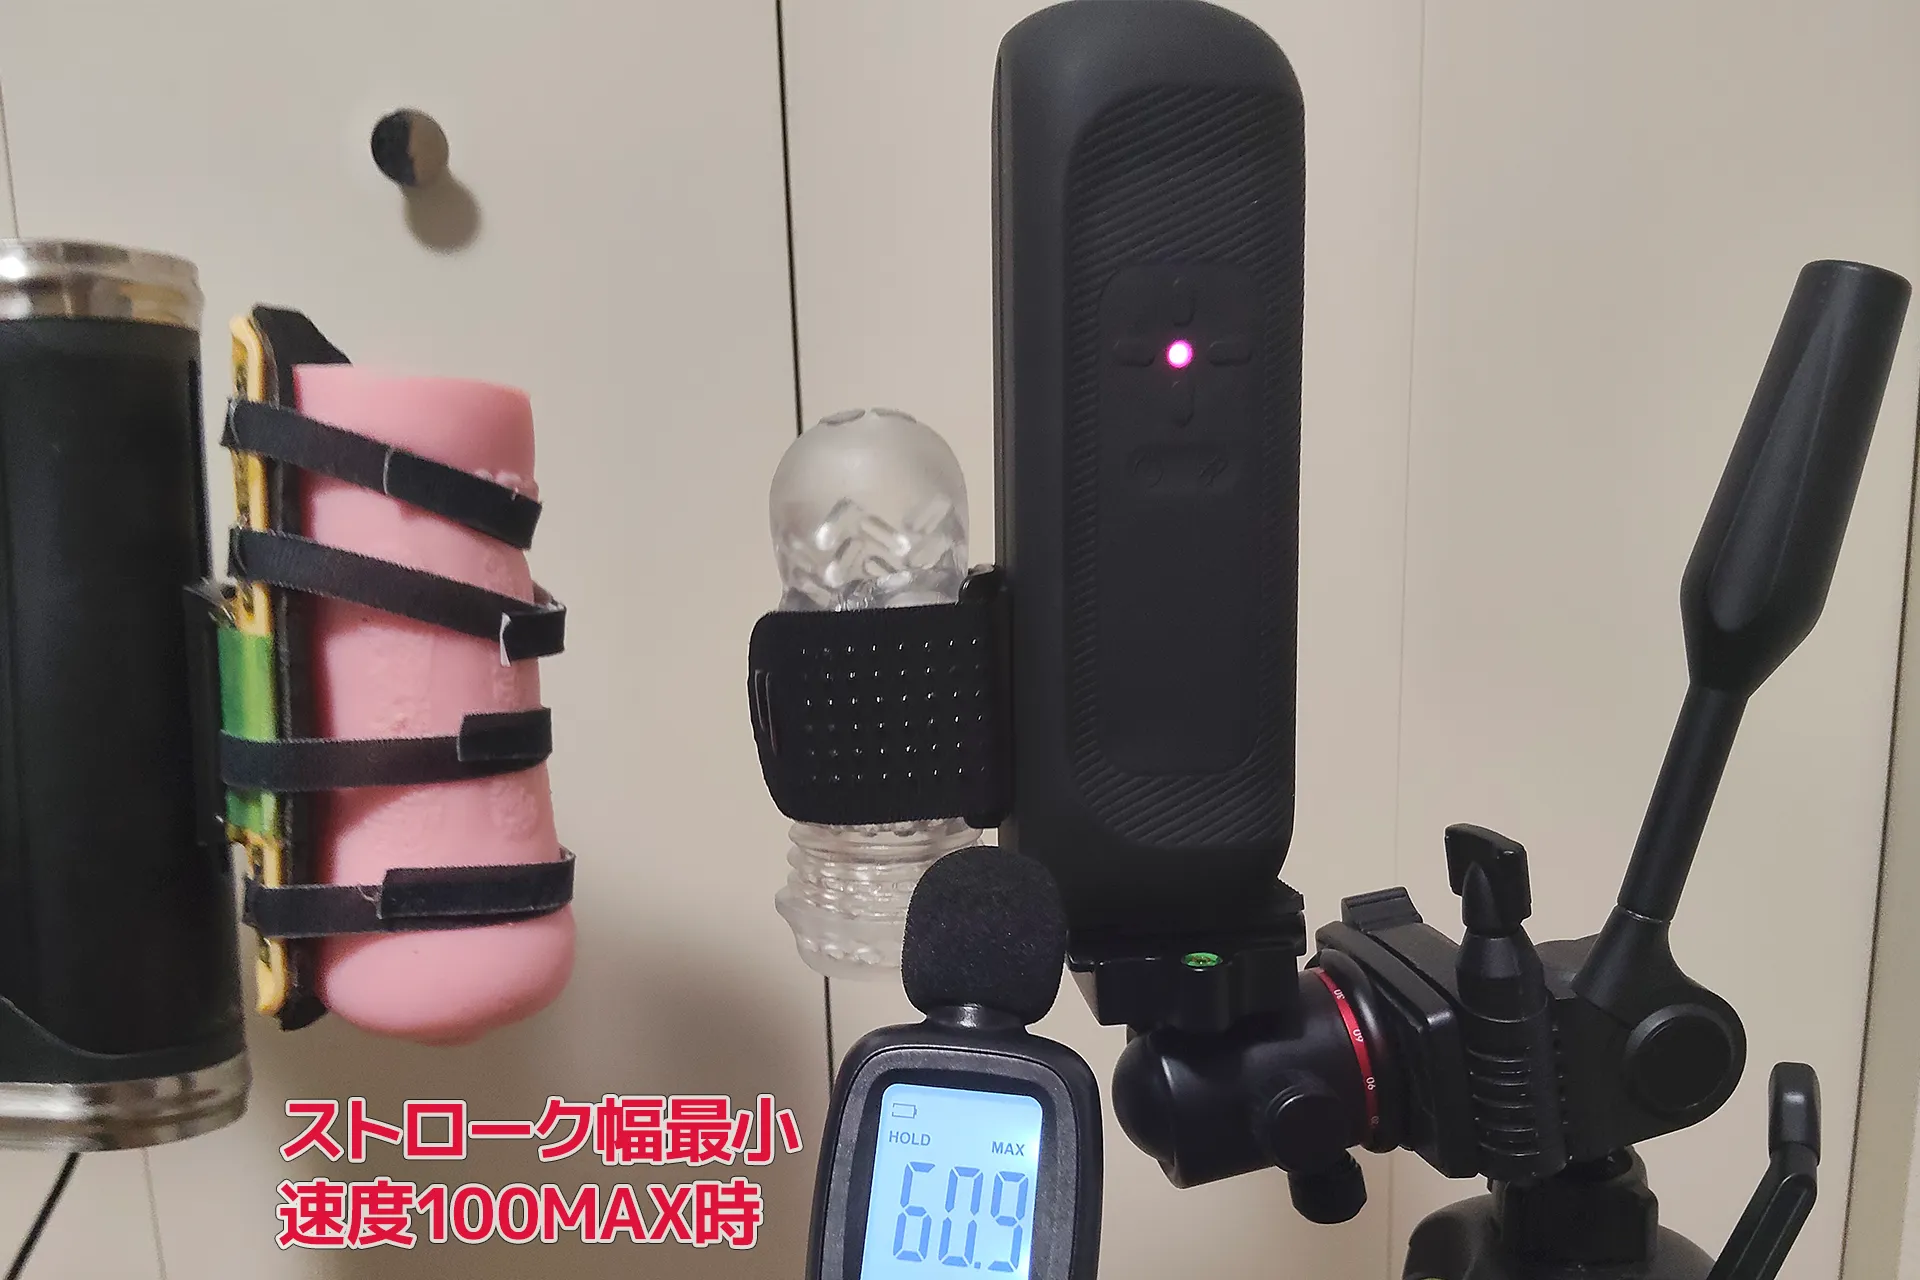
The noise level is significantly quieter than the first generation model. Even at the minimum stroke length and maximum speed of 100, the noise level is only 60.9 dB.
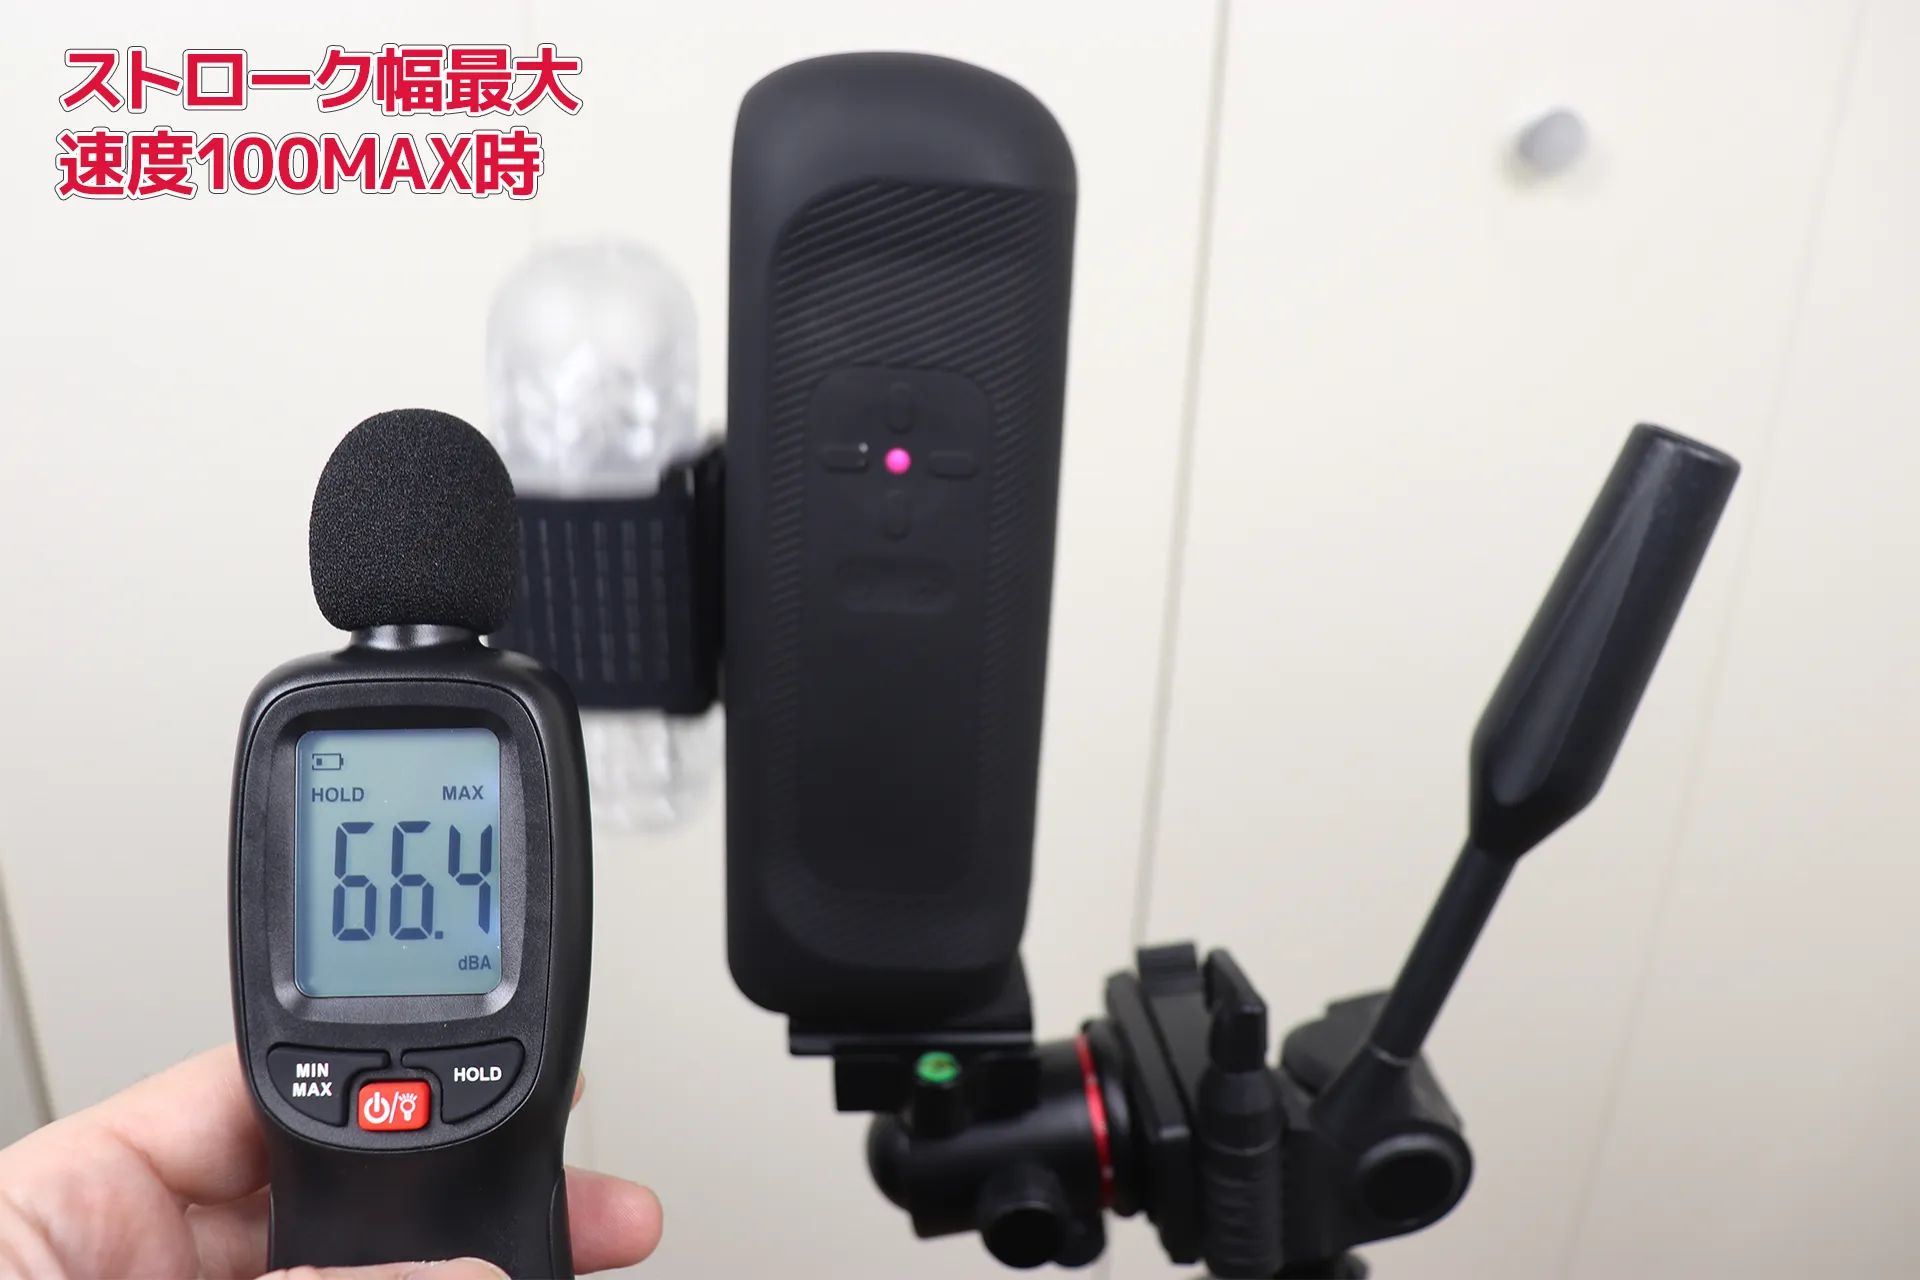
When measured with the maximum stroke length and maximum speed of 100, the result was 66.4 dB. Therefore,The maximum volume is 66.4 dB.is!
| Comparison items | The Handy (First Generation) | The Handy 2 PRO |
|---|---|---|
| weight | 583g | 831g |
| Stroke length | 11cm | 12.5cm |
| Maximum volume | 69.3db | 66.4db |
| Power supply method | Power supply via outlet | Built-in battery |
| price | $169 | STD: $239 PRO : $379 |
✅Sound differences between the original and the handy2 pro
Although the numerical difference in volume is only 6dB, the Pro version feels quieter than the numbers suggest. The original model has deteriorated over time, and I haven't added any gear oil, so I think the current volume is quite different from when I bought it.
I watched a video of the first generation model when it was first released to check the sound, and not only is it quieter, but the sound quality is quite different. The first generation has a clanging sound and a squeaking sound like wires being wound up, but the Pro has a whirring motor sound.
It's difficult to explain in words, but I've included both sounds in the video, so please listen and compare them if you're curious.
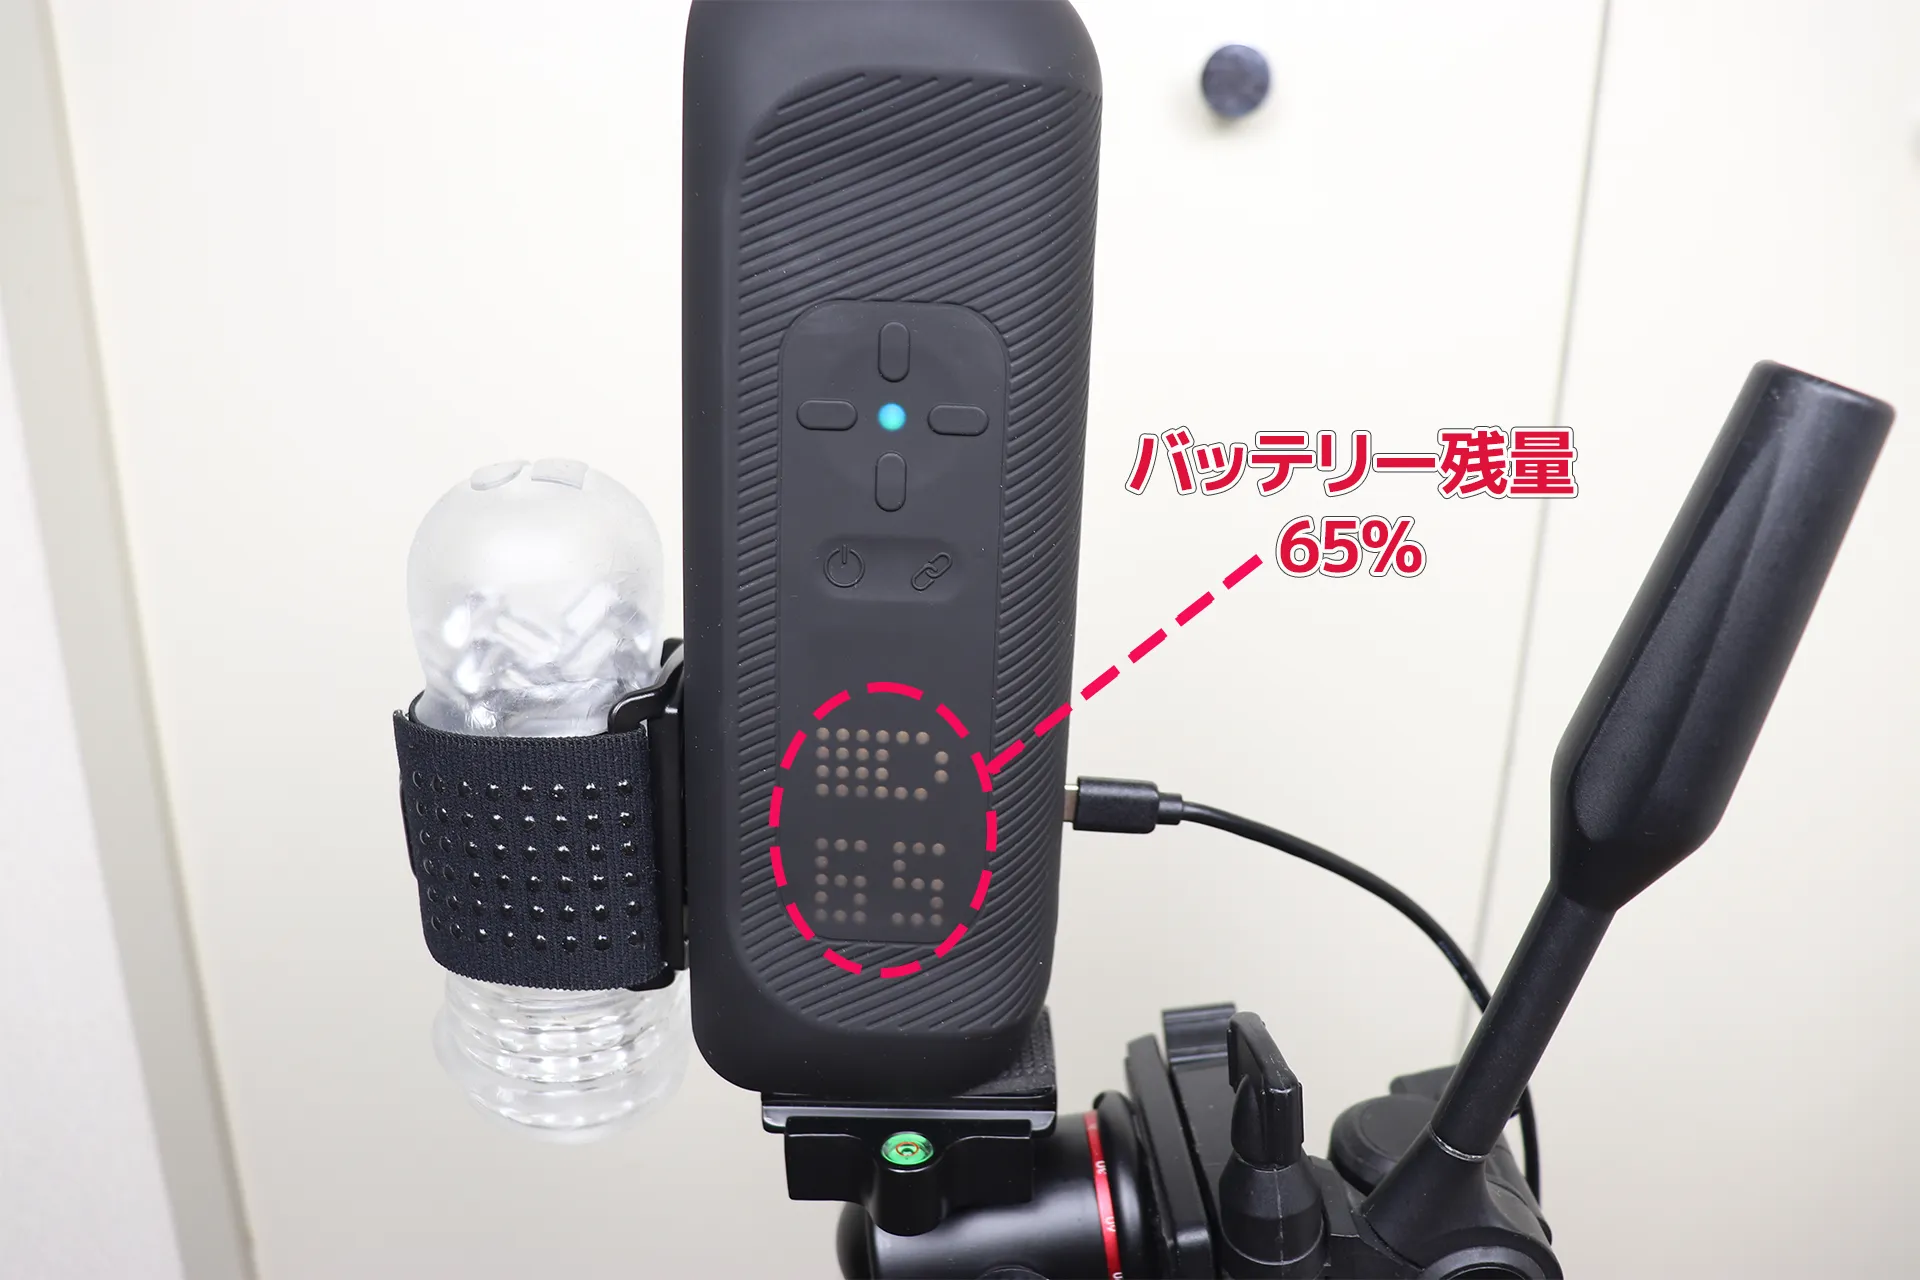
The battery level will be displayed when you plug in the USB cable.
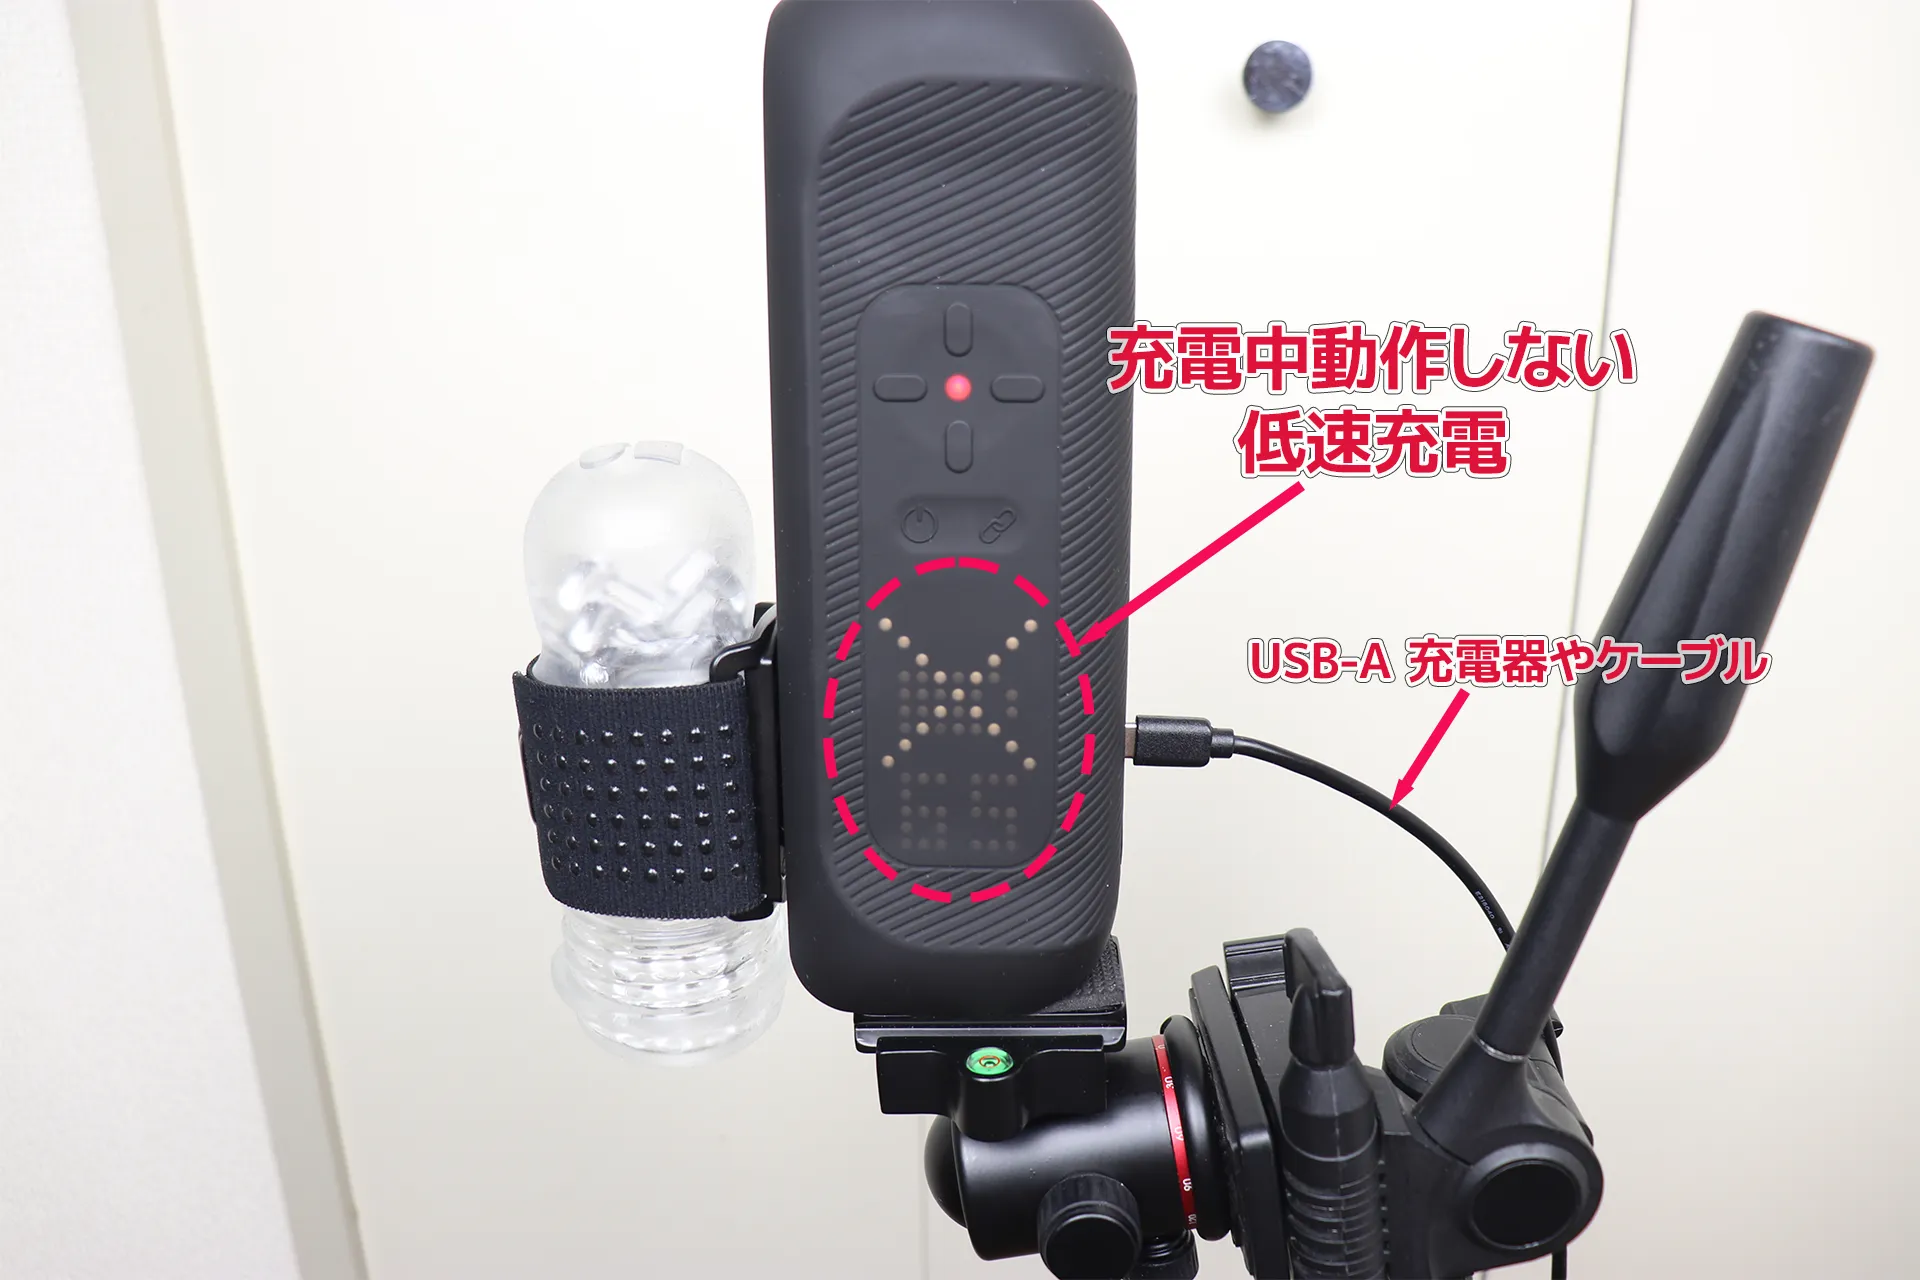
If an "X" mark appears when you plug in the cable, it means that charging will be slow. This "X" doesn't mean that charging is impossible, but rather that you cannot move the device while it is charging.
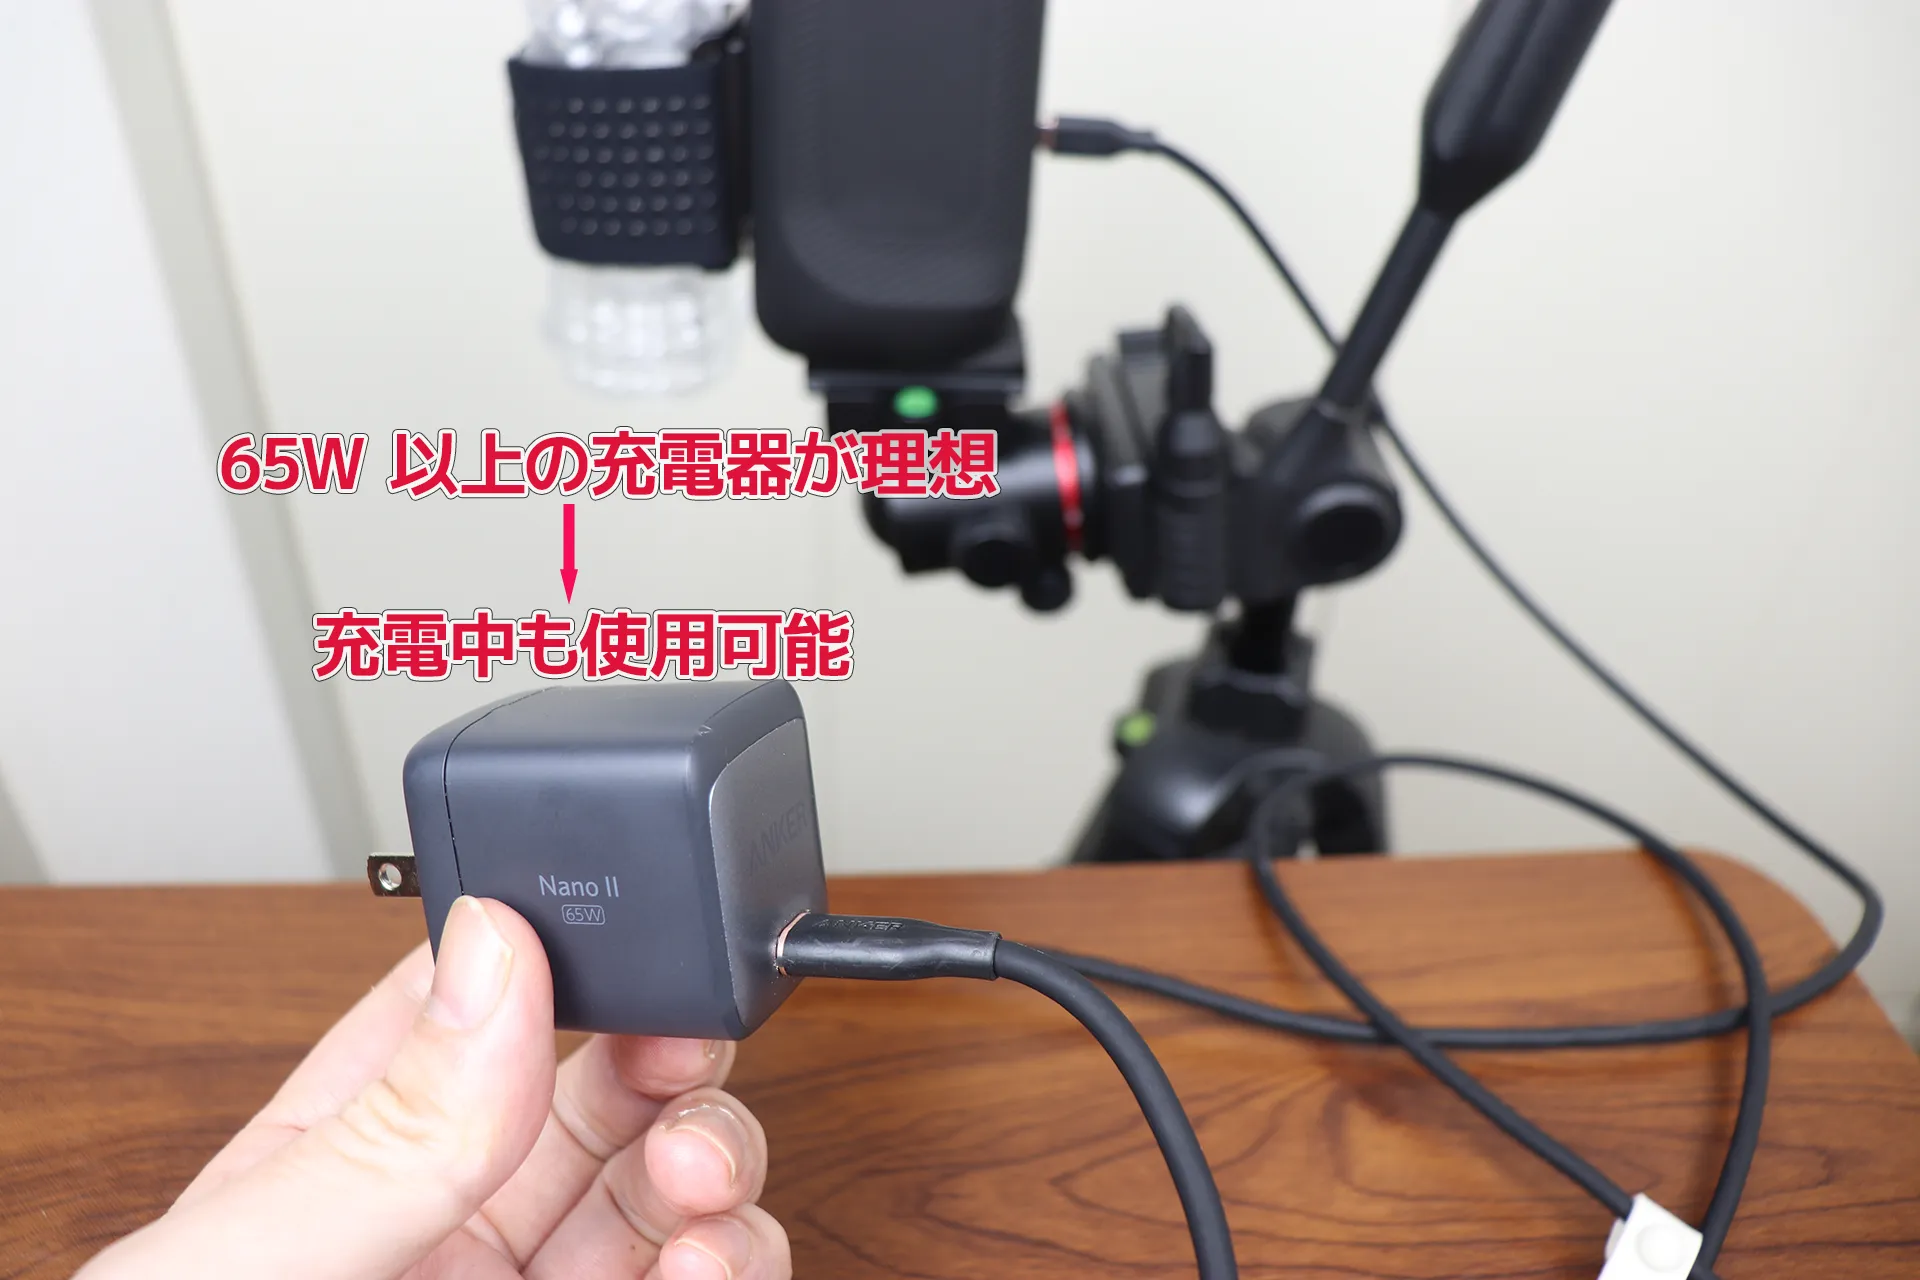
If you have a suitable PD charger (ideally 65W or higher), you can charge it quickly and even use it while it's charging (no "X" indicator will appear). With slow charging, it can take up to 20 hours to fully charge, so I think a charger is essential for stress-free use.
| Types of chargers | Example Output | Charging time | Using while | remarks |
|---|---|---|---|---|
| Old 5V charger (USB-A, etc.) |
5V / 0.5A (2.5W) |
18-20 hours | Not possible (Motor stops) |
An error message appears. |
| Suitable PD charger (20V) |
20V / 1.4A (28W) |
1.5-2 hours | Possible (Full power) |
Recommended |
| At maximum load (Use + Charging) |
Max 60W | - | Possible | 65W or more is ideal. |
✅5 points to check before purchasing
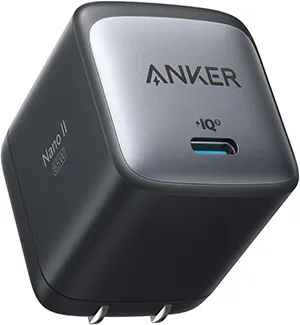
Currently in use by the administrator (operation confirmed).
| Product name | Anker Nano II 65W |
|---|---|
| retailers | |
| price | 4,490 yen (tax included) |
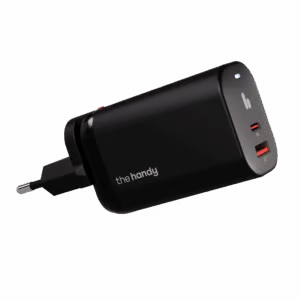
Official PD charger
| Product name | The Fast Charger |
|---|---|
| retailers |
|
| price | $19 |
The long-awaited time to try out the handy2 has finally arrived. The handy2 comes in a standard and a pro version, and this review will focus on the pro version. As the name suggests, the packaging is very luxurious. It comes in a magnetic box, giving it a high-end feel that you wouldn't expect from an adult toy.
Unlike the first generation model, the body has a plasticky feel; it's made of soft, rubbery silicone with a stealth black finish. It feels substantial and heavy in the hand, noticeably heavier than the original.
The included male masturbator is transparent, 5.12 in (13 cm) long, and lightweight at 0.28 lb (128 g), but it's slightly longer than male masturbator that came with the original model. The inside has a typical bumpy surface, and to be honest, I don't have high expectations for it.
I immediately applied lotion to the inside and began insertion. I secured the device to a tripod and applied lotion to my penis as well. After watching some erotic videos to get a firm erection, I started moving it around with the head of my penis slightly inside male masturbator .
The included male masturbator has a wide inner diameter, allowing the penis to slide in very smoothly. Start with short, slow strokes to ensure safe movement, then gradually increase the speed and stroke length.
The first thing that surprises you when you try it out is how quiet it is. The first generation made a loud clunking noise when winding up the wire and when it hit the start and end points, but with the second generation, it's not noticeable at all. This is assuming it's brand new, unmodified, and comes with the included male masturbator , but I definitely feel that it's quieter than the first generation.
The included male masturbator provides a moderate amount of stimulation from the bumps, but it's not painful. Because it's transparent, you can clearly see your penis, and despite being thin, it feels better than I expected. male masturbator is lightweight, so it feels stable even at high speeds, making it safe and comfortable to use.
When you increase the stroke to its maximum of 4.92 in (12.5 cm), it thoroughly licks from the base of the penis to the glans. The original model's 4.33 in (11 cm) stroke was already quite long, but increasing it by another 0.59 in (1.5 cm) makes a noticeable jump in pleasure.
Furthermore, the speed switching and stroke width adjustments are extremely smooth, making it enjoyable even with offline operation alone. I think even those who are using handy for the first time can use it with ease. From here, you can connect it to an app for remote control, and if you have the knowledge, you can even synchronize it with videos, so the ways to enjoy it expand depending on the user's skill level, which is its charm.
Now, regarding my experience using the included male masturbator , I honestly underestimated it. Thanks to its wide bore and smooth stroke, even someone like me who prefers a more relaxed pace could thoroughly enjoy male masturbator . It felt like its potential was greatly enhanced by the machine's performance. If you don't like or are not comfortable with modifying the main unit, the included male masturbator is more than enough to enjoy, so I recommend trying it out first.
In this new version, male masturbator can now be removed along with its holder. This makes it much easier to remove the entire male masturbator even while in use, which greatly simplifies refilling the lubricant. When using the electric male masturbator , you had to keep male masturbator facing downwards at all times, and you had to release the holder each time you wanted to refill it, but now that hassle is gone, which is incredibly convenient.
Another excellent change is the display on the side of the body. When you use it, you'll find it very easy to understand, and it makes offline operation much simpler. With the first generation, you had to memorize the location of the buttons, and it was difficult to grasp how fast it was moving or how far the stroke was when offline, but now you can see what operation you're doing each time you press a button, so there's absolutely no confusion.
This time, I tested it using only offline operation, and I was able to experience a very smooth and fluid stroke thanks to the improved quietness and motor performance. It felt absolutely amazing. Wow, what a fantastic electric masturbator. The electric male masturbator market in 2026 will undoubtedly be centered around the handy2.

![Easy DIY! How to Make The Handy 2 Fixing Bracket [Revealing the Six-Month Project]](../../imgs/top/handy2_koteigu-m.webp)