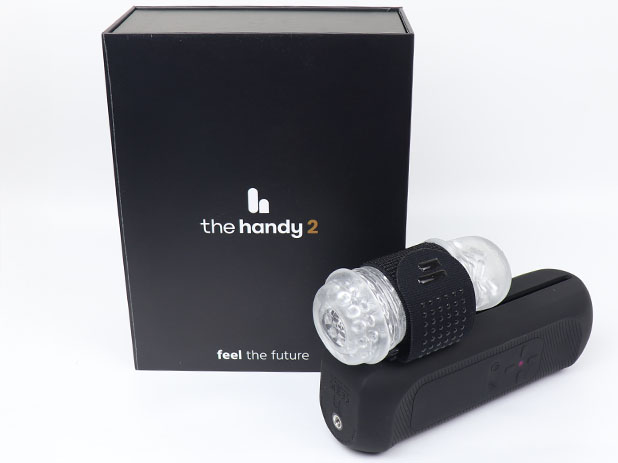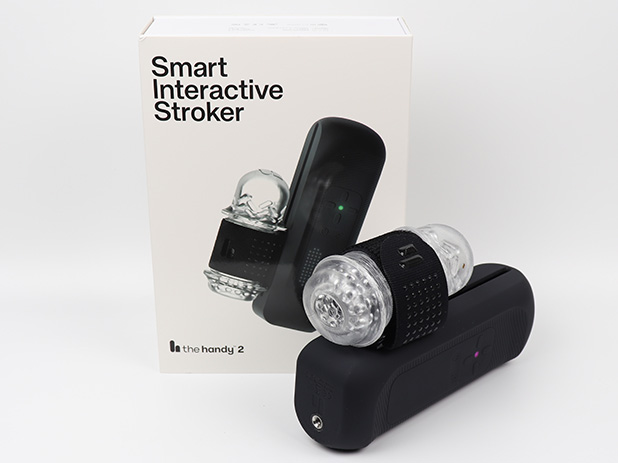
The Handy 2 Standard
The Standard model offers comparable performance to the handy2 PRO , while maintaining high cost-performance.

It was a long process! Including the initial planning stages, I spent nearly half a year creating Handy2 mounting bracket. The first handy bracket was very easy to make, so I thought this Handy2 wouldn't take that long either, but once I started, I encountered a mountain of challenges.
First of all, while it may have been intended to be stylish, its unique shape is problematic. At first glance, it looks square and easy to secure, but the corners are strangely rounded, the sides are recessed and have a large display, and to top it all off, the rear is a rounded, curved shape. If you want to secure it without obscuring the status display, which is its main selling point, there are few places to hold it down, making it a very troublesome design.
The design is so troublesome that you might think the person who designed it did it on purpose to prevent it from being fixed in place. The official statement confidently claims that it can be easily attached to a camera arm by providing two screw holes, but with such a thin arm, it would be impossible to attach anything other than the lightweight male masturbator .
They claim it's easy to operate with one hand and that you can hold it in your hand, but that's not the case. This time, the attachment is magnetic, so if you attach the large male masturbator and try to hold it in your hand, it will shake from side to side and the entire holder will fall off in no time.
That's right, this model absolutely requires mounting; you can't enjoy it at all if you hold it by hand. Without mounting it, you're only experiencing a tenth of Handy2 's charm. Despite this, the official manufacturer didn't consider the possibility of attaching the larger male masturbator , and they haven't provided a sturdy mounting device. To enjoy the larger male masturbator , which is probably what everyone who bought the Handy2 wants to do, you have to prepare a sturdy mounting device yourself. Well, that hasn't changed since the first generation model.
Therefore, as someone who hopes that Handy2 will become more popular in Japan, it was my urgent task to complete the mounting kit recipe for Handy2 and spread it to the world, however small my contribution may be.
The creation of the mounting hardware proved extremely difficult, but a prototype was finally completed around the beginning of March. However, during testing, it was discovered that the rear of the main unit shifted slightly under heavy load. Therefore, we hastily decided to attach a retaining bracket, and the device was completed for the time being.
Even though it's a prototype, it could be made practical with improvements, but I've started to get bothered by the clamp attached to the rear. I'm starting to wonder if it's really suitable for everyone with something that looks so complicated attached.
I realized that to make it accessible to everyone, it needed to be simpler and easier to make, so I went through further trial and error and finally arrived at an improved version that simplified the design while maintaining its strength.
Ideally, I should only introduce the improved version, but I'm also attached to the prototype, and it's fully functional, so please take a look. I thought that even just showing what happened during the production process might give someone some hint, so I decided to release both the prototype and the improved version.
For those who want to start using Handy2 , I've carefully designed both an improved version that's as easy to build as possible and a prototype that's the result of trial and error. I hope that both will give someone a hint to enjoy Handy2 even more.
table of contents
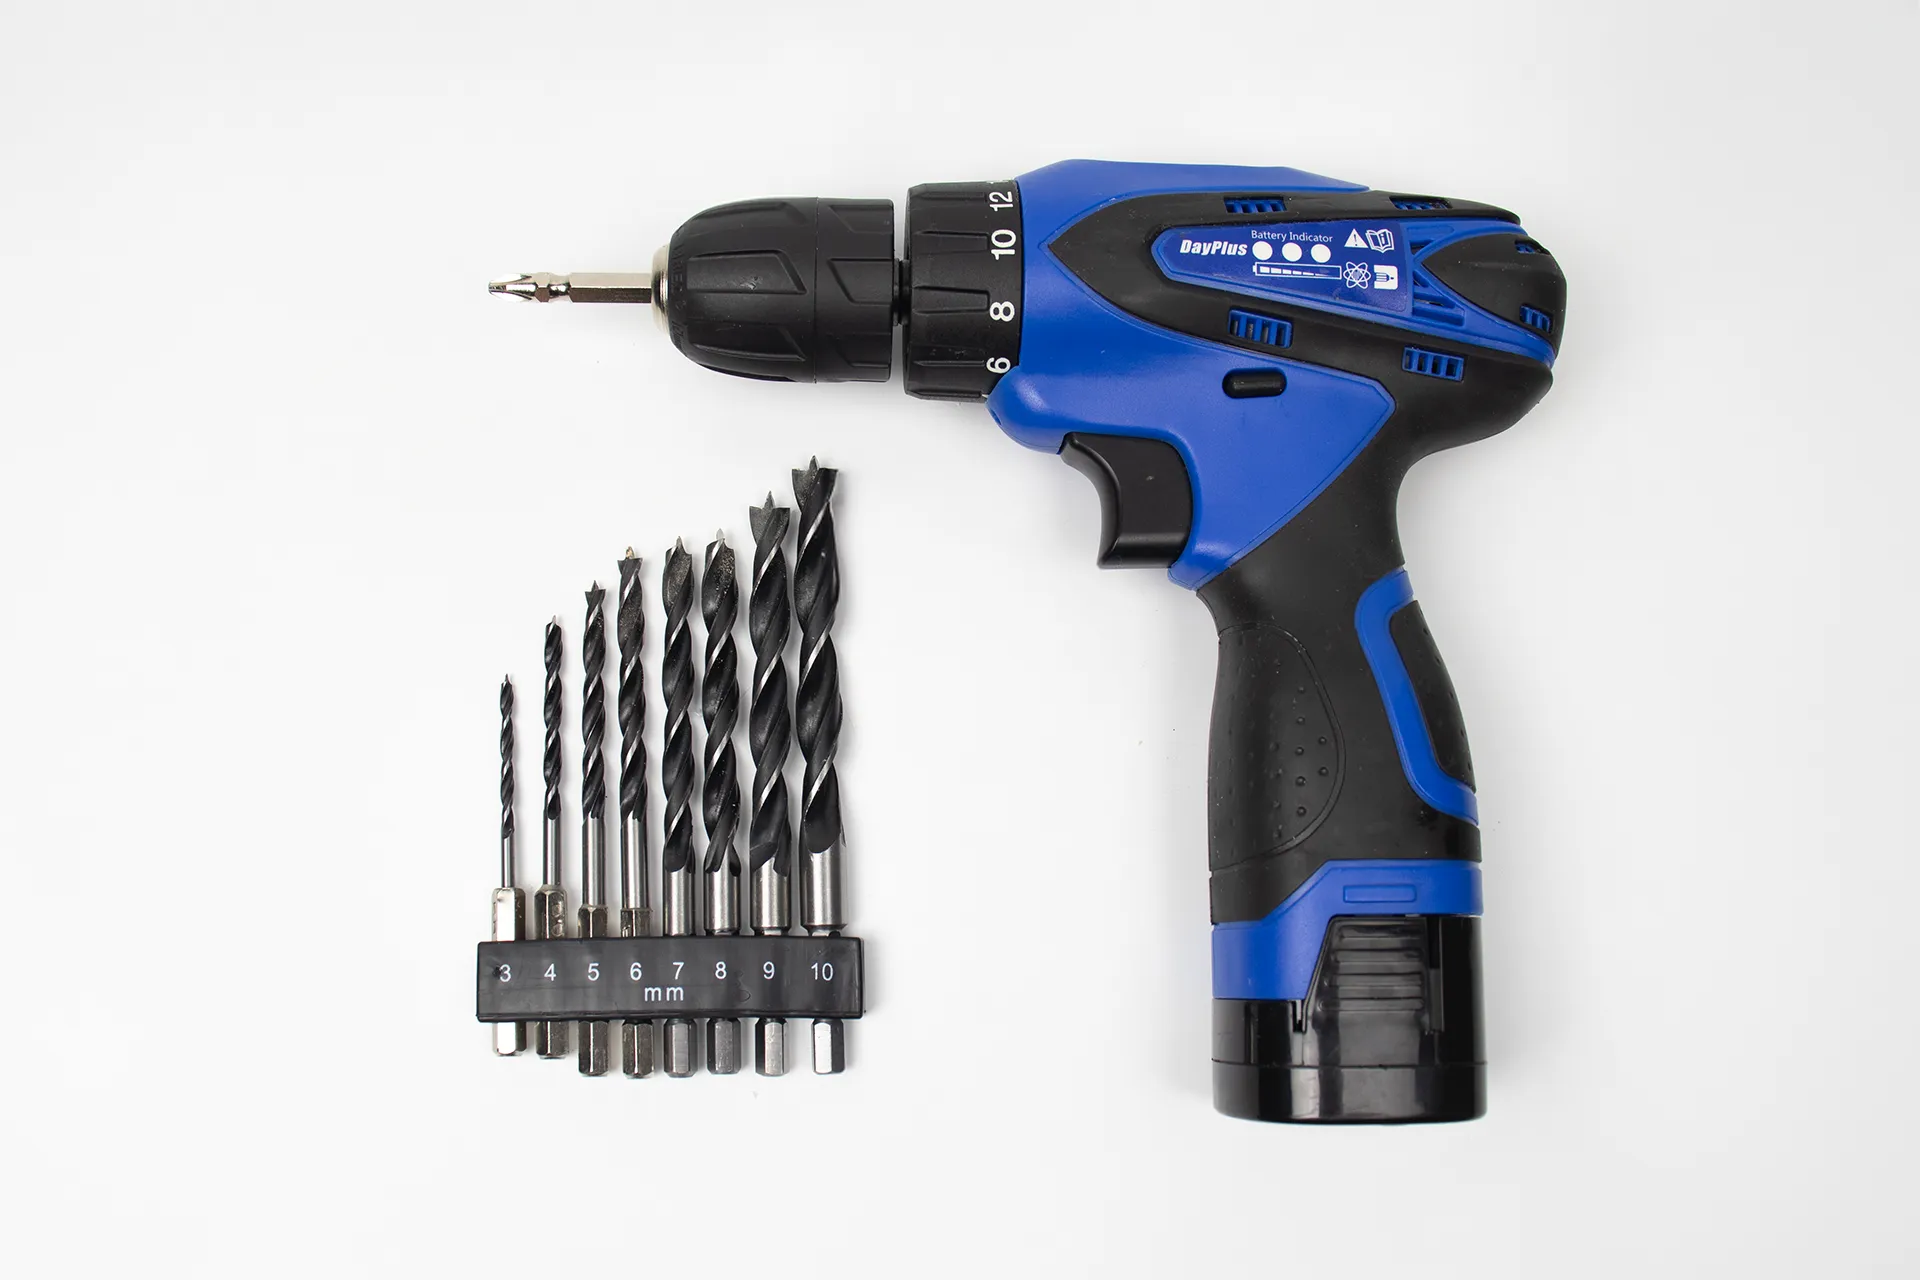
An electric screwdriver is a necessary tool for both the prototype and the improved version. Of course, an impact driver is also acceptable. Ideally, the goal was to assemble it with just one screwdriver, but since embedding threaded inserts is absolutely essential, an electric screwdriver and drill bits are required.
For this type of work, a power drill costing around 3000 yen should be sufficient, but you'll be less likely to regret it if you choose drill bits that are known for their sharpness. The drill bits that come with a power drill are usually only thin ones, so you'll need to buy a separate set of drill bits. Woodworking bits with thin, pointed tips are the easiest to use.
For the prototype, I used 10mm, 6mm, and 5mm drill bits, and for the improved version, I used 6mm and 5mm drill bits to drill pilot holes for the threaded inserts.
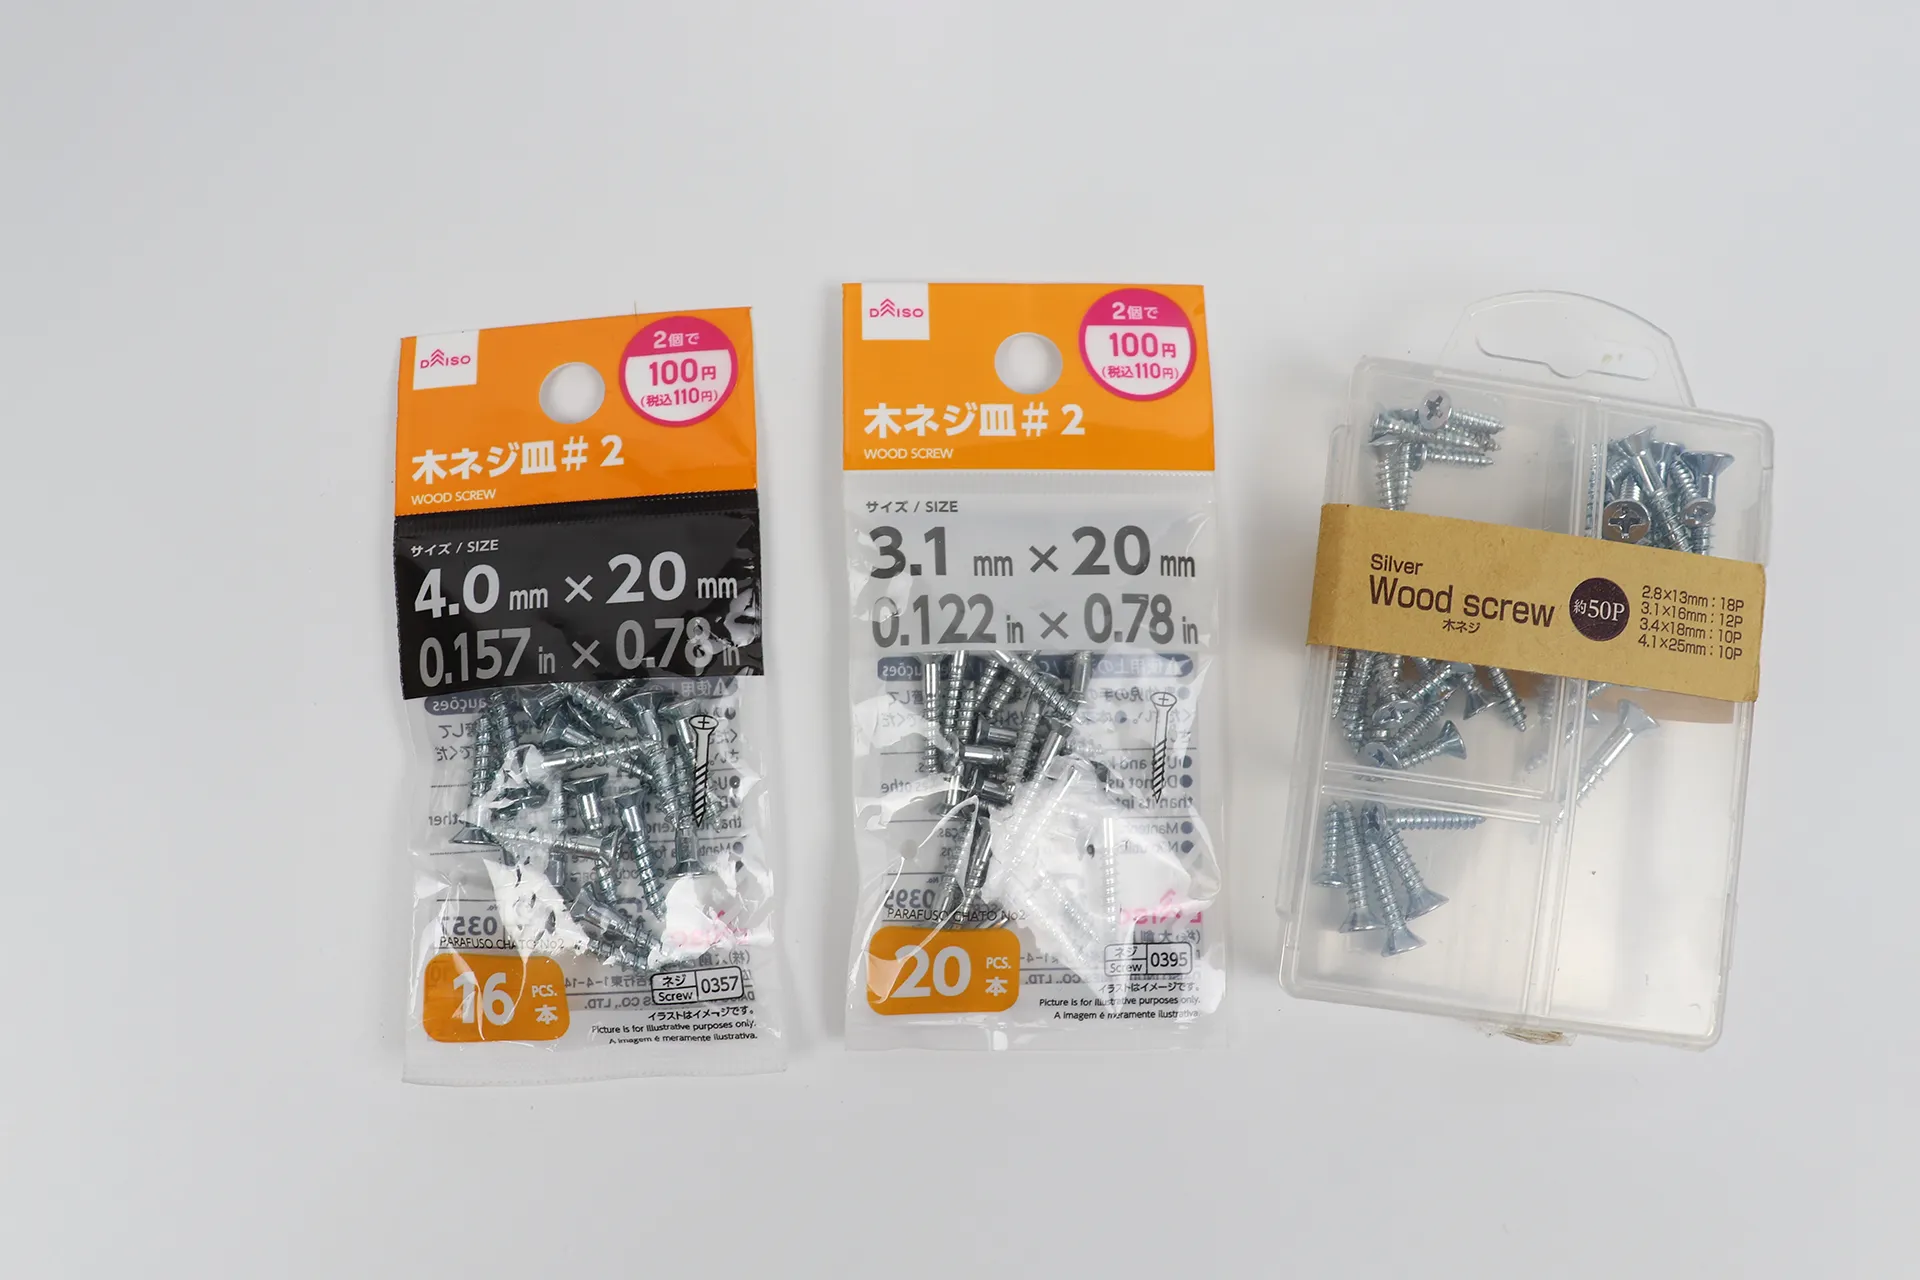
I'll also introduce the screws I used. I used 20mm countersunk wood screws from Daiso, as the board thickness was 9mm x 2 = 18mm plus the thickness of the metal fittings. I also prepared a separate wood screw set, but I didn't end up using it.
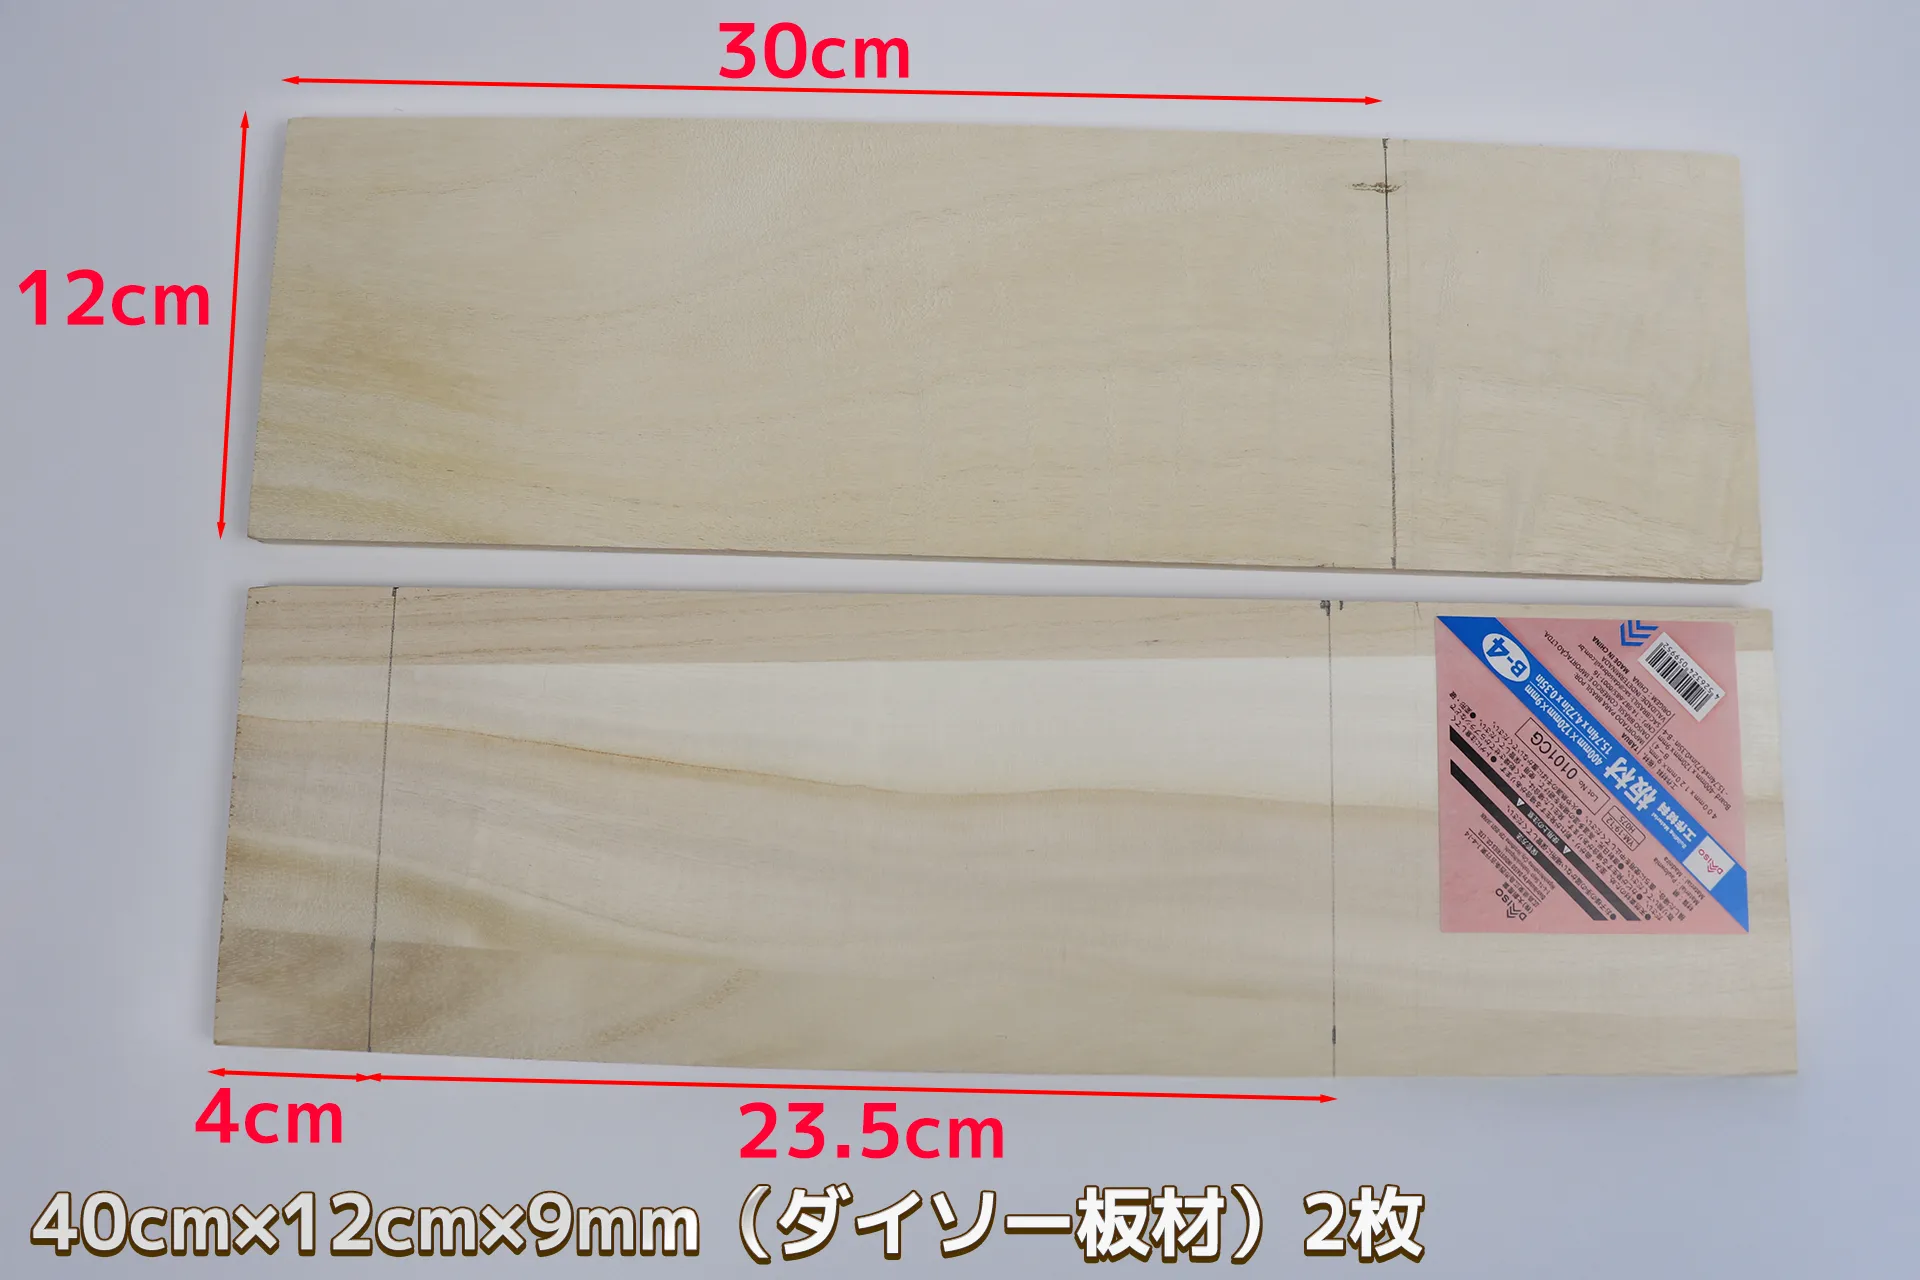
For the prototype, I used wood I bought at Daiso. I prepared two pieces measuring 15.75 in (40 cm) x 4.72 in (12 cm) x 9mm thick and cut them to the dimensions shown in the image above.
| Product name | Work material Plate material 400x9x120mm B-4 | ||
|---|---|---|---|
| retailers | |||
| price | 110 yen (tax included) | ||
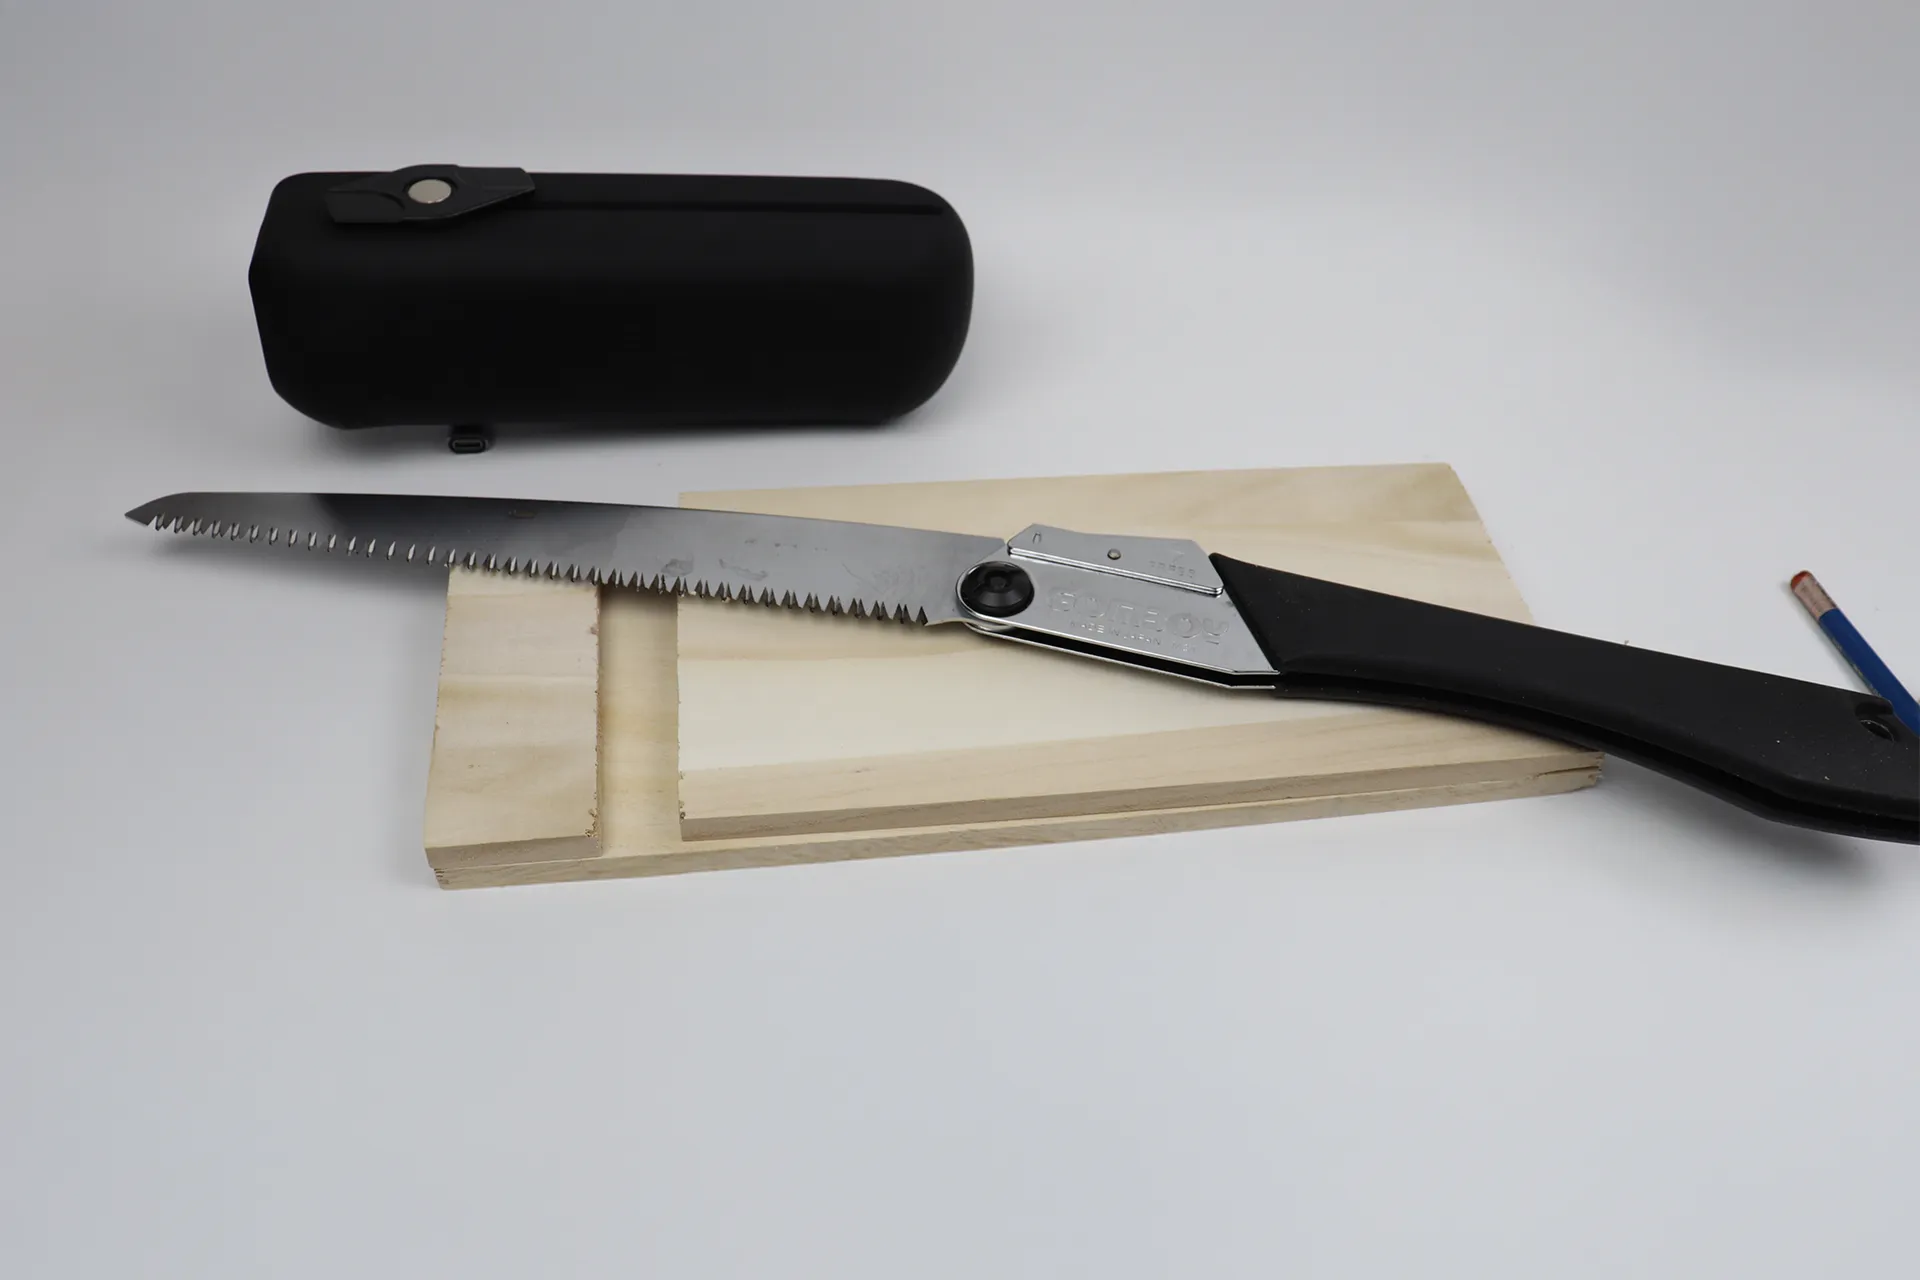
Since it was soft paulownia wood, I was able to cut it easily with a saw. I cut out three pieces of wood, which I used to make grooves.
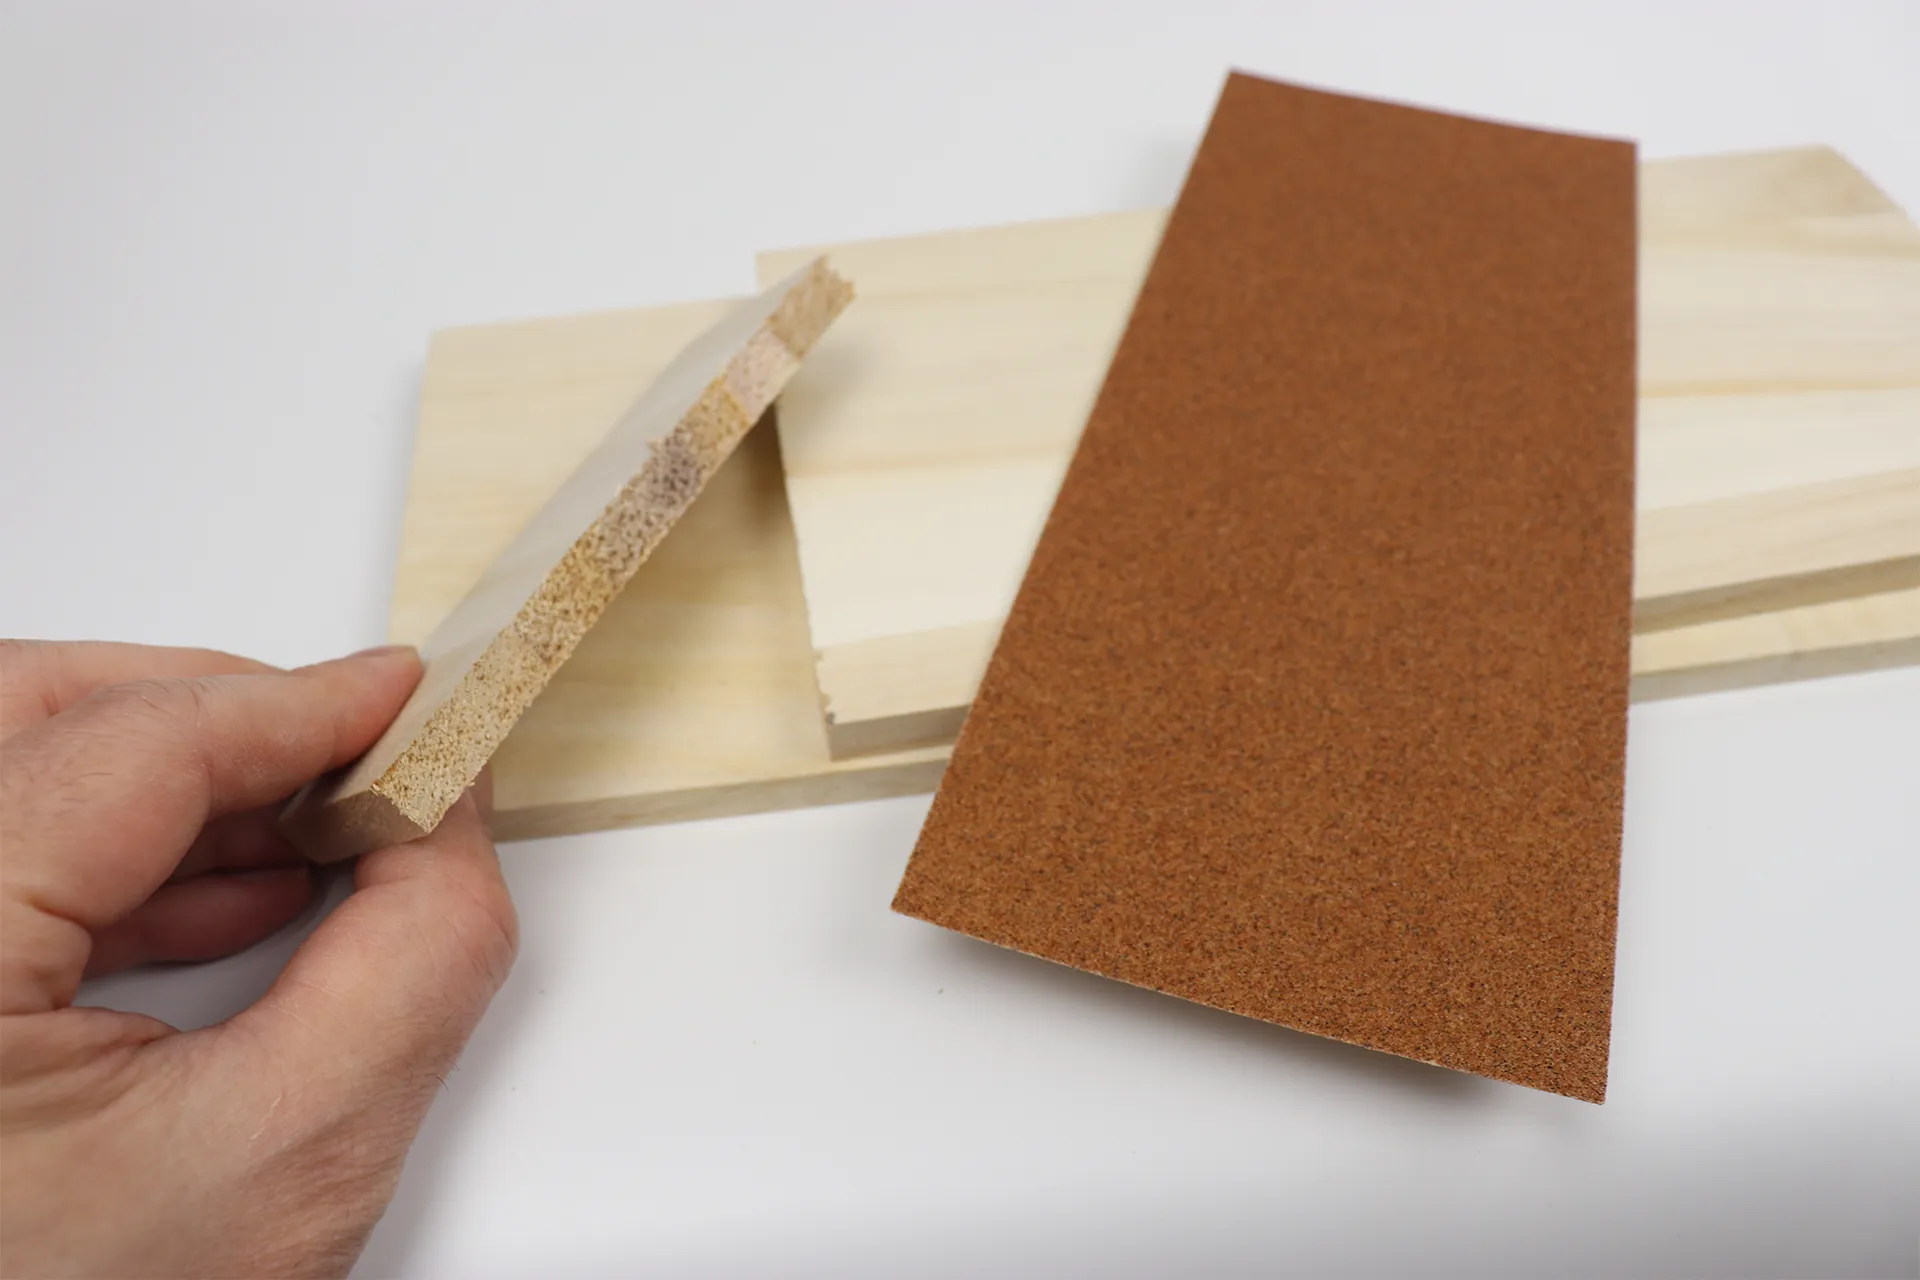
Smooth the cut surface with sandpaper.
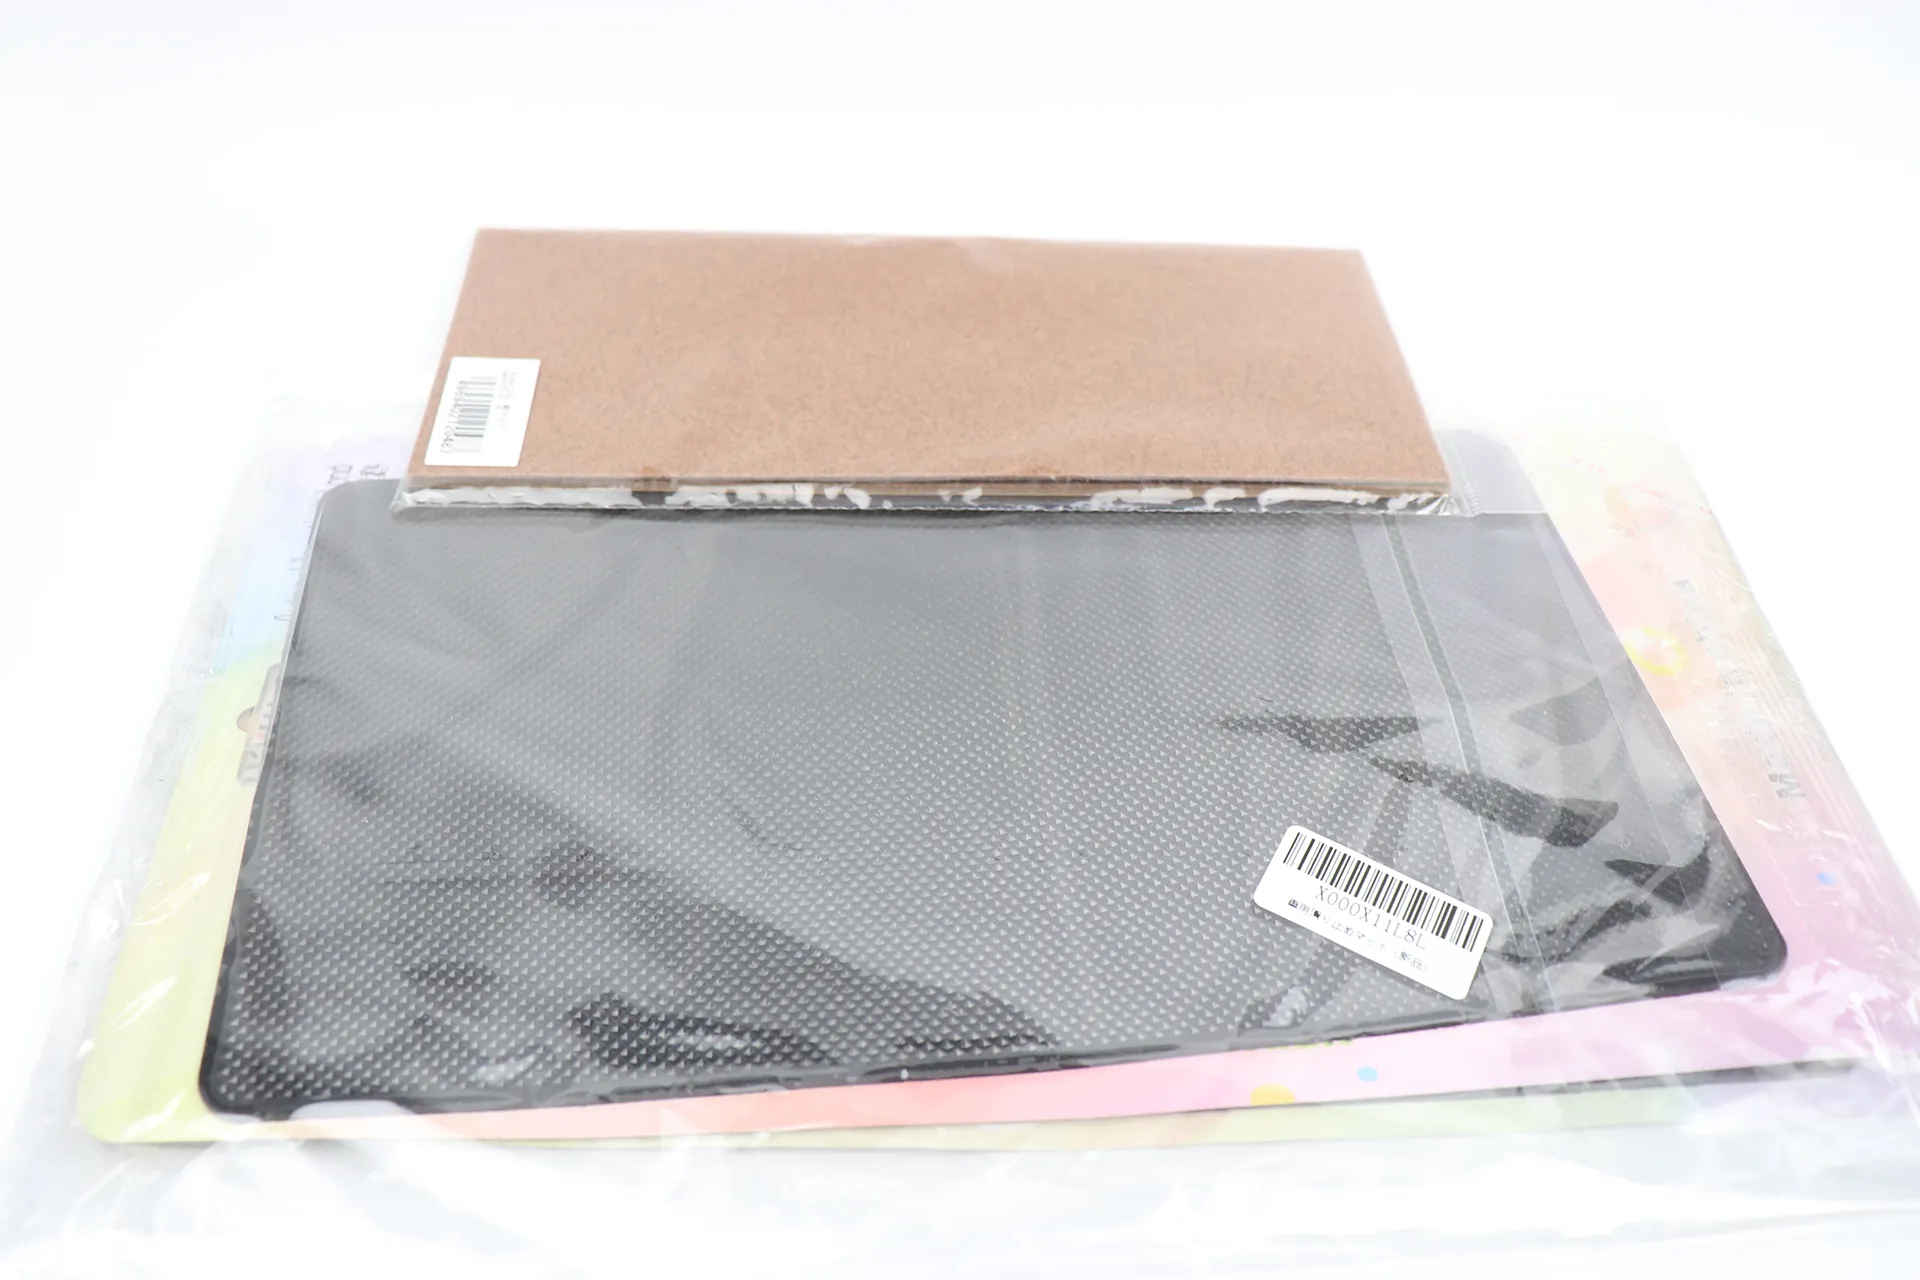
This is an anti-slip mat that attaches to metal fittings. I've used various anti-slip mats, but I found this one to have the best grip on the rubbery texture of Handy2 body.
| Product name | Super strong anti-slip mat | ||
|---|---|---|---|
| retailers | |||
| price | Around 685 yen (tax included) | ||
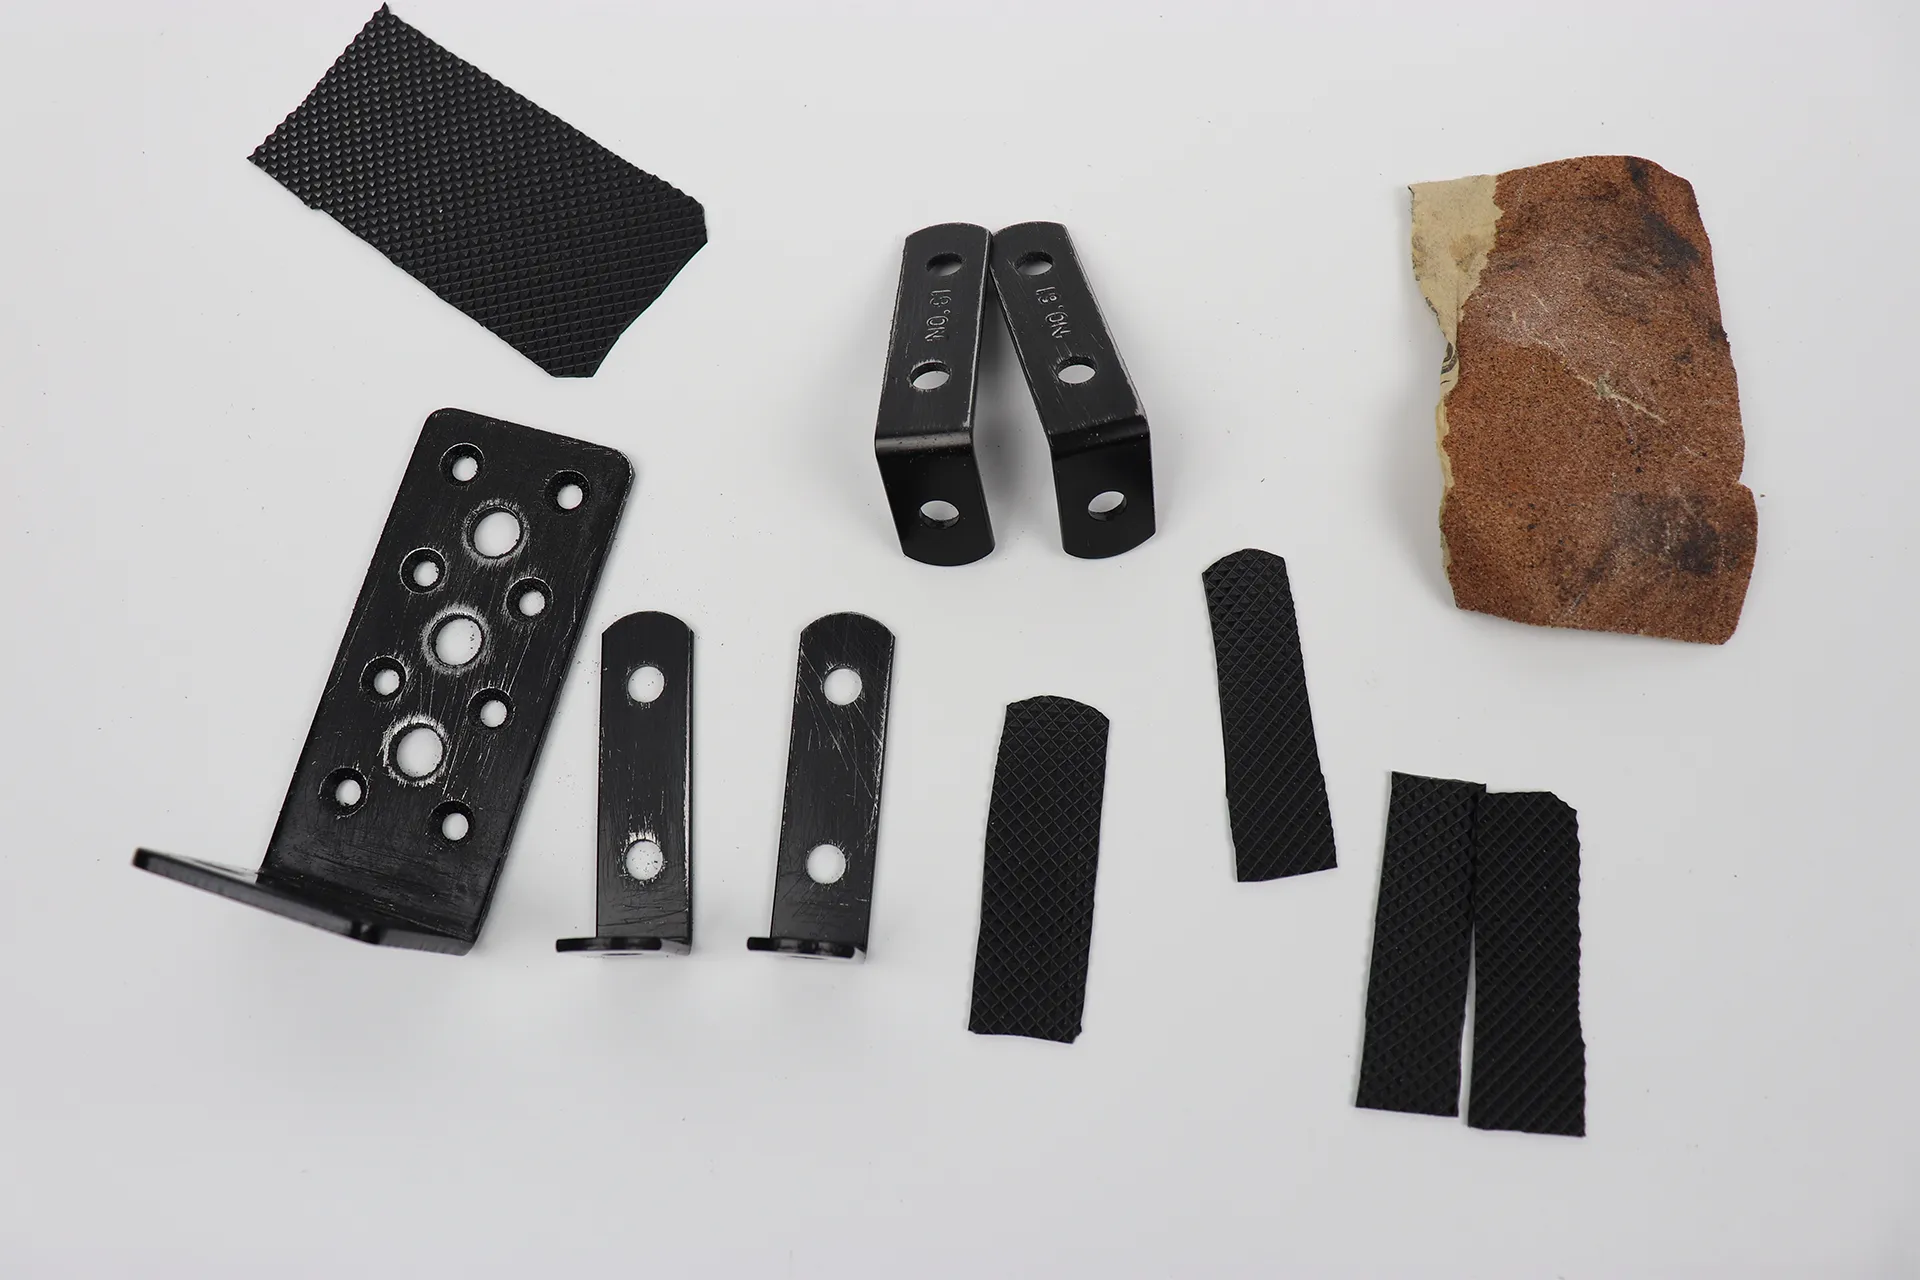
To attach the cut non-slip mat to one large L-shaped bracket and four small L-shaped brackets, we roughen the adhesive surface with sandpaper.
| Product name | DAIDOHANT (Reinforcement Hardware) Black Multi-purpose Hardware L-shaped [Steel] | ||
|---|---|---|---|
| retailers | |||
| price | Around 428 yen (tax included) | ||
| Product name | Koni Viola Reinforcement Brackets, Black, No. 61L Type, 58 x 29mm, Set of 2 | ||
|---|---|---|---|
| retailers | |||
| price | Around 499 yen (tax included) | ||
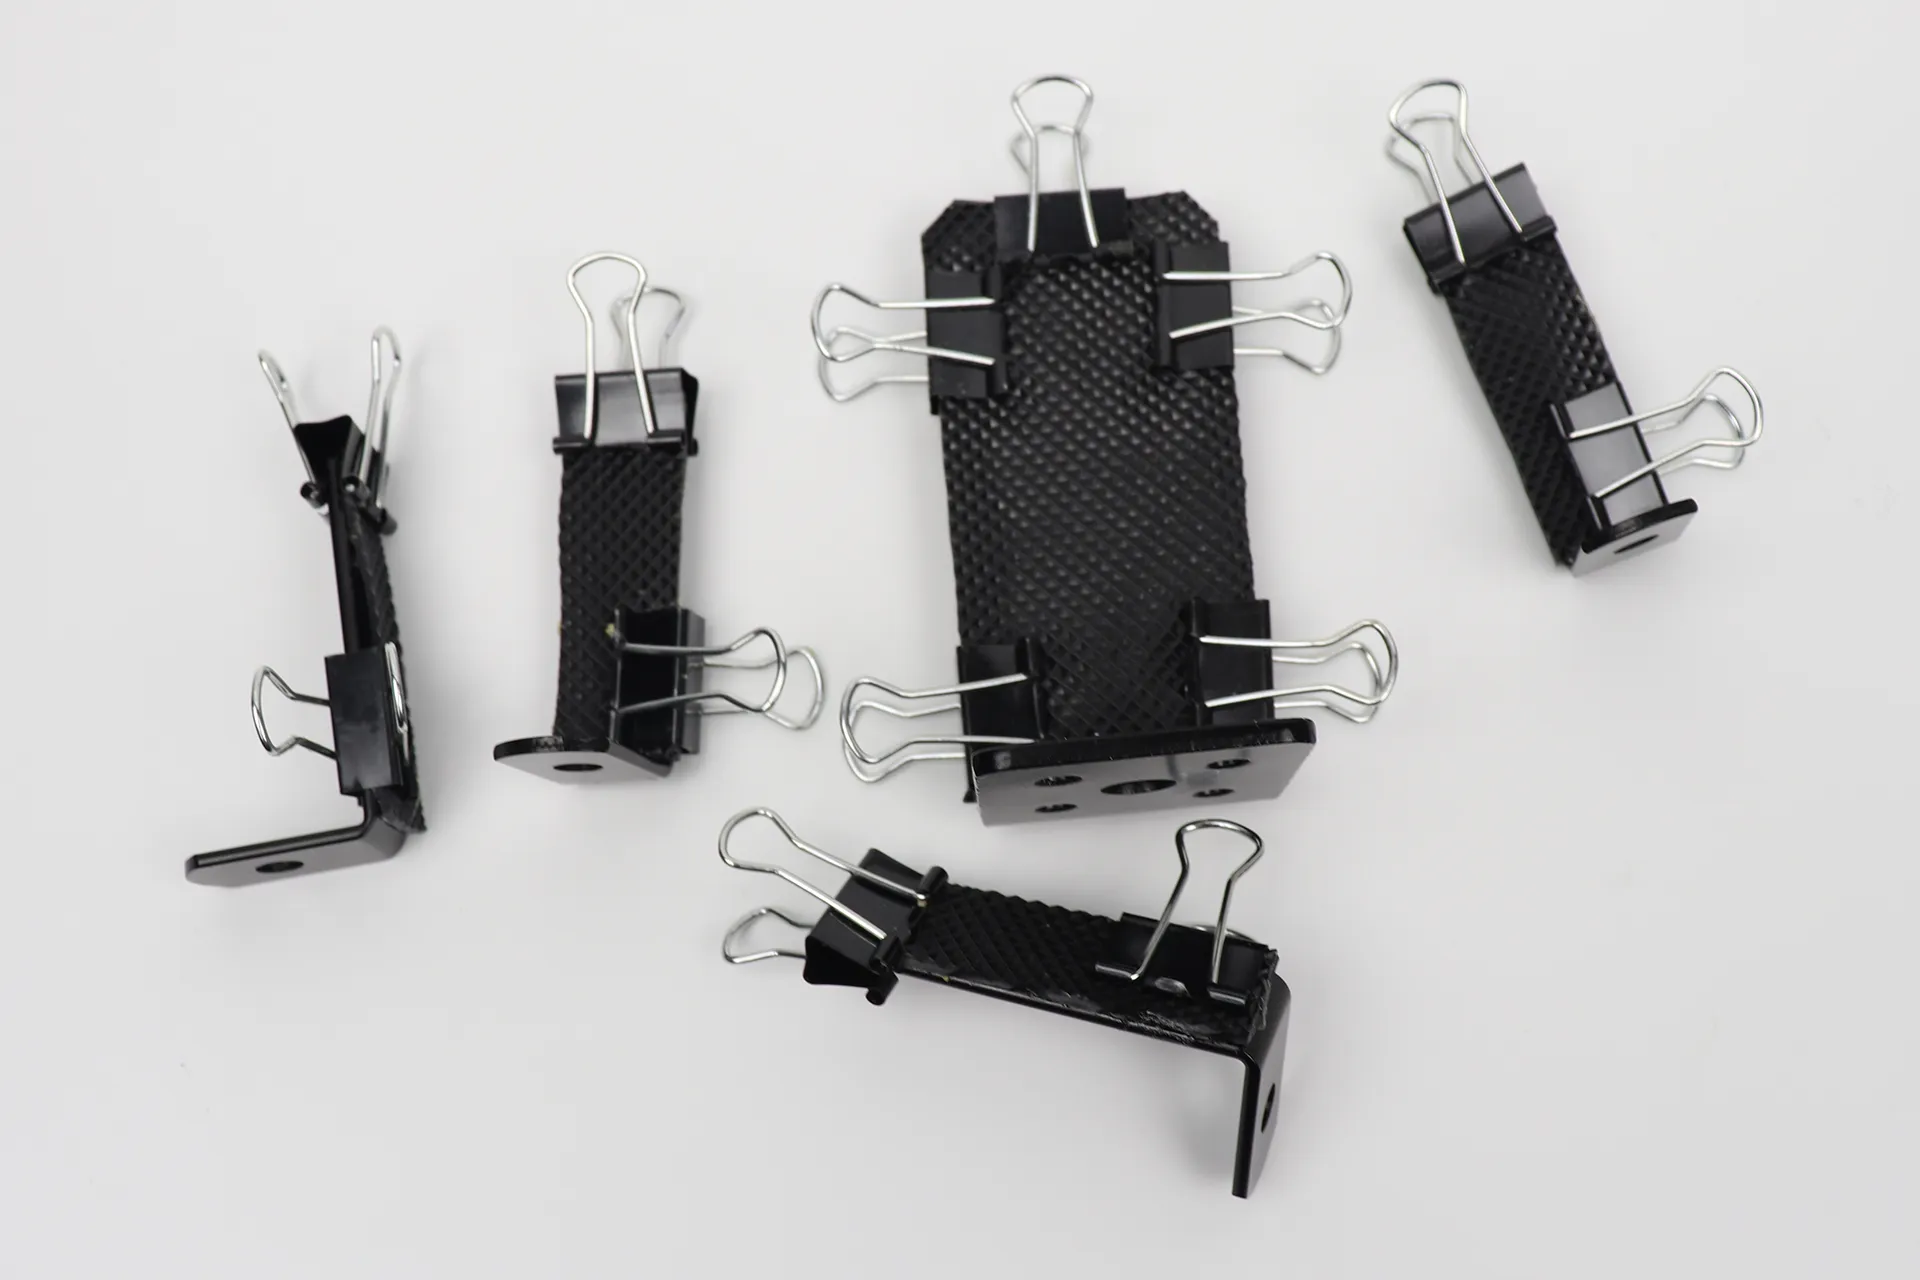
Any adhesive will do, but I think an ultra-multipurpose adhesive would be best. As a precaution, attach anti-slip mats to the inside of two of the small L-shaped brackets and to the outside of the other two. Leave them like this for a day.
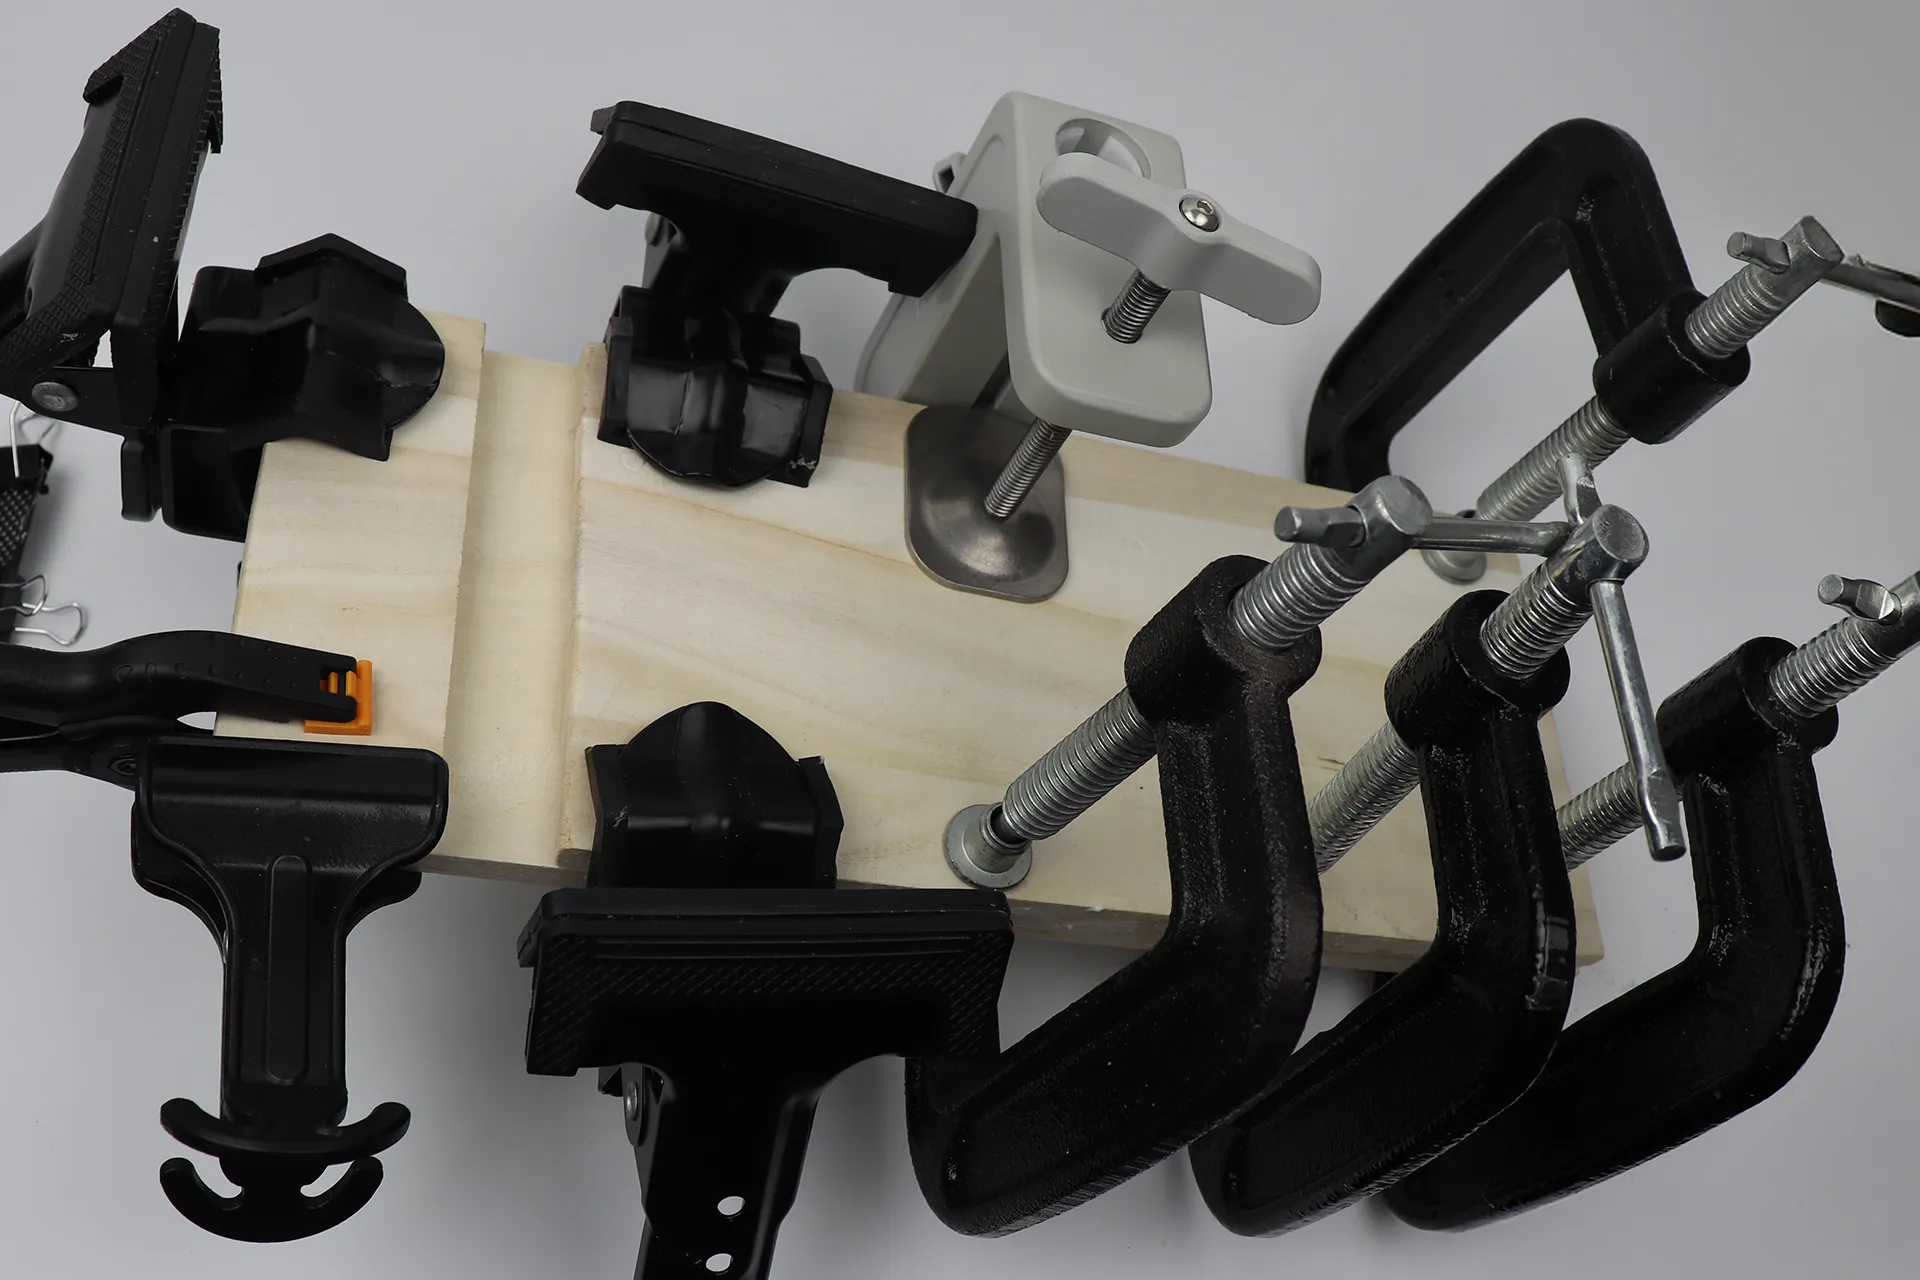
I glued the cut pieces of wood together with wood glue and secured them with clamps, then left them for a day. I used all the clamps I had at home, but you really don't need this many. If you don't have clamps, just place a heavy weight on top.
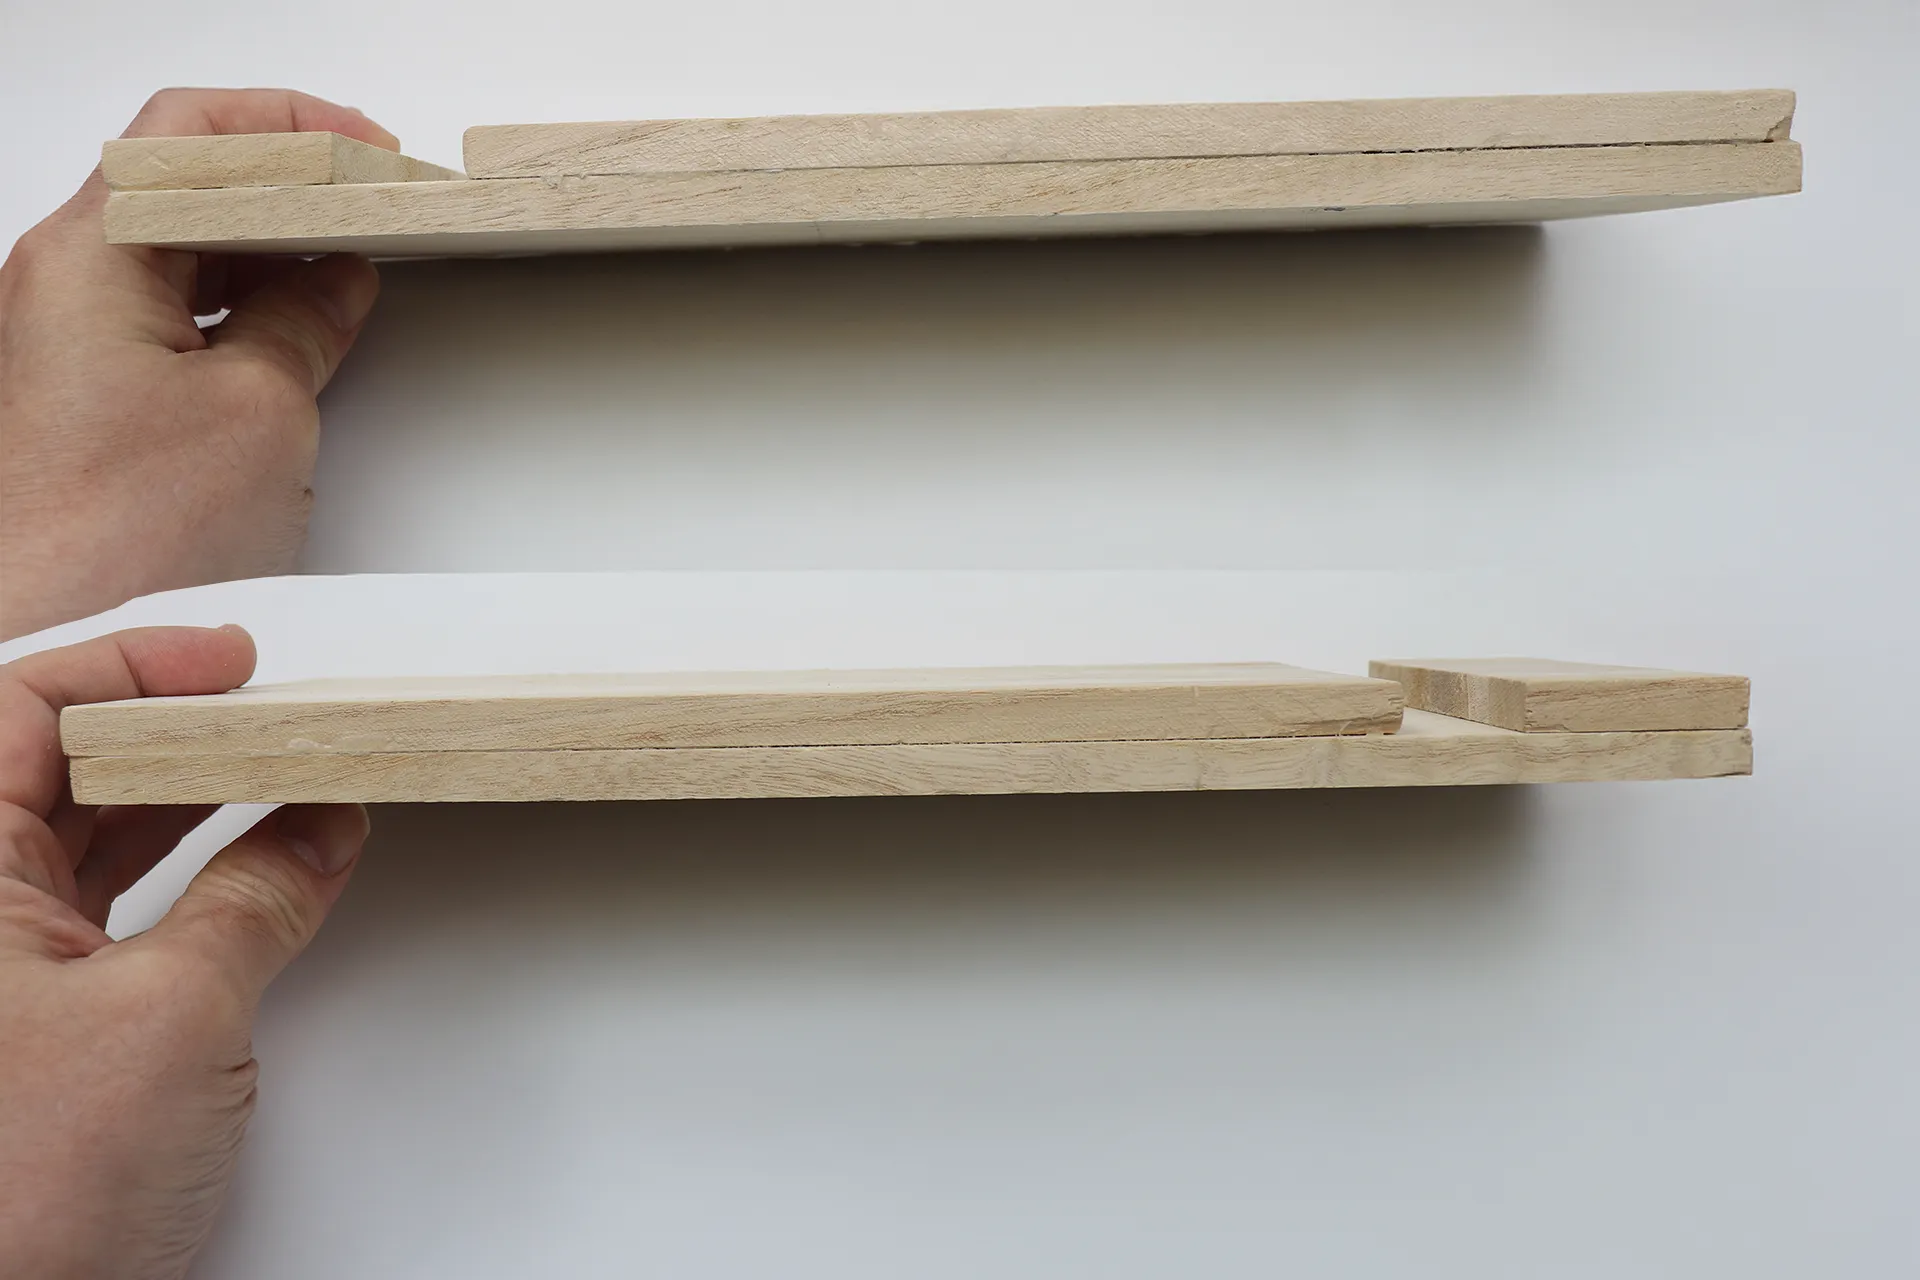
Since it's a board from Daiso, there are some small chipped parts, but I was able to attach them together perfectly.
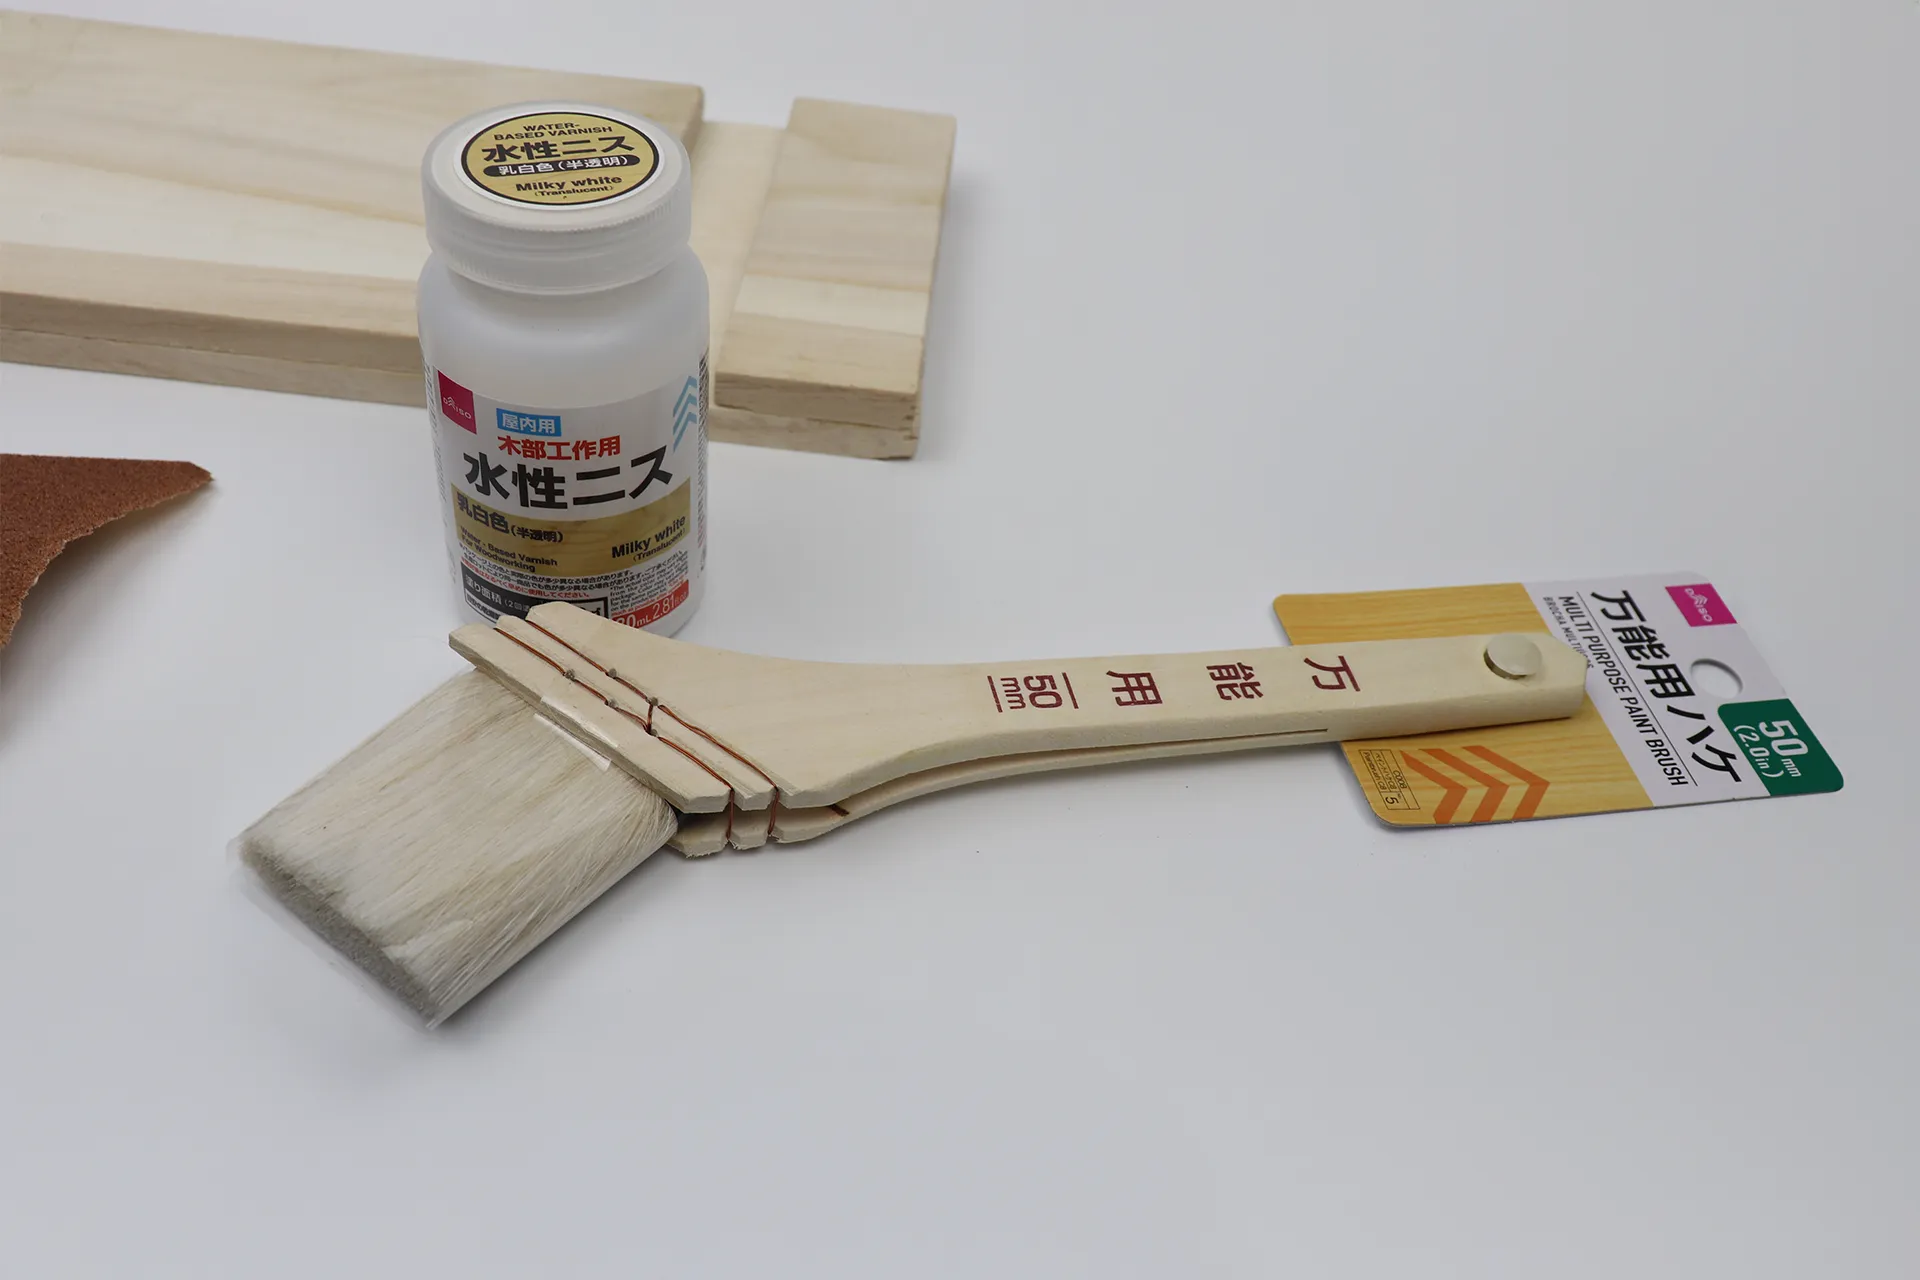
Since we're at it, let's apply varnish to the wood. You can skip this step, but if you have the time, give it a try! It also has the added benefit of providing some waterproofing to the wood surface, so if lotion drips on it, it won't soak in.
I used water-based varnish (milky white) and a brush from Daiso.
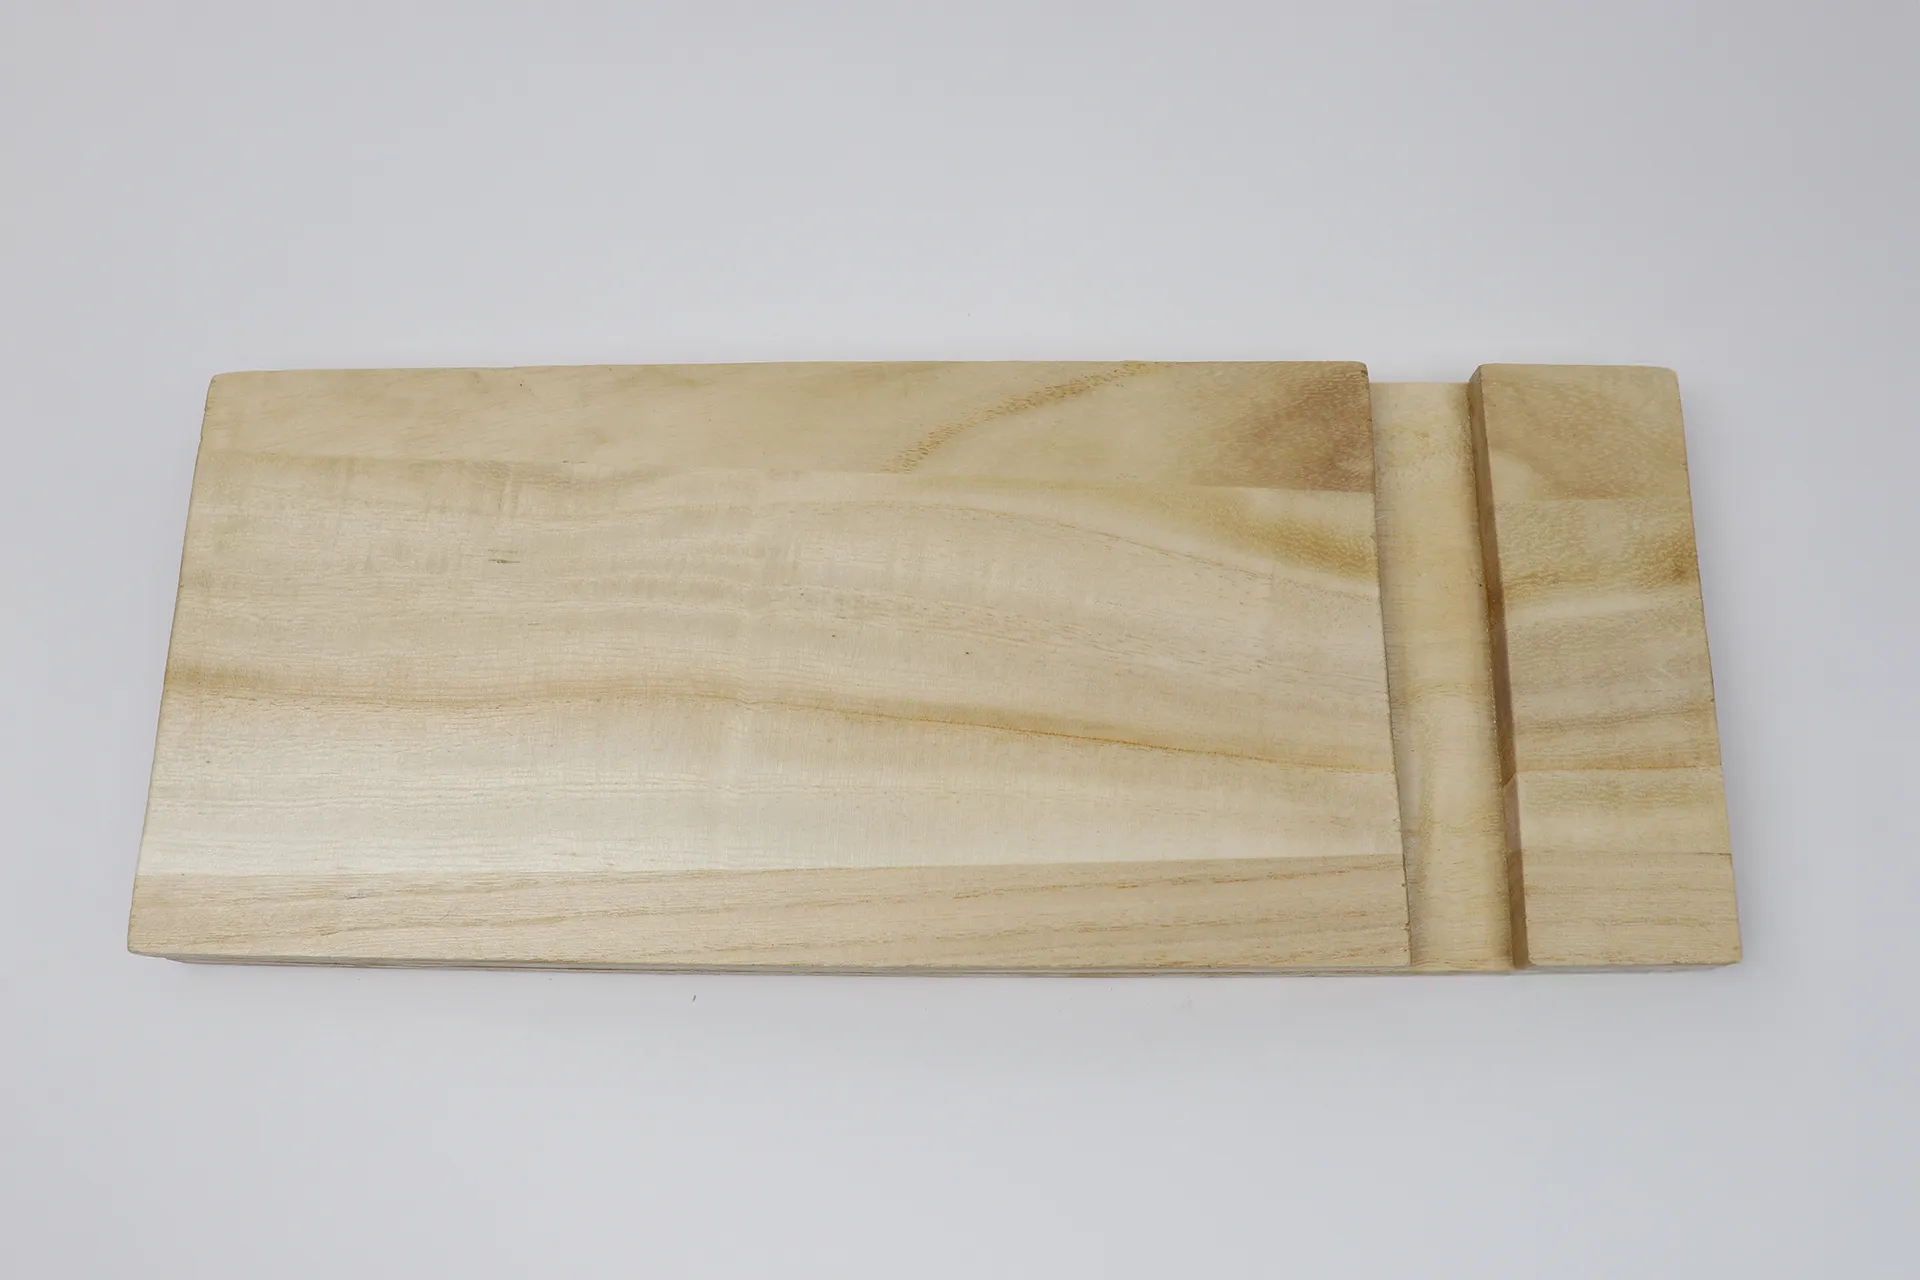
I applied three coats, one hour apart. After sanding the surface with fine-grit sandpaper, it became smooth. It has a nice texture, and I'm personally satisfied with the result.
Next, before proceeding, it's easier to embed the threaded inserts for VESA mounting while this board is still glued in place, so do that first.HereI recommend finishing it.
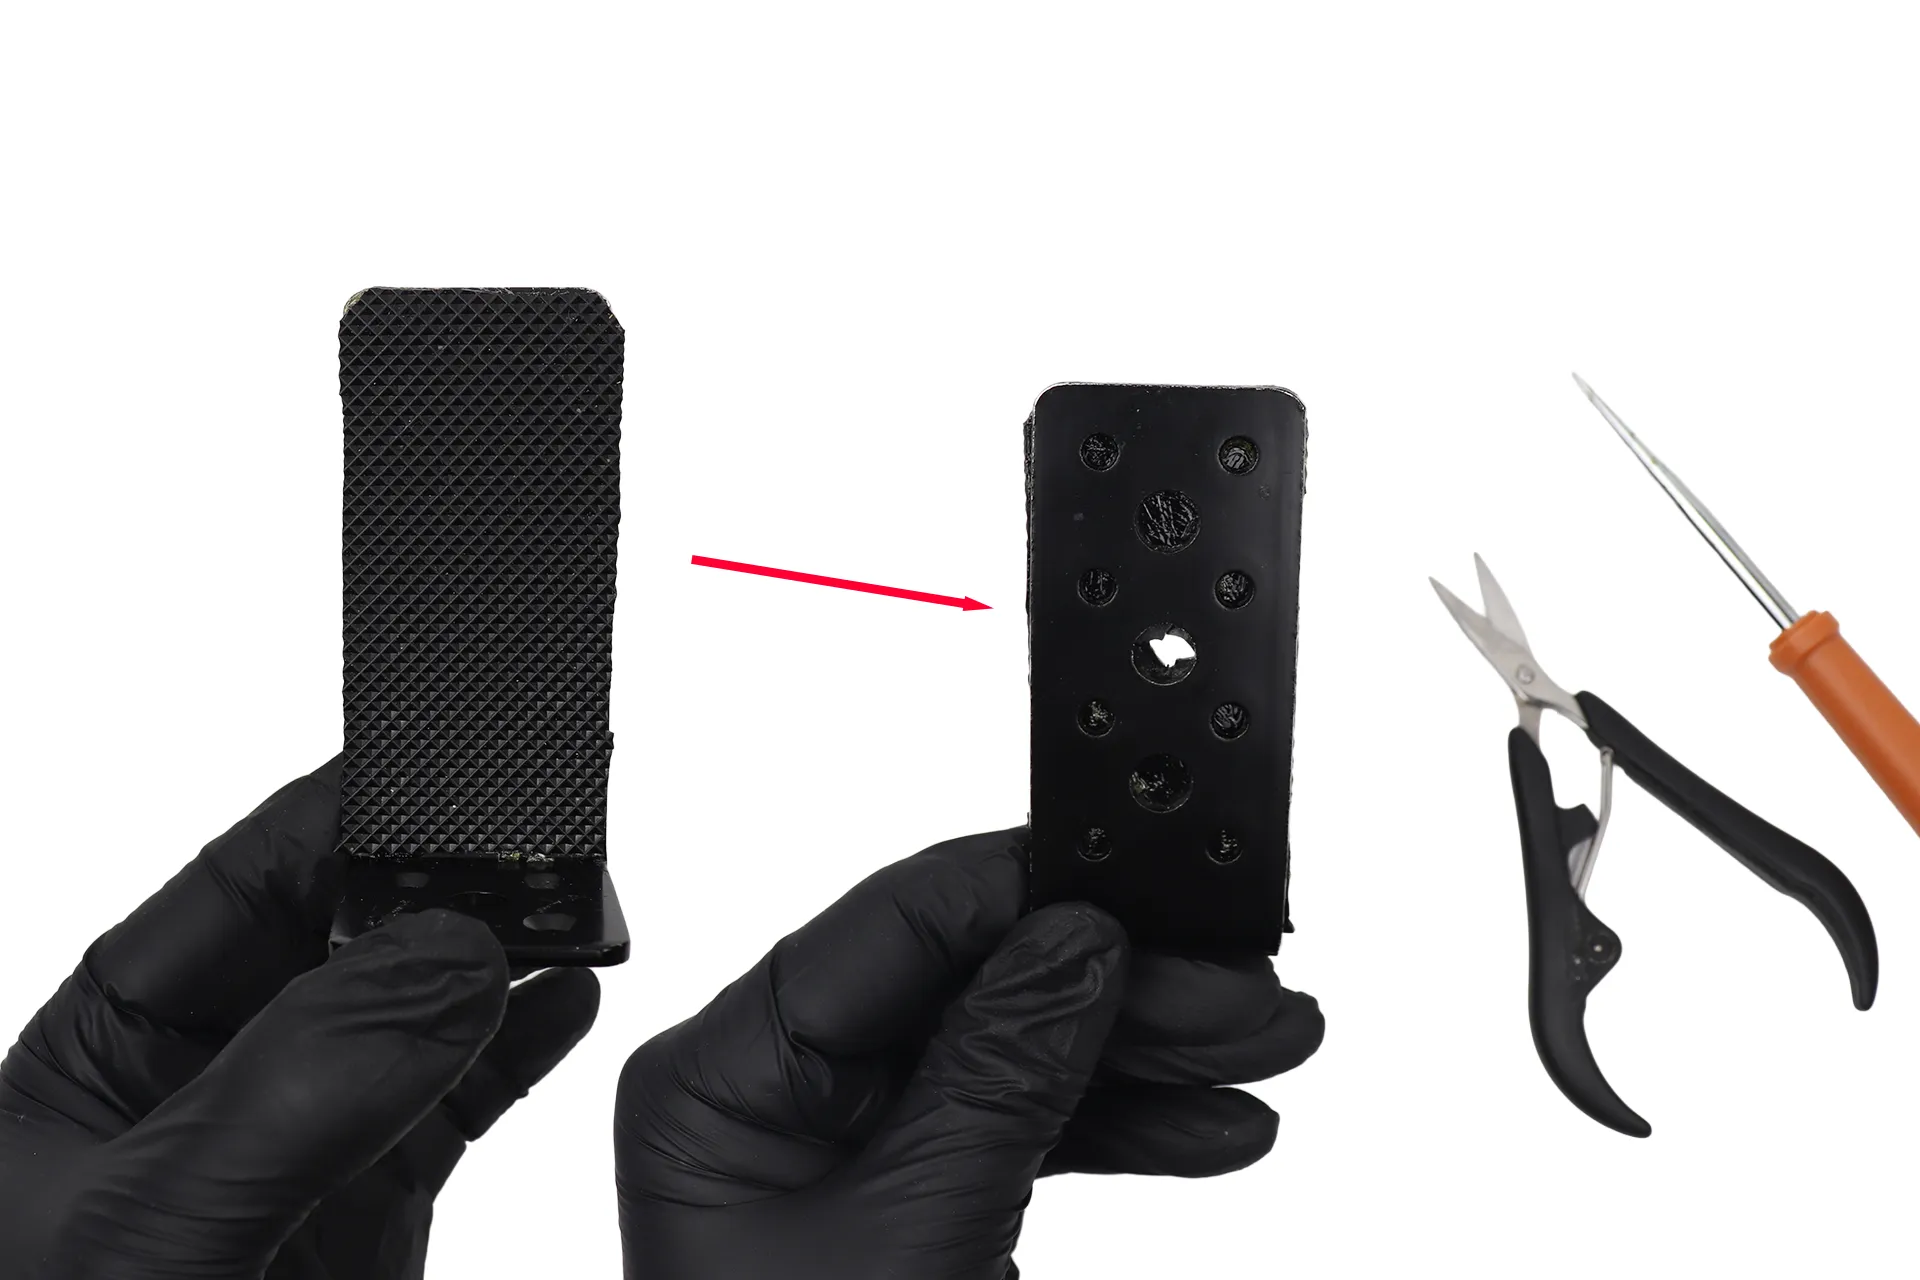
Using scissors and an awl, I made a hole in the center of the large L-shaped bracket that I had attached. I used scissors and an awl for the prototype, but it's easier to make a clean hole using a soldering iron.
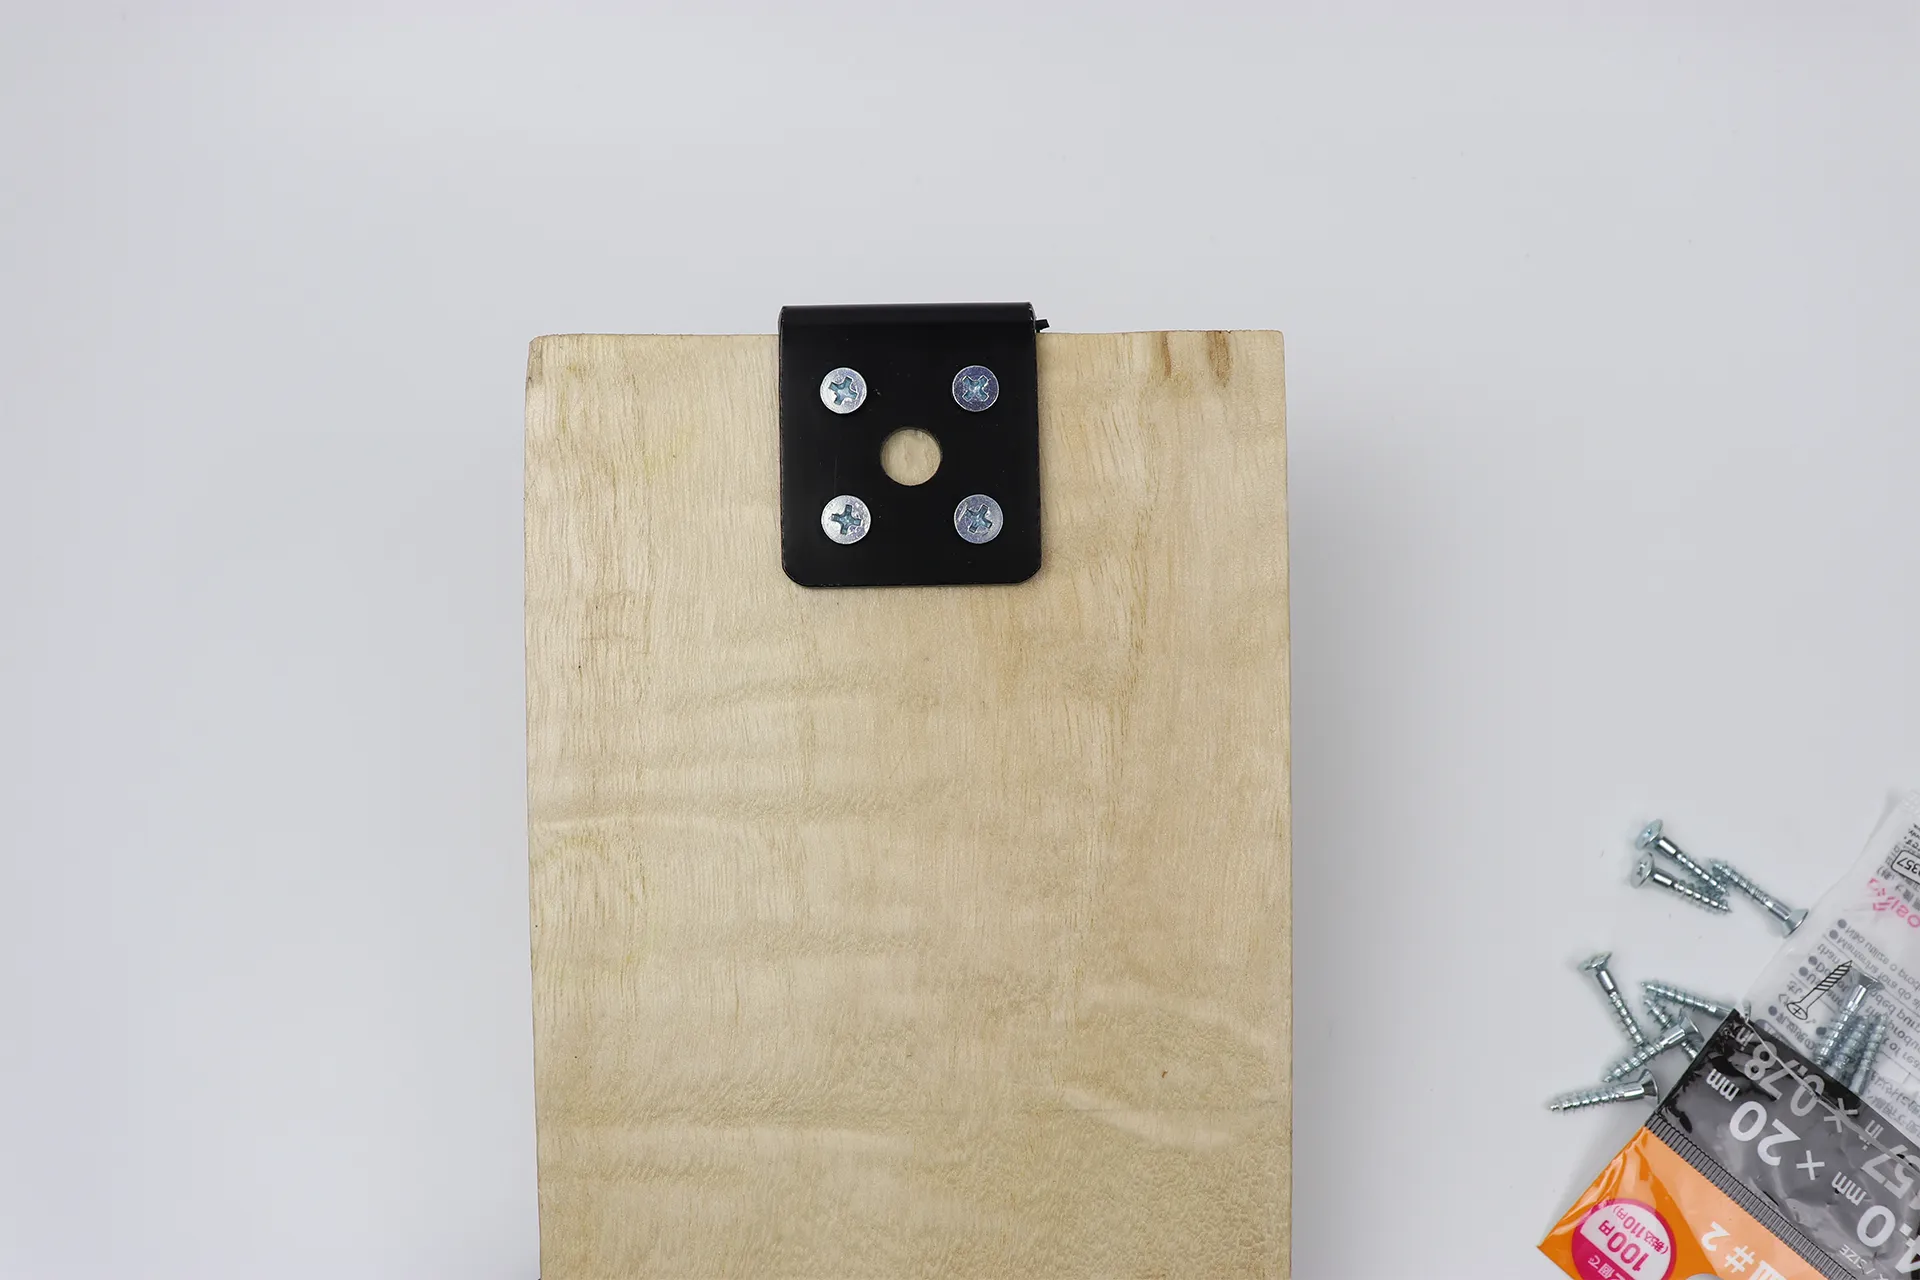
I screwed a large L-shaped bracket to the back of the mounting bracket. I positioned it so that it was exactly in the middle.
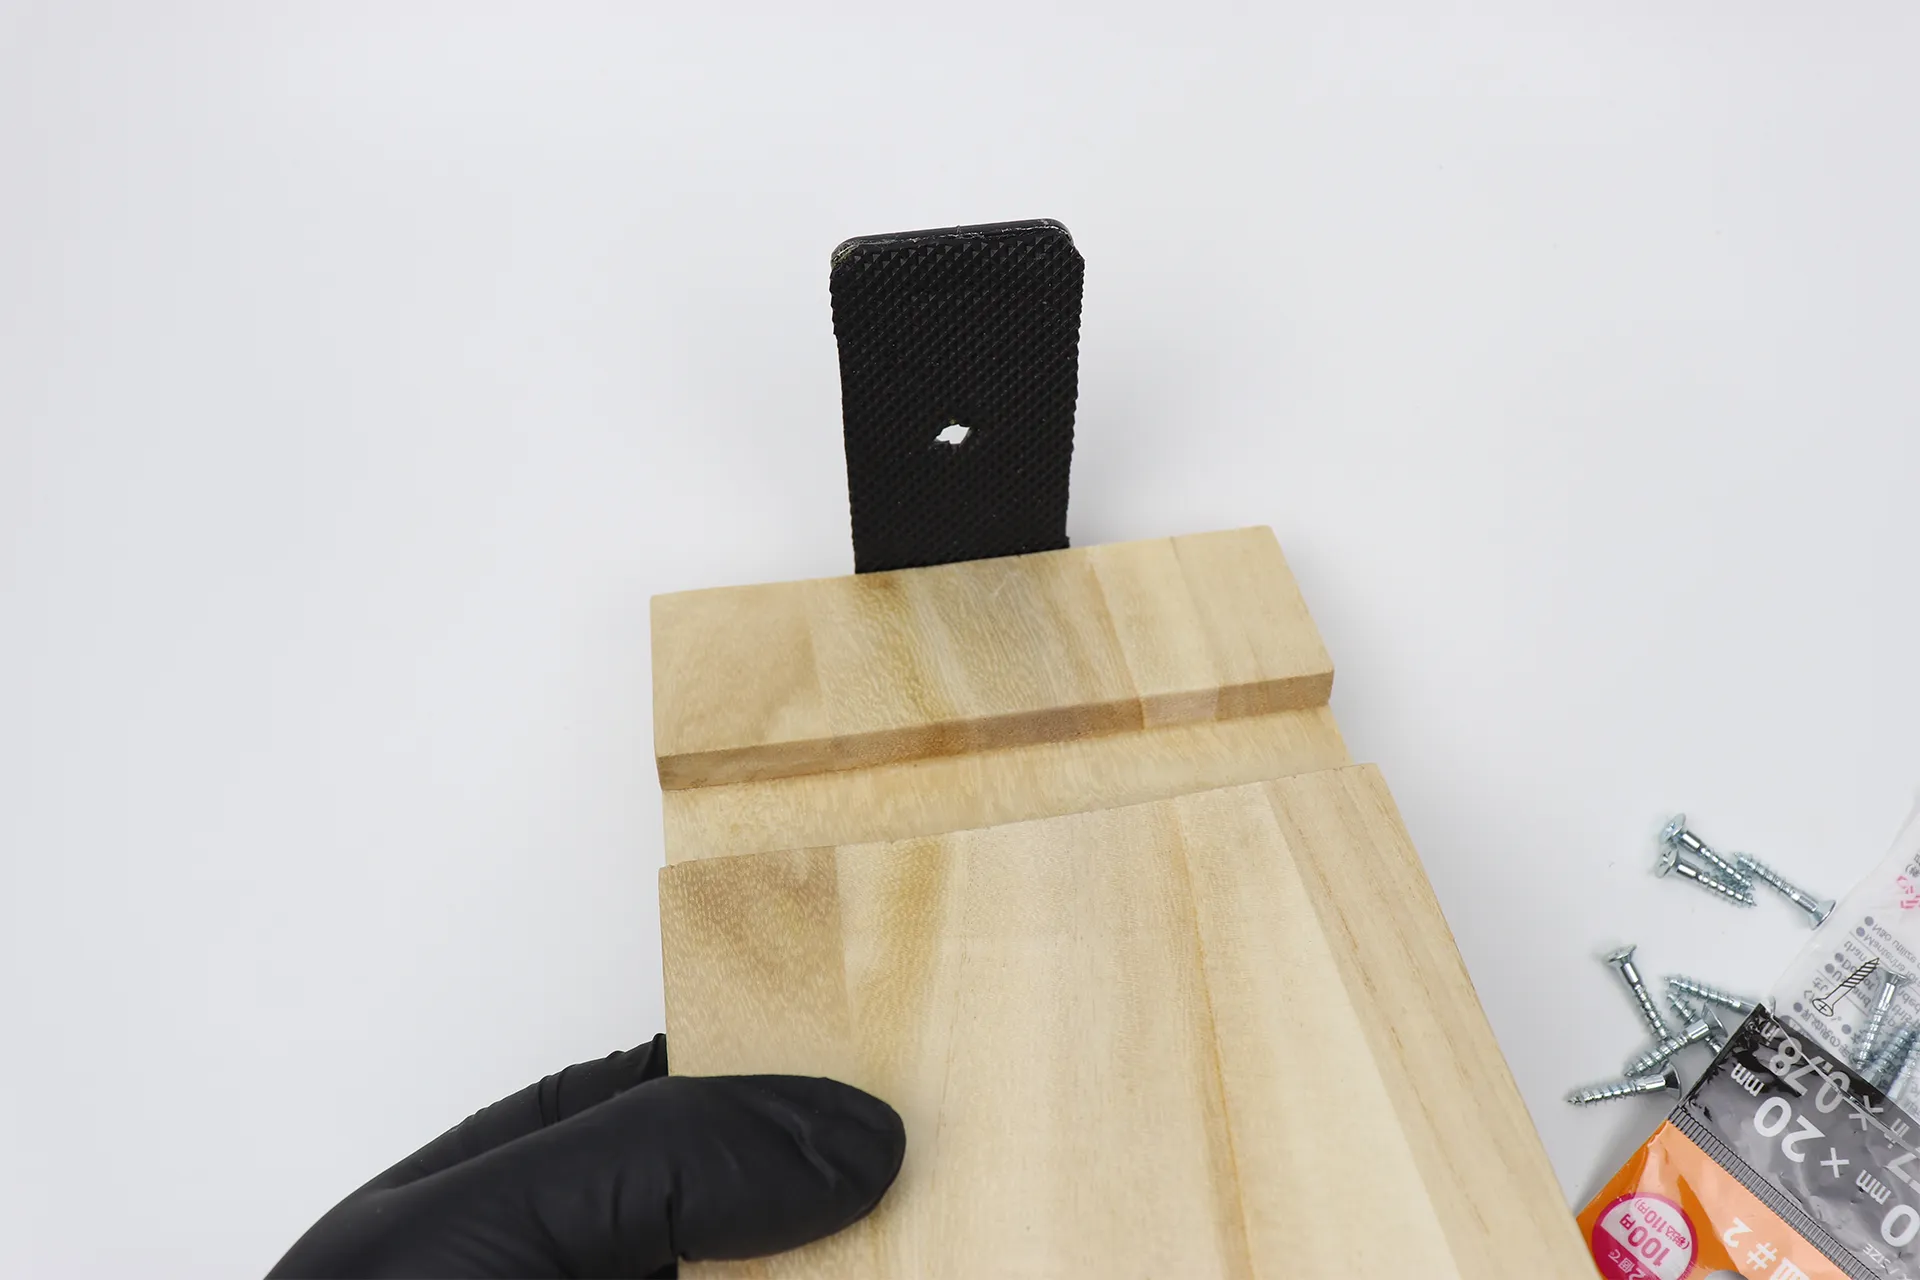
Once fixed in place, it will become a front guard, and the screw holes on the front of the main unit will align with the central opening, allowing it to be secured with 1/4-inch screws.
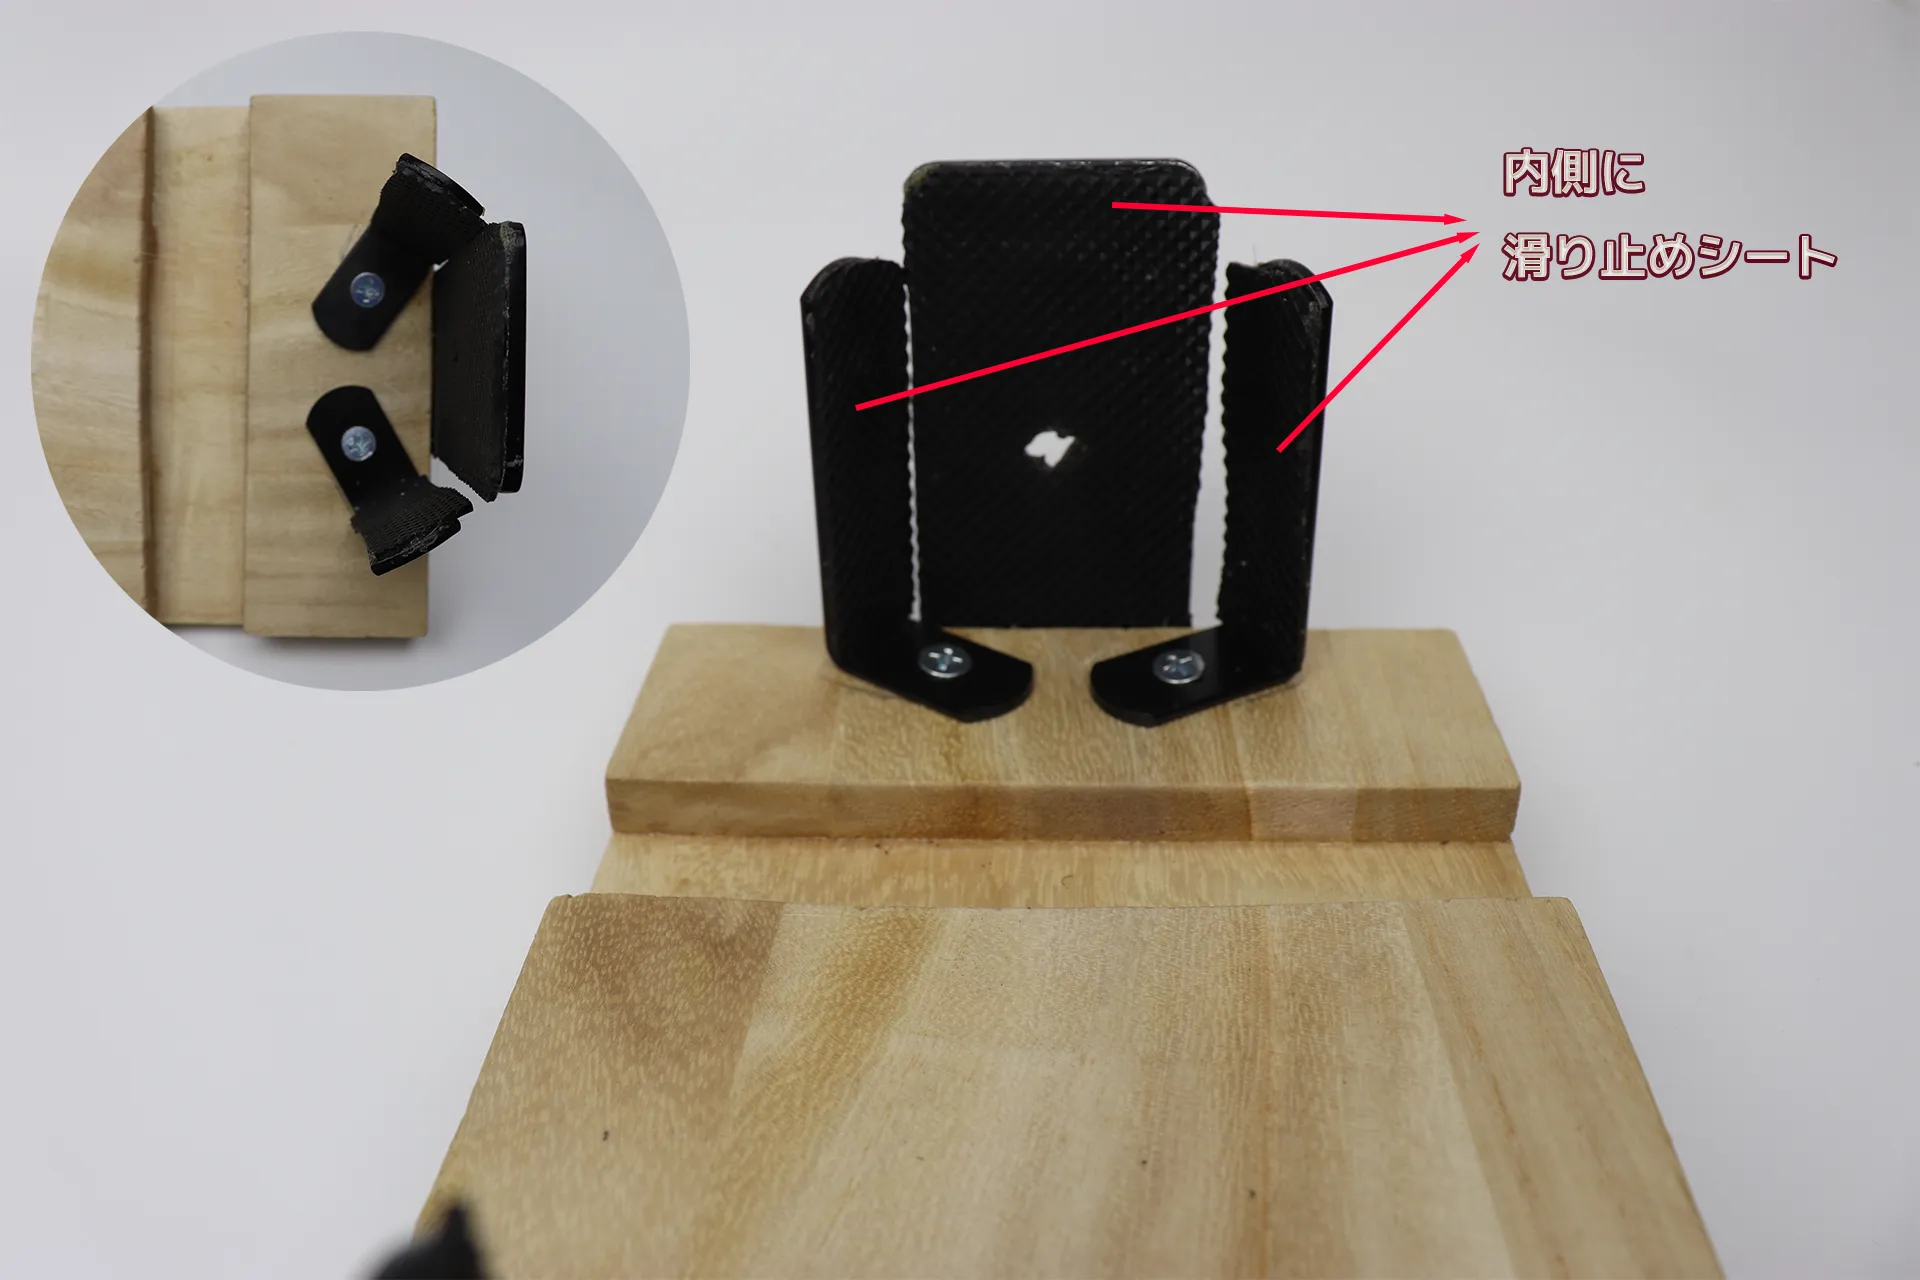
Attach two small L-shaped brackets, each with non-slip material on the inside, to the brackets with screws at a slight angle as shown in the image. This angle is determined by placing the front of the main unit against it and ensuring a snug fit.
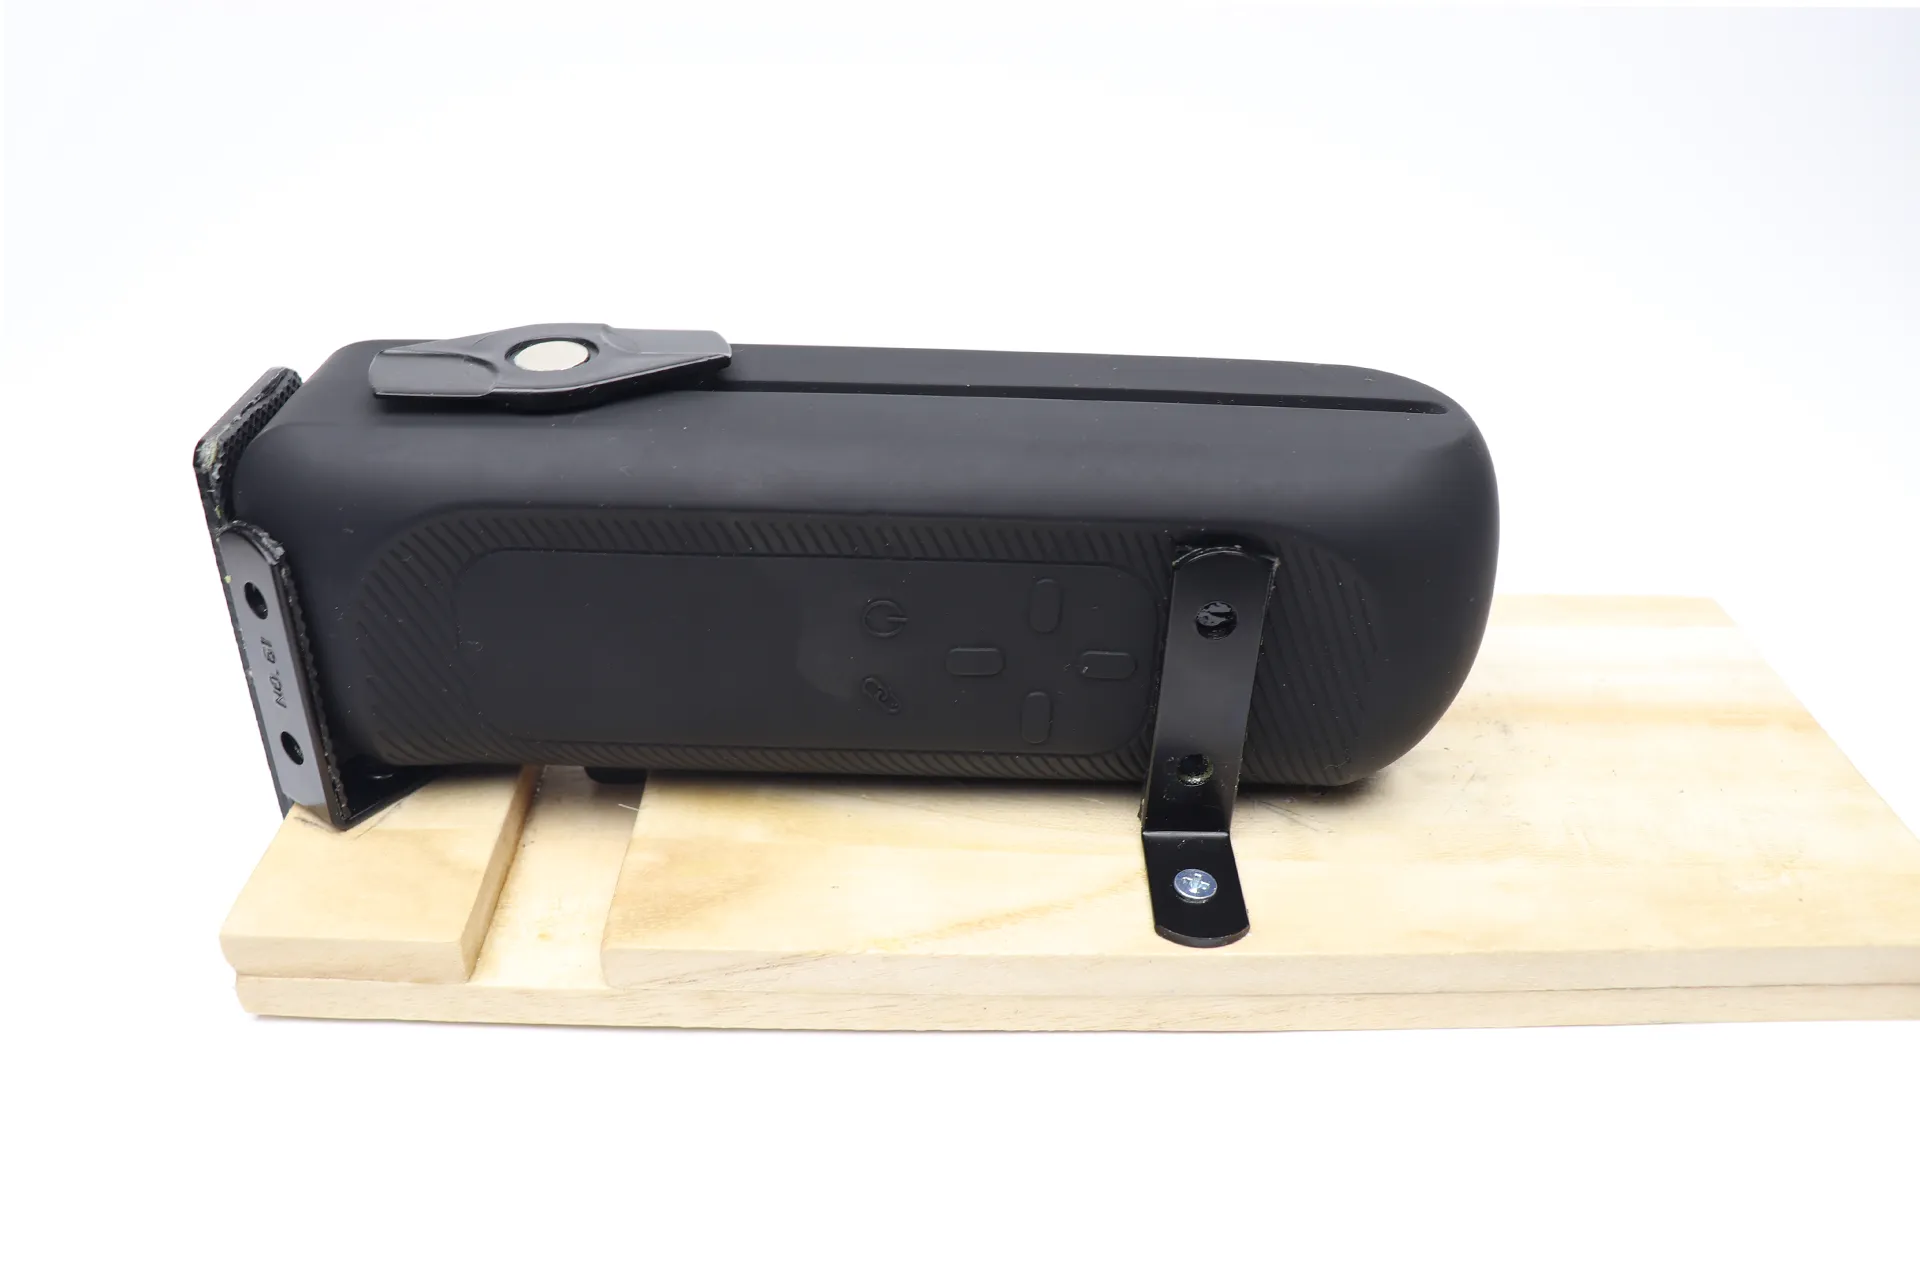
A small L-shaped piece with anti-slip material on the outside is screwed to the back of the main unit. It is positioned so as not to interfere with the control panel.
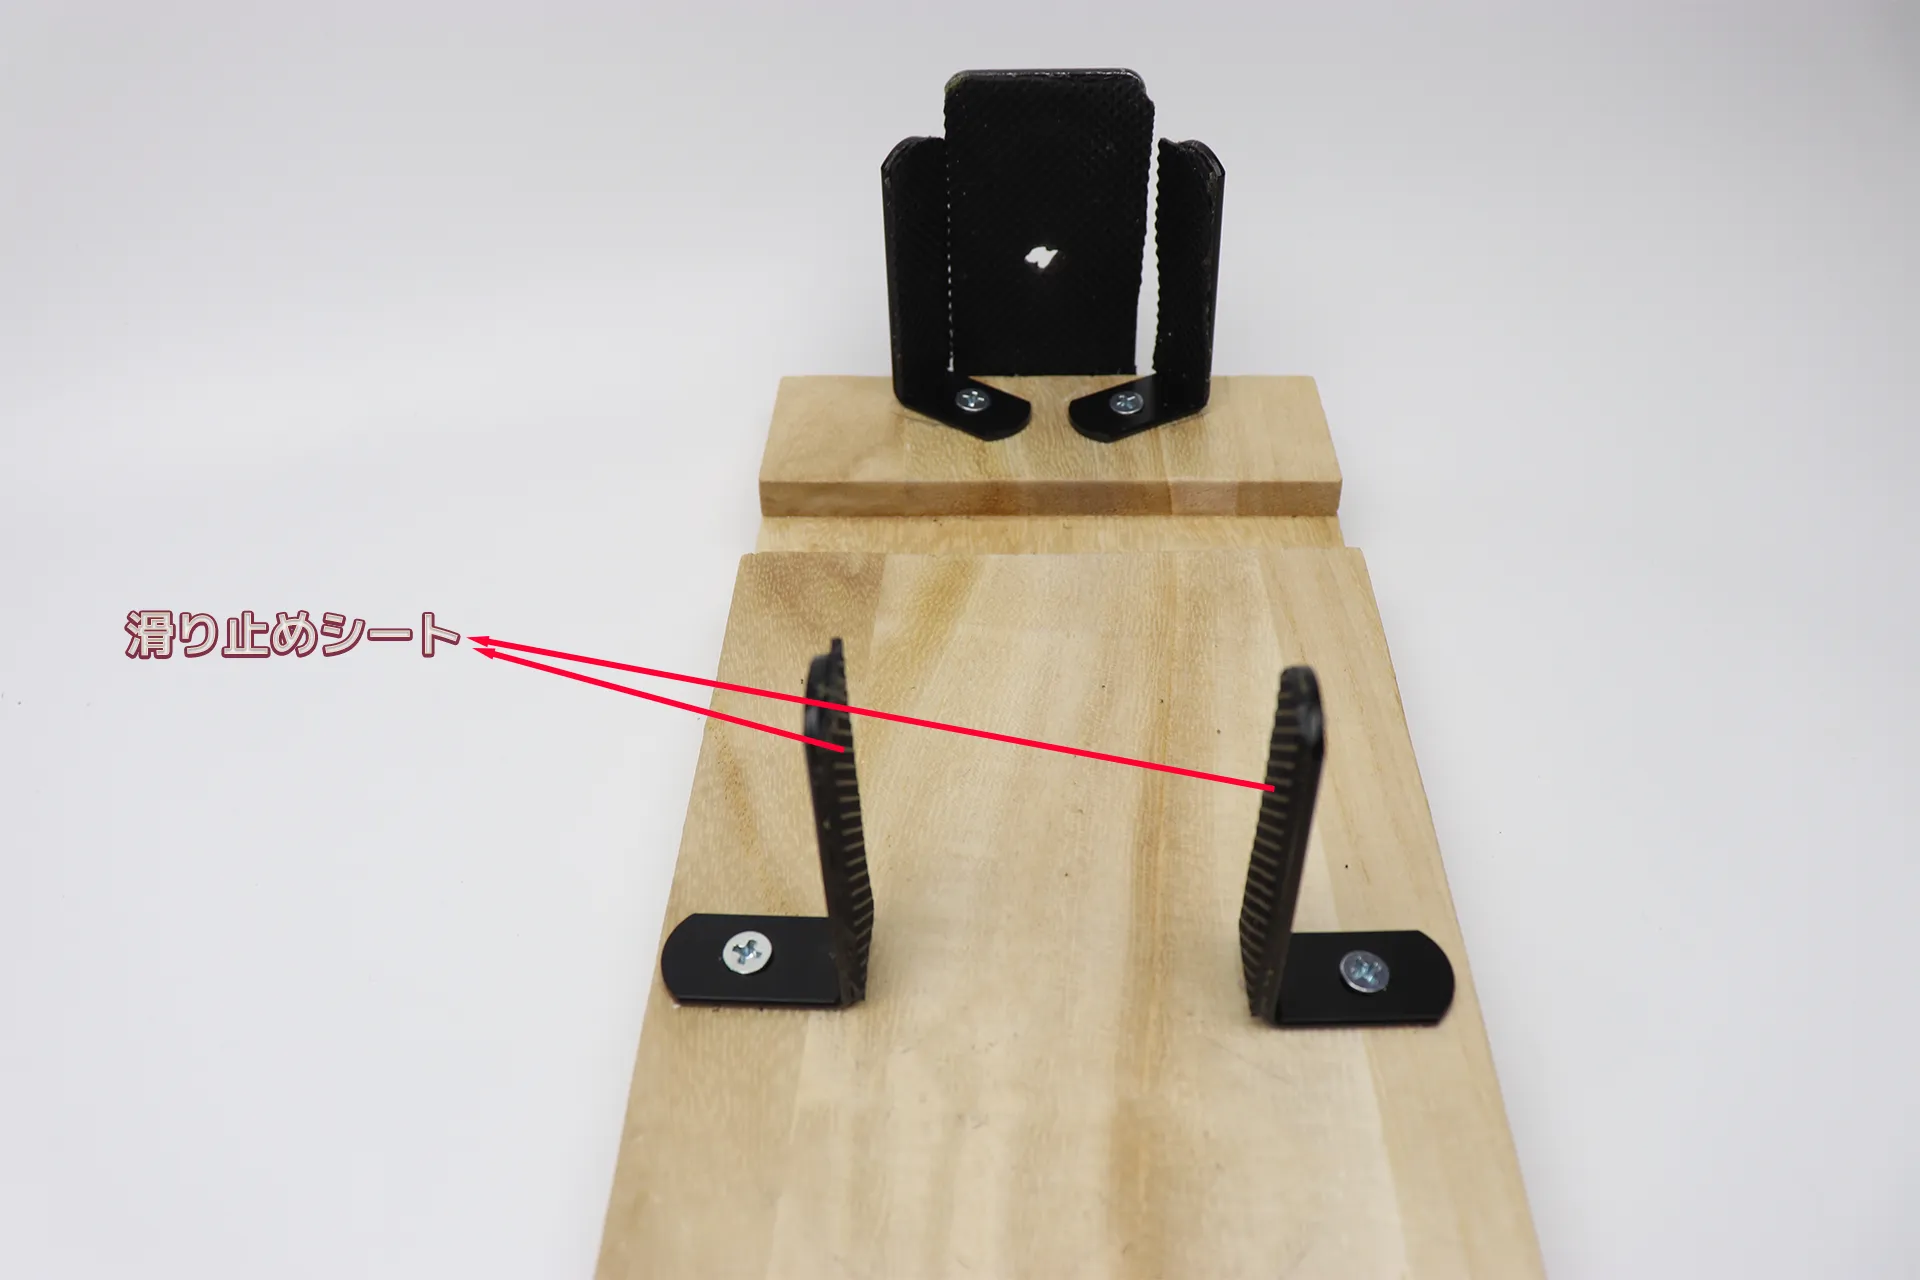
The other side is also secured with screws as shown in the image. The width is adjusted to perfectly match the main body.
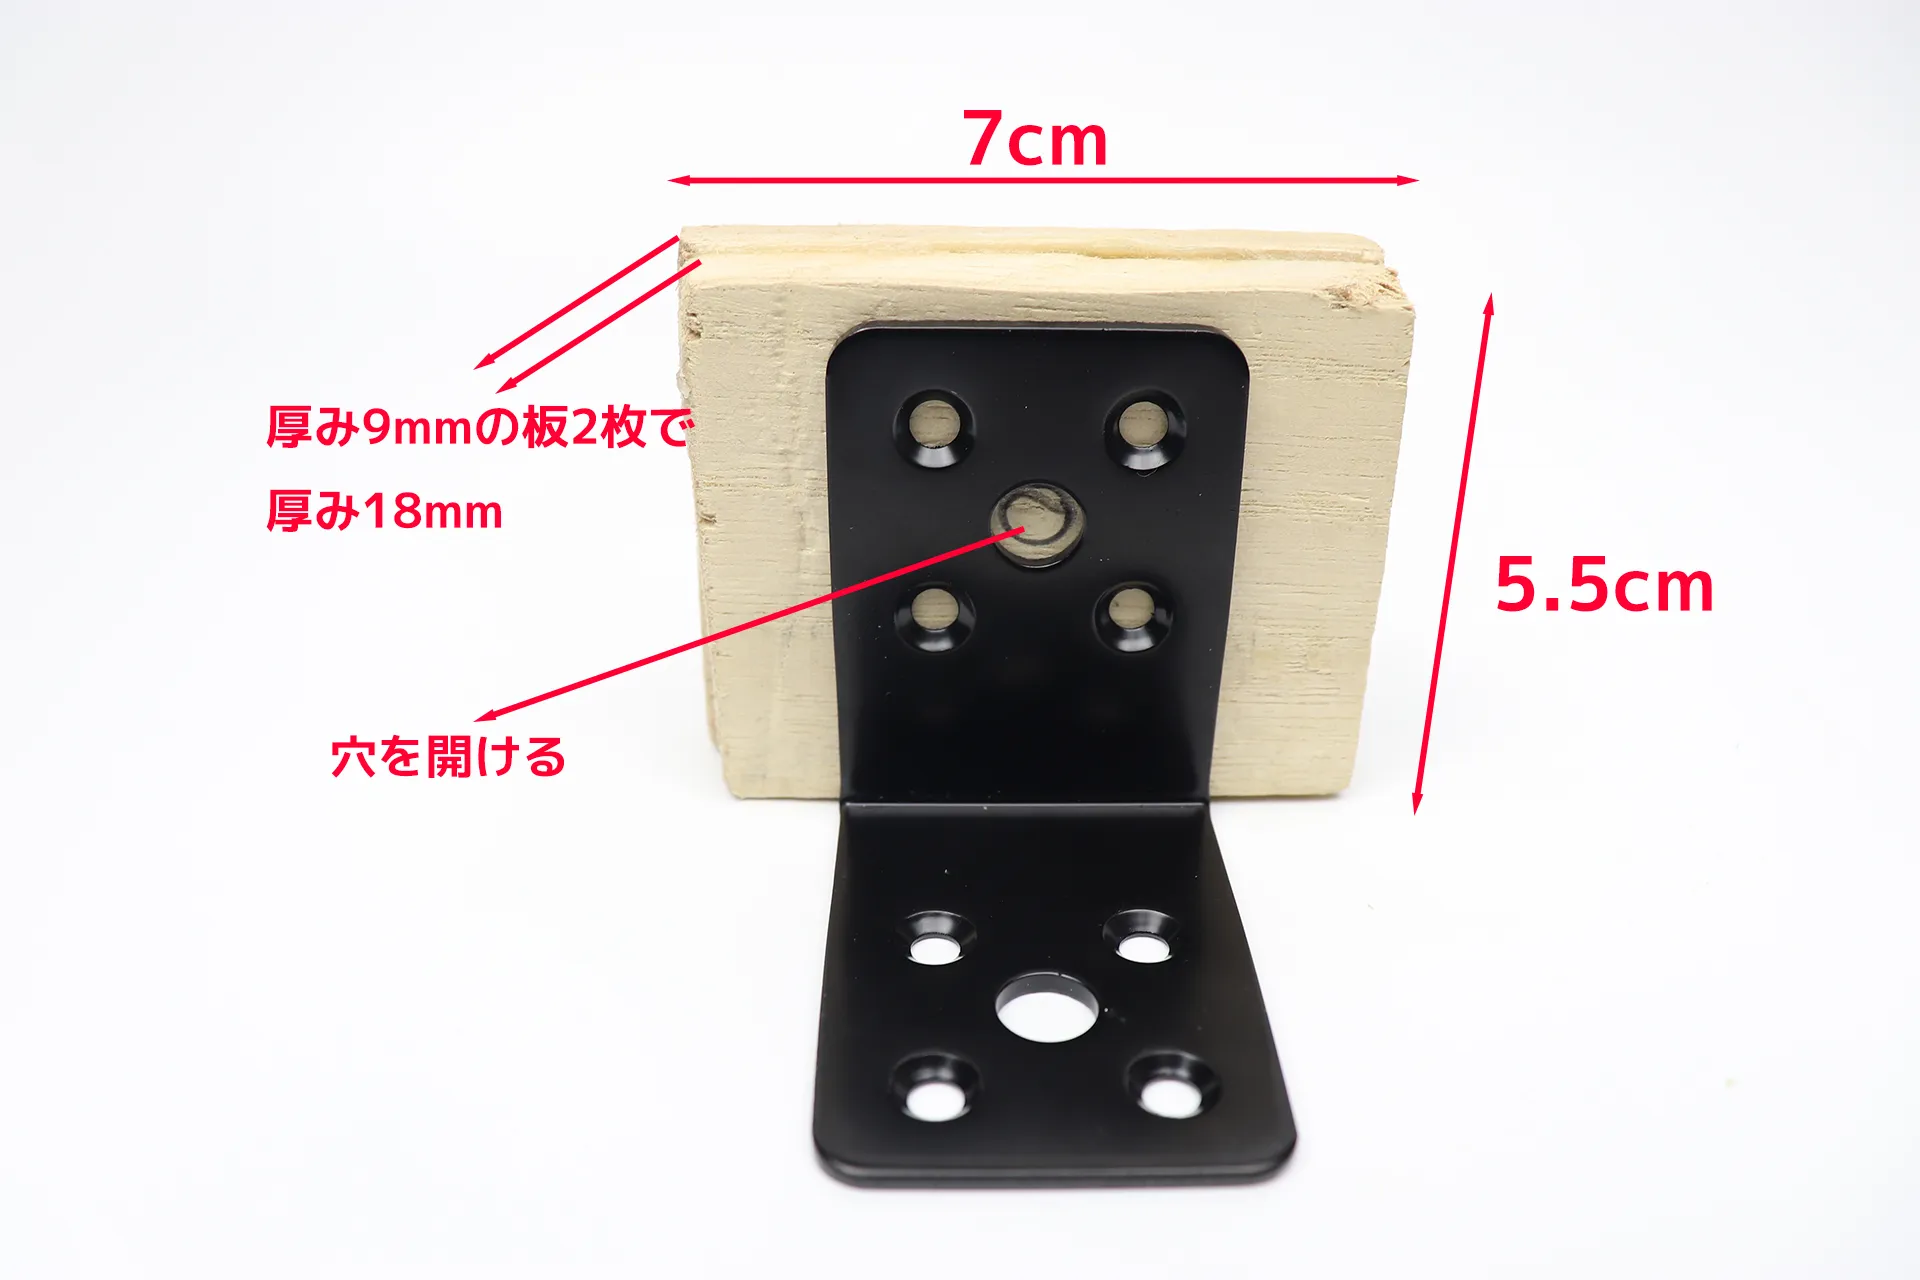
Now we'll make the clamp part. Cut out two 2.76 in (7 cm) x 2.17 in (5.5 cm) pieces of scrap wood and glue them together with wood glue. Place the L-shaped bracket on the wood and mark the hole positions with a pencil.
| Product name | DAIDOHANT (Reinforcement Hardware) Black Multi-purpose Hardware L-shaped [Steel] | ||
|---|---|---|---|
| retailers | |||
| price | Around 264 yen (tax included) | ||
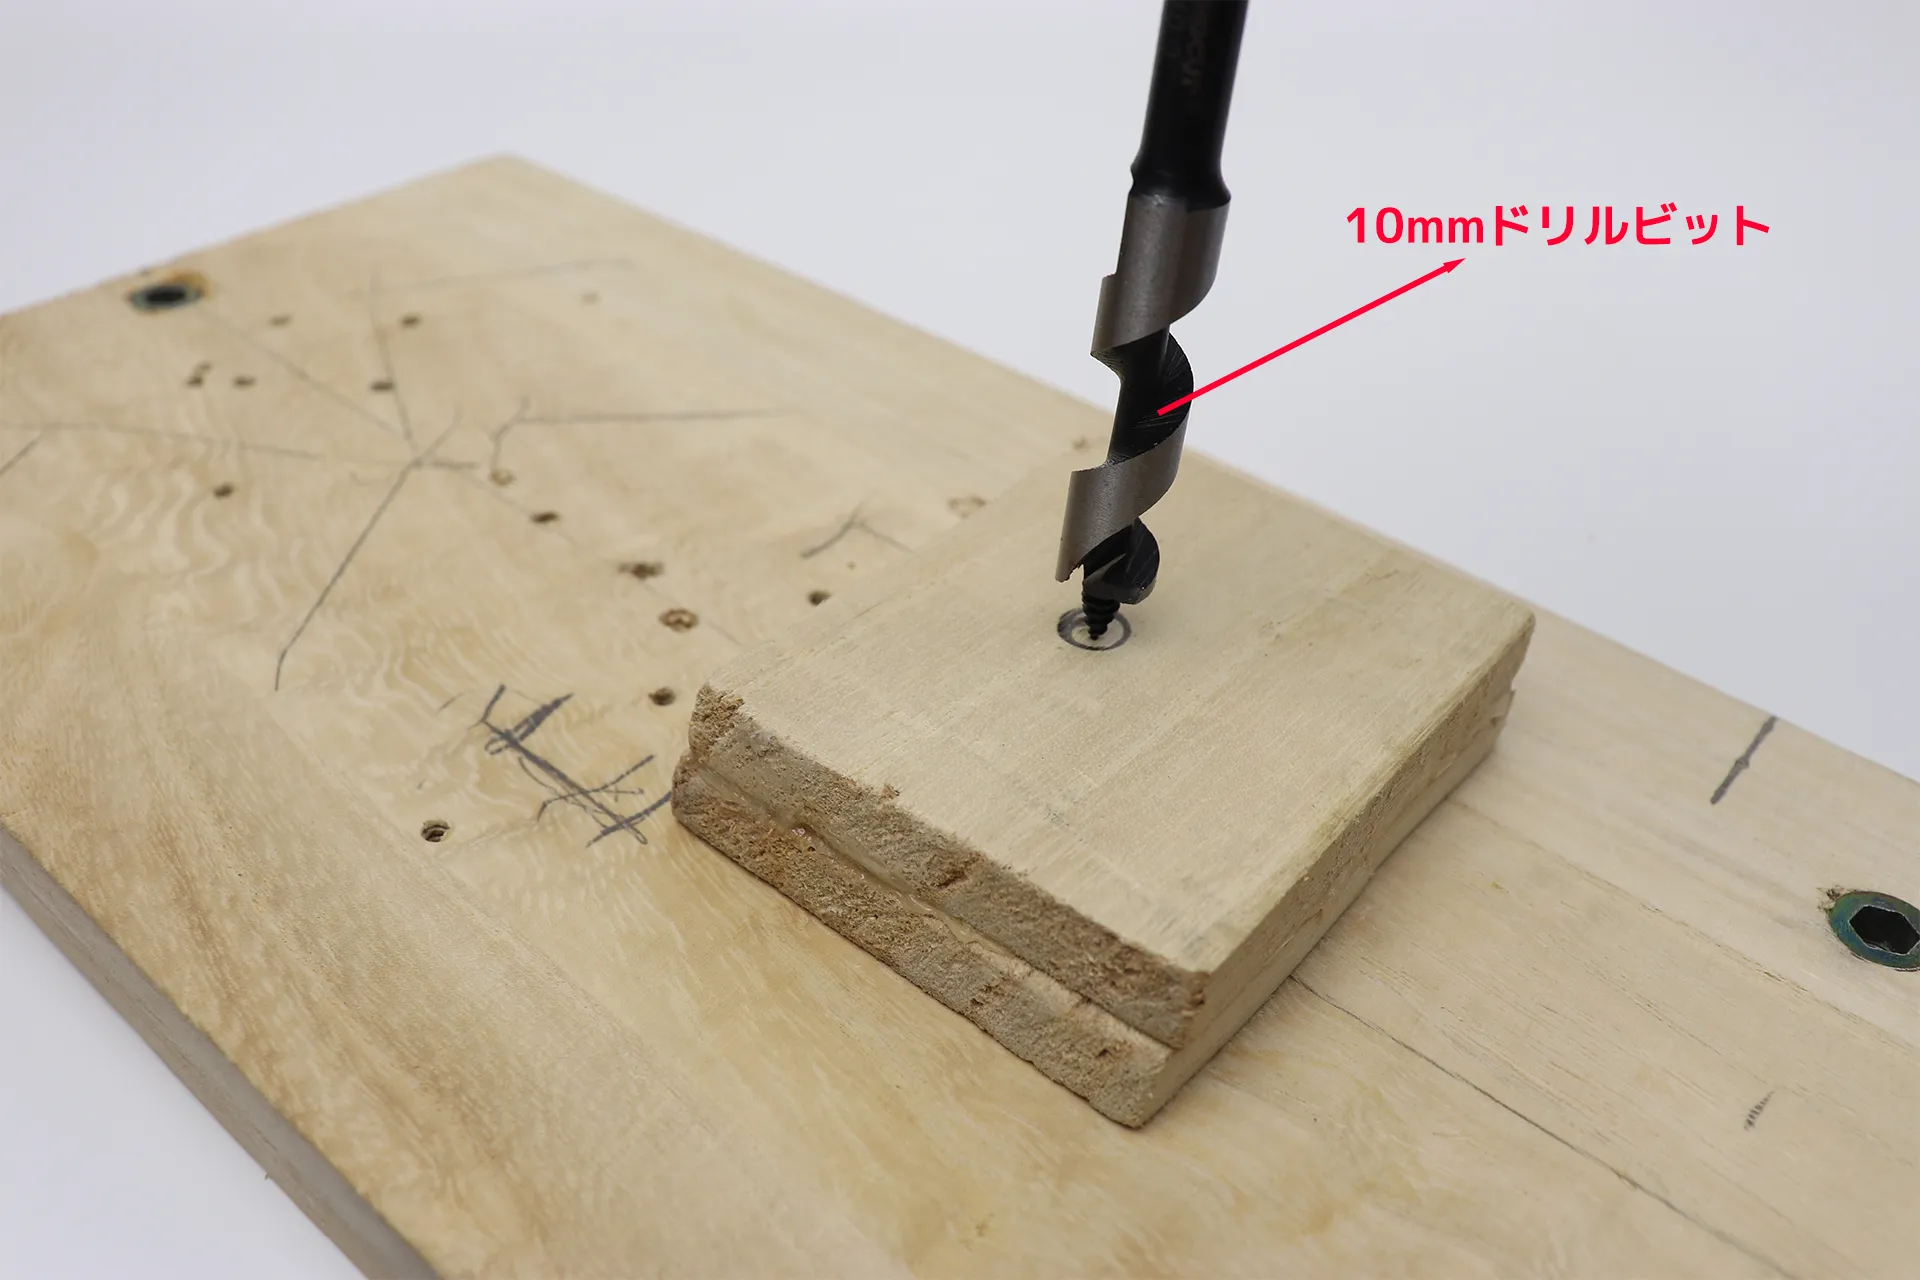
I drilled a through hole using a 10mm drill bit. I placed a sacrificial board underneath before drilling.
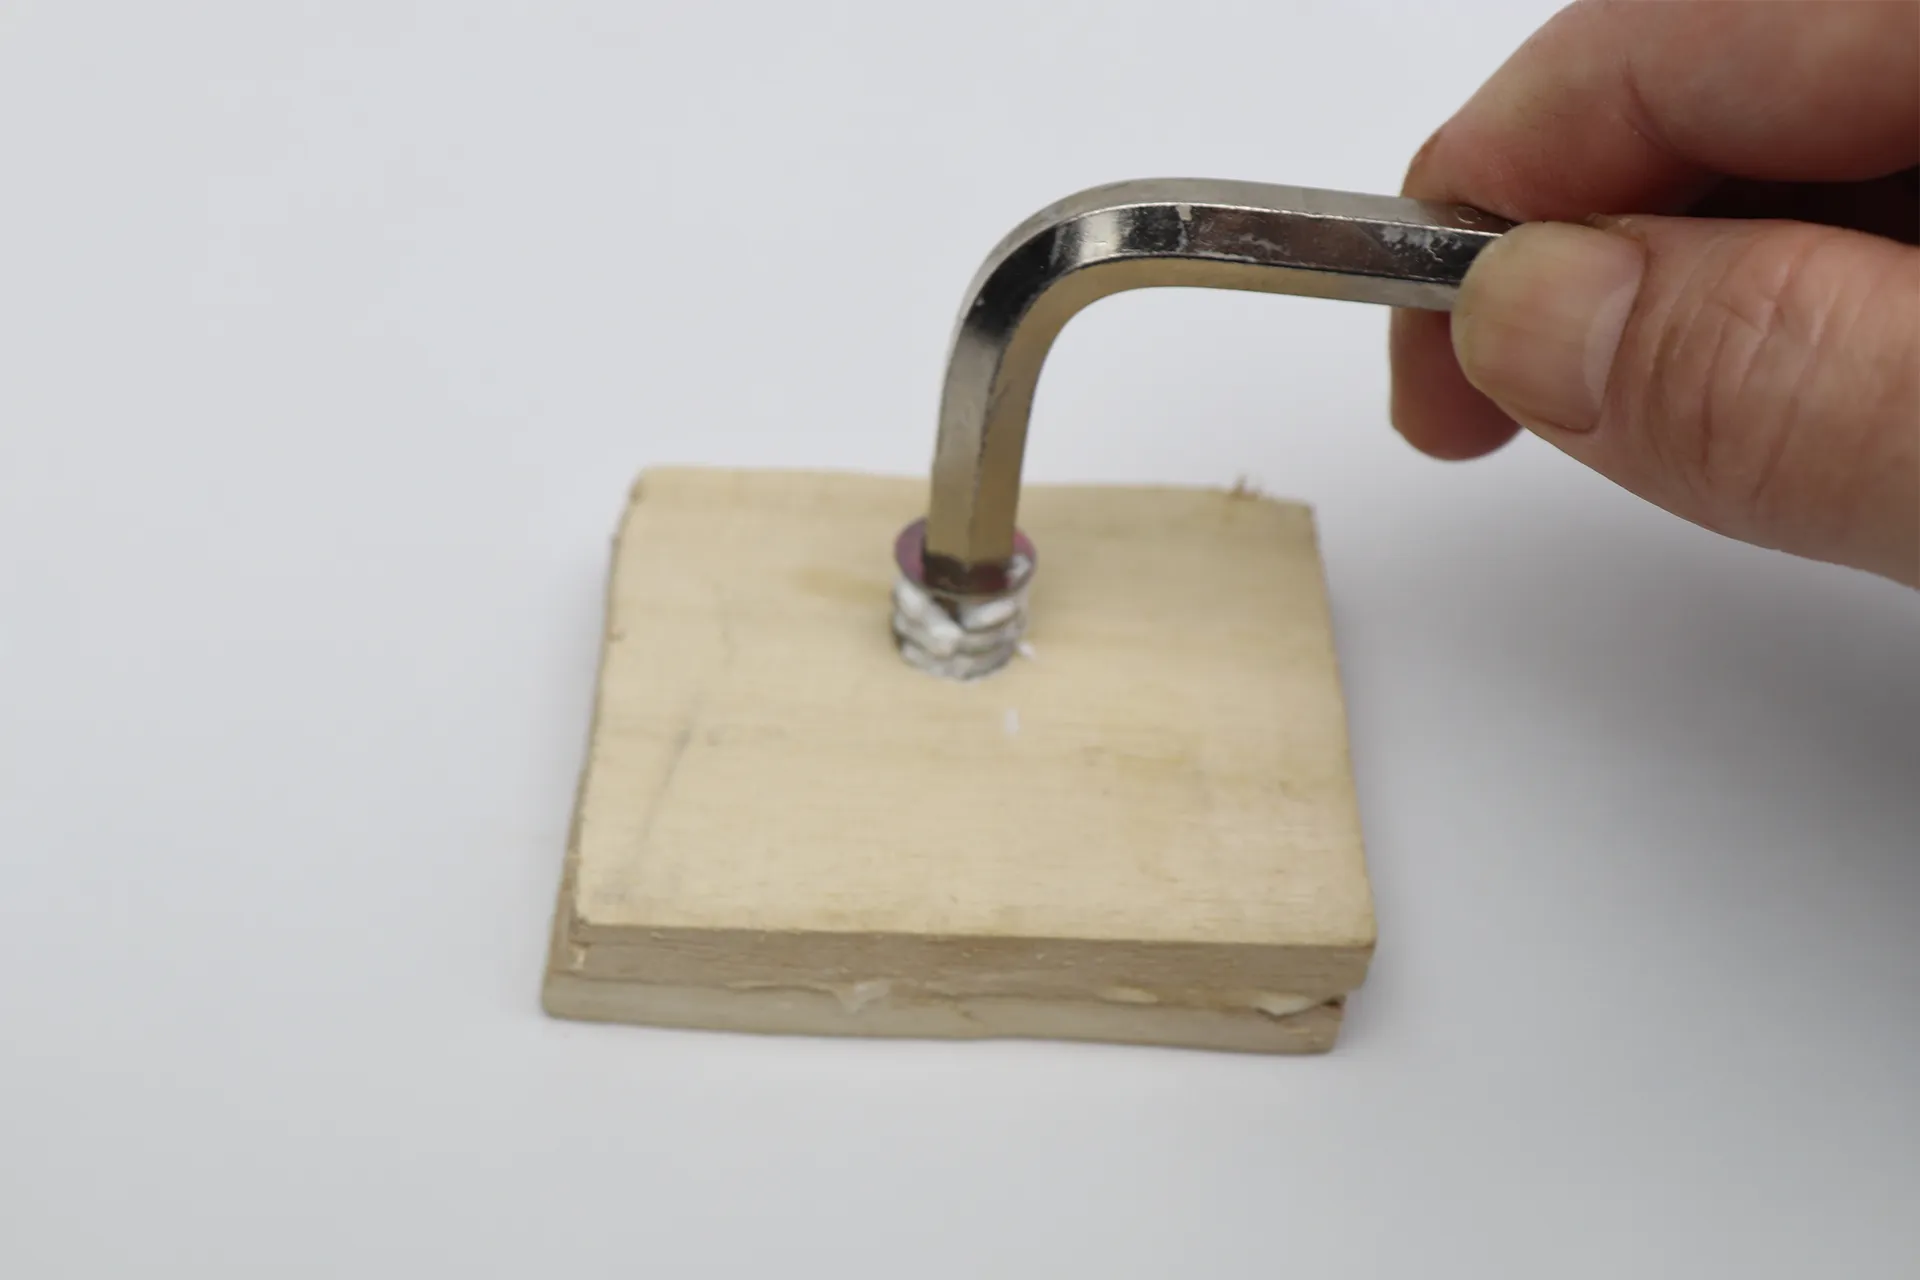
Insert a threaded insert into the through hole. Apply wood glue to prevent loosening and tighten it with a hex wrench to secure it in place.
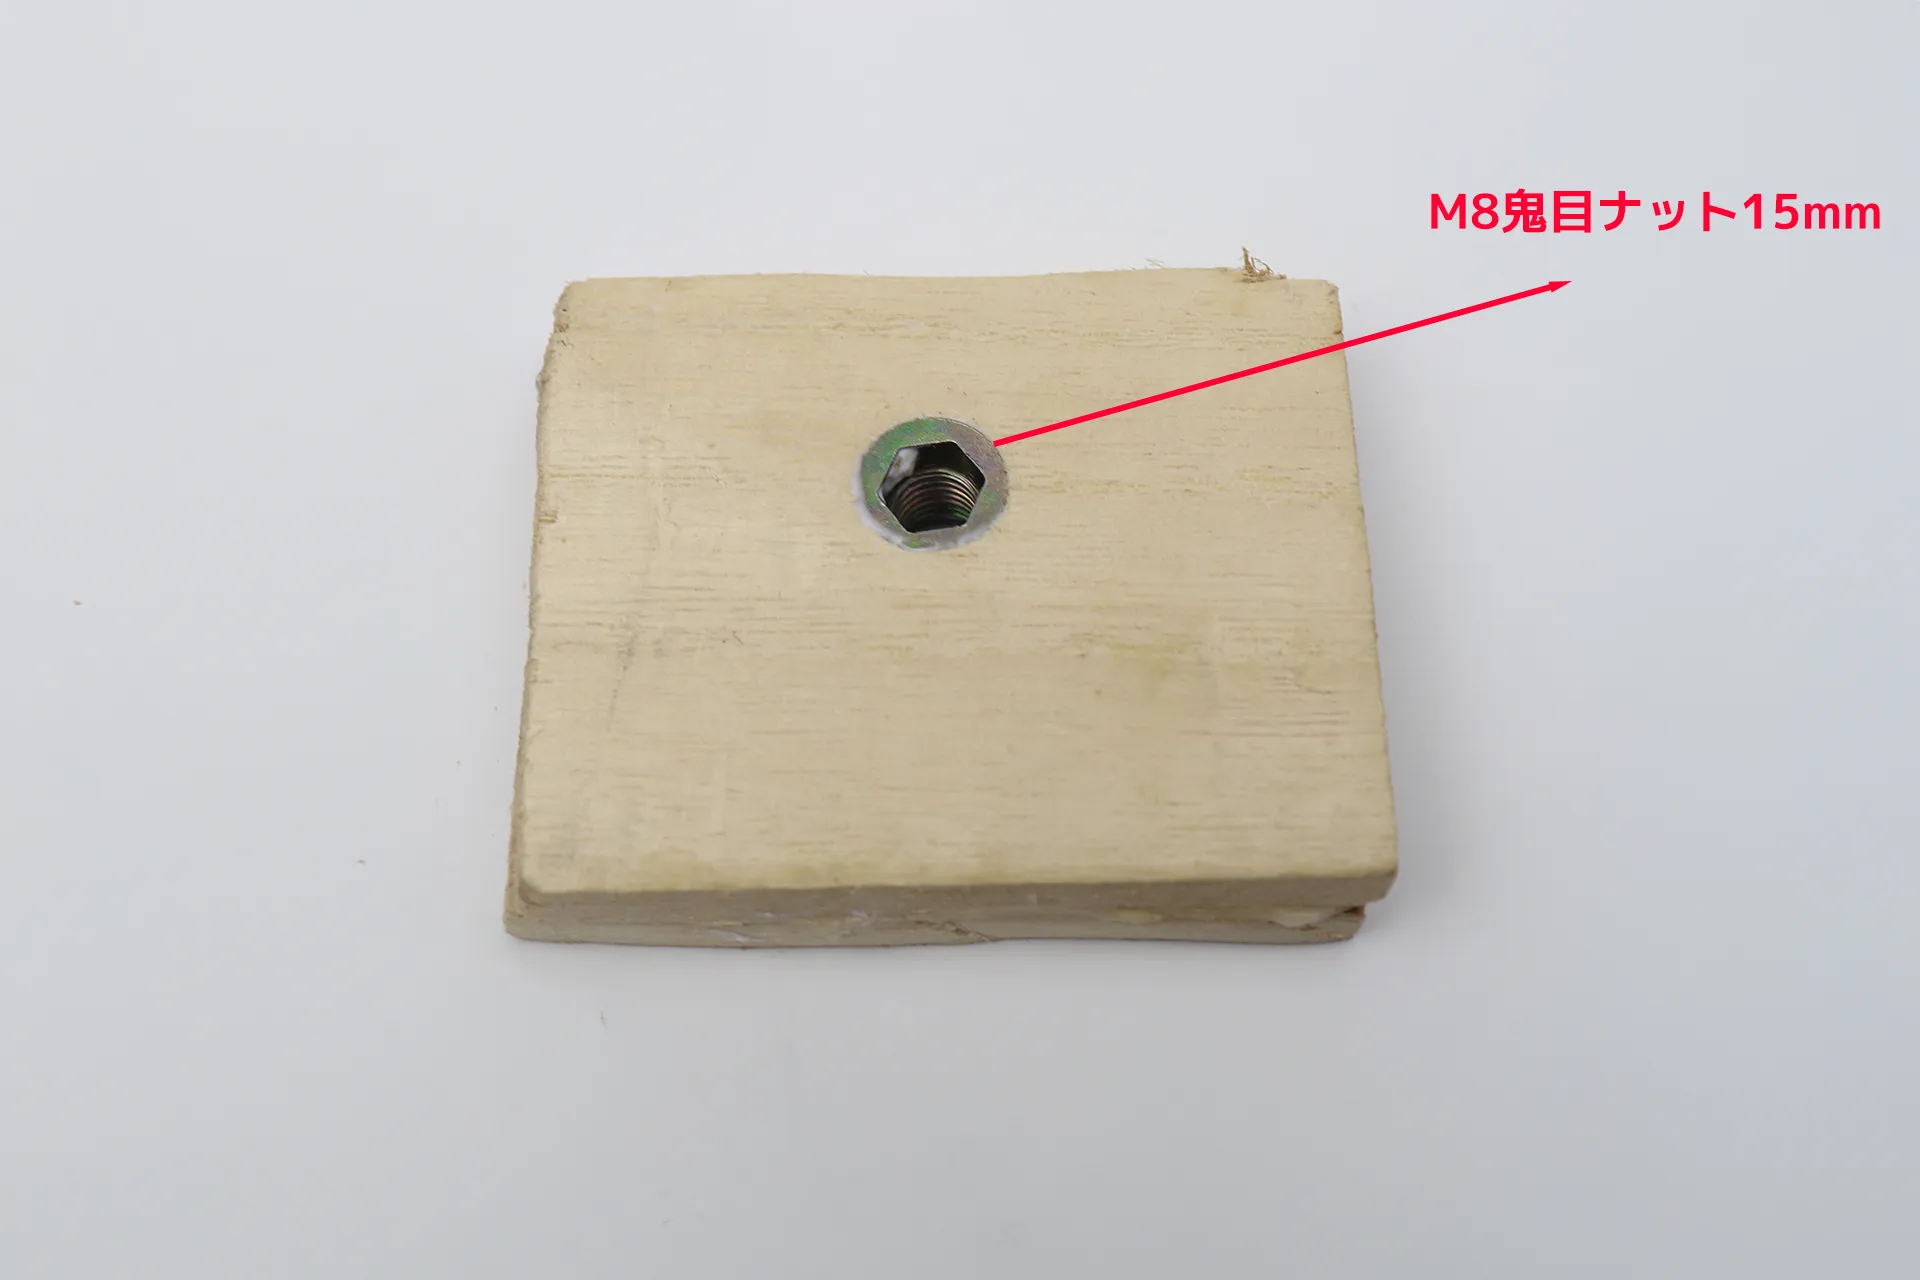
I embedded an M8 threaded insert nut, 15mm in length.
| Product name | Embedded insert nut, hexagonal nut, BESTU threaded type | ||
|---|---|---|---|
| retailers | |||
| price | Around 980 yen (tax included) | ||
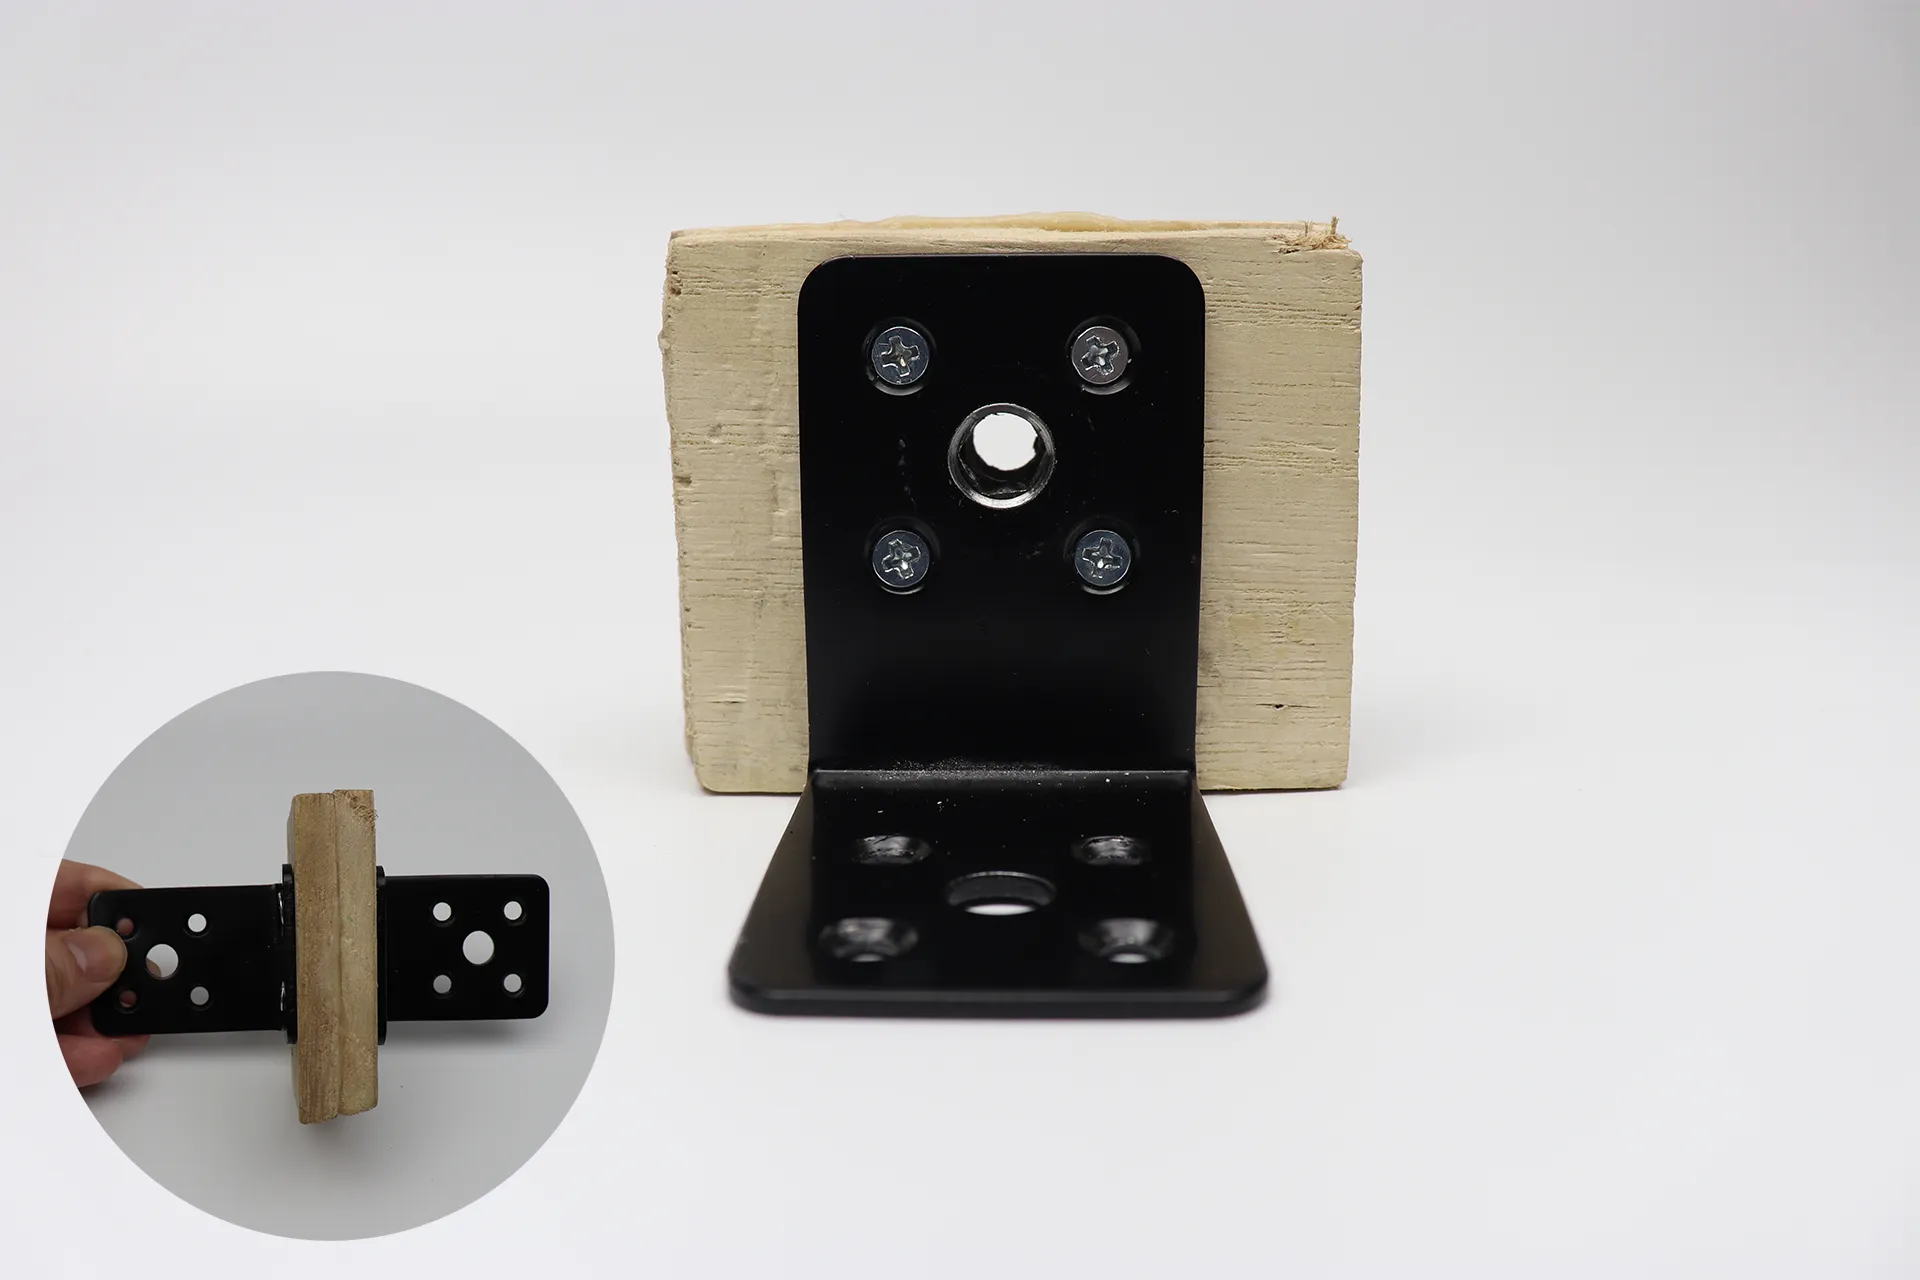
Use two L-shaped brackets to screw in the board with the threaded inserts attached. Since you're screwing from both sides, there's a high chance of the screws interfering with each other, so although the image shows four screws, it's safer to only secure it diagonally. (On the opposite side, screw in the diagonal on the side where the screws won't interfere.)
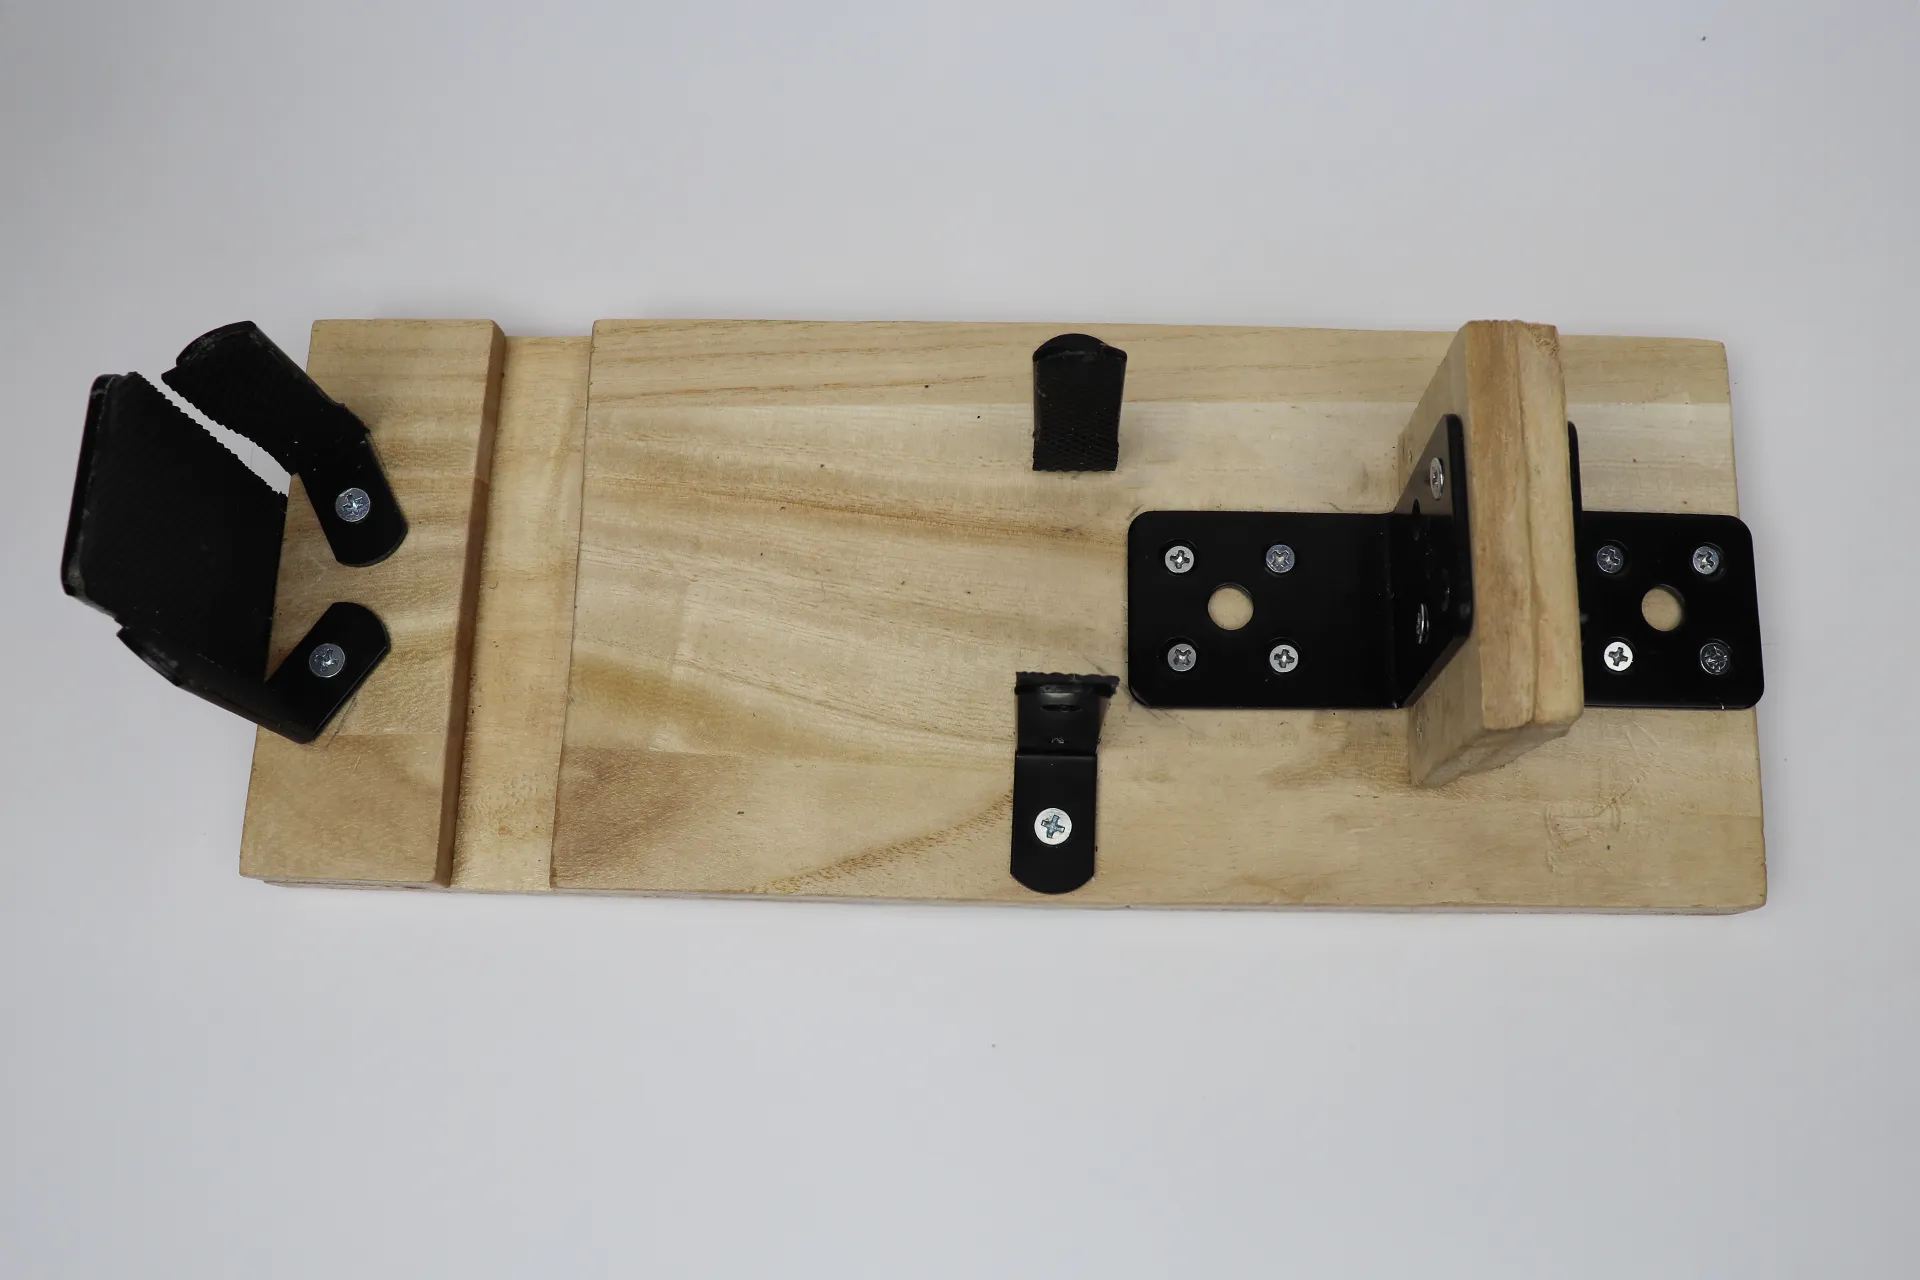
Attach the completed clamp base as shown in the image. I screwed it in so that the tip of the metal fitting was right at the edge of the 11.81 in (30 cm) board.
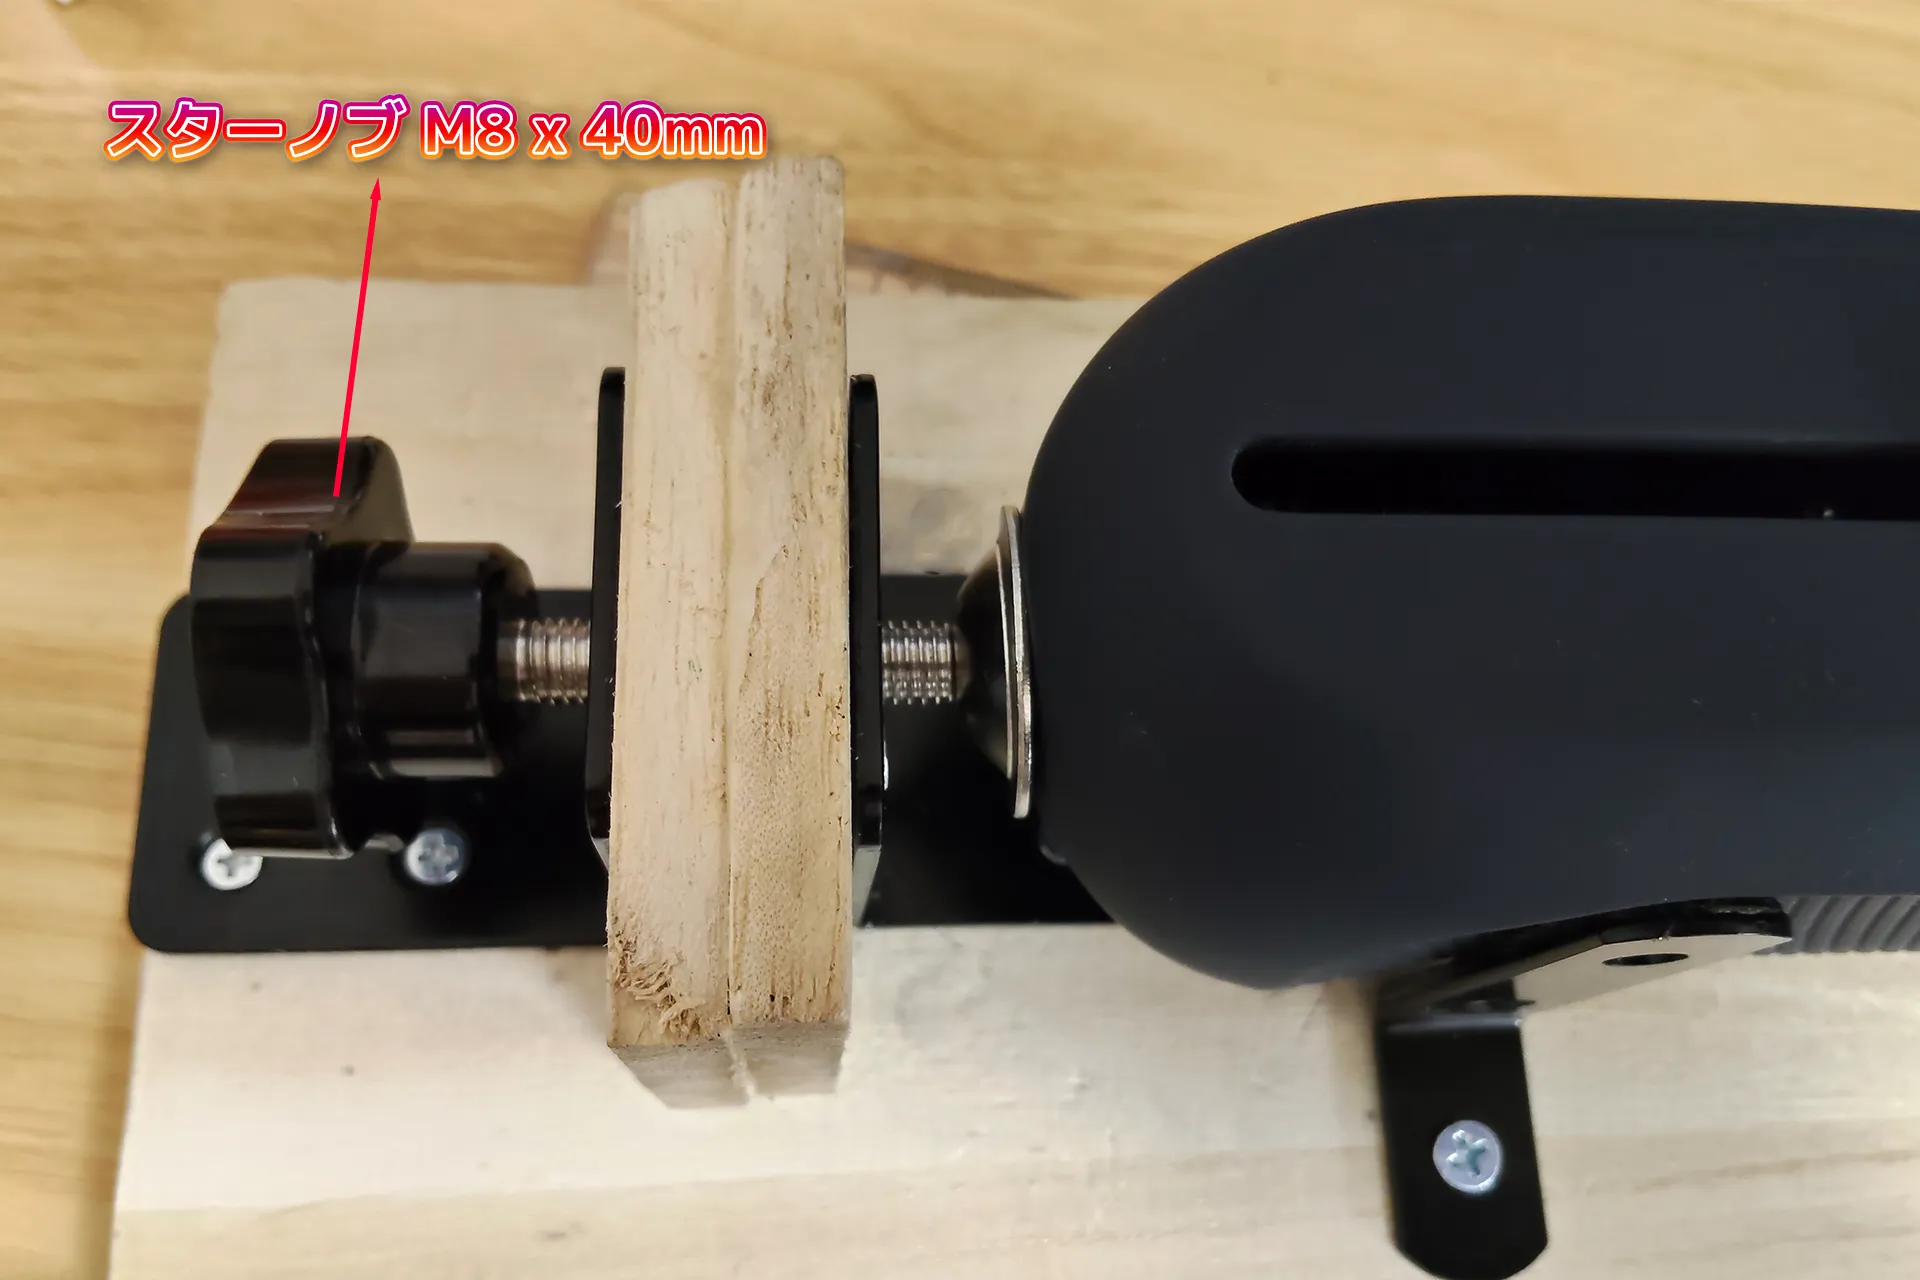
Attach the Star Knob M8 to the clamp base as shown in the image.
| Product name | uxcell Star Knob M8 x 40mm | ||
|---|---|---|---|
| retailers | |||
| price | Around 1,112 yen (tax included) | ||
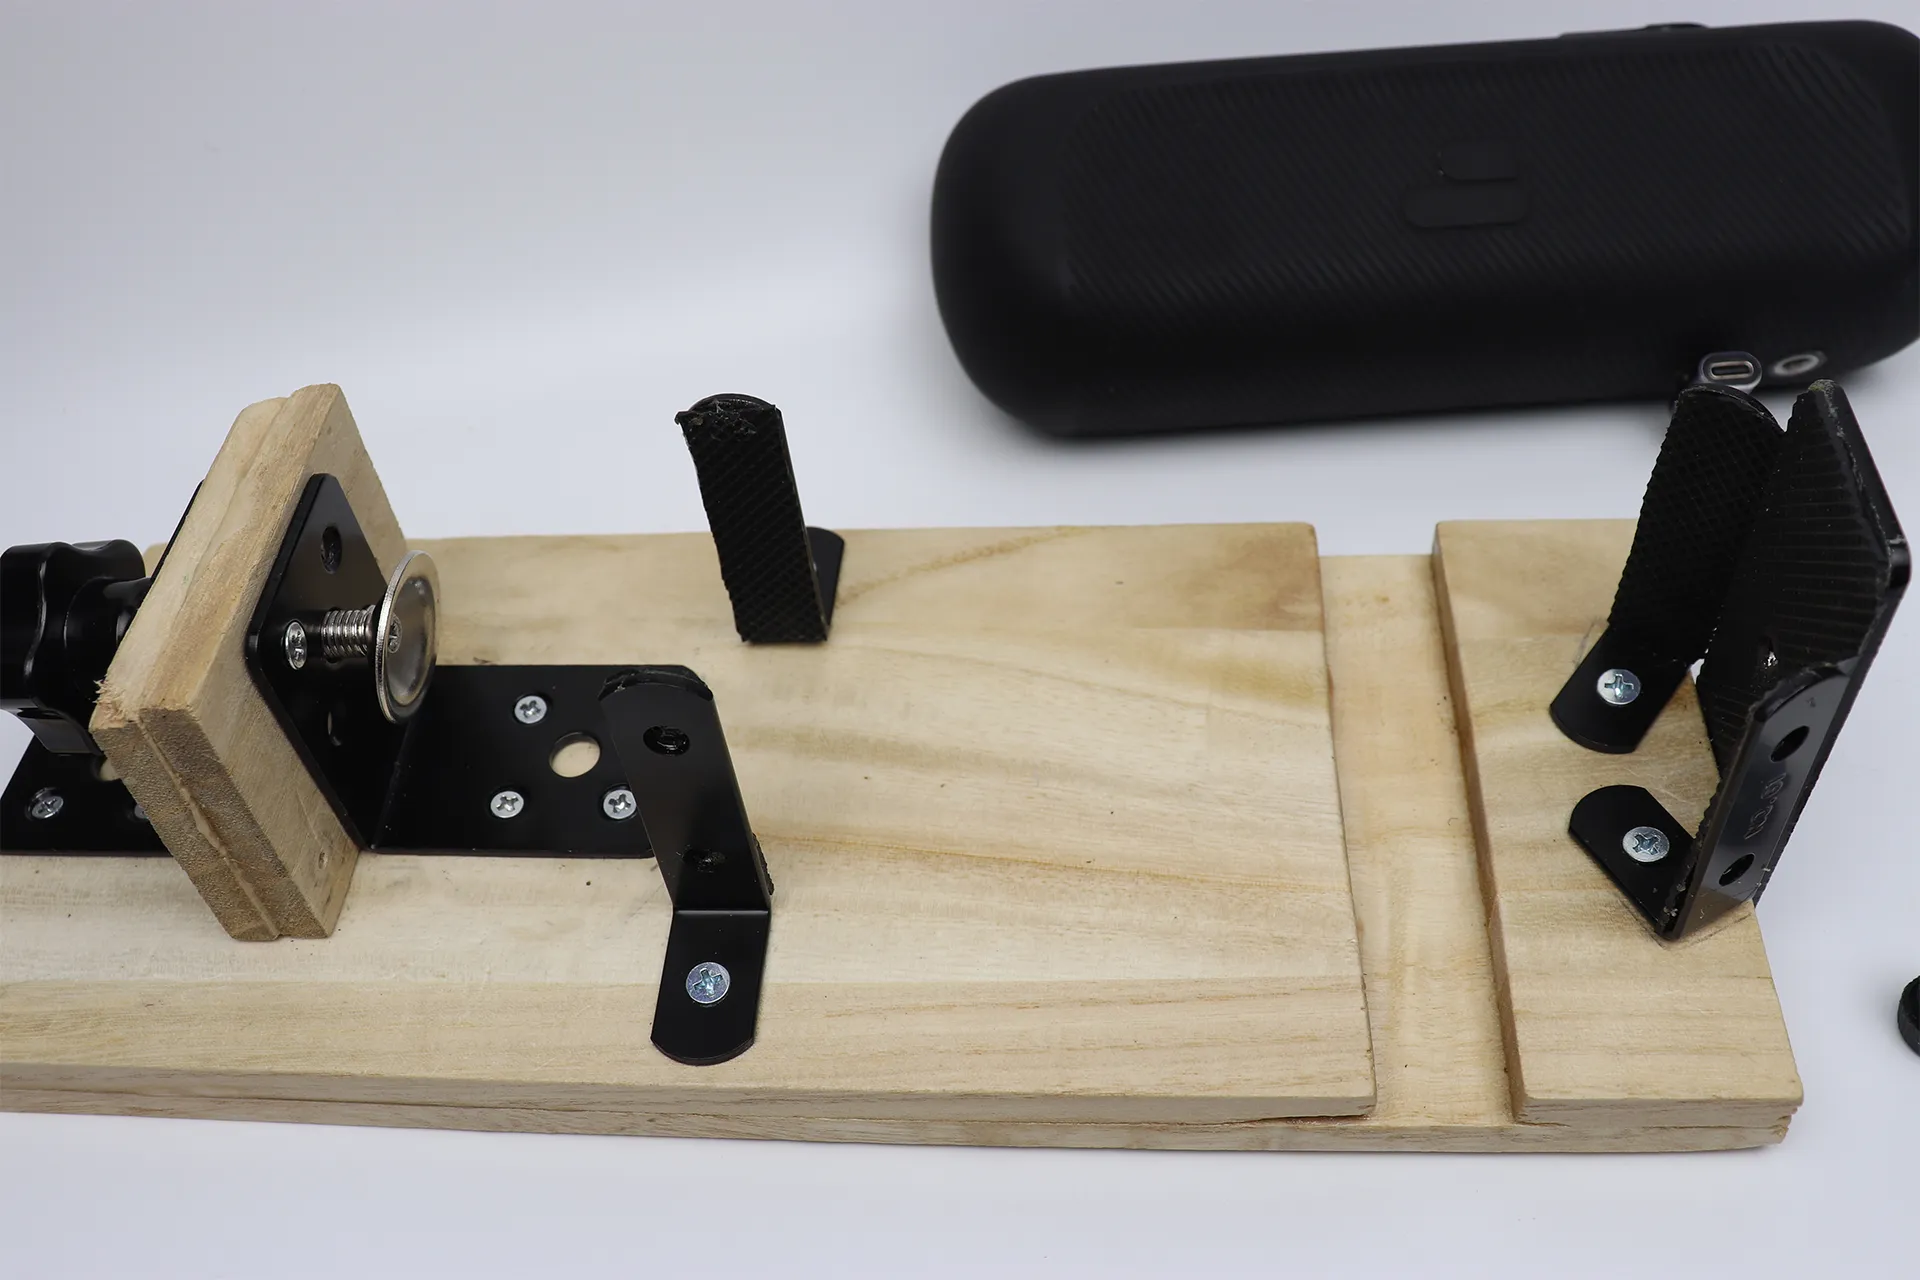
The mounting positions for each bracket are arranged as shown.
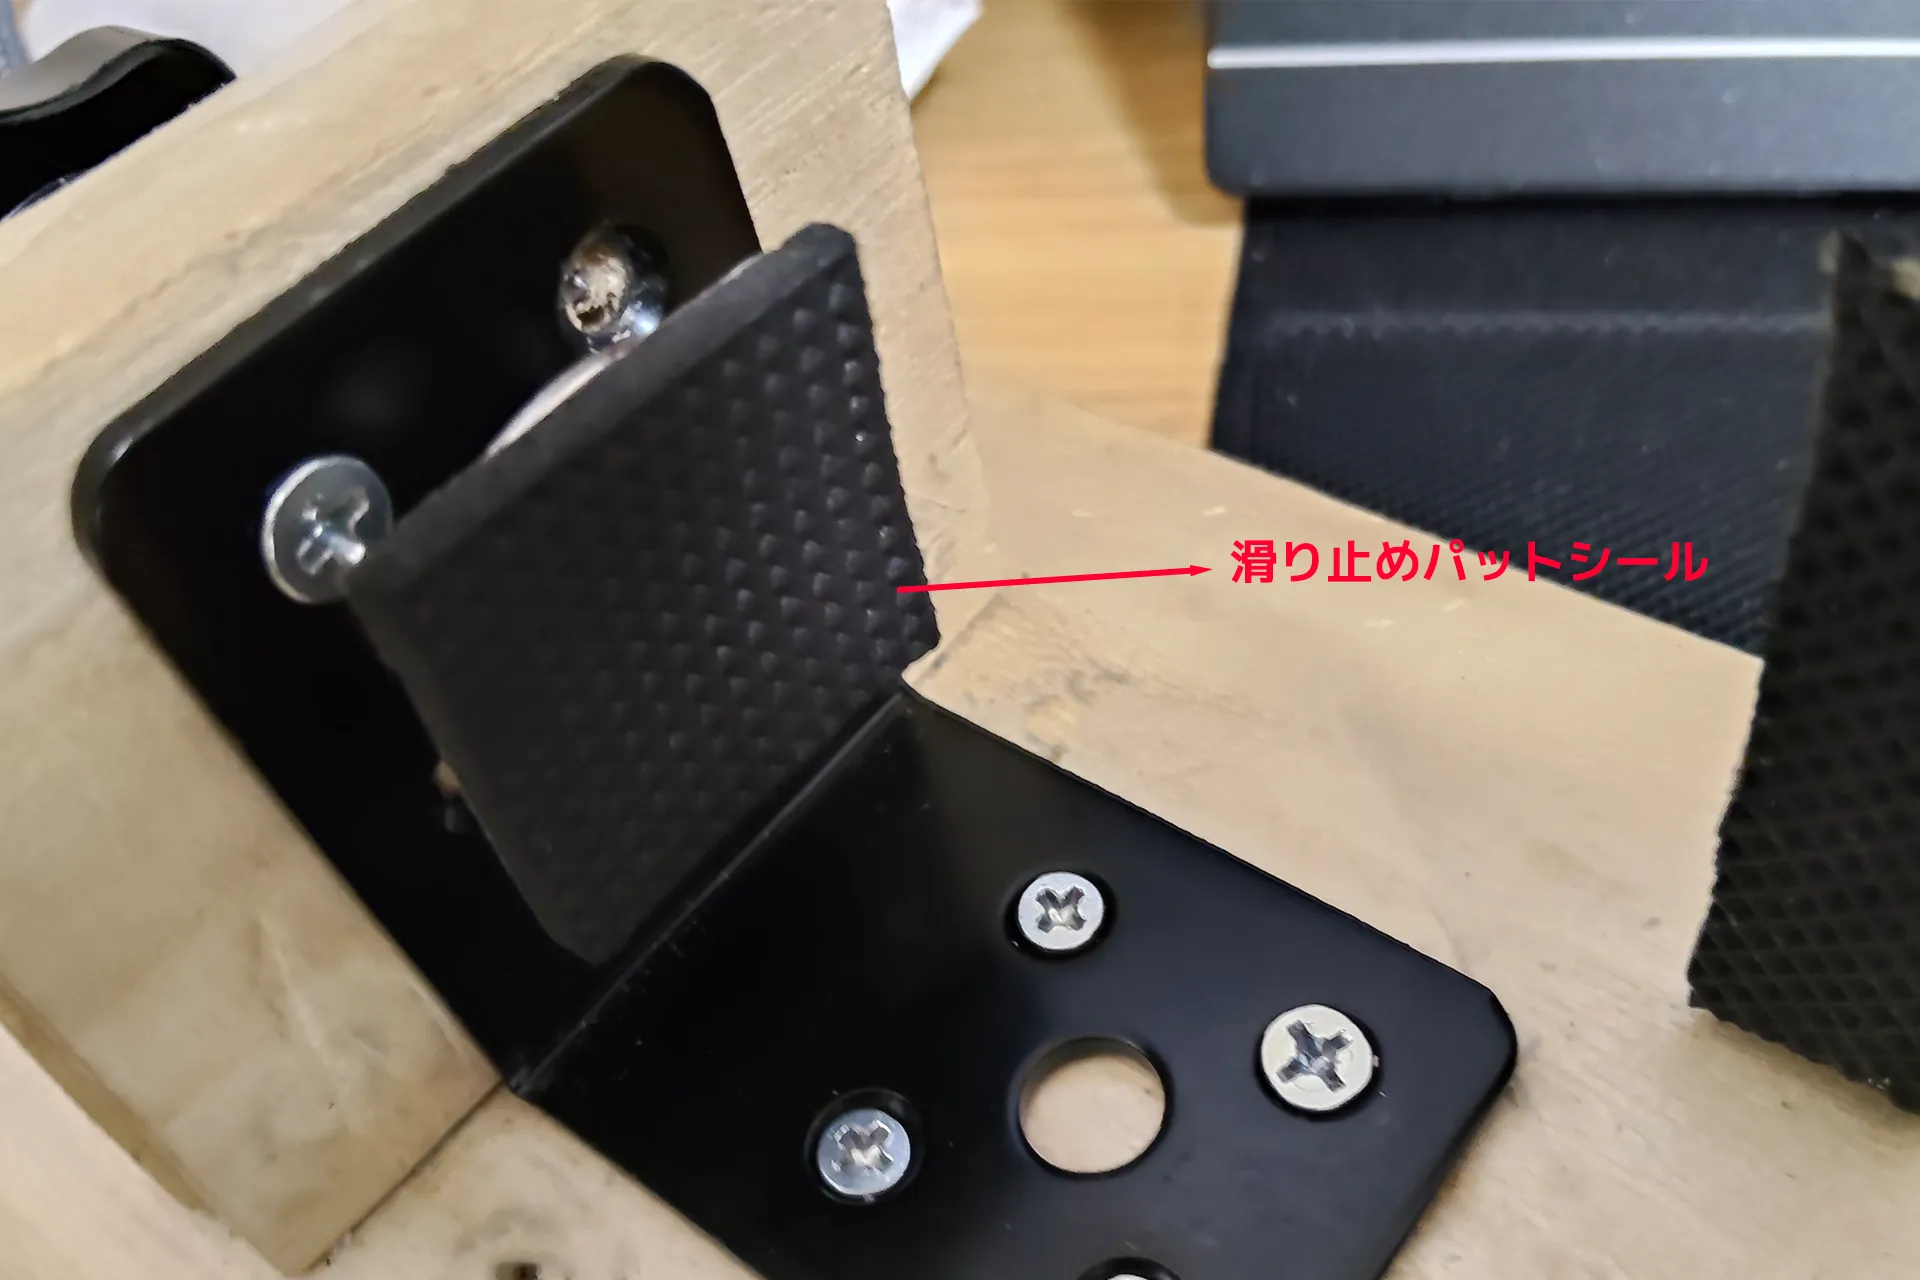
Attach the anti-slip pad stickers to the clamp.
The star knob emerges from the hole on the opposite side and, when rotated, acts as a clamp that pushes forward.
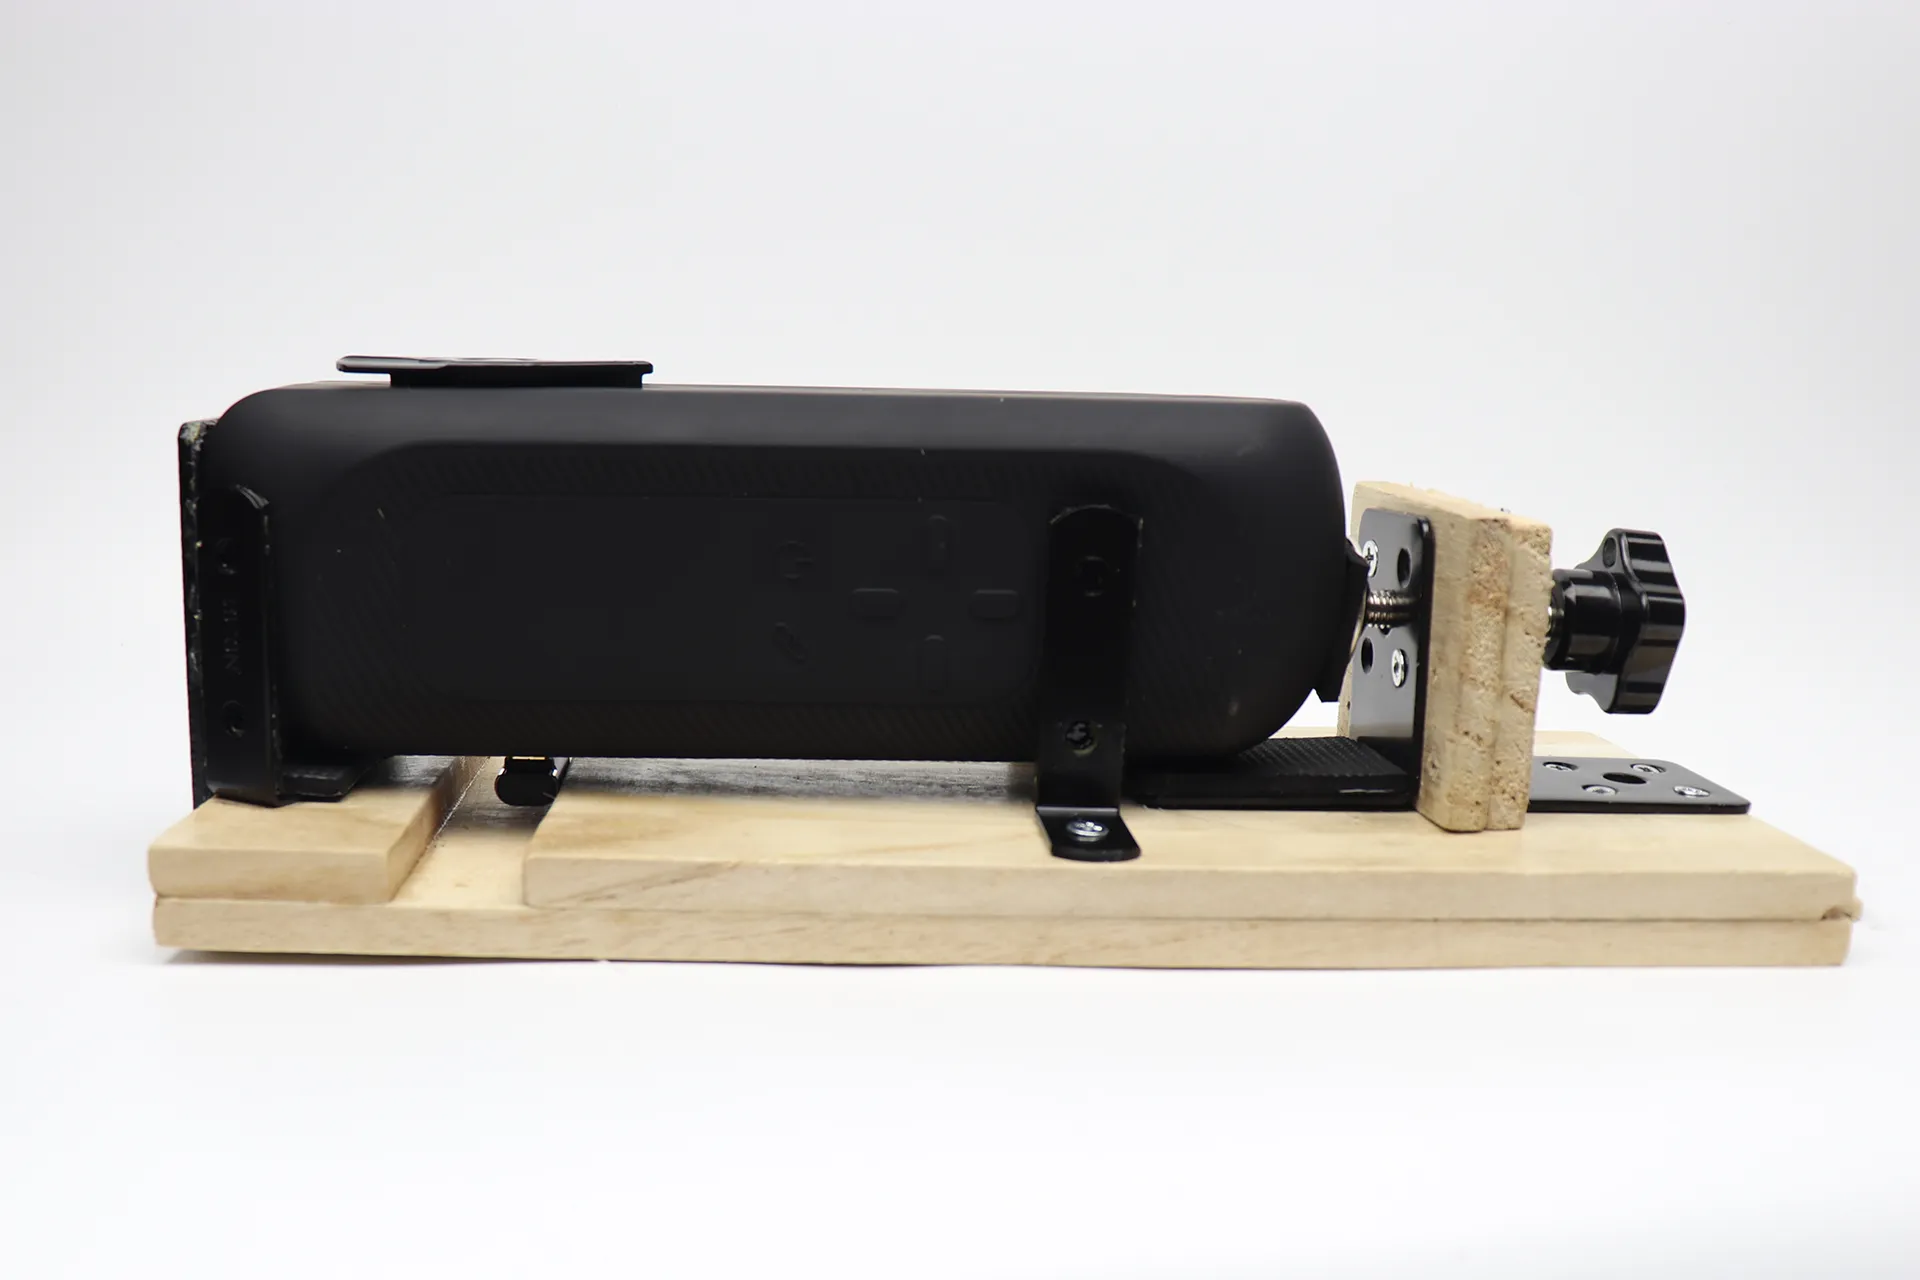
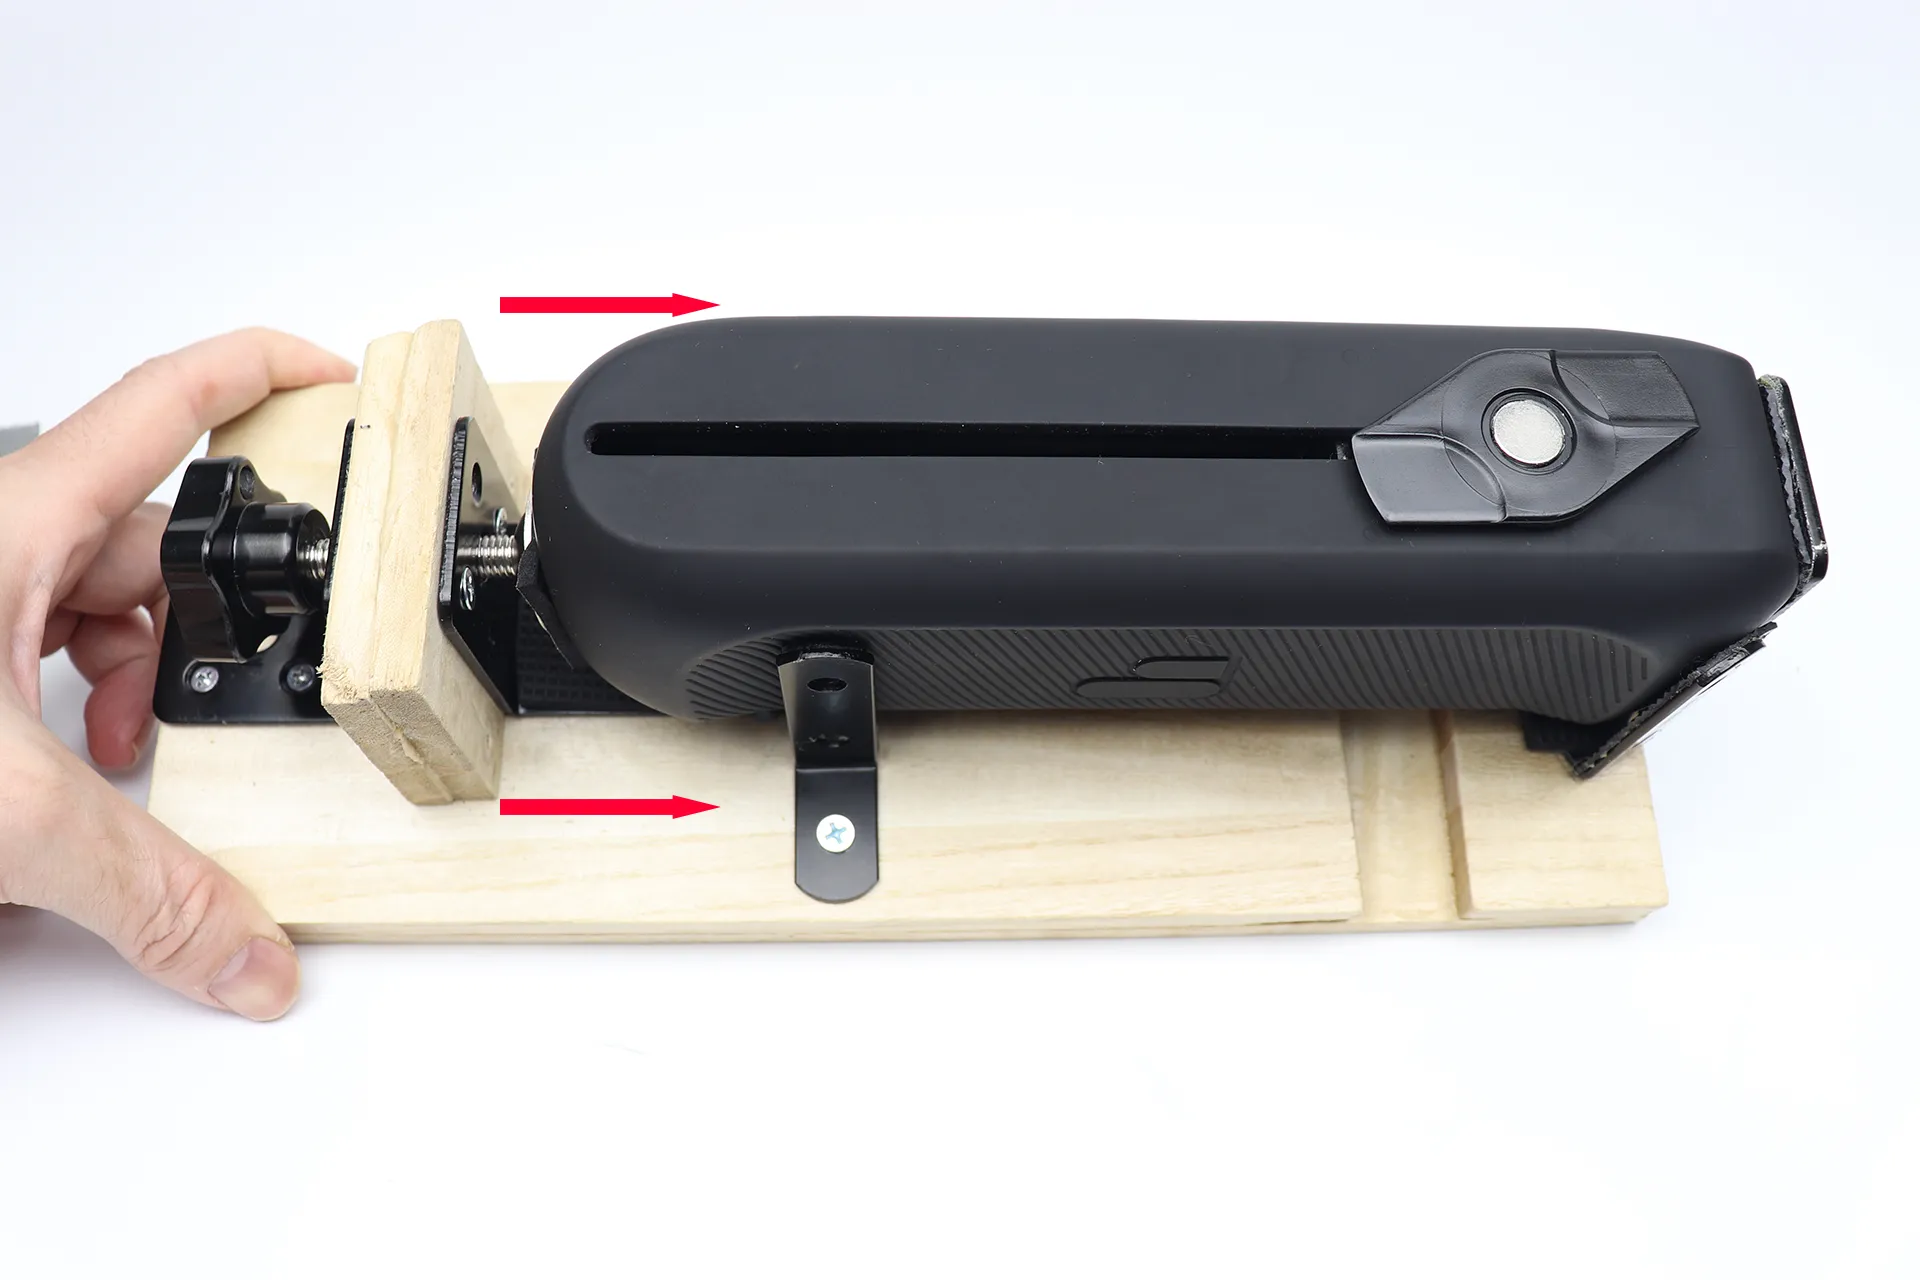
The front is secured by tightening a quarter-inch screw, and the main body can be clamped and tightened from the rear. However, be careful not to overtighten, as this may damage the main body.
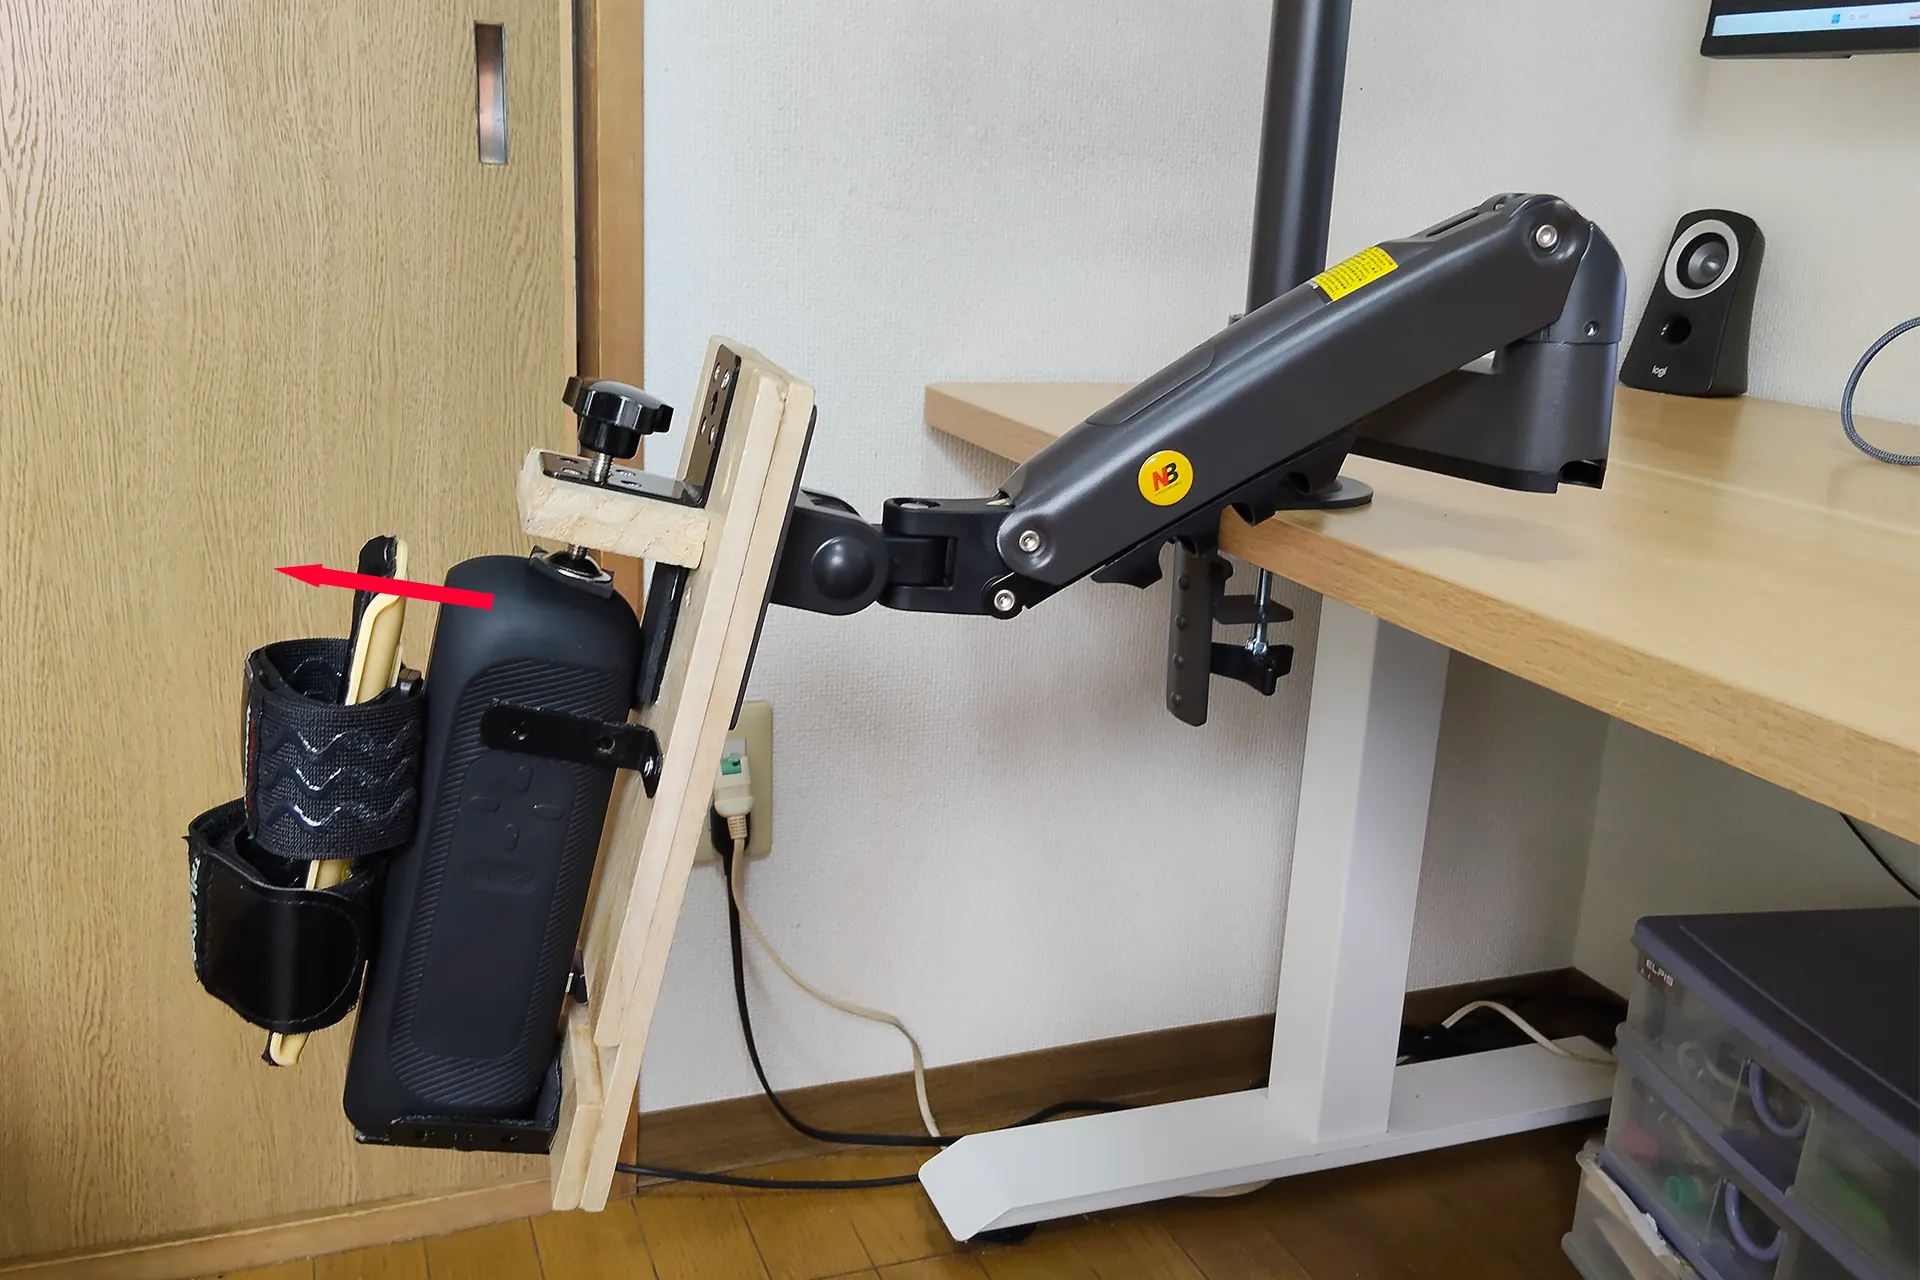
I thought this would secure it perfectly, but when I tested it, I discovered that the rear of the unit moves in the direction of the arrow at high speeds.
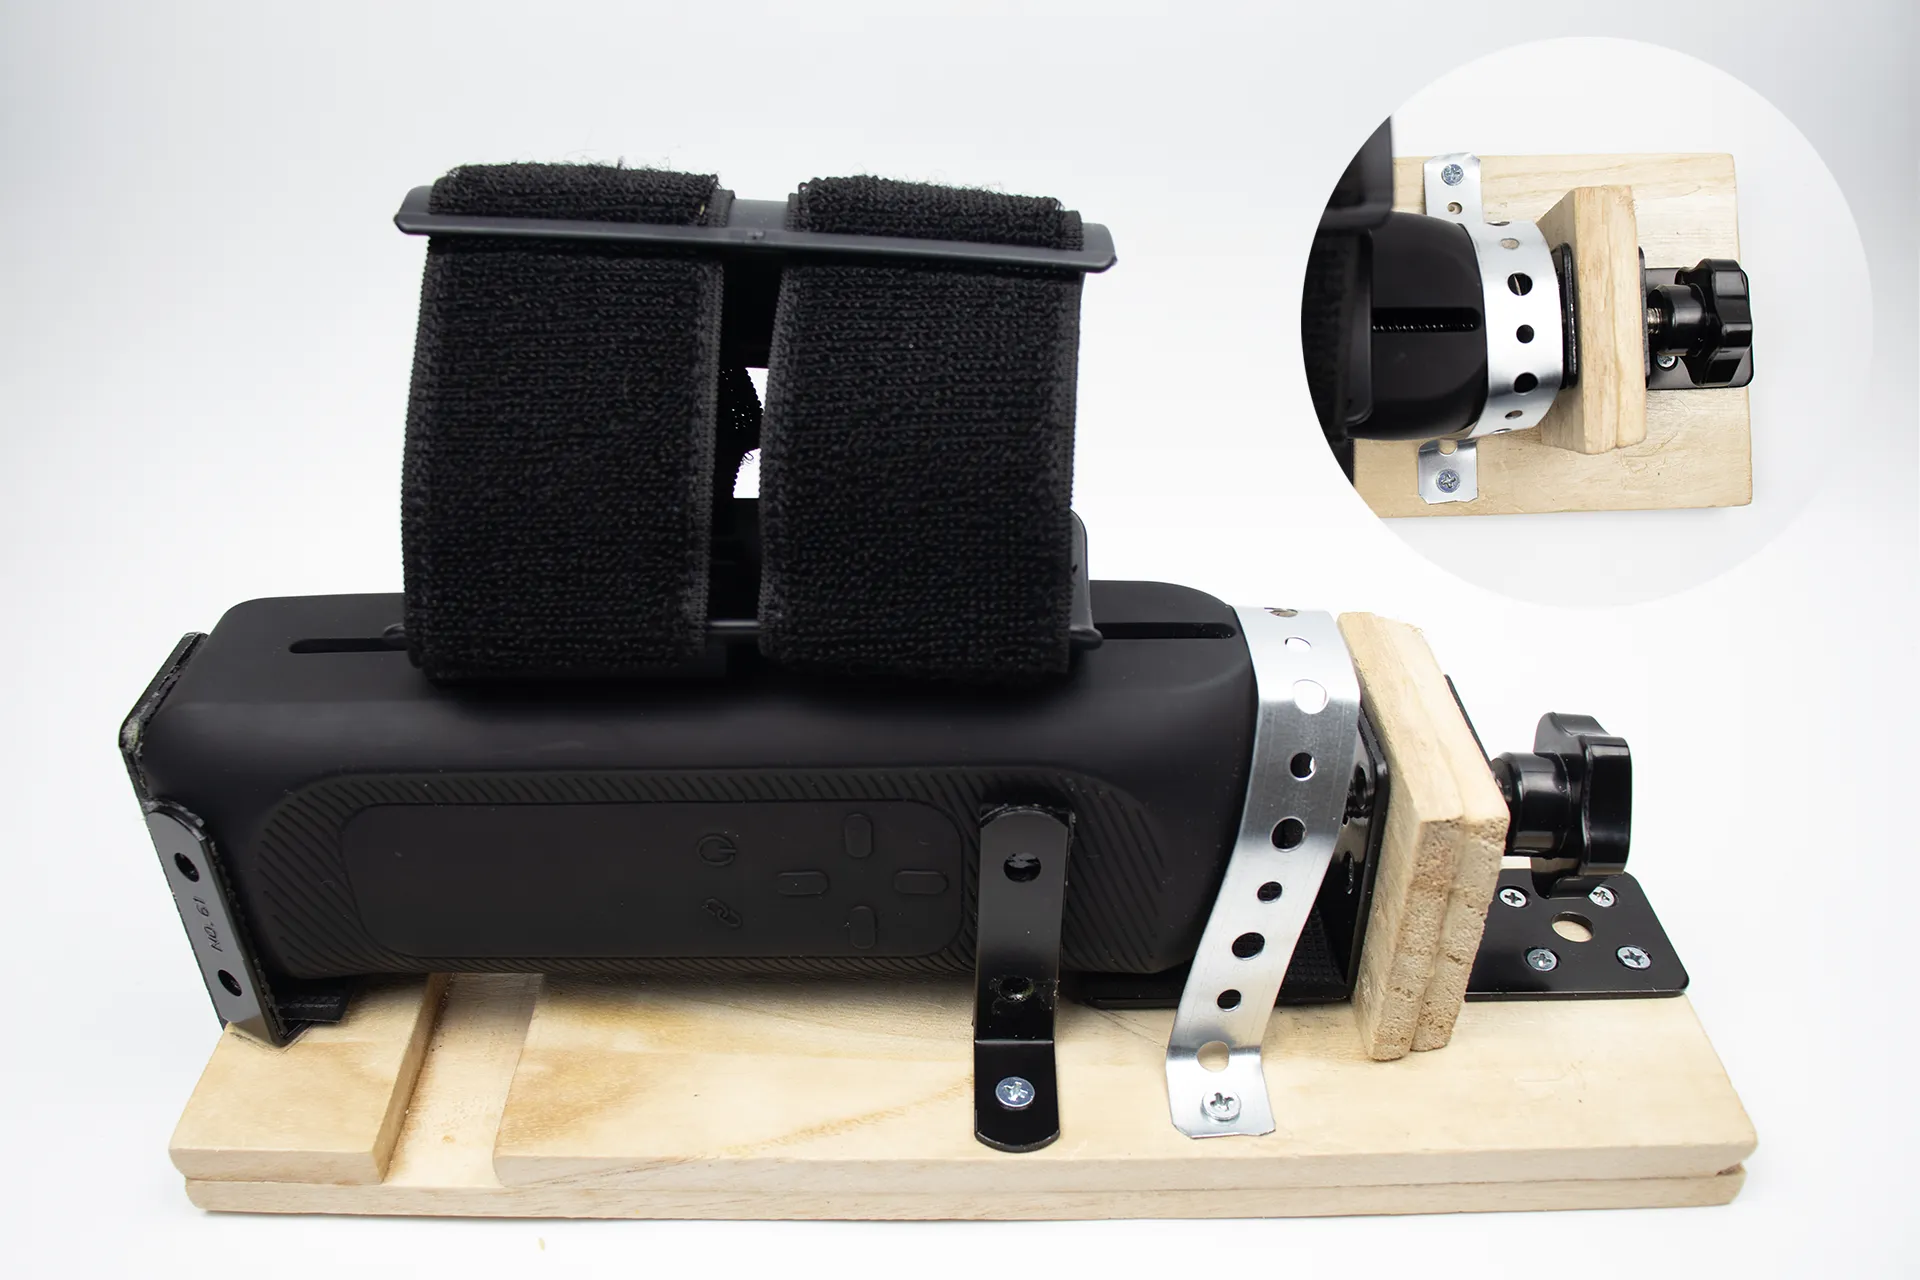
Therefore, I ultimately gave up on using clamps alone for fastening and decided to use reinforcement brackets in addition.The following itemsI've written about it in more detail there, so please take a look.
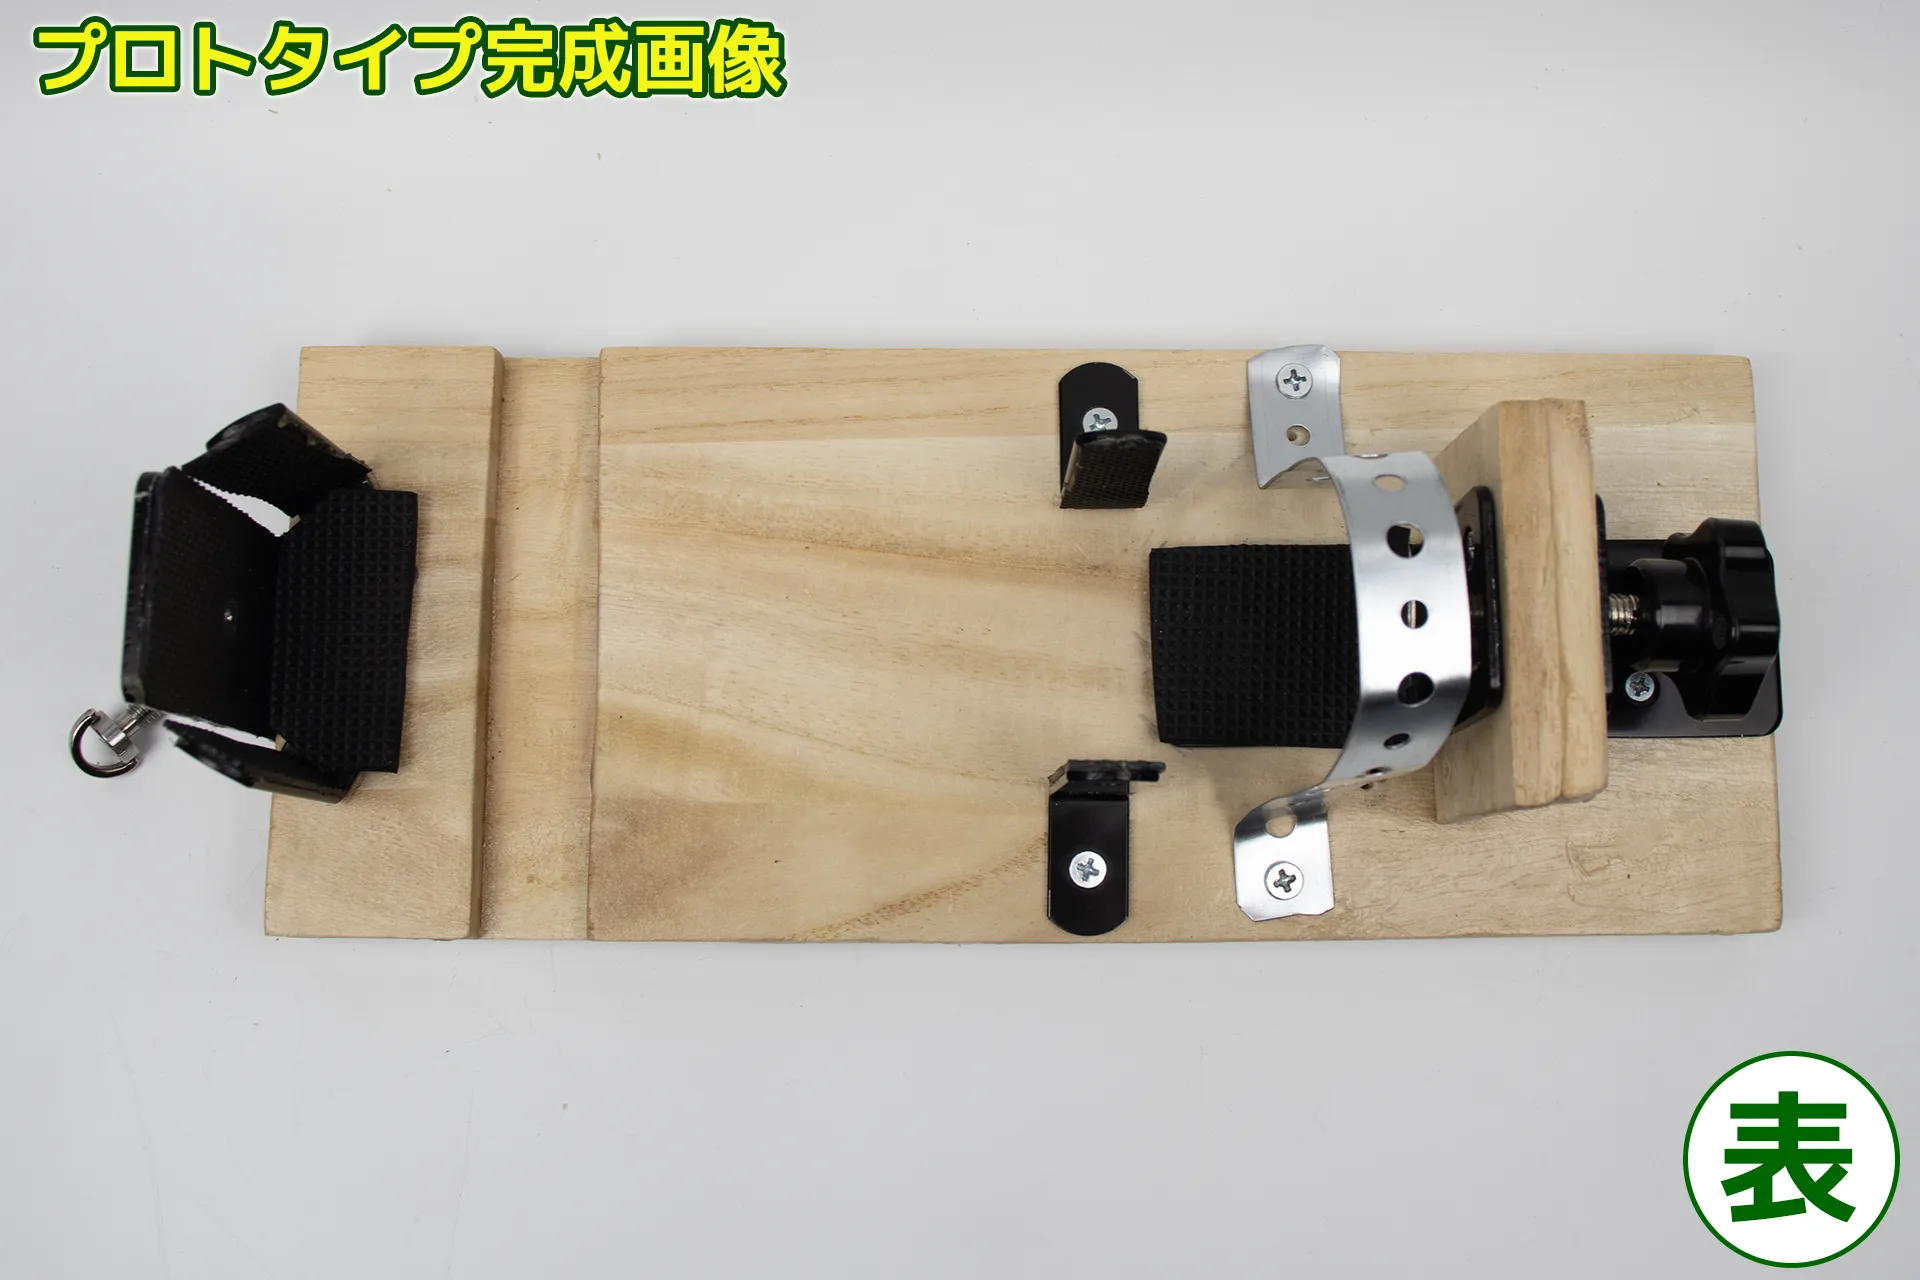
This is a table image of the completed prototype of the fixing device for Handy2 .
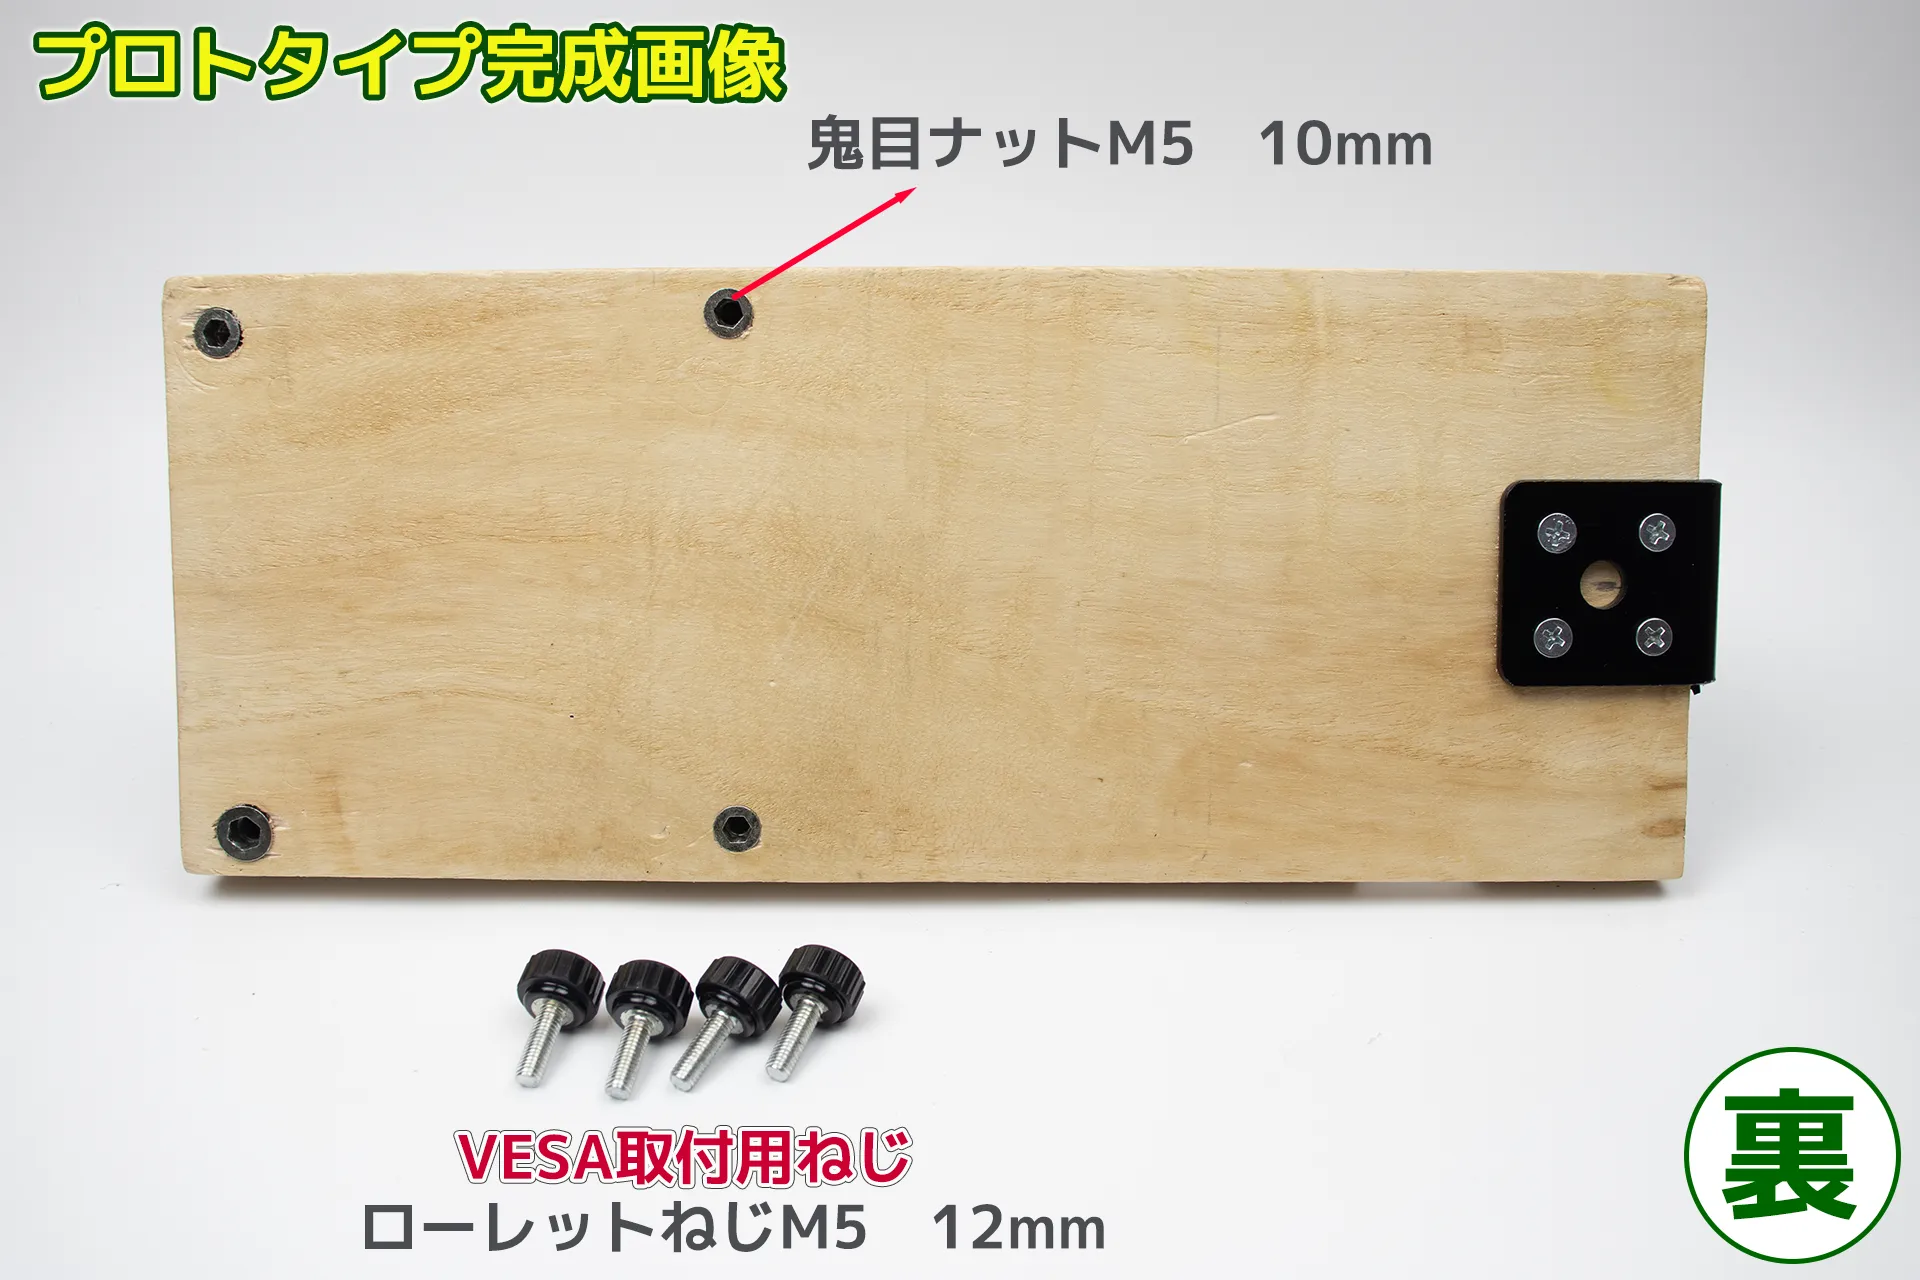
This is a picture of the back of the completed prototype mounting bracket image for Handy2 . Regarding VESA mounting...The following itemsPlease see below.
| Product name | Embedded insert nut, hexagonal nut, BESTU threaded type | ||
|---|---|---|---|
| retailers | |||
| price | Around 980 yen (tax included) | ||
| Product name | uxcell 4pcs Knurled Knobs M5 x 12mm | ||
|---|---|---|---|
| retailers | |||
| price | Around 930 yen including tax and up | ||
| Product name | retailers | Price (tax included) |
|---|---|---|
| Work material Plate material 400x9x120mm B-4×2 | Daiso | 110 yen |
| Super strong anti-slip mat | Reference links | Around 685 yen and up |
| Multi-purpose metal fitting, L-shaped (Daido Hunt) x 1 | Reference links | Around 428 yen and up |
| Koni Viola Reinforcement Bracket, Black, No. 61 L-type, 58 x 29 mm, Set of 2 | Reference links | Around 499 yen and up |
| Multi-purpose hardware L-shaped (Daido Hunt, small) x 2 | Reference links | Around 264 yen and up |
| Insert Nut BESTU Threaded Type | Reference links | Around 980 yen and up |
| Star knob M8 x 40mm | Reference links | Around 1,112 yen and up |
| Embedded insert nut, hexagonal nut, BESTU threaded type | Reference links | Around 980 yen and up |
| uxcell 4pcs Knurled Knobs M5 x 12mm | Reference links | 930 yen |
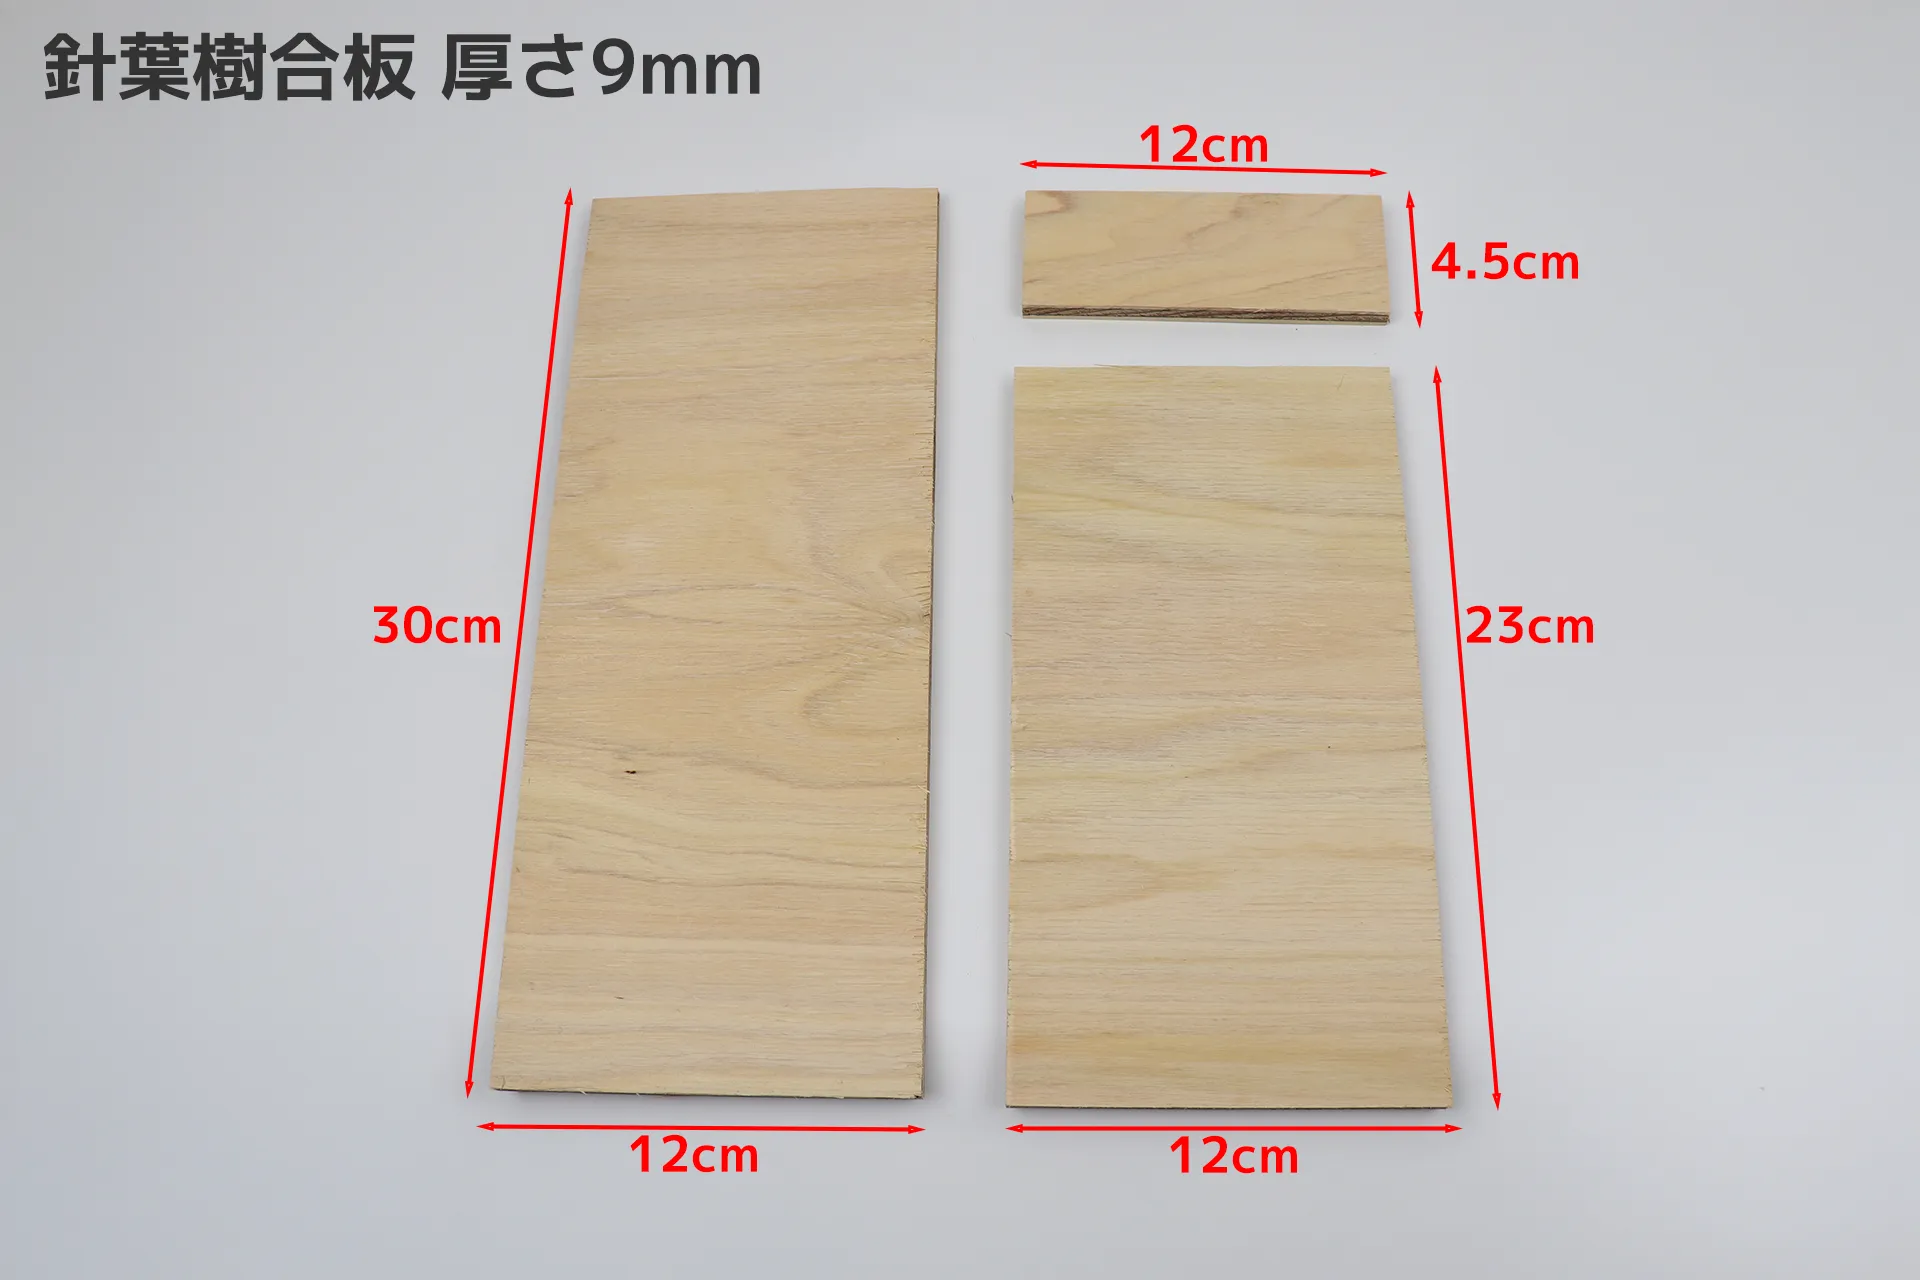
This is 9mm thick softwood plywood that I had cut at a home improvement store.HerePlease take a look.
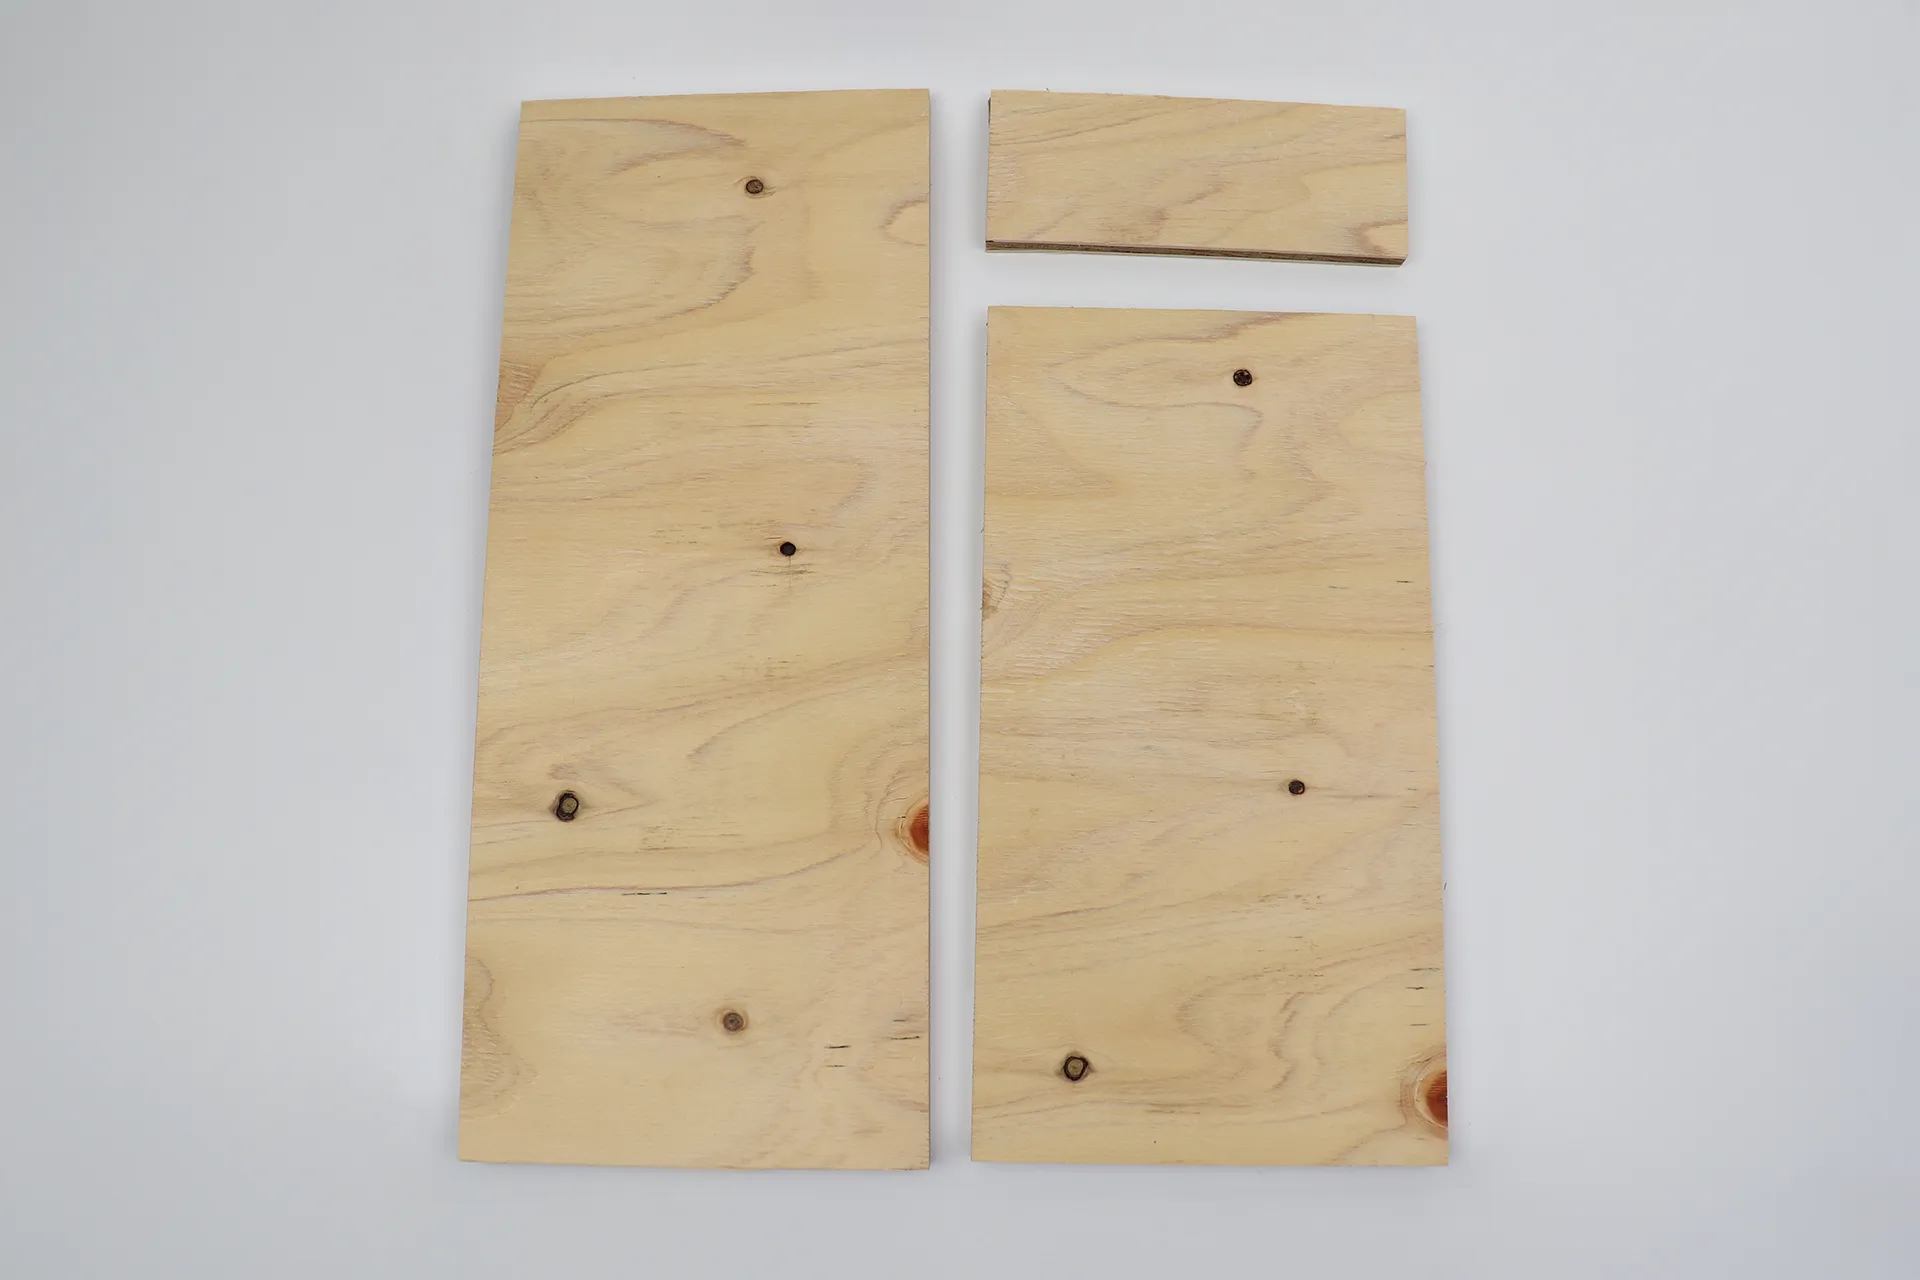
The opposite side had a knot like this, so I decided to use that side as the mating surface and glue it in place to hide it.
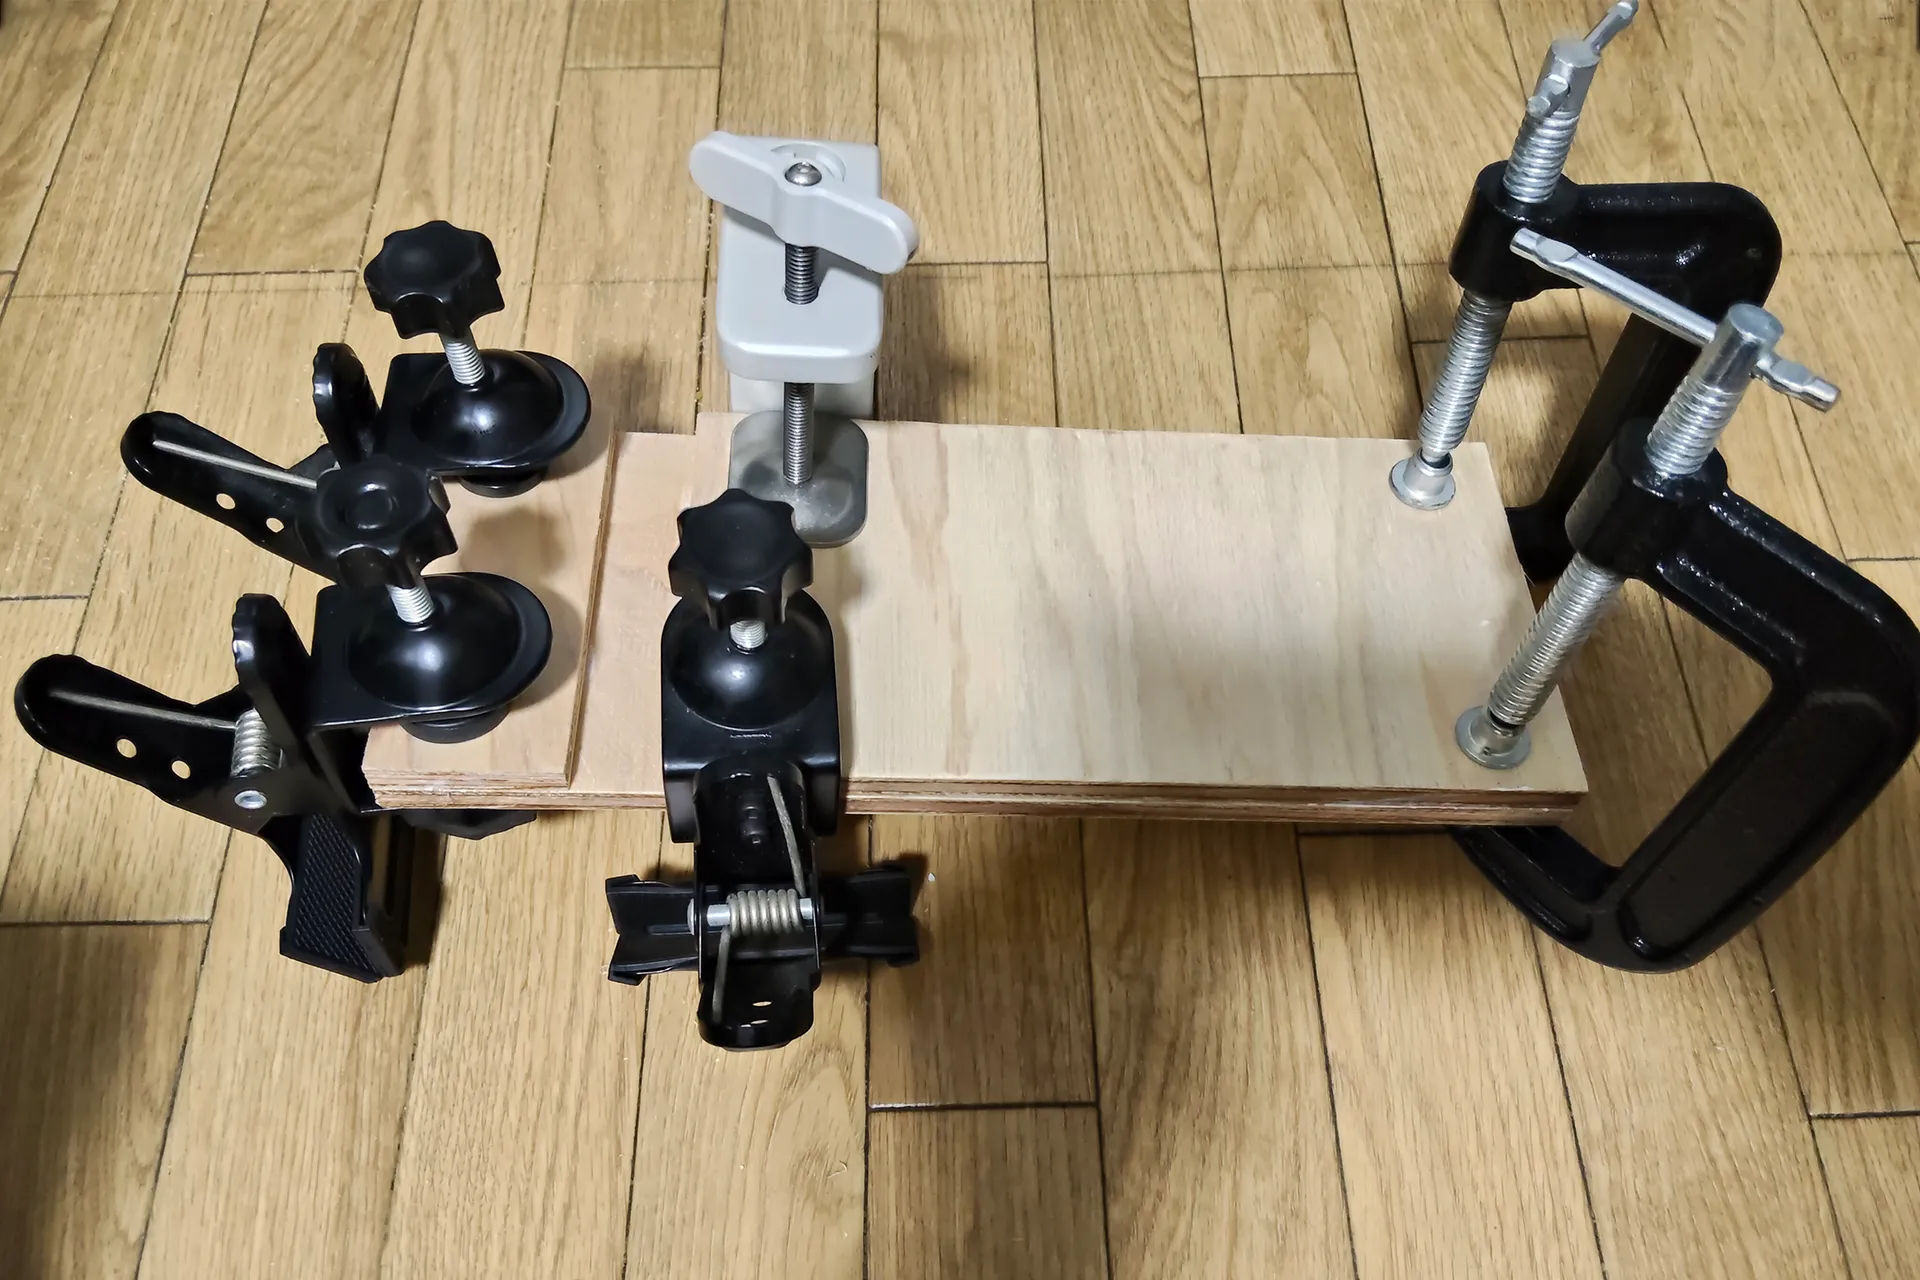
I glued it with wood glue and let it dry for a day. I didn't use all the clamps this time. I think this is just right.
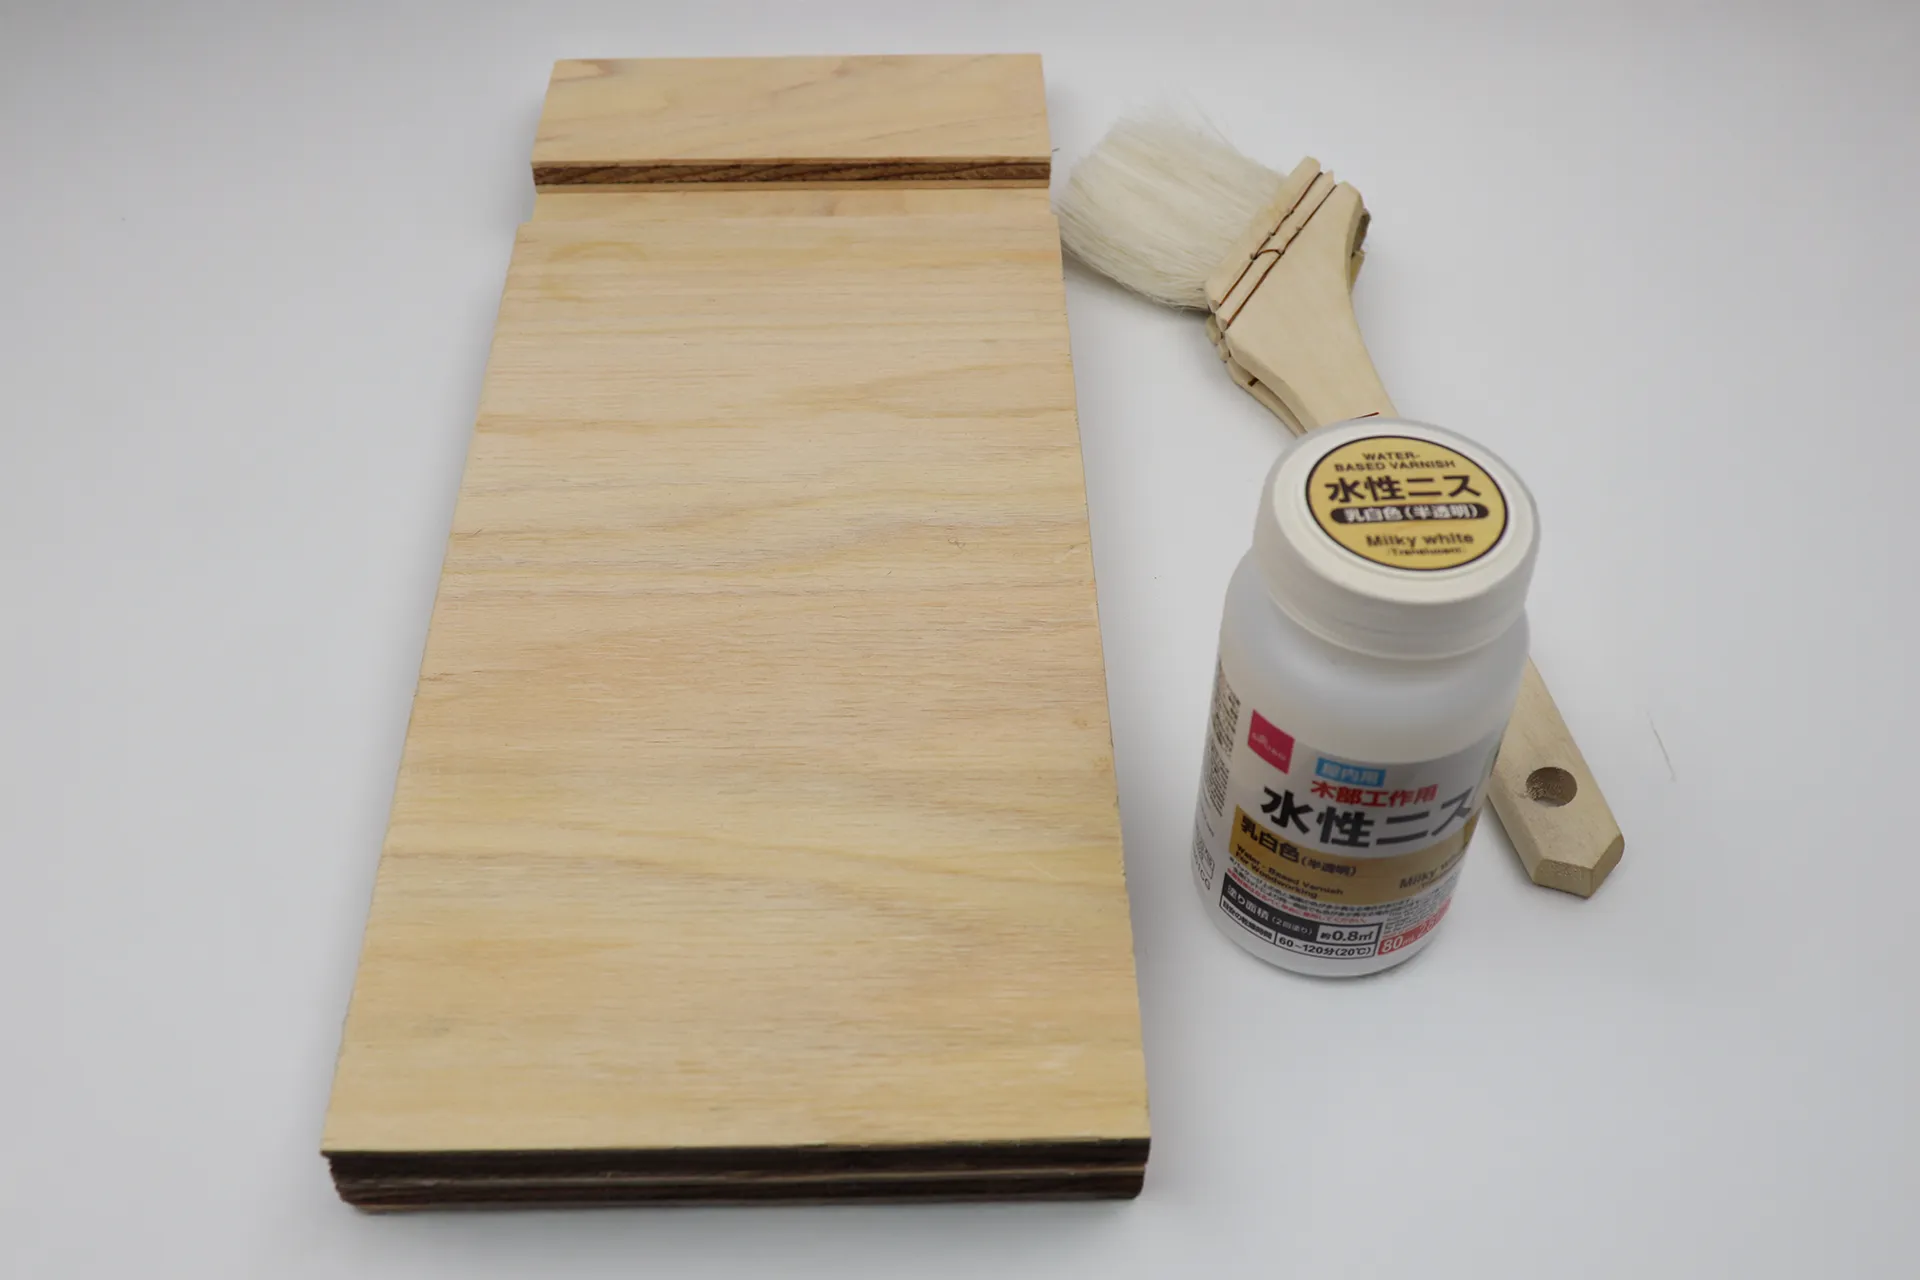
After gluing, I became hooked on varnishing, so this time, just like with the prototype, I applied Daiso's water-based milky white varnish. I applied three coats. As for the smell, there was almost no smell while applying it or after it dried.
As expected from having the wood cut at the shop, the pieces are perfectly aligned. It's not something that requires that level of precision, but it's nice when everything is neatly arranged.
Next, before proceeding, it's easier to embed the threaded inserts for VESA mounting while this board is still glued in place, so do that first.HereI recommend finishing it.
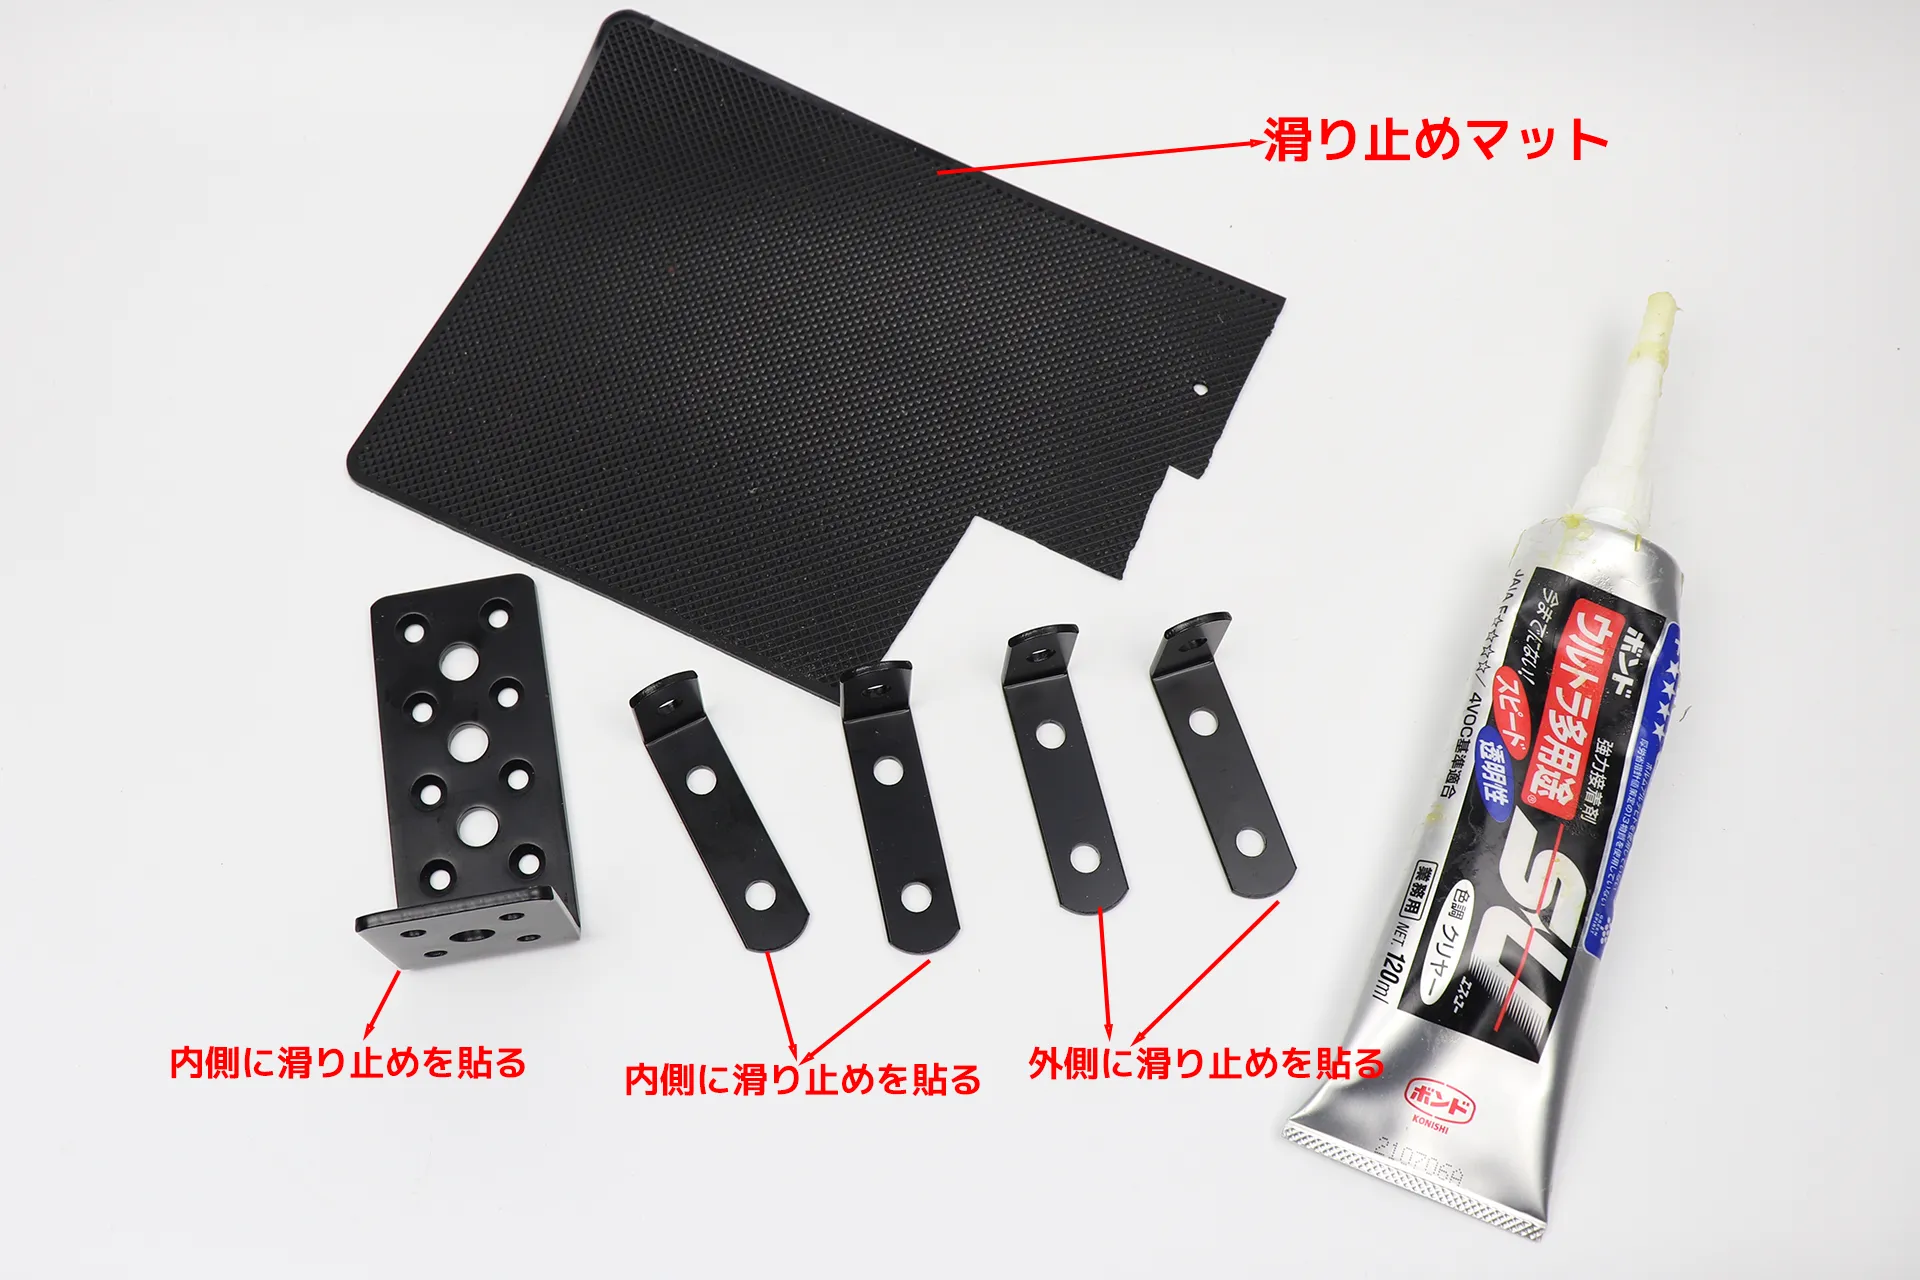
Attach the cut non-slip mats to one large L-shaped bracket and four small L-shaped brackets. Note that for the small L-shaped brackets, attach the non-slip mats to the inside of two of them and the outside of the other two. Leave them in place for a day. Use Ultra Multi-Purpose SU adhesive.
| Product name | Super strong anti-slip mat | ||
|---|---|---|---|
| retailers | |||
| price | Around 685 yen (tax included) | ||
| Product name | DAIDOHANT (Reinforcement Hardware) Black Multi-purpose Hardware L-shaped [Steel] | ||
|---|---|---|---|
| retailers | |||
| price | Around 428 yen (tax included) | ||
| Product name | Koni Viola Reinforcement Brackets, Black, No. 61L Type, 58 x 29mm, Set of 2 | ||
|---|---|---|---|
| retailers | |||
| price | Around 499 yen (tax included) | ||
| Product name | Bond Ultra Multi-Purpose S・U Clear | ||
|---|---|---|---|
| retailers | |||
| price | Around 420 yen (tax included) | ||
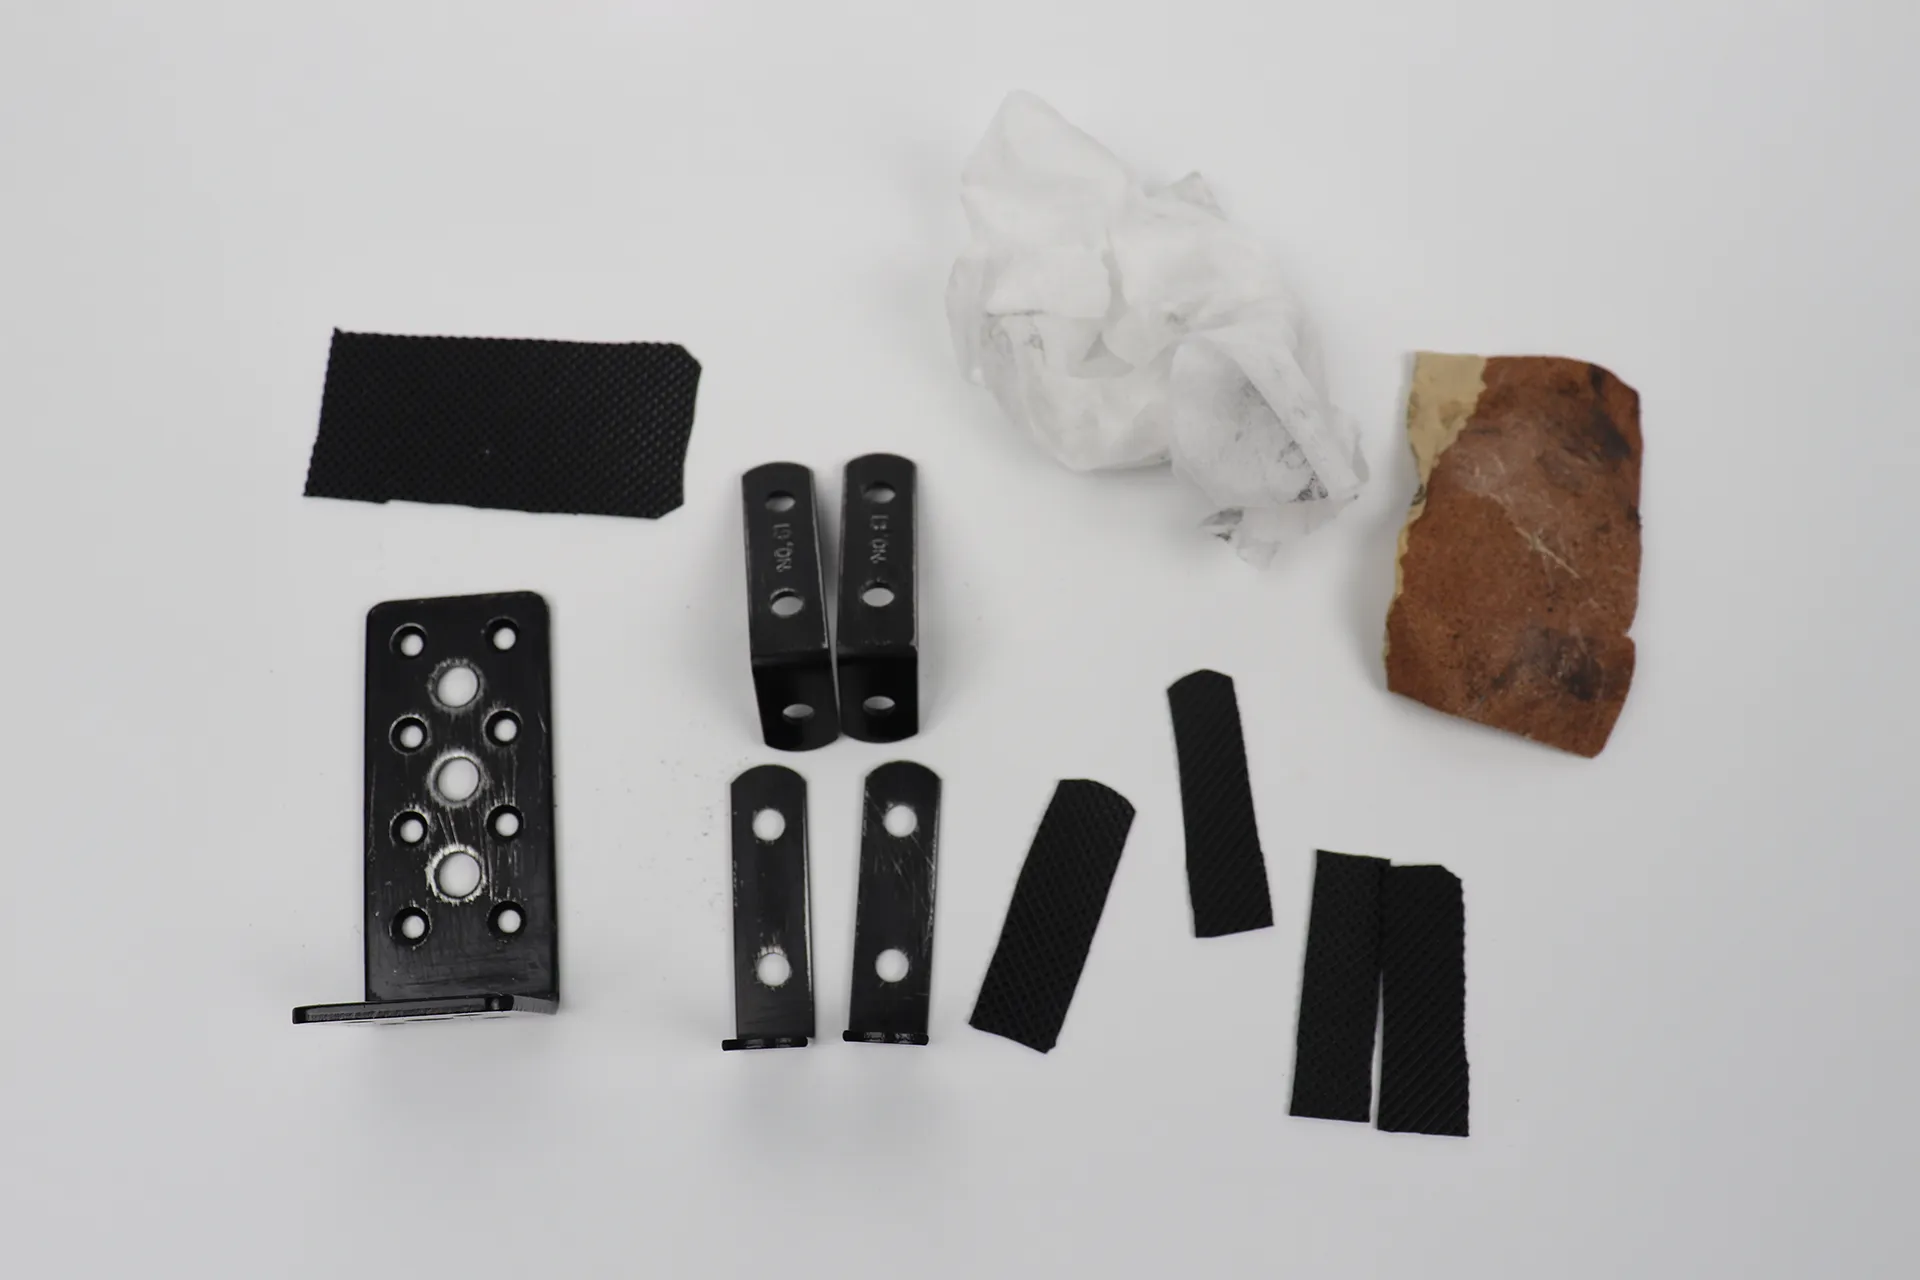
Before gluing the non-slip mat in place, I roughened the surface with sandpaper to prepare it for adhesion.
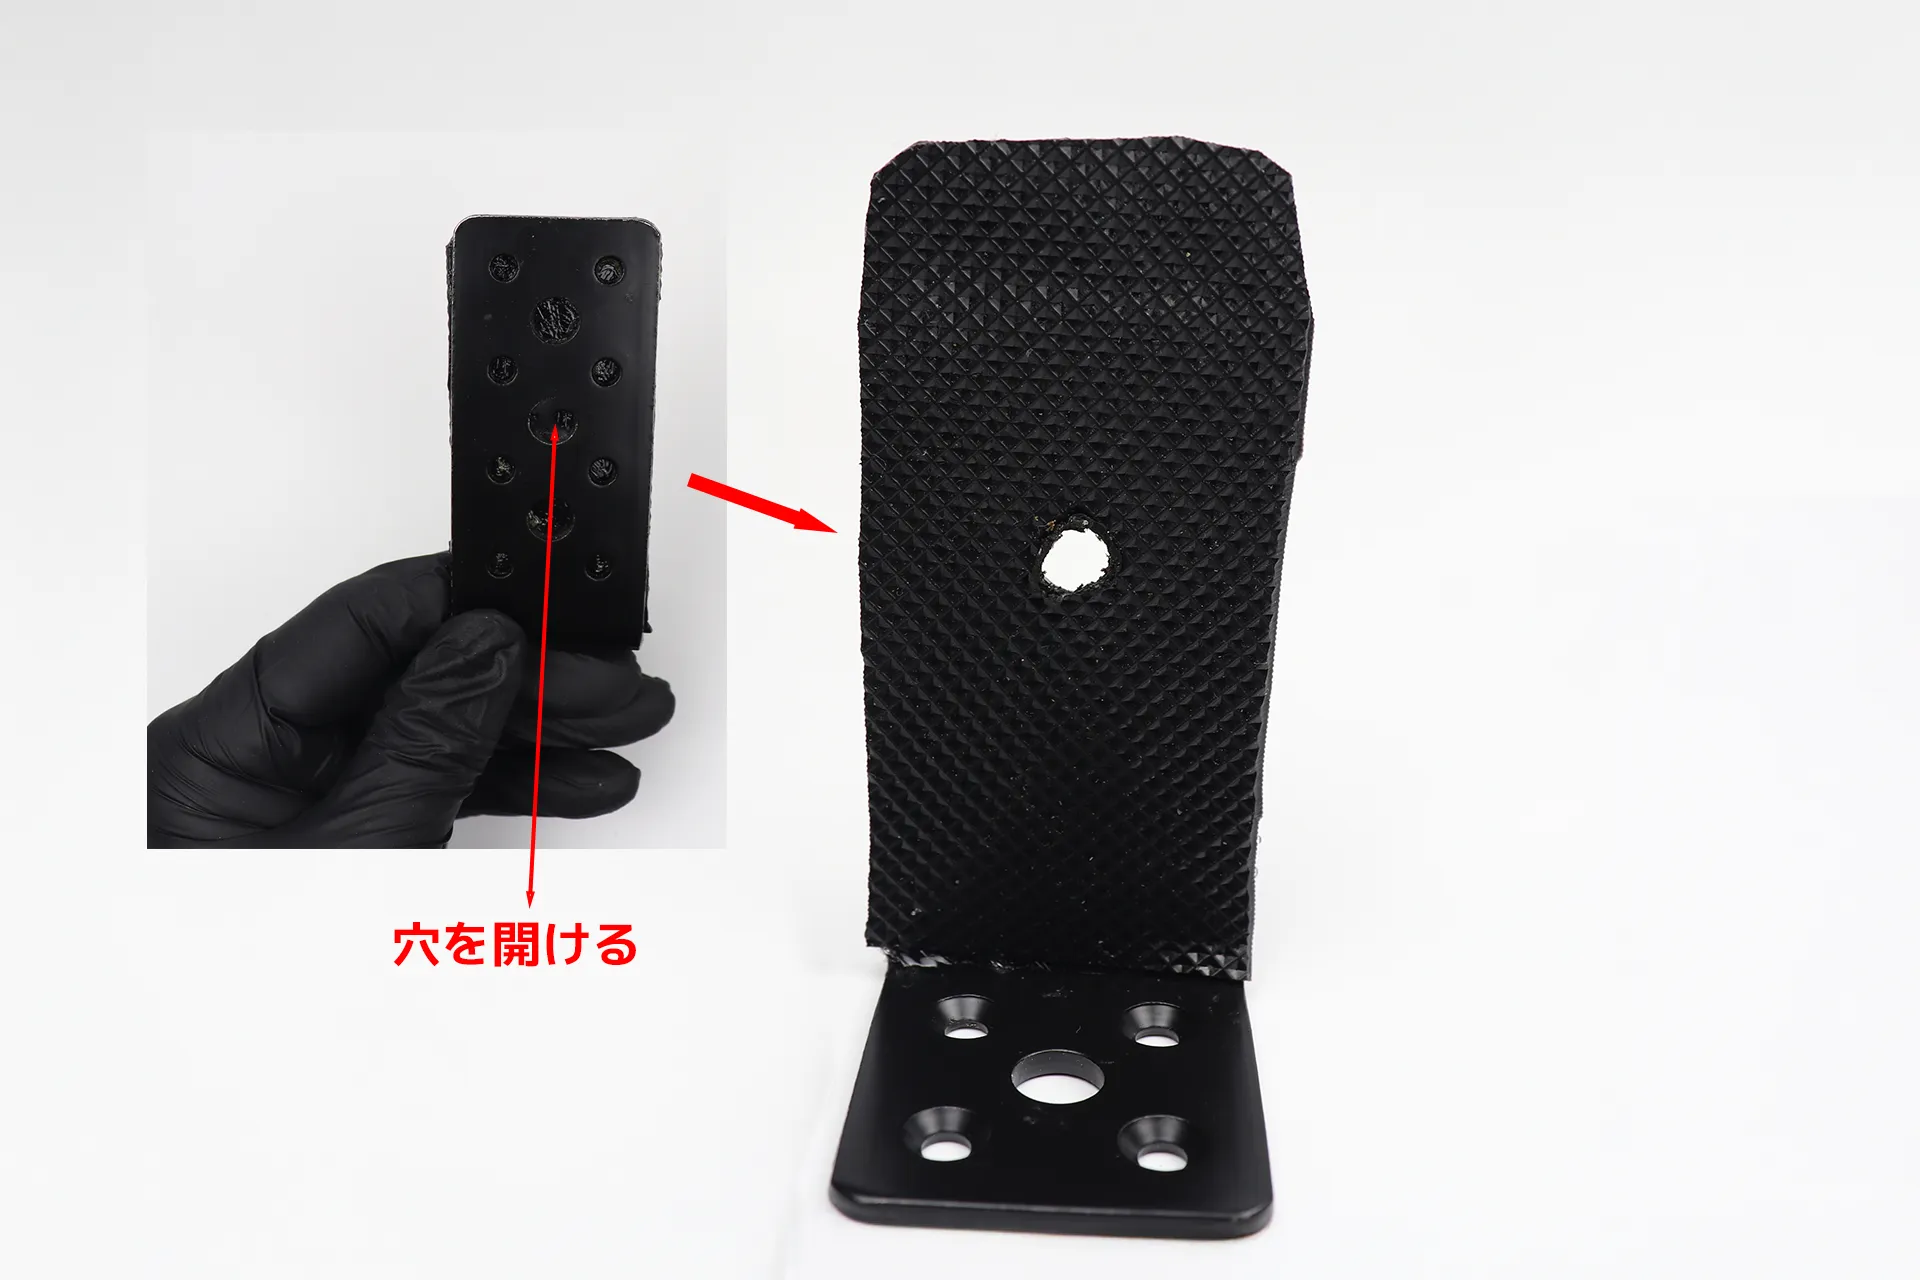
I drilled a hole in the center screw hole of the large L-shaped bracket. Since the anti-slip mat attached is rubber, it was easier to melt it with a soldering iron to make the hole. However, the smell is very strong, so I think you should ventilate well and wear a mask. For me, who has become accustomed to melting male masturbator many times, it was a familiar smell.
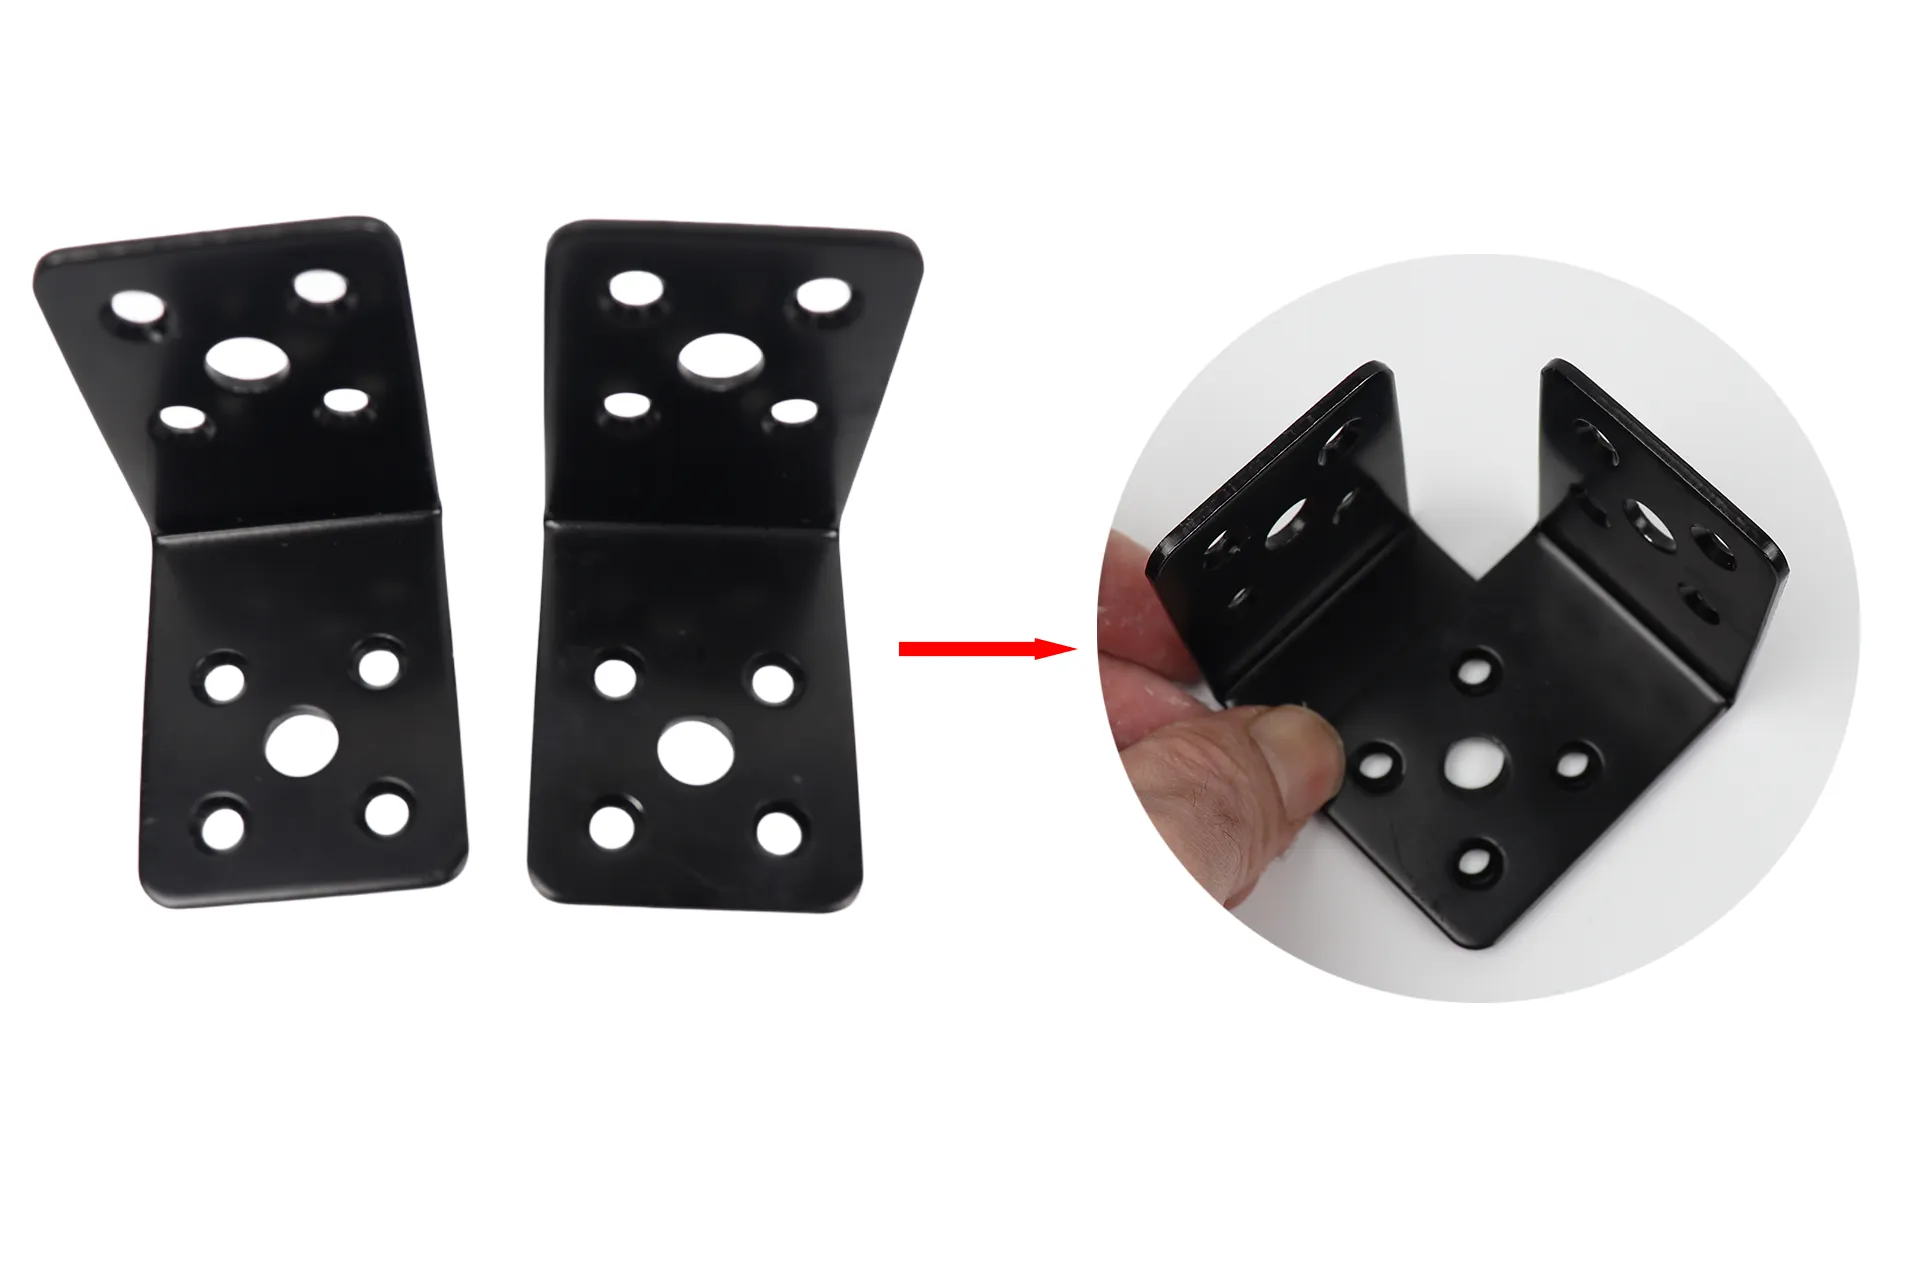
Attach the two L-shaped brackets perpendicularly, making sure the holes align perfectly, and then glue them together.
| Product name | DAIDOHANT (Reinforcement Hardware) Black Multi-purpose Hardware L-shaped [Steel] | ||
|---|---|---|---|
| retailers | |||
| price | Around 264 yen (tax included) | ||
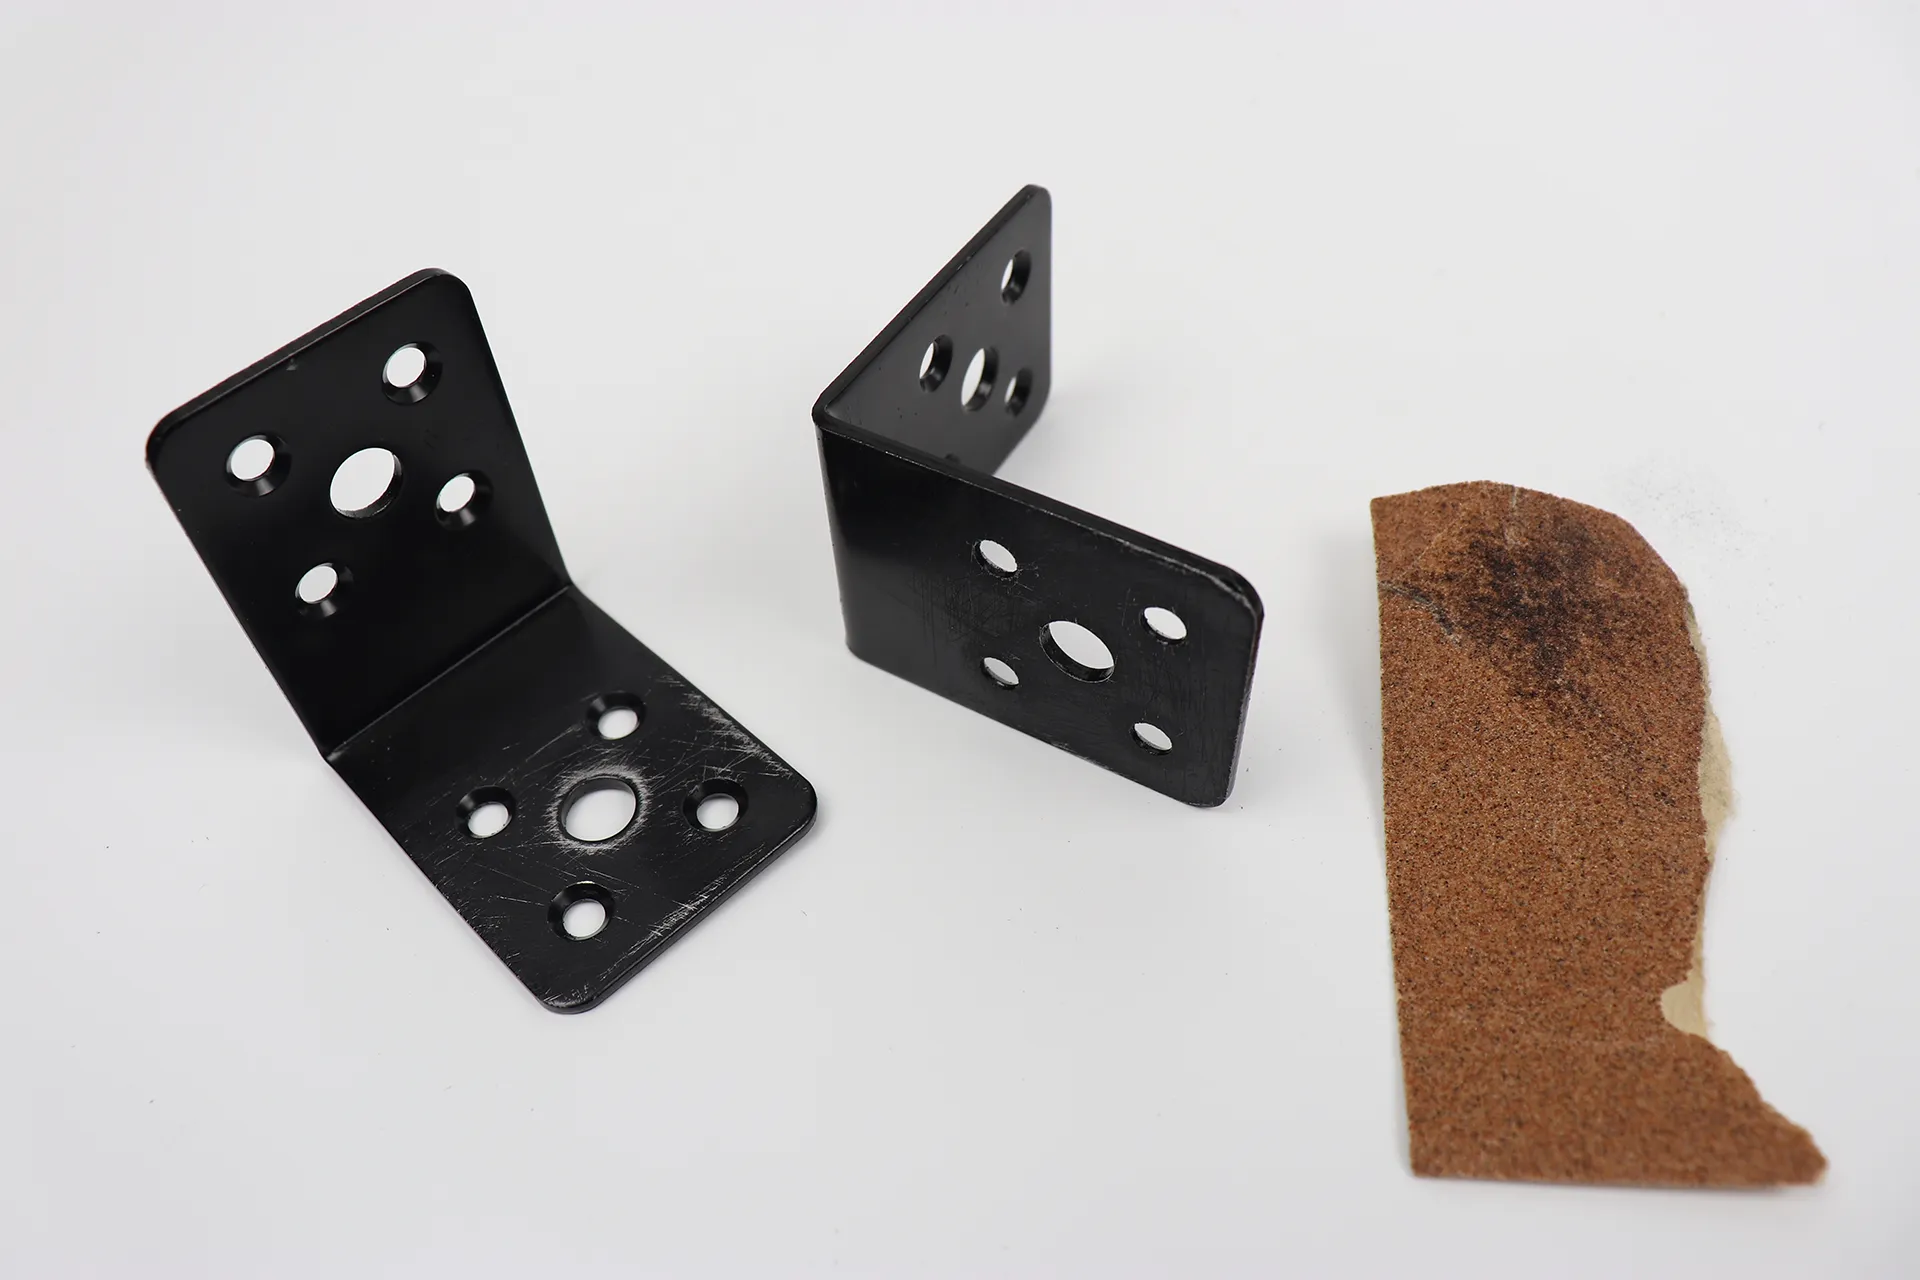
Roughen the bonding surface with sandpaper and degrease it with an alcohol wipe.
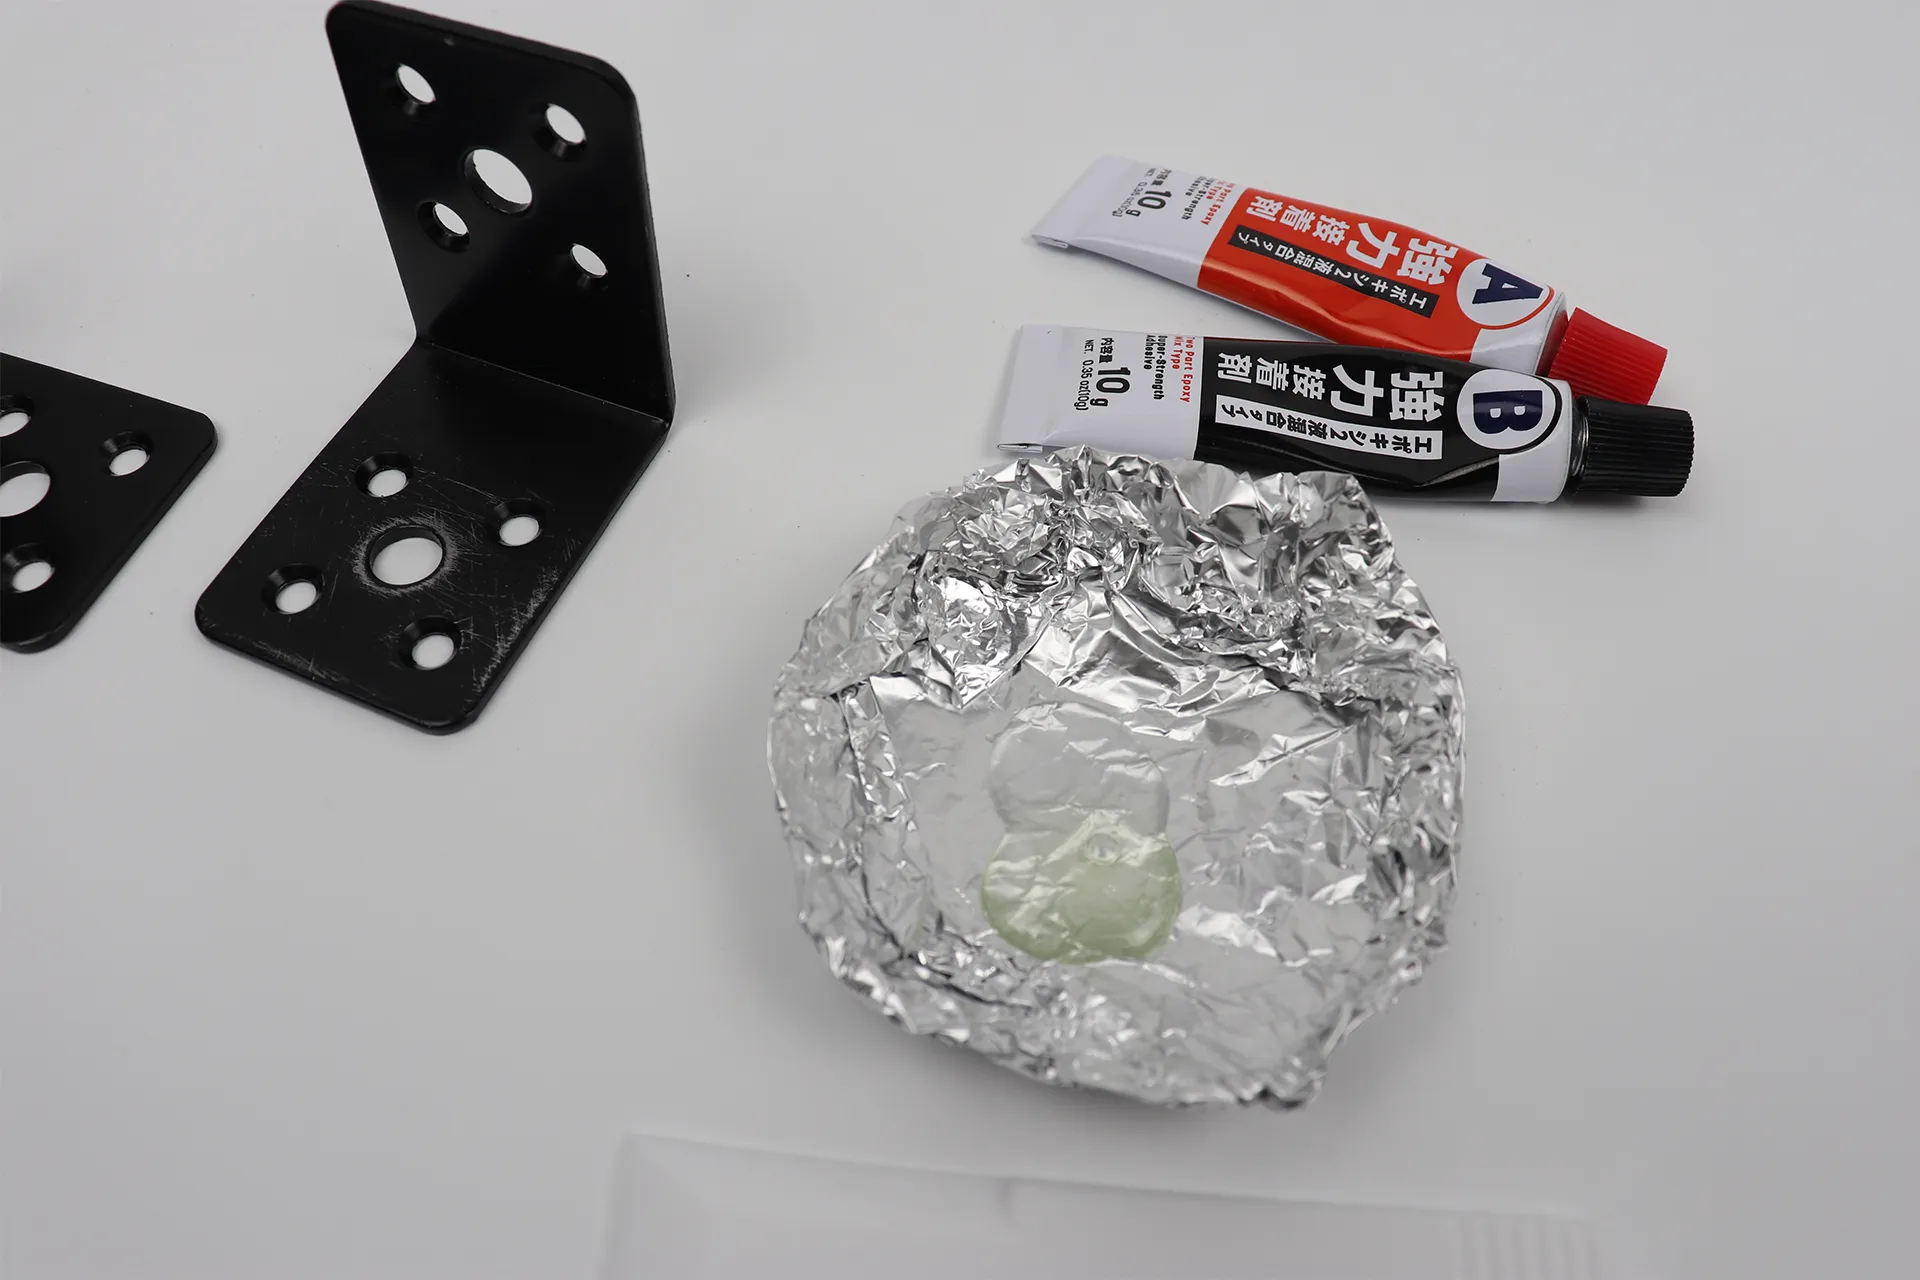
Since the bonding is between metals, we will use a two-part epoxy. Put equal amounts of epoxy components A and B into a dish made of aluminum foil, mix them with the included spatula, and then use.
| Product name | Strong adhesive (two-part epoxy type, 2 bottles) | ||
|---|---|---|---|
| retailers | |||
| price | 110 yen (tax included) | ||
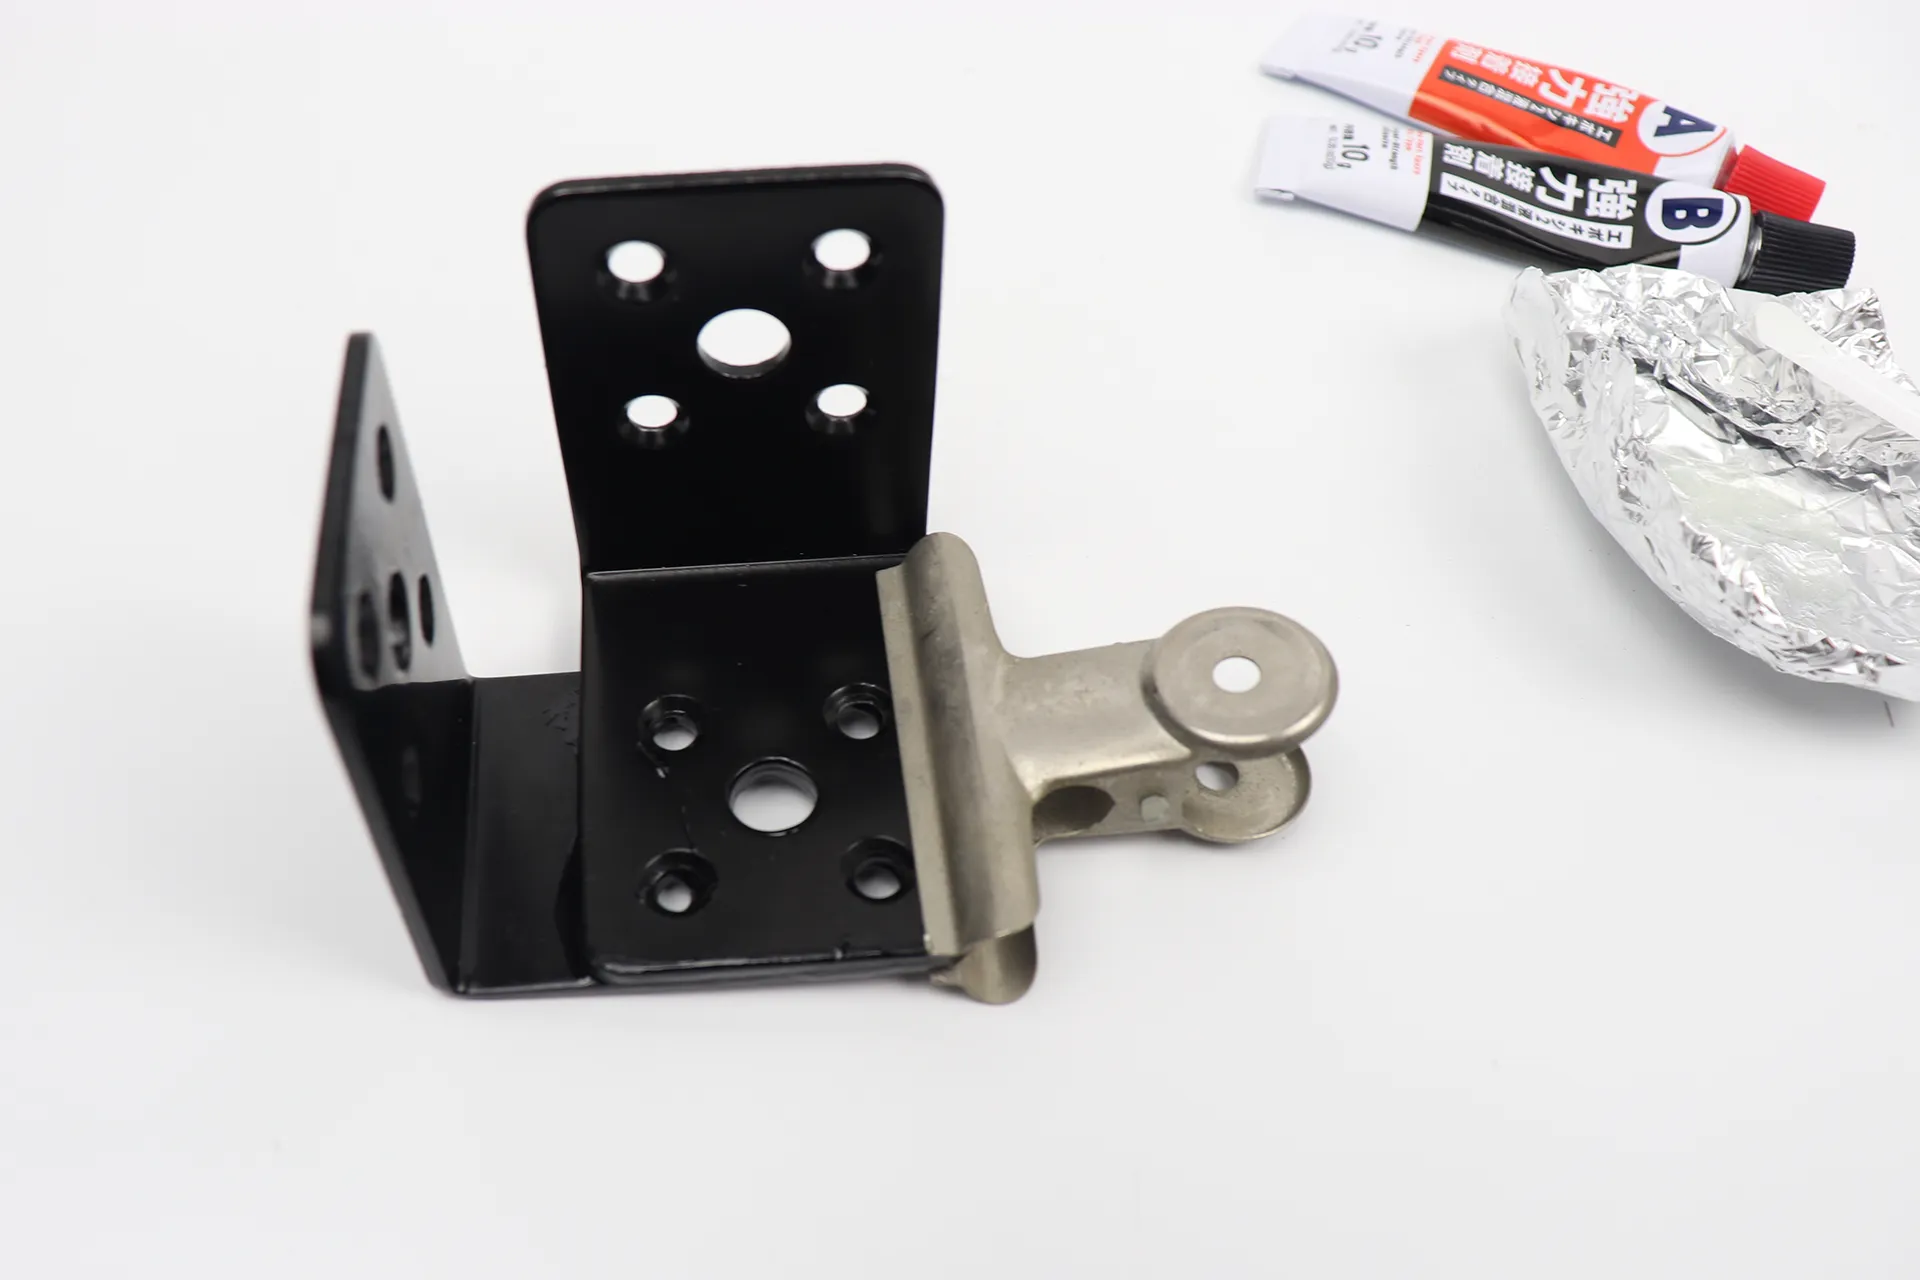
It will bond firmly if left overnight.
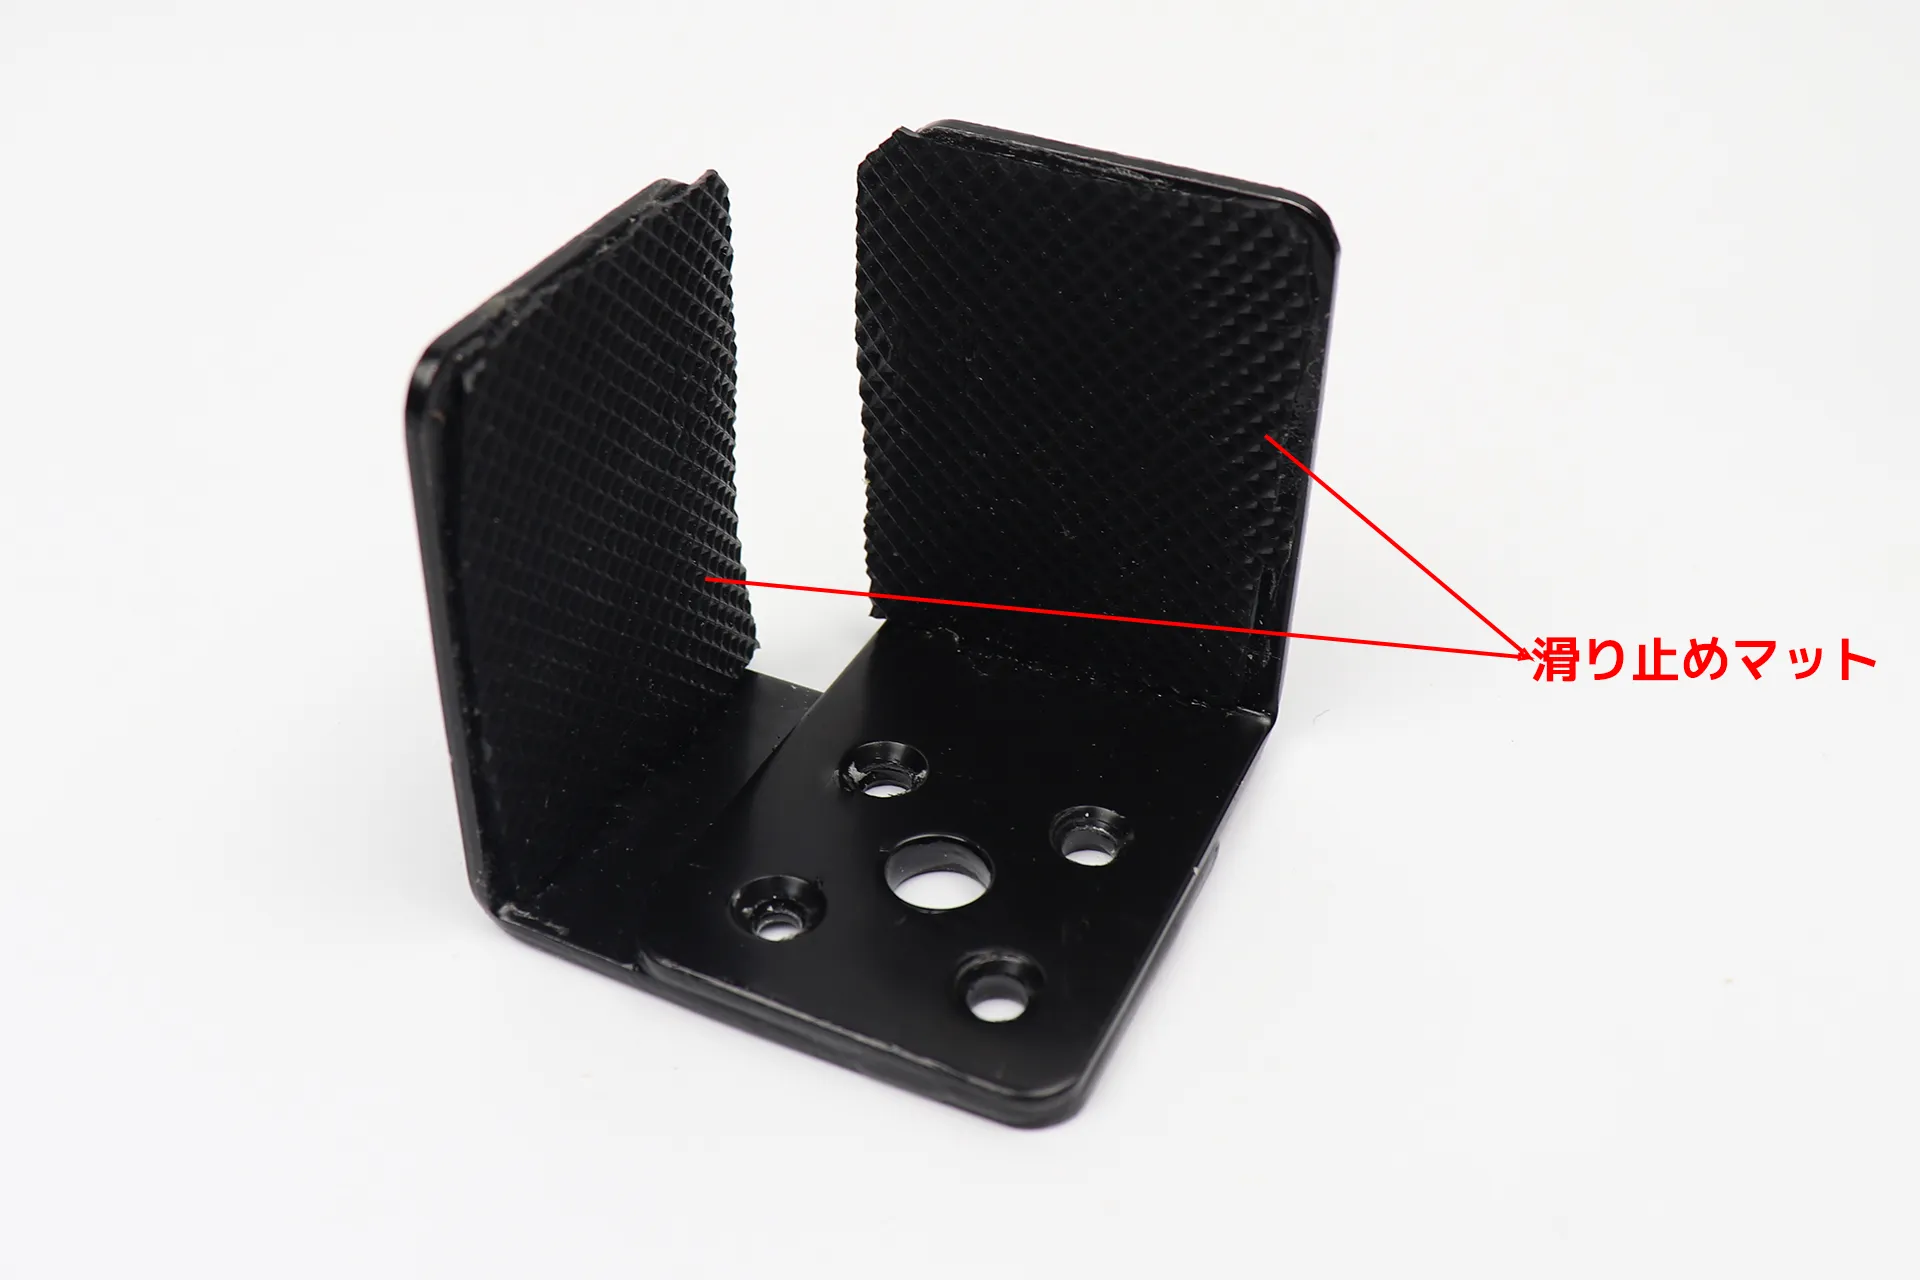
After the metal fittings are glued, attach a non-slip mat to the inside.
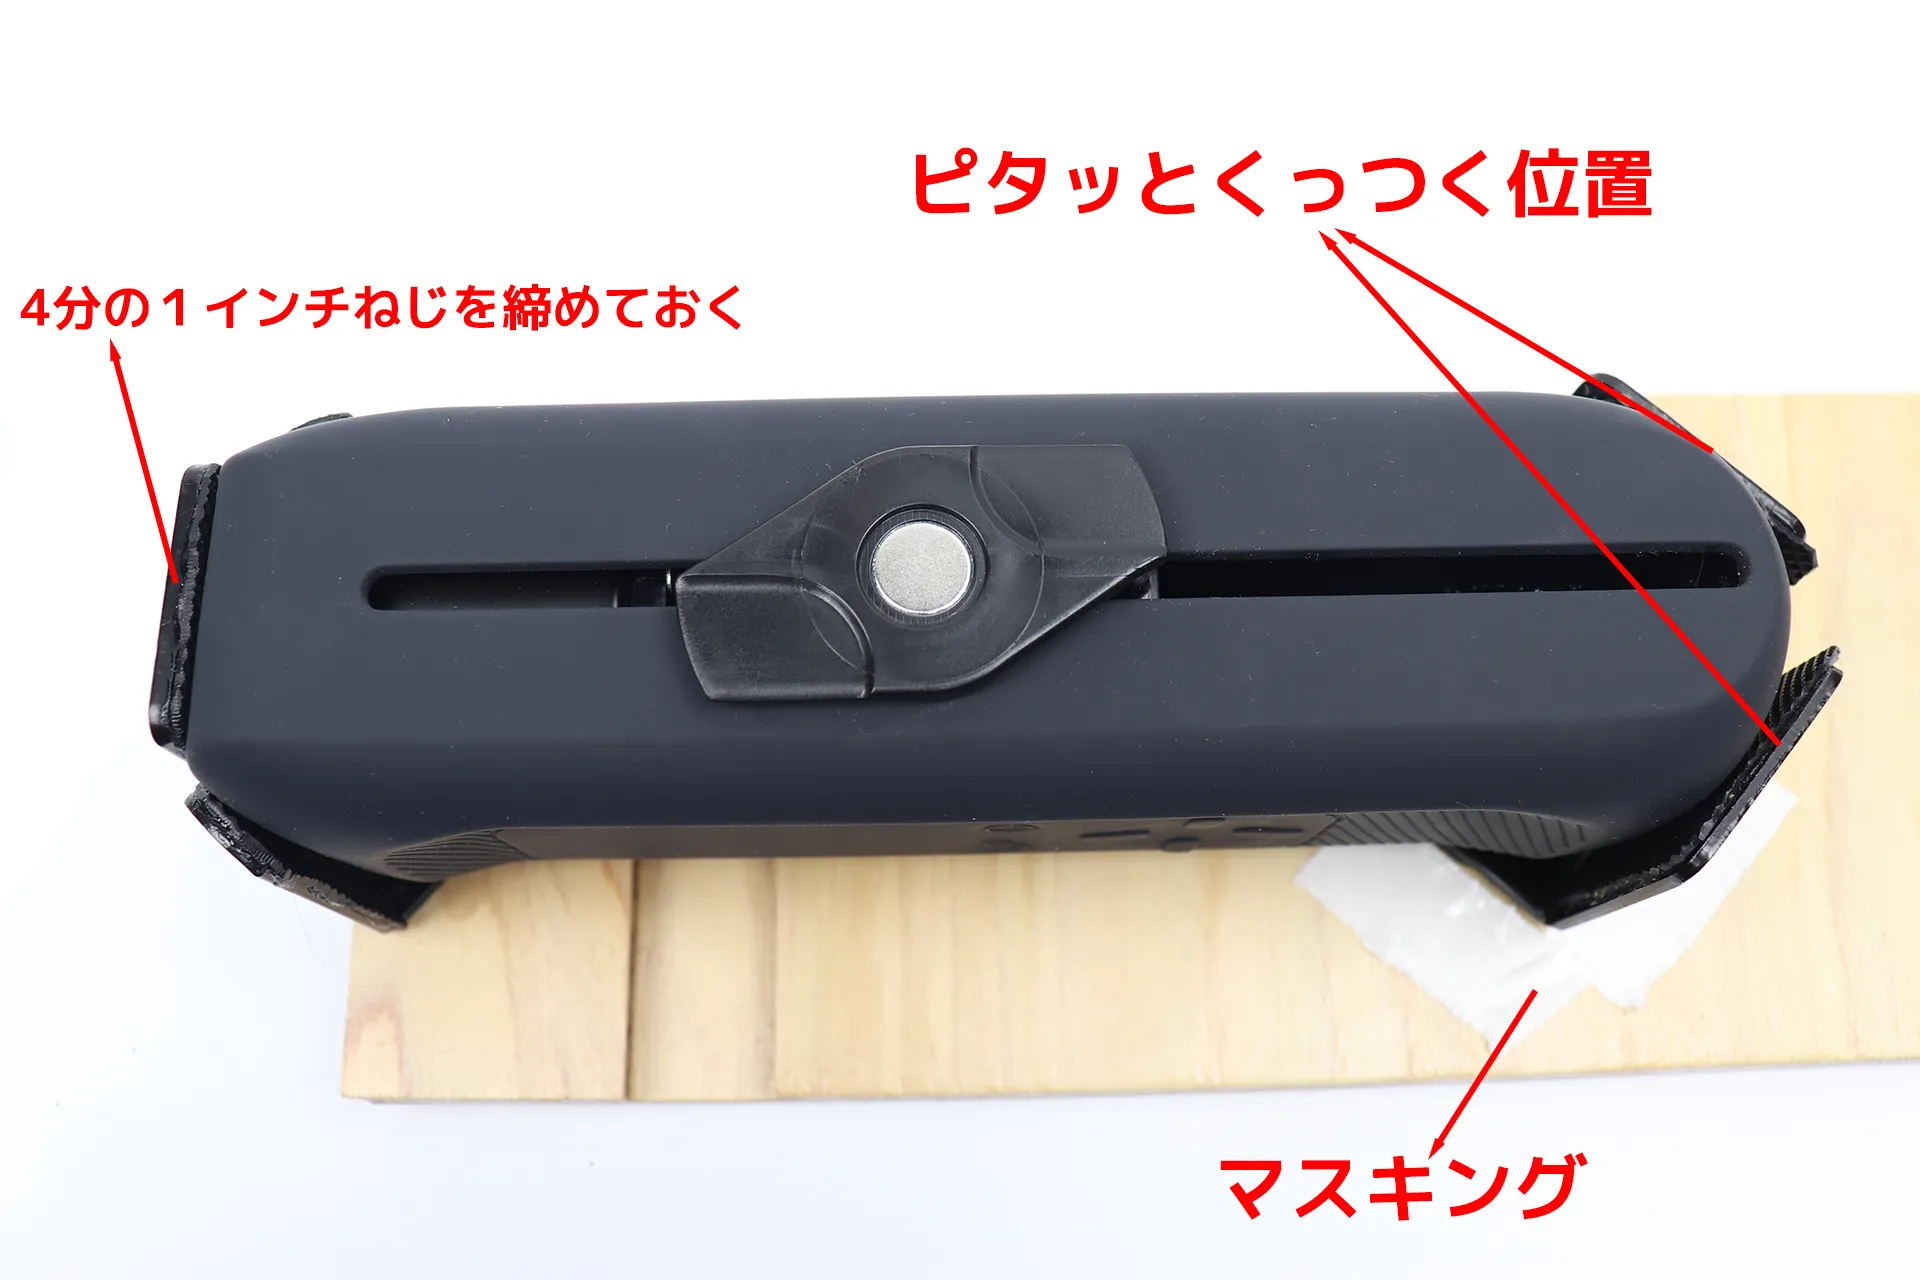
Attach the intersecting L-shaped brackets to the mounting hardware. To determine the mounting position, place the main unit on the mounting base, lock the front with a quarter-inch screw, and then mark the exact position where it fits.
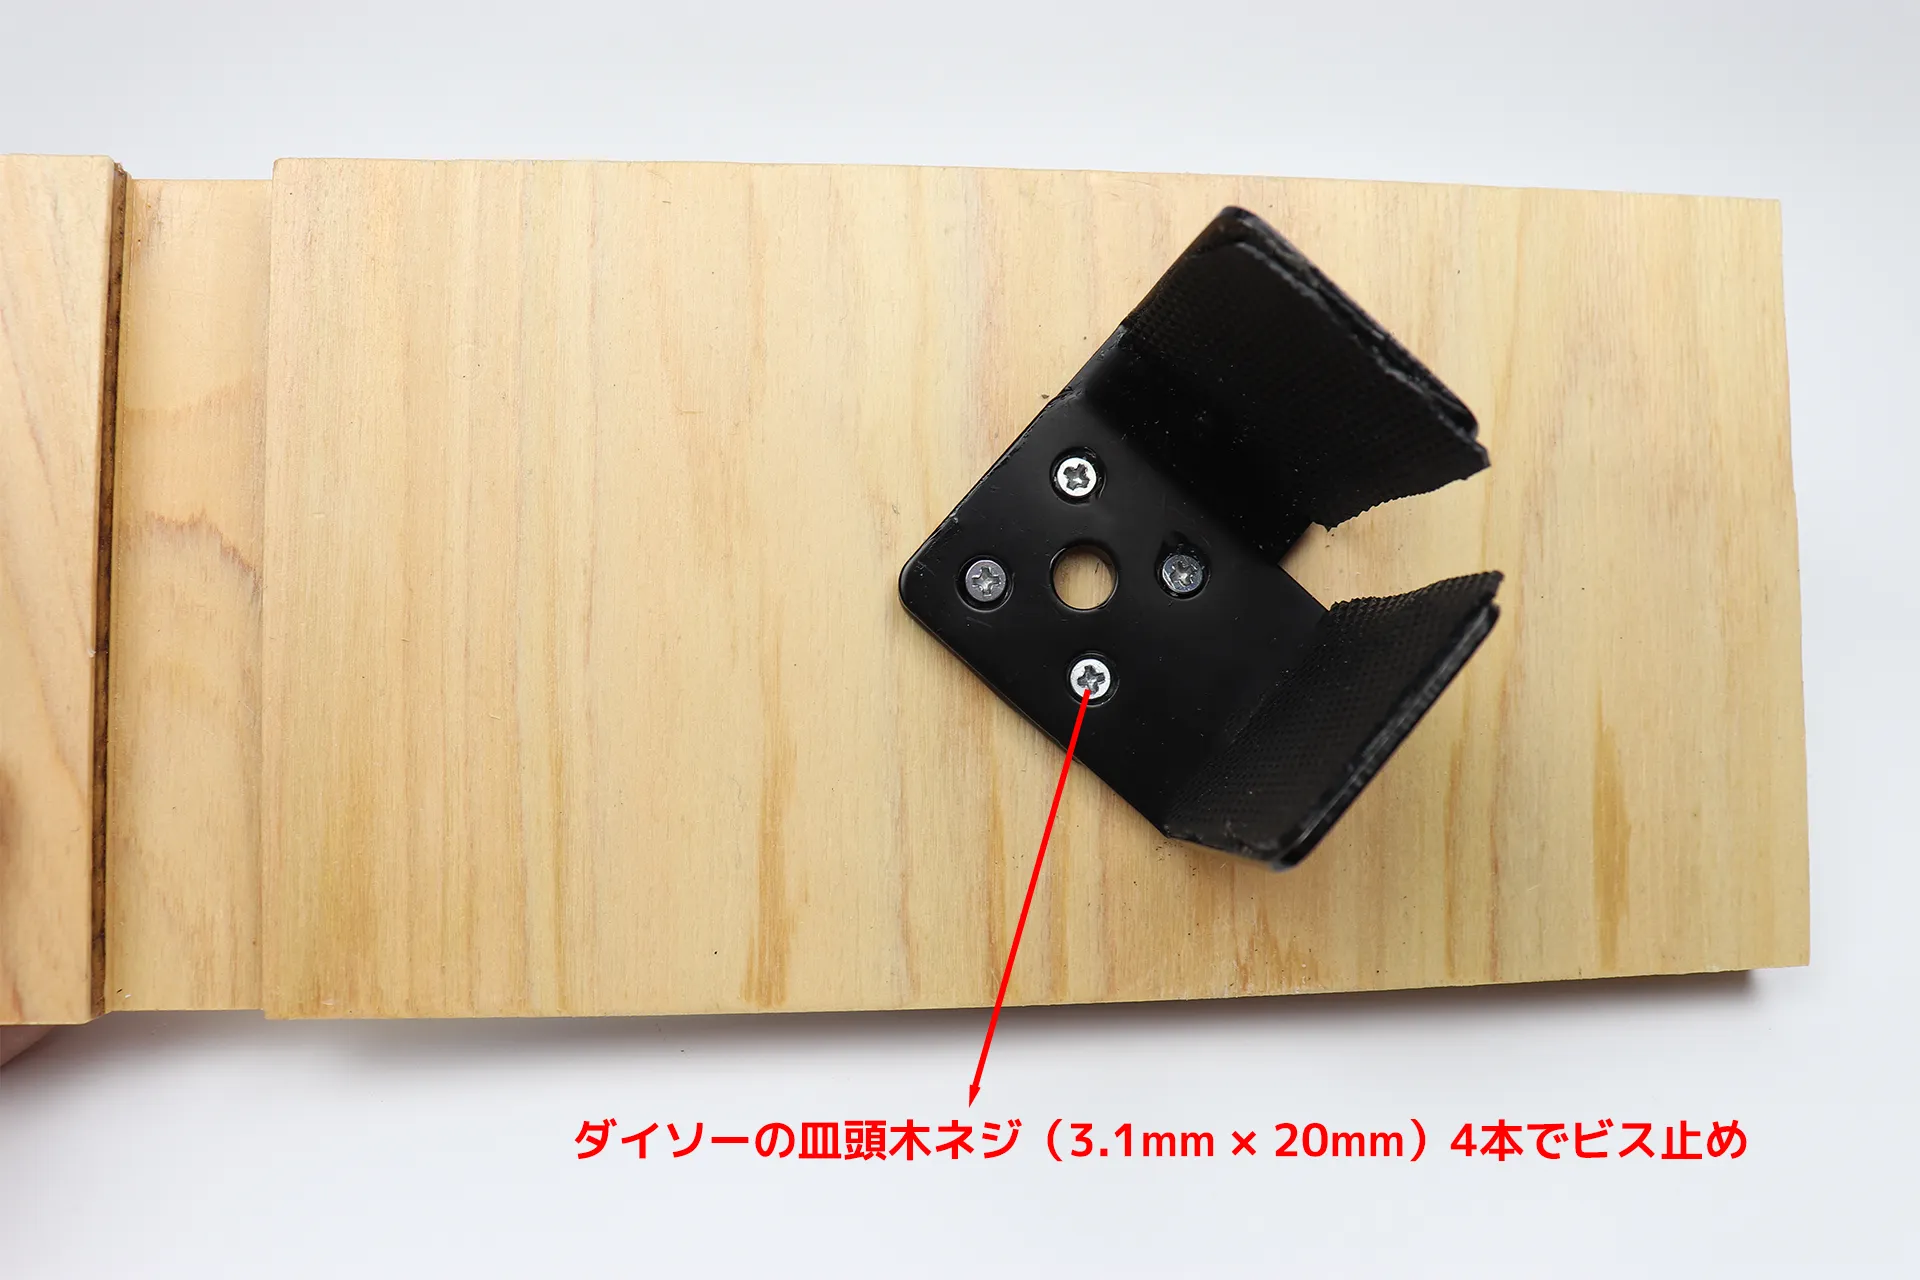
The plate from Daiso is secured with four small wood screws. Using the smaller screws ensures the plate fits inside the holes and doesn't stick out.
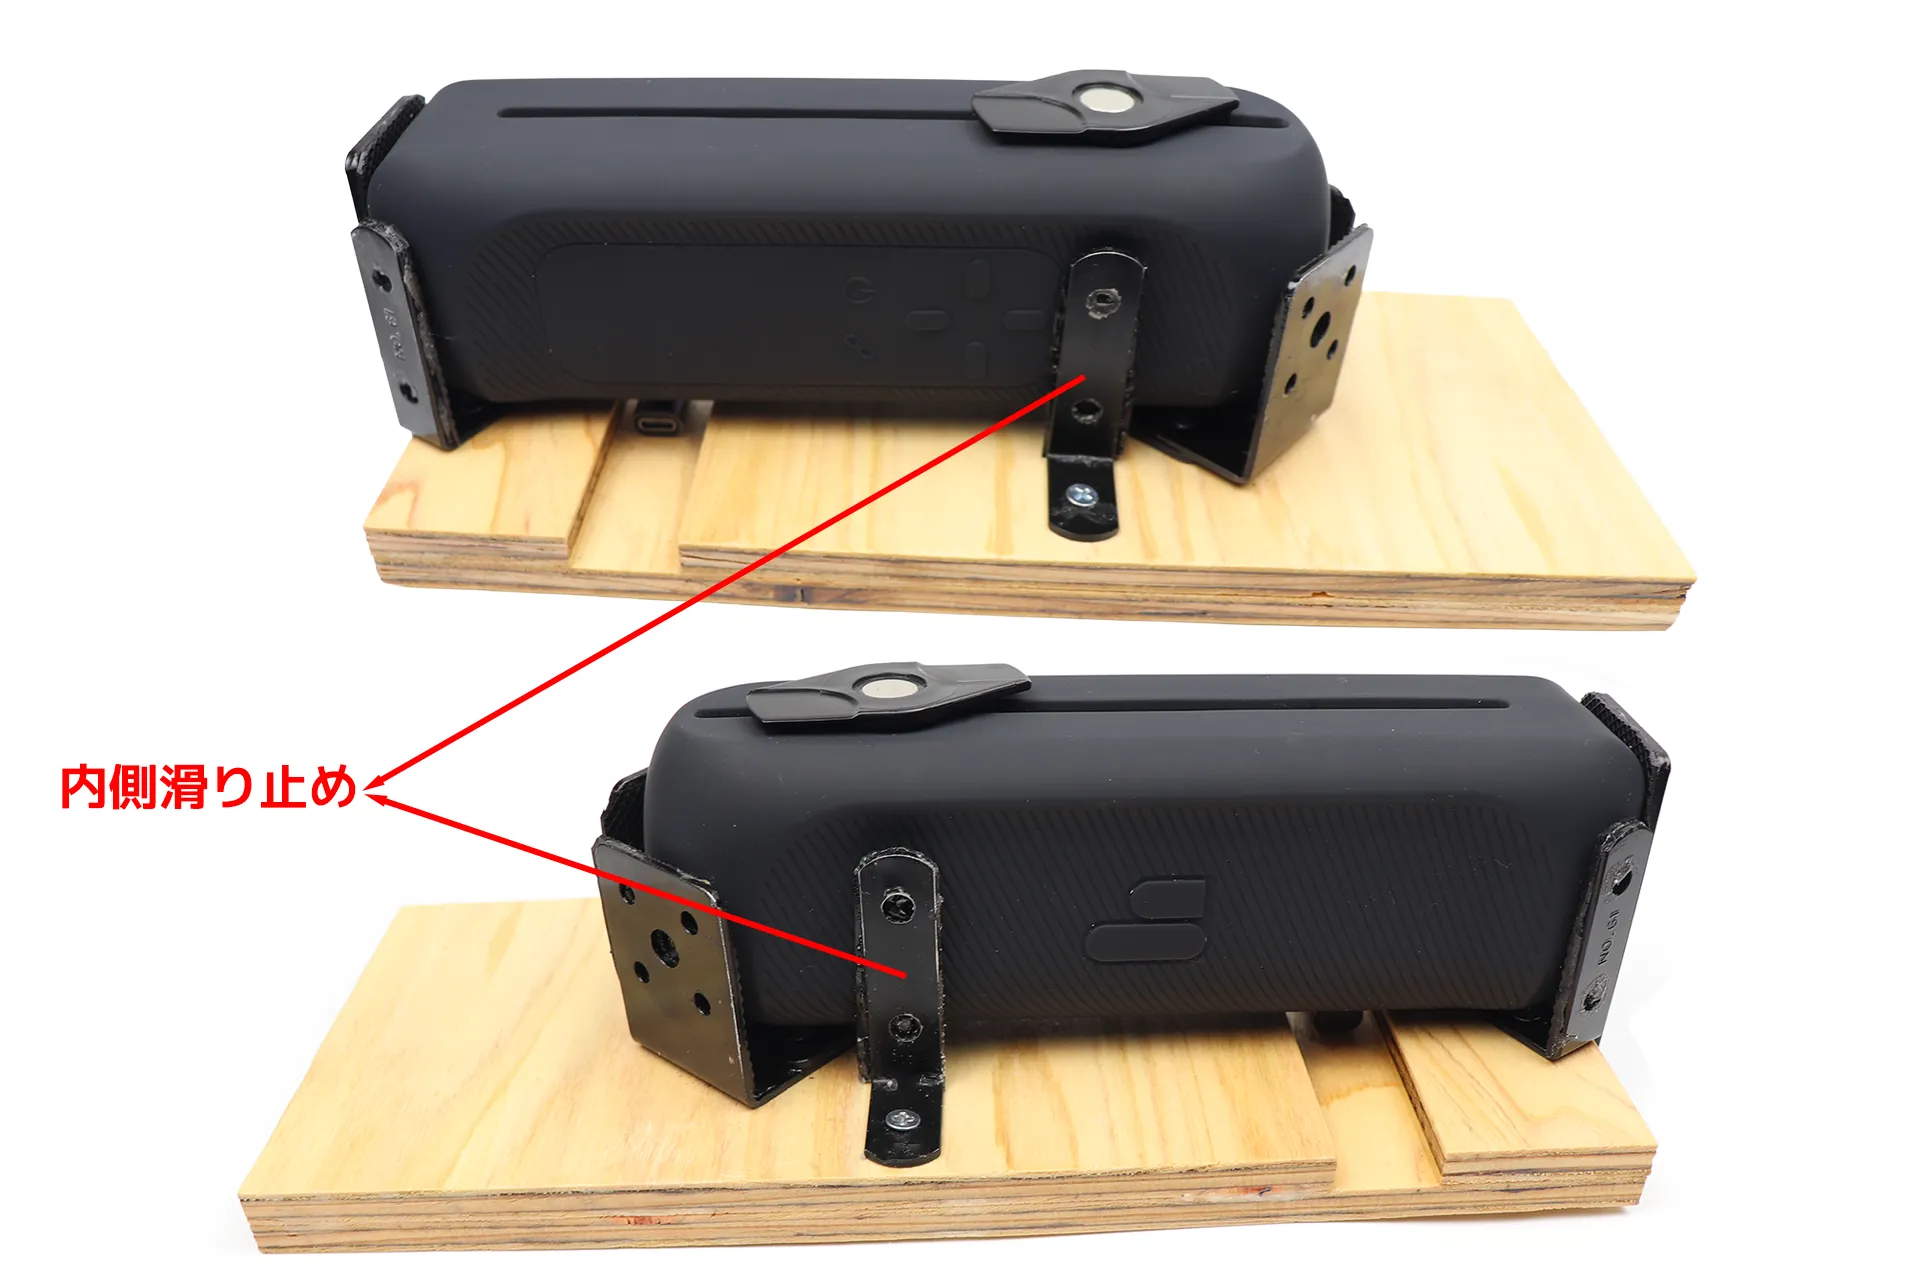
Attach a small L-shaped support with an anti-slip mat on the inside to the rear side of Handy2 . Install it in a position where it does not interfere with the control buttons.
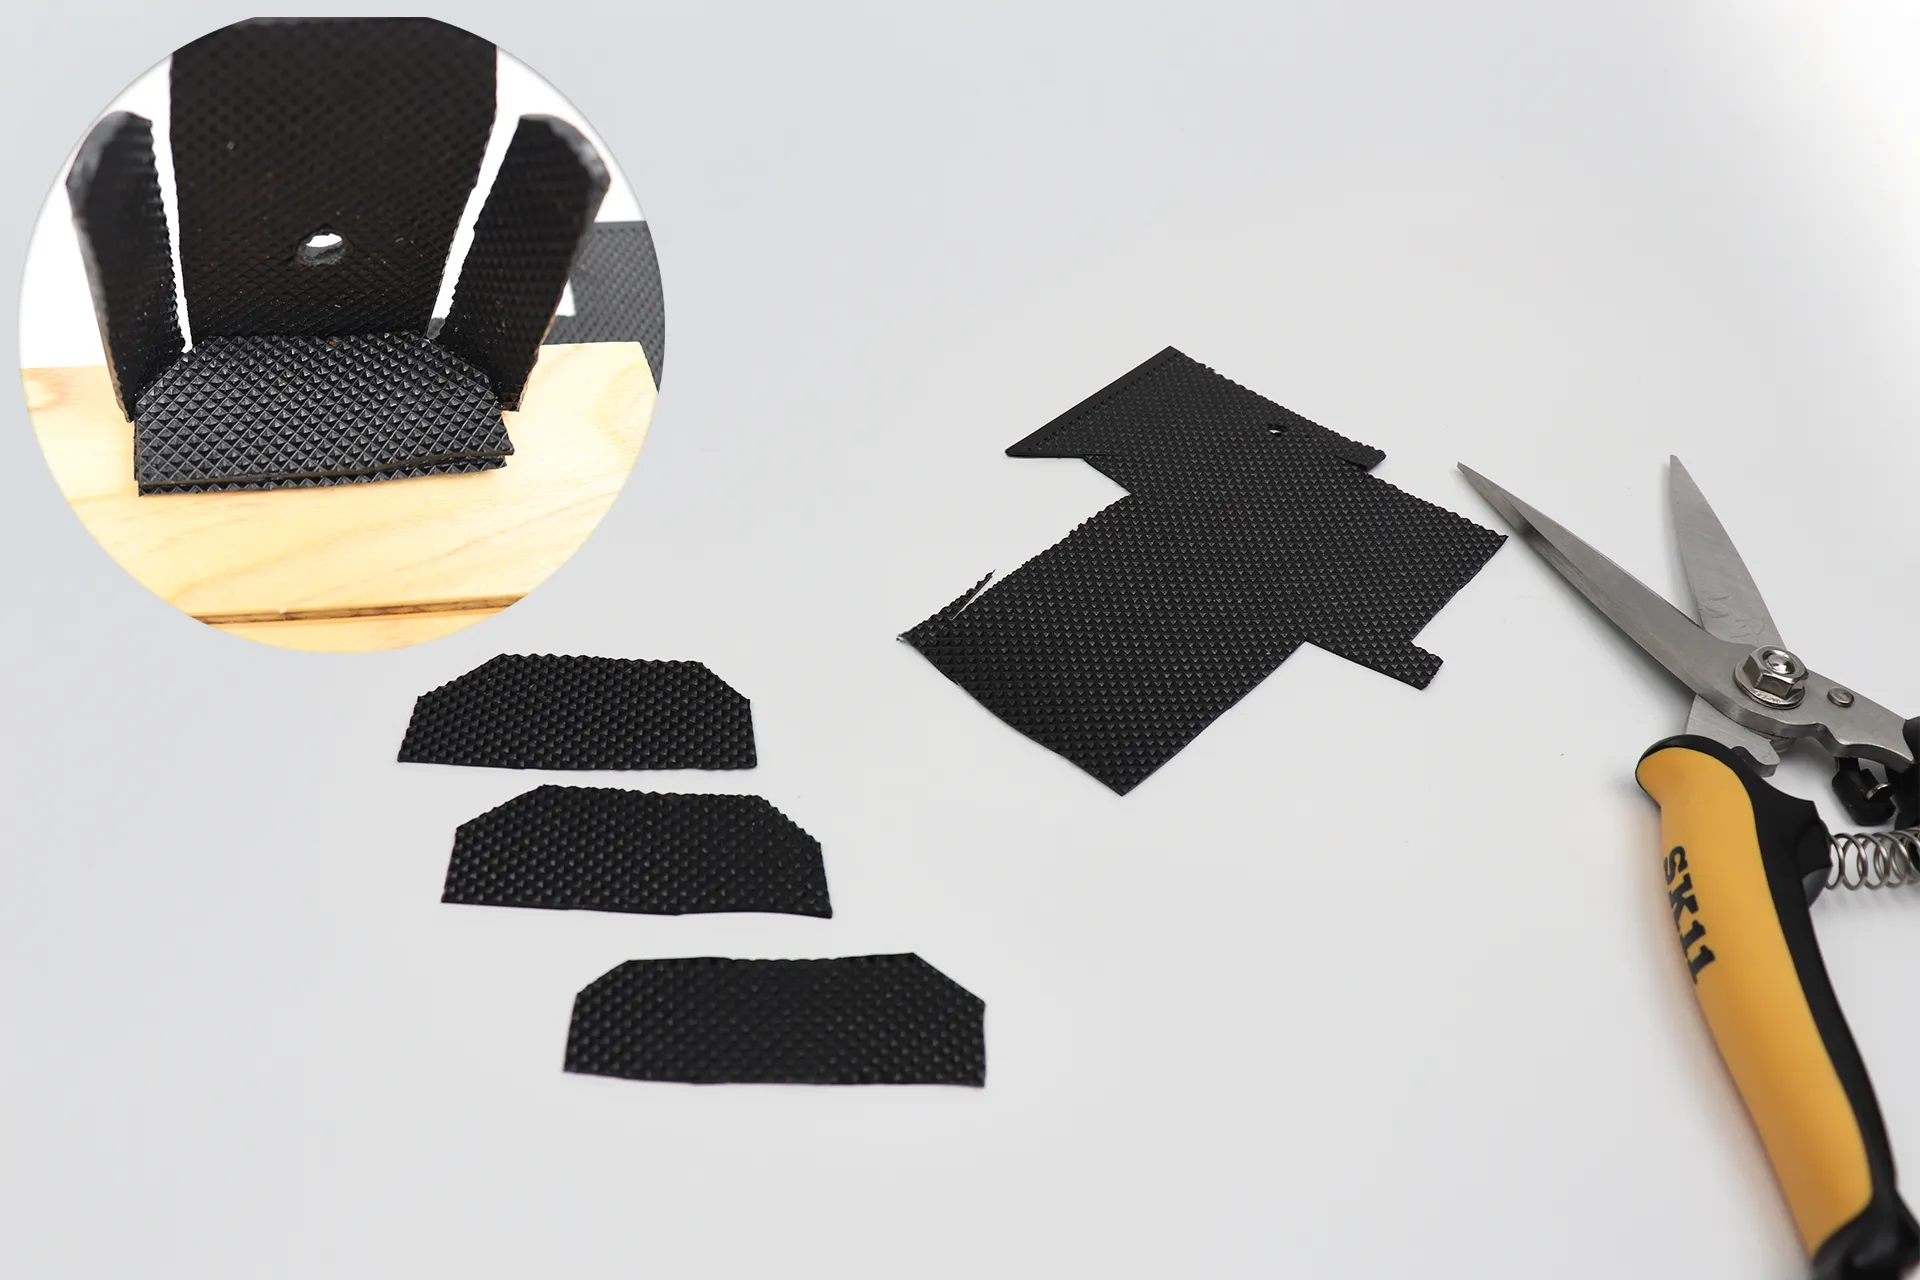
Attach a cushion to the front of the image, aligning the height of the screw holes. Glue three anti-slip mats, cut to the correct shape, together with ultra-multipurpose adhesive to create a single, thicker mat.
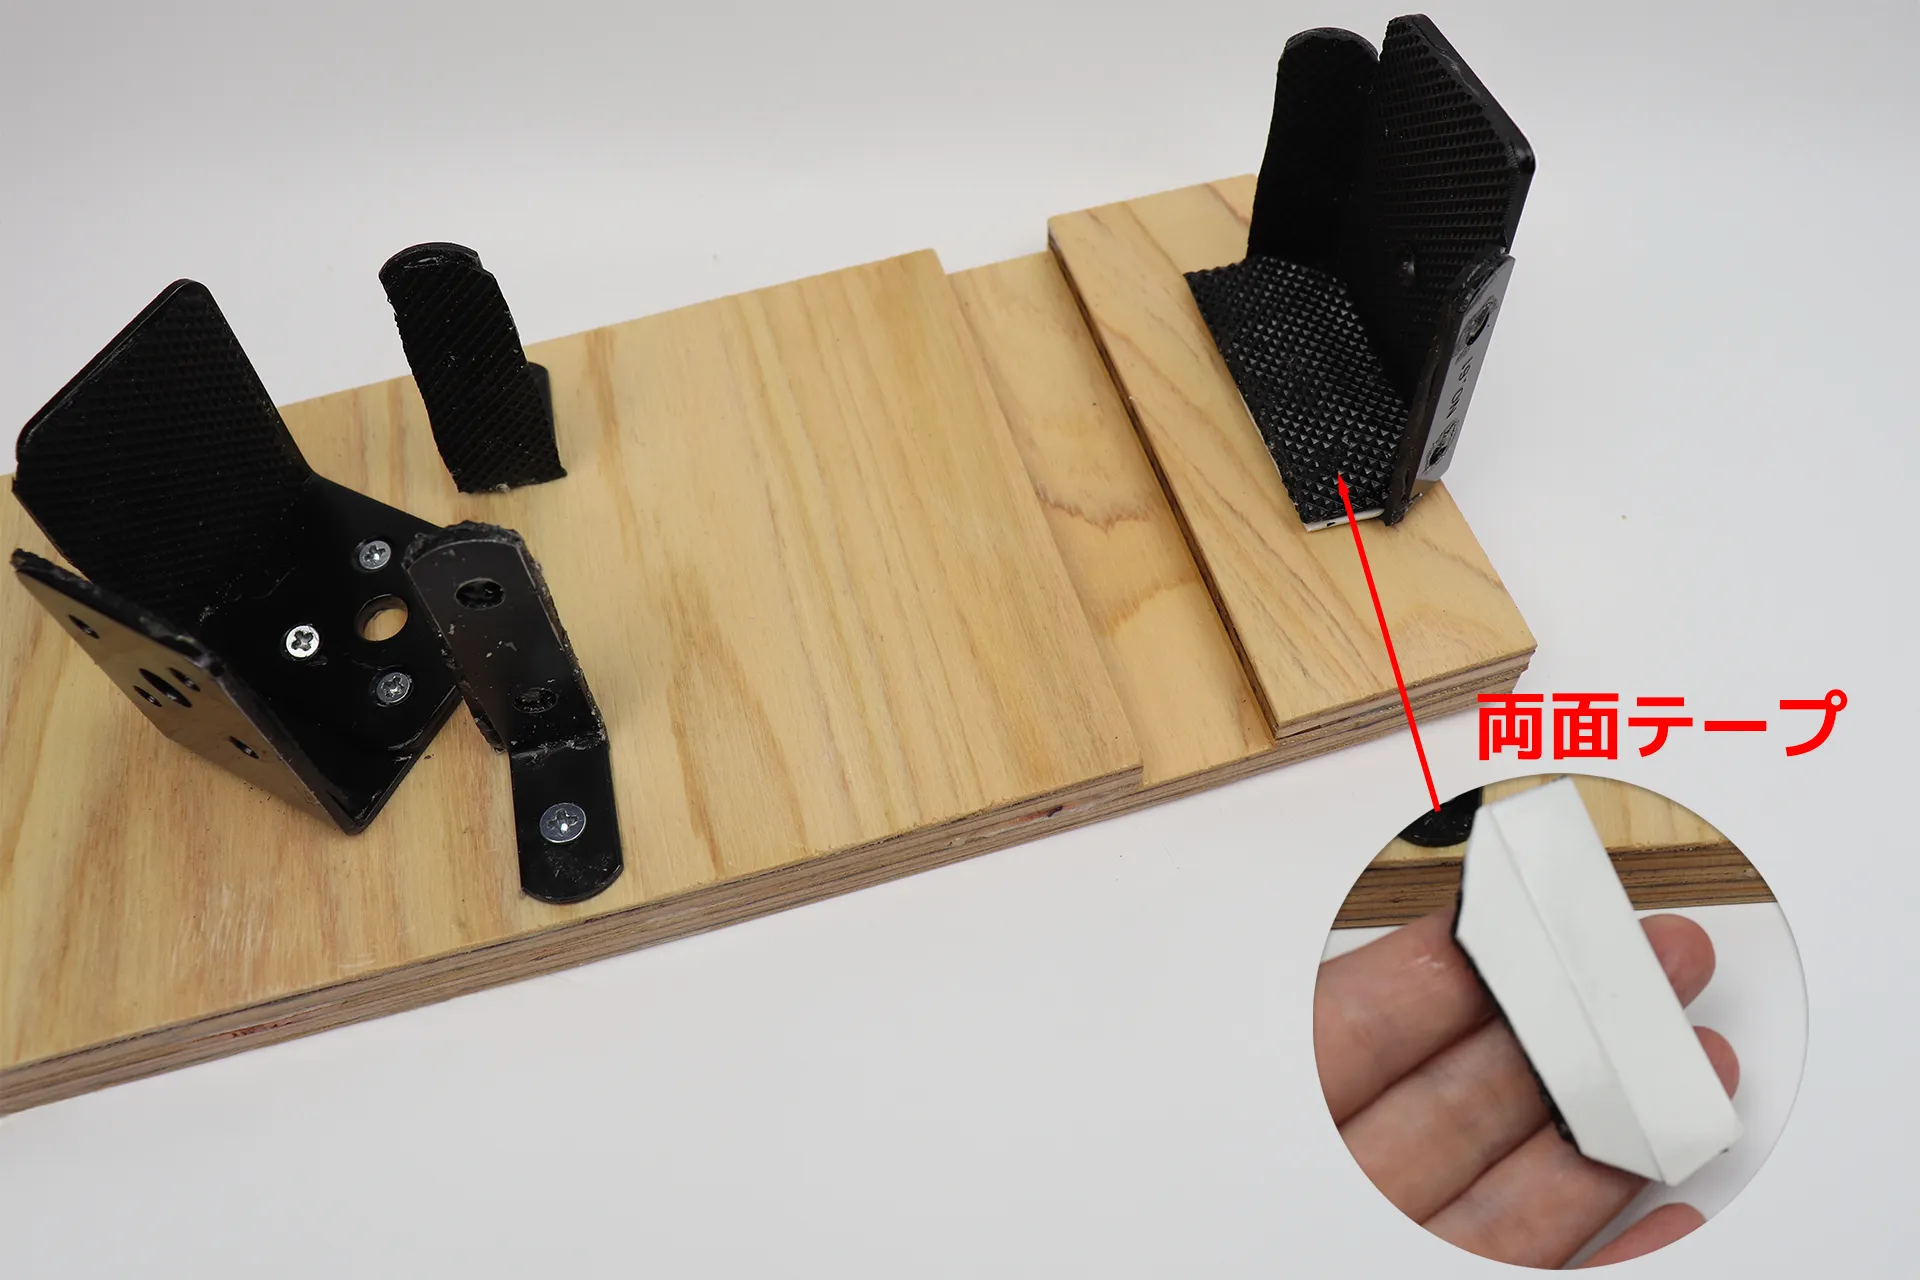
Once the thick non-slip mat is dry, attach it using double-sided tape.
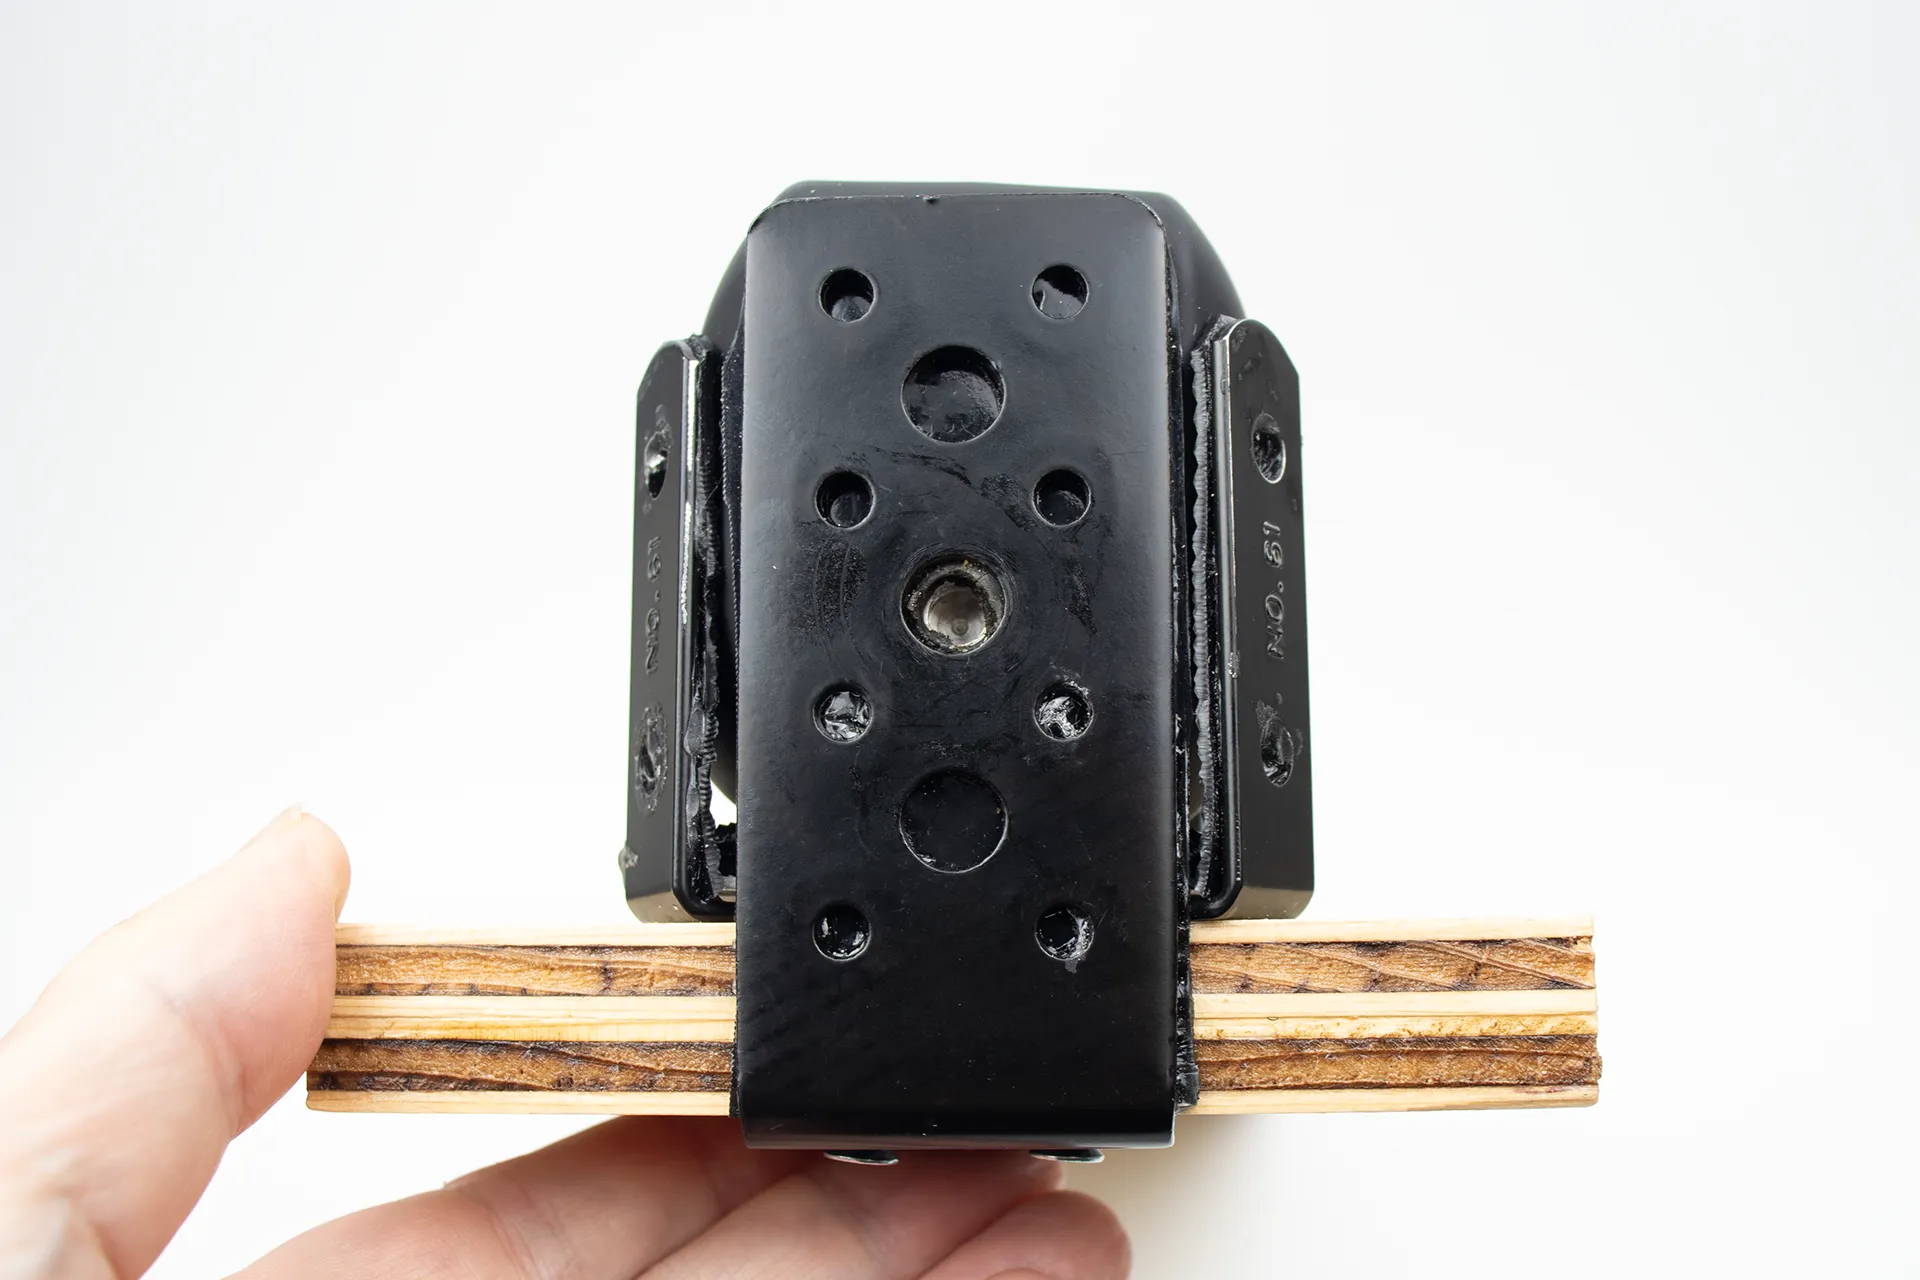
By inserting the cushion mat, the screw holes align perfectly, making it easier to secure with 1/4-inch screws. The thickness of the cushion will vary depending on the type of wood used, so please adjust it by adding or removing some as needed.
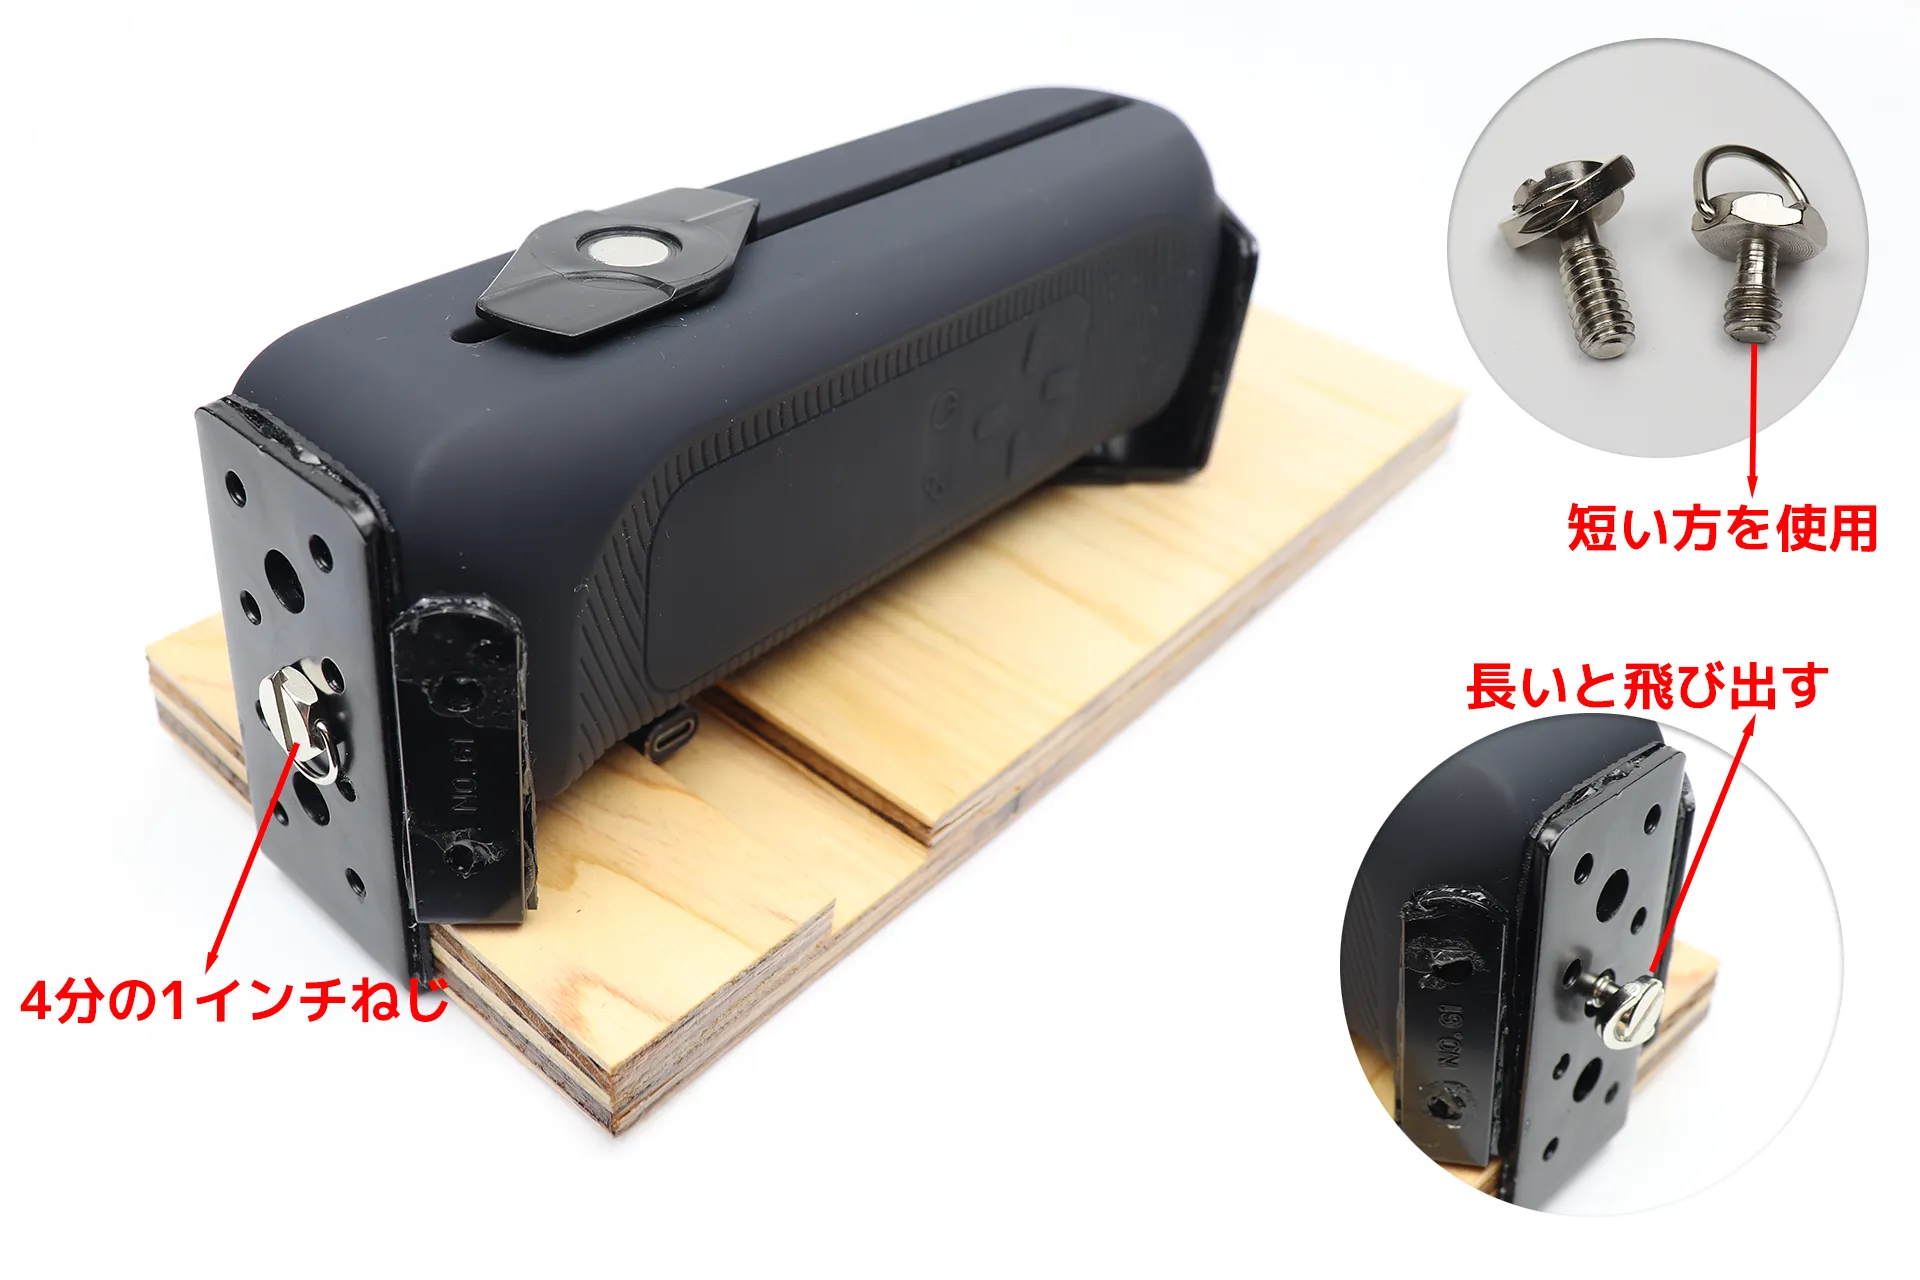
The short 1/4-inch screws I used for mounting were a perfect fit and allowed me to tighten them easily.
| Product name | SMALLRIG 1/4-inch Screw Camera Mounting Screw, 2-Pack, 1/4-inch Knob, 1/4"-20 Thread | ||
|---|---|---|---|
| retailers | |||
| price | From around 999 yen (tax included) | ||
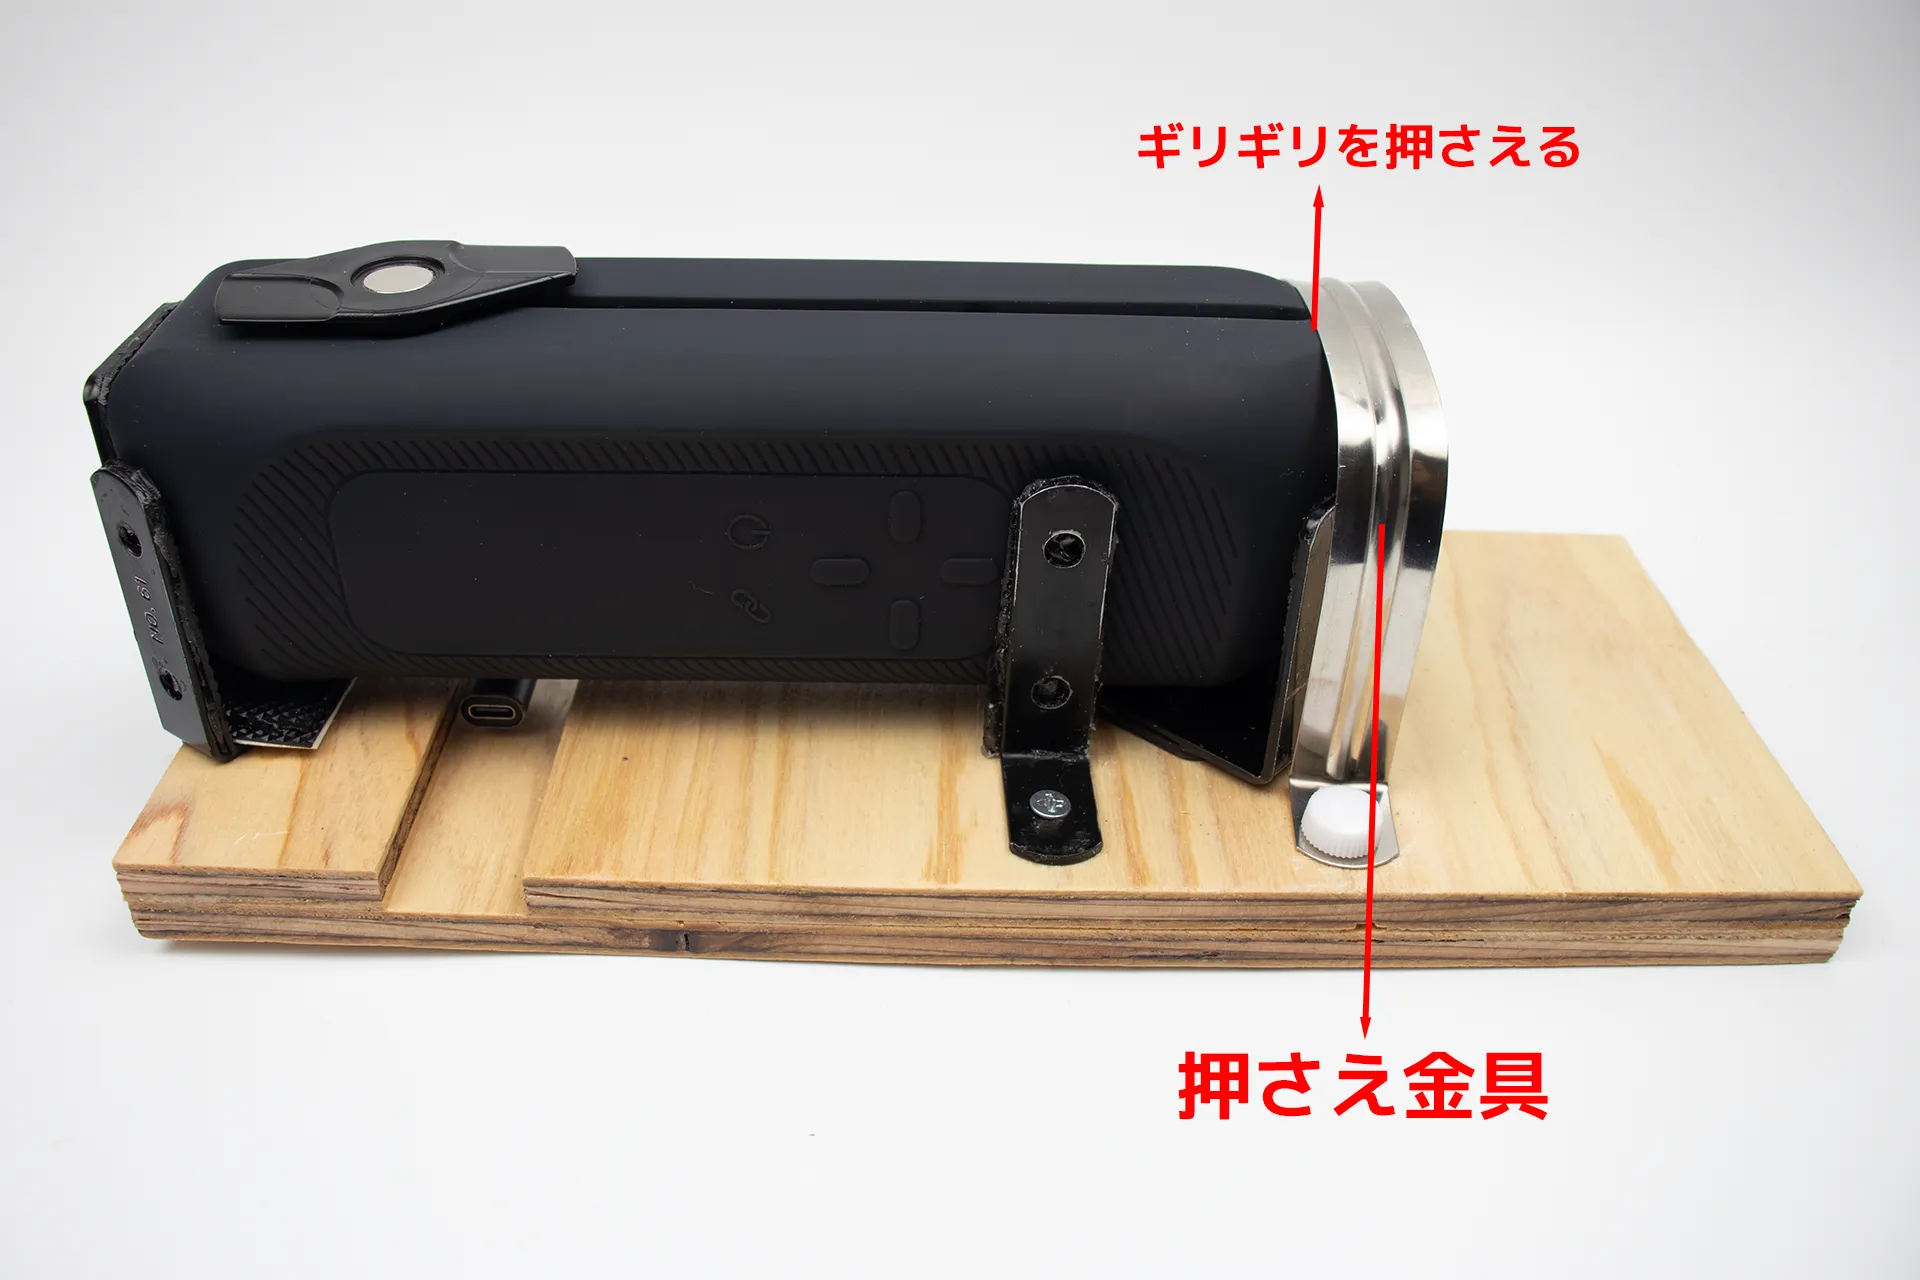
Attach the retaining clip to the very rear edge of Handy2 .The following itemsI've written about it in more detail there, so please take a look.
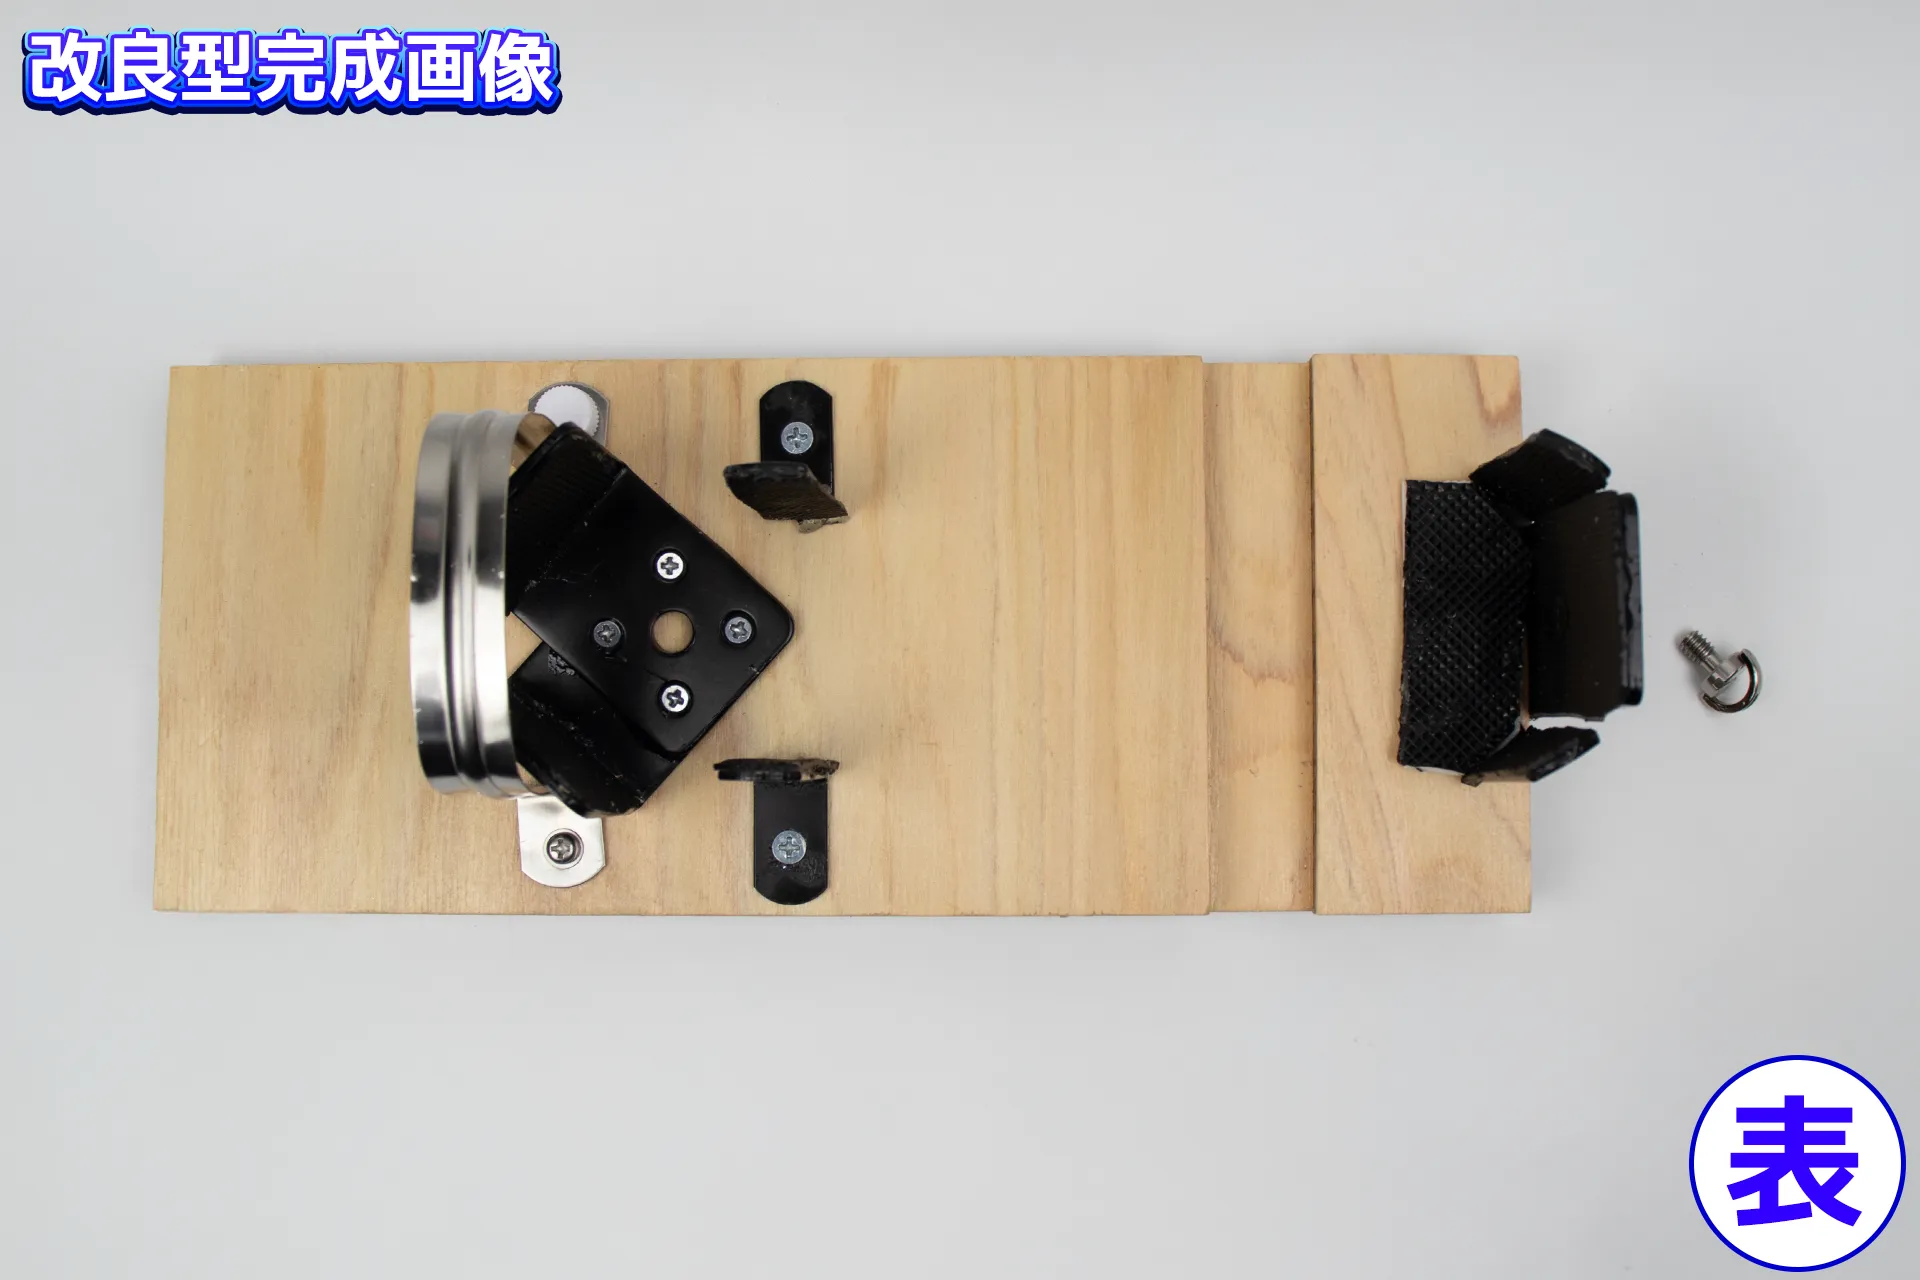
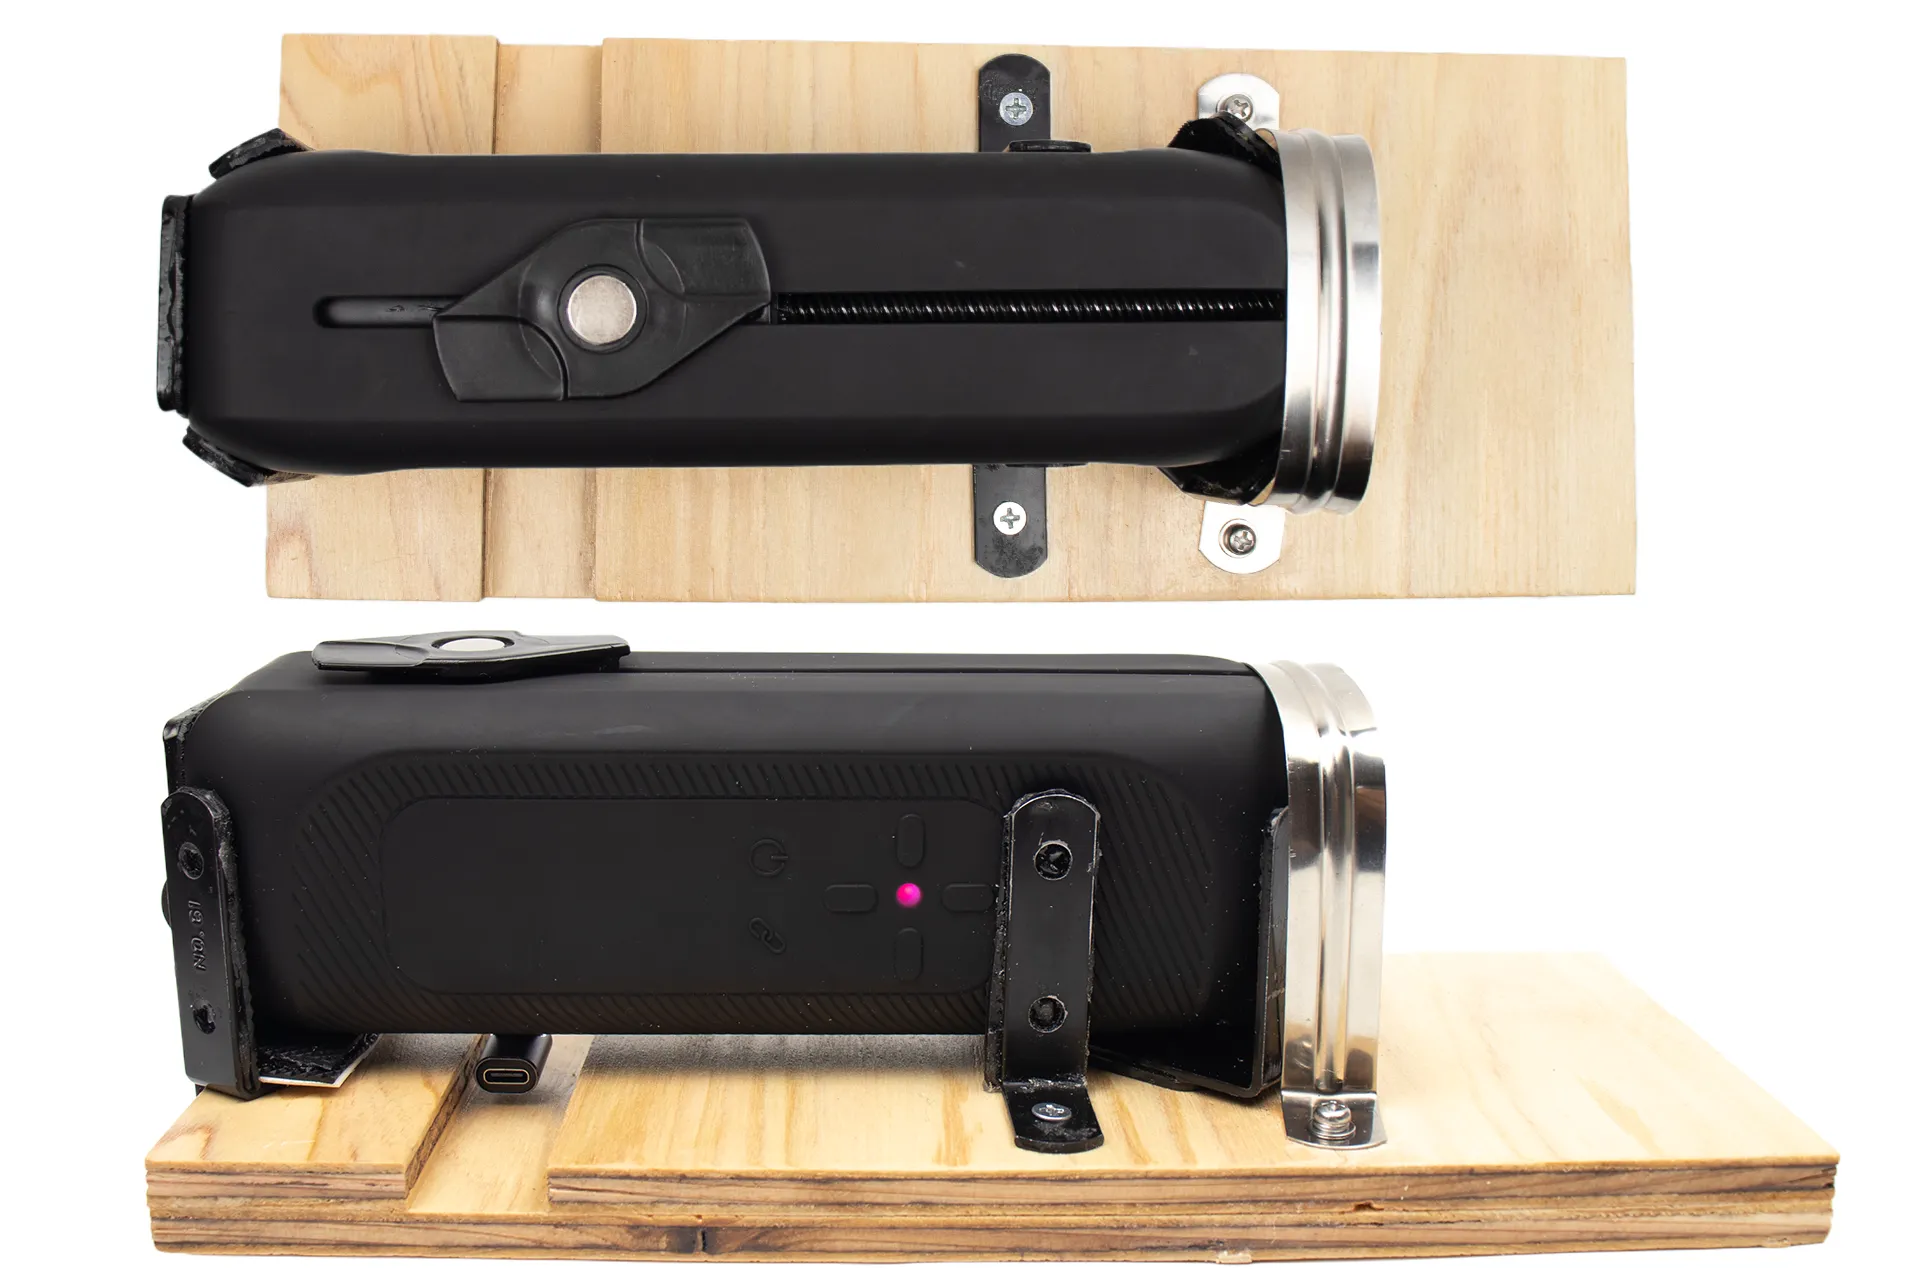
This is a picture of the improved Handy2 mounting bracket, showing the finished surface. There's quite a bit of space at the back, so I could cut it shorter, but I'm thinking of adding a mobile battery in the future.
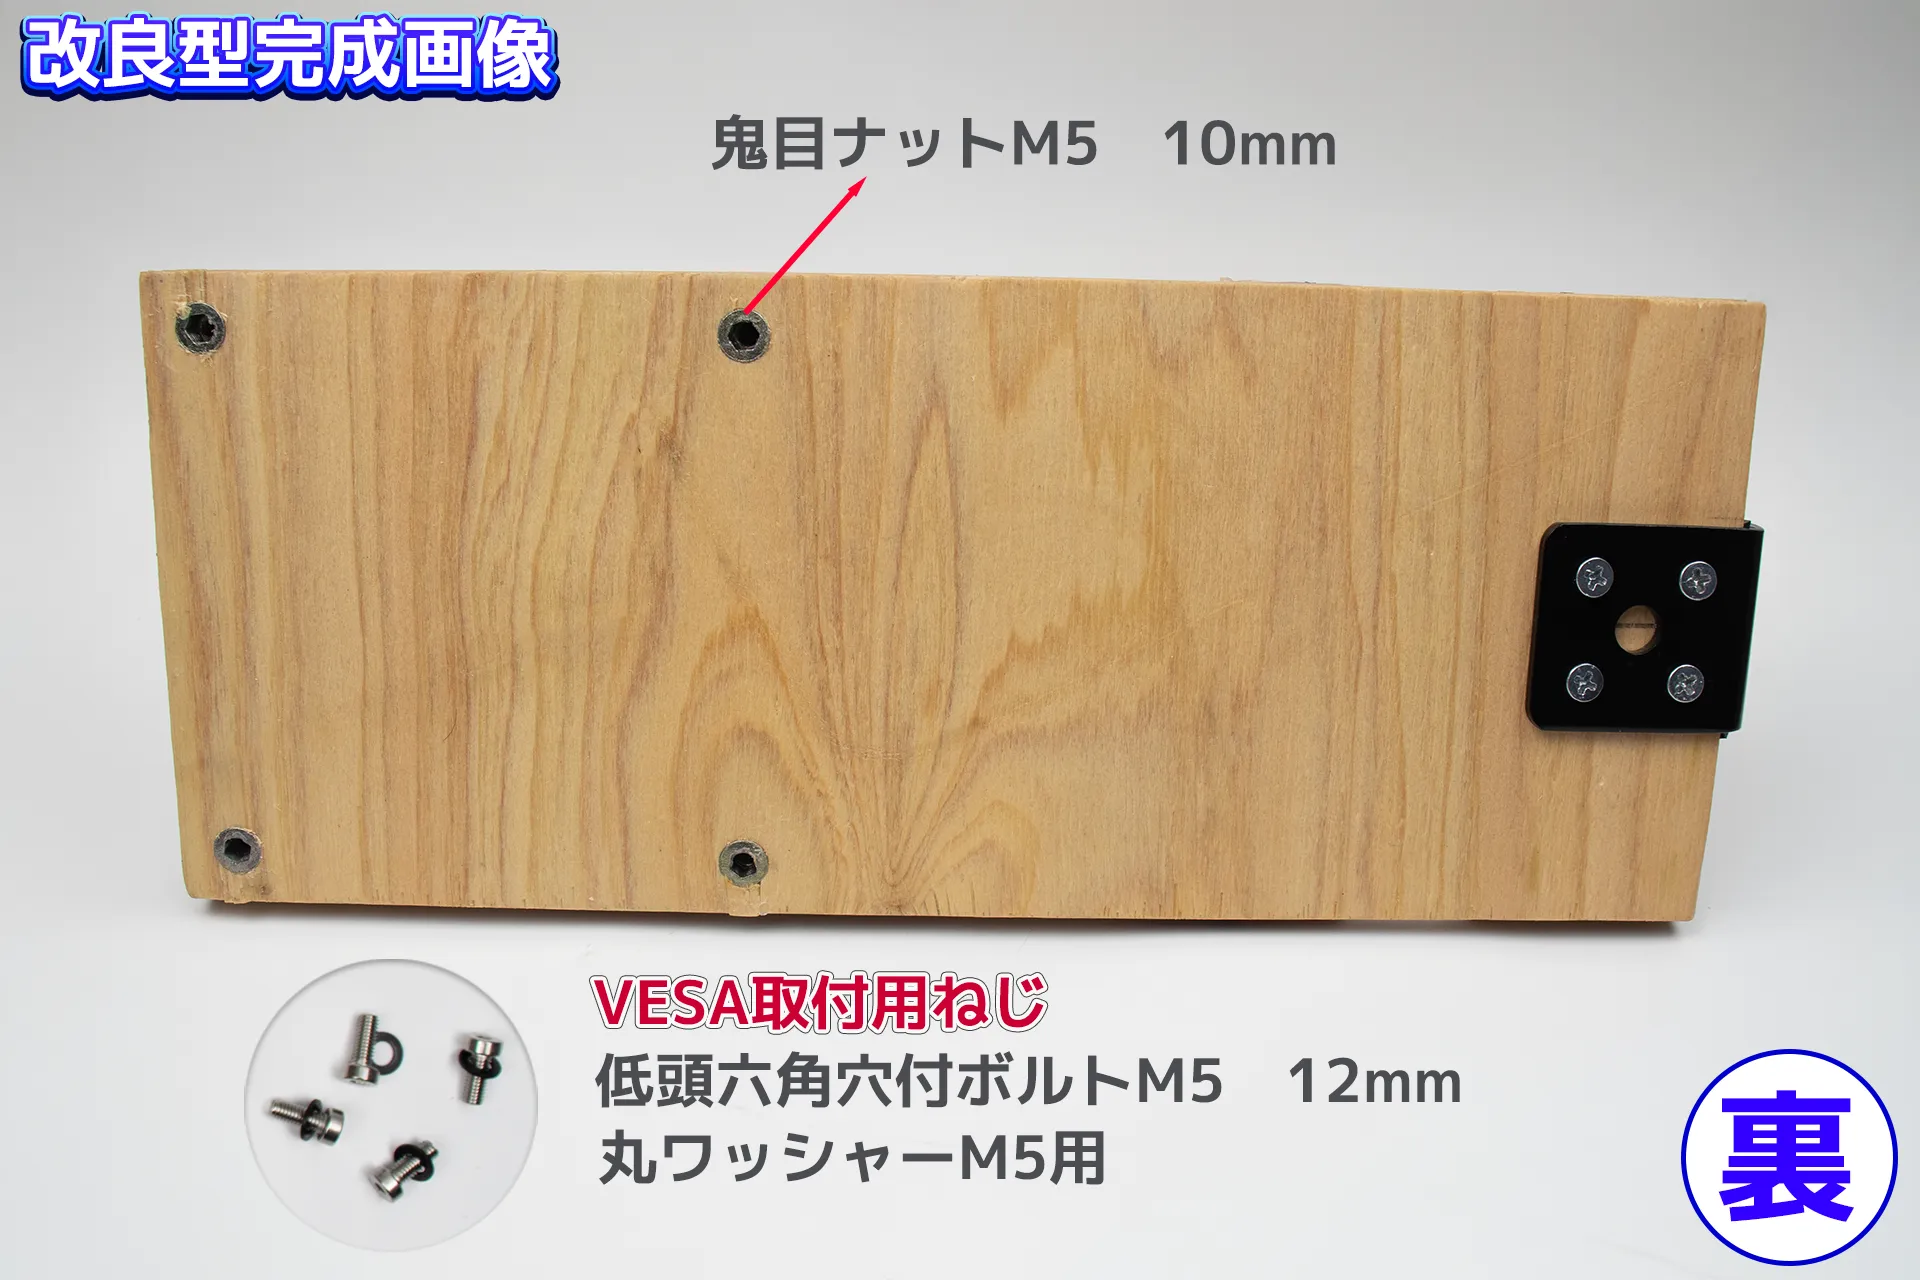
This is the back view of the improved Handy2 mounting bracket. Regarding VESA mounting...The following itemsPlease see below.
| Product name | Embedded insert nut, hexagonal nut, BESTU threaded type | ||
|---|---|---|---|
| retailers | |||
| price | Around 980 yen (tax included) | ||
| Product name | TRUSCO Low-profile Hex Socket Head Cap Screw, Stainless Steel, Fully Threaded, M5 x 12, 12 pieces (B089-0512) | ||
|---|---|---|---|
| retailers | |||
| price | Around 571 yen (tax included) | ||
| Product name | Stainless steel/SS black round washer [ISO] for M5 | ||
|---|---|---|---|
| retailers | |||
| price | Around 460 yen (tax included) | ||
| Product name | retailers | Price (tax included) |
|---|---|---|
| Super strong anti-slip mat | Reference links | Around 685 yen and up |
| Multi-purpose metal fitting, L-shaped [iron] (Daido Hunt) x 1 | Reference links | Around 428 yen and up |
| Koni Viola Reinforcement Bracket, Black, No. 61 L-type, 58 x 29 mm, Set of 2 | Reference links | Around 499 yen and up |
| Bond Ultra Multi-Purpose S・U Clear | Reference links | Around 420 yen and up |
| Multi-purpose hardware L-shaped (Daido Hunt, small) x 2 | Reference links | Around 264 yen and up |
| Strong adhesive (two-part epoxy type) | Daiso | 110 yen |
| SMALLRIG 1/4-inch Camera Mounting Screw | Reference links | Around 999 yen and up |
| Embedded insert nut, hexagonal nut, BESTU threaded type | Reference links | Around 980 yen and up |
| TRUSCO Low-profile Hex Socket Head Cap Screw, Stainless Steel, Fully Threaded, M5 x 12 | Reference links | 571 yen |
| Stainless steel/SS black round washer [ISO] for M5 | Reference links | Around 460 yen and up |
I attached the bracket that secures the rear of Handy2 to the mounting bracket, but before that, I checked to see how far the area would extend without interfering with the holder.
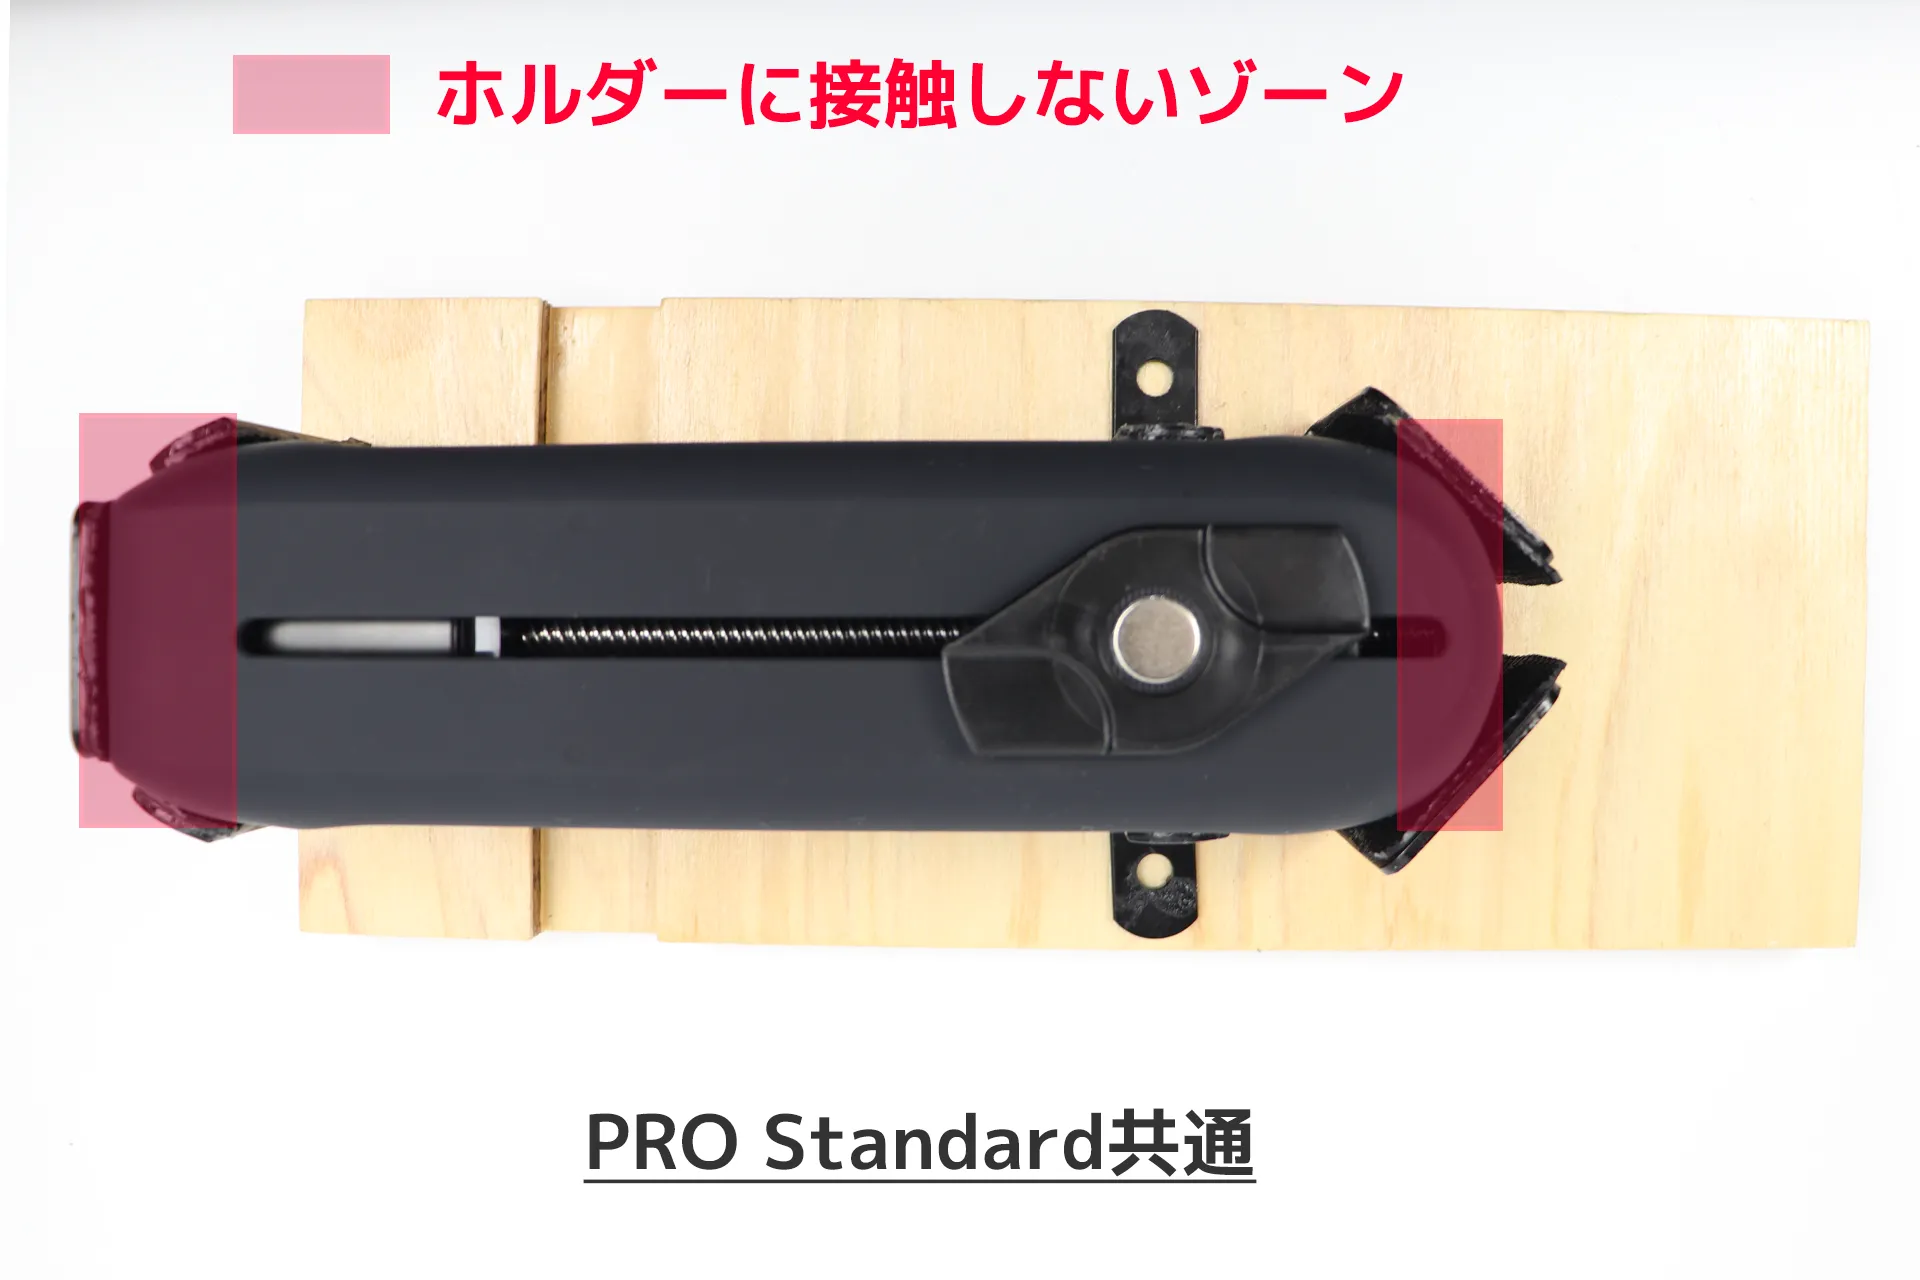
After investigating, I found that the safe zone is the red area, and there is a fair amount of space in front (about the width of one finger), but there is only about half that much space behind.
What I want you to pay attention to is that the entire groove at the rear doesn't make contact; there's a small zone above the groove where it doesn't. This tiny space is the key to attaching the retaining clip.
The difference in holding power with and without the retaining clips is significant, so let's carefully attach the retaining clips right at the edge!
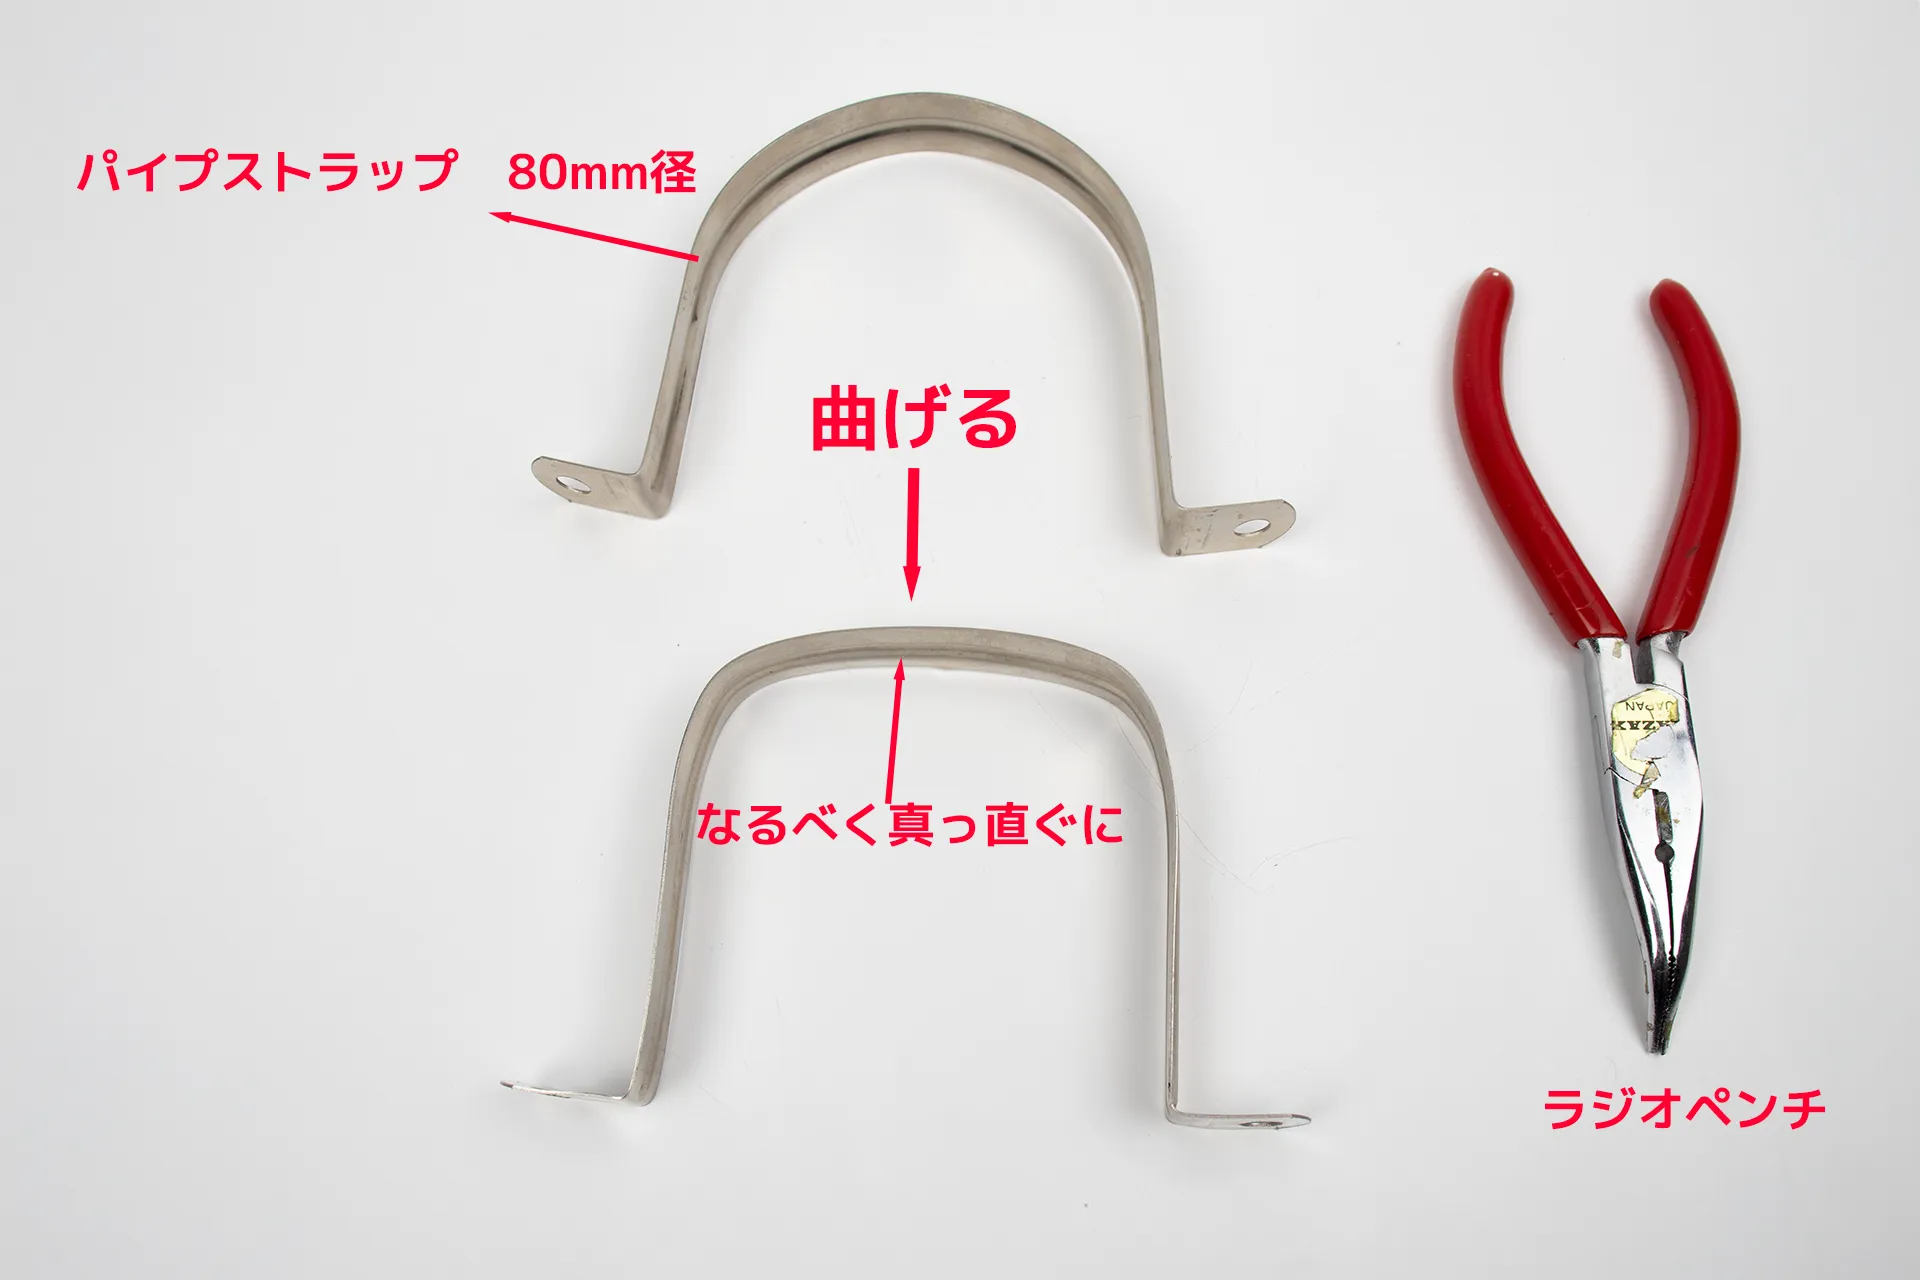
The first method involves bending an 80mm pipe strap with needle-nose pliers. Shape it so that the top is as straight as possible.
| Product name | Wuuycoky Φ80 Stainless Steel 2-Hole Pipe Straps, Set of 4 for 80mm Diameter Tubes | ||
|---|---|---|---|
| retailers | |||
| price | From around 459 yen (tax included) | ||
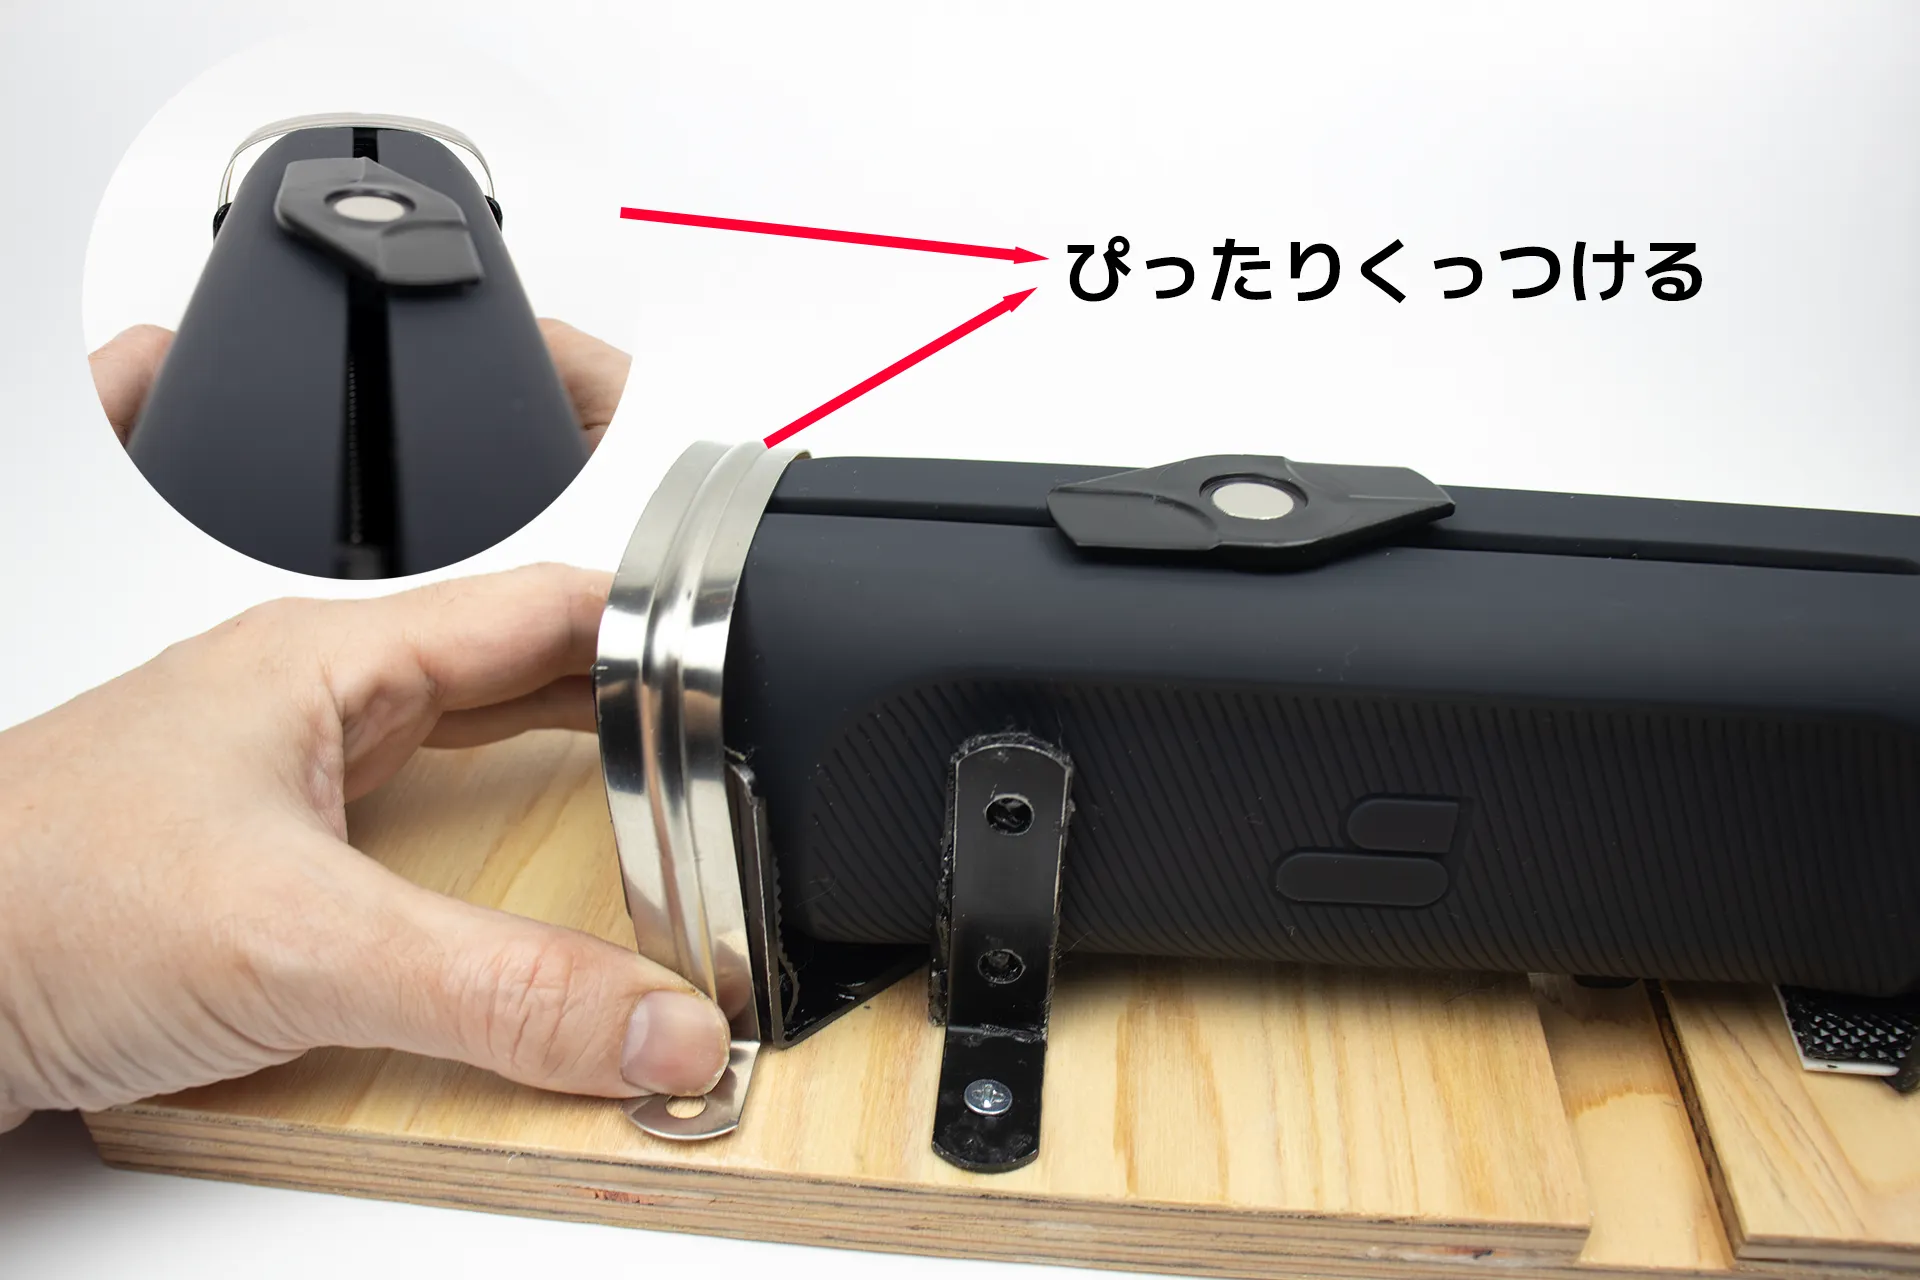
Set the hnady2 unit in place, find a point where the metal fitting fits snugly against the rear safe zone, and then determine the position of the holes for the threaded inserts that will be secured with bolts.
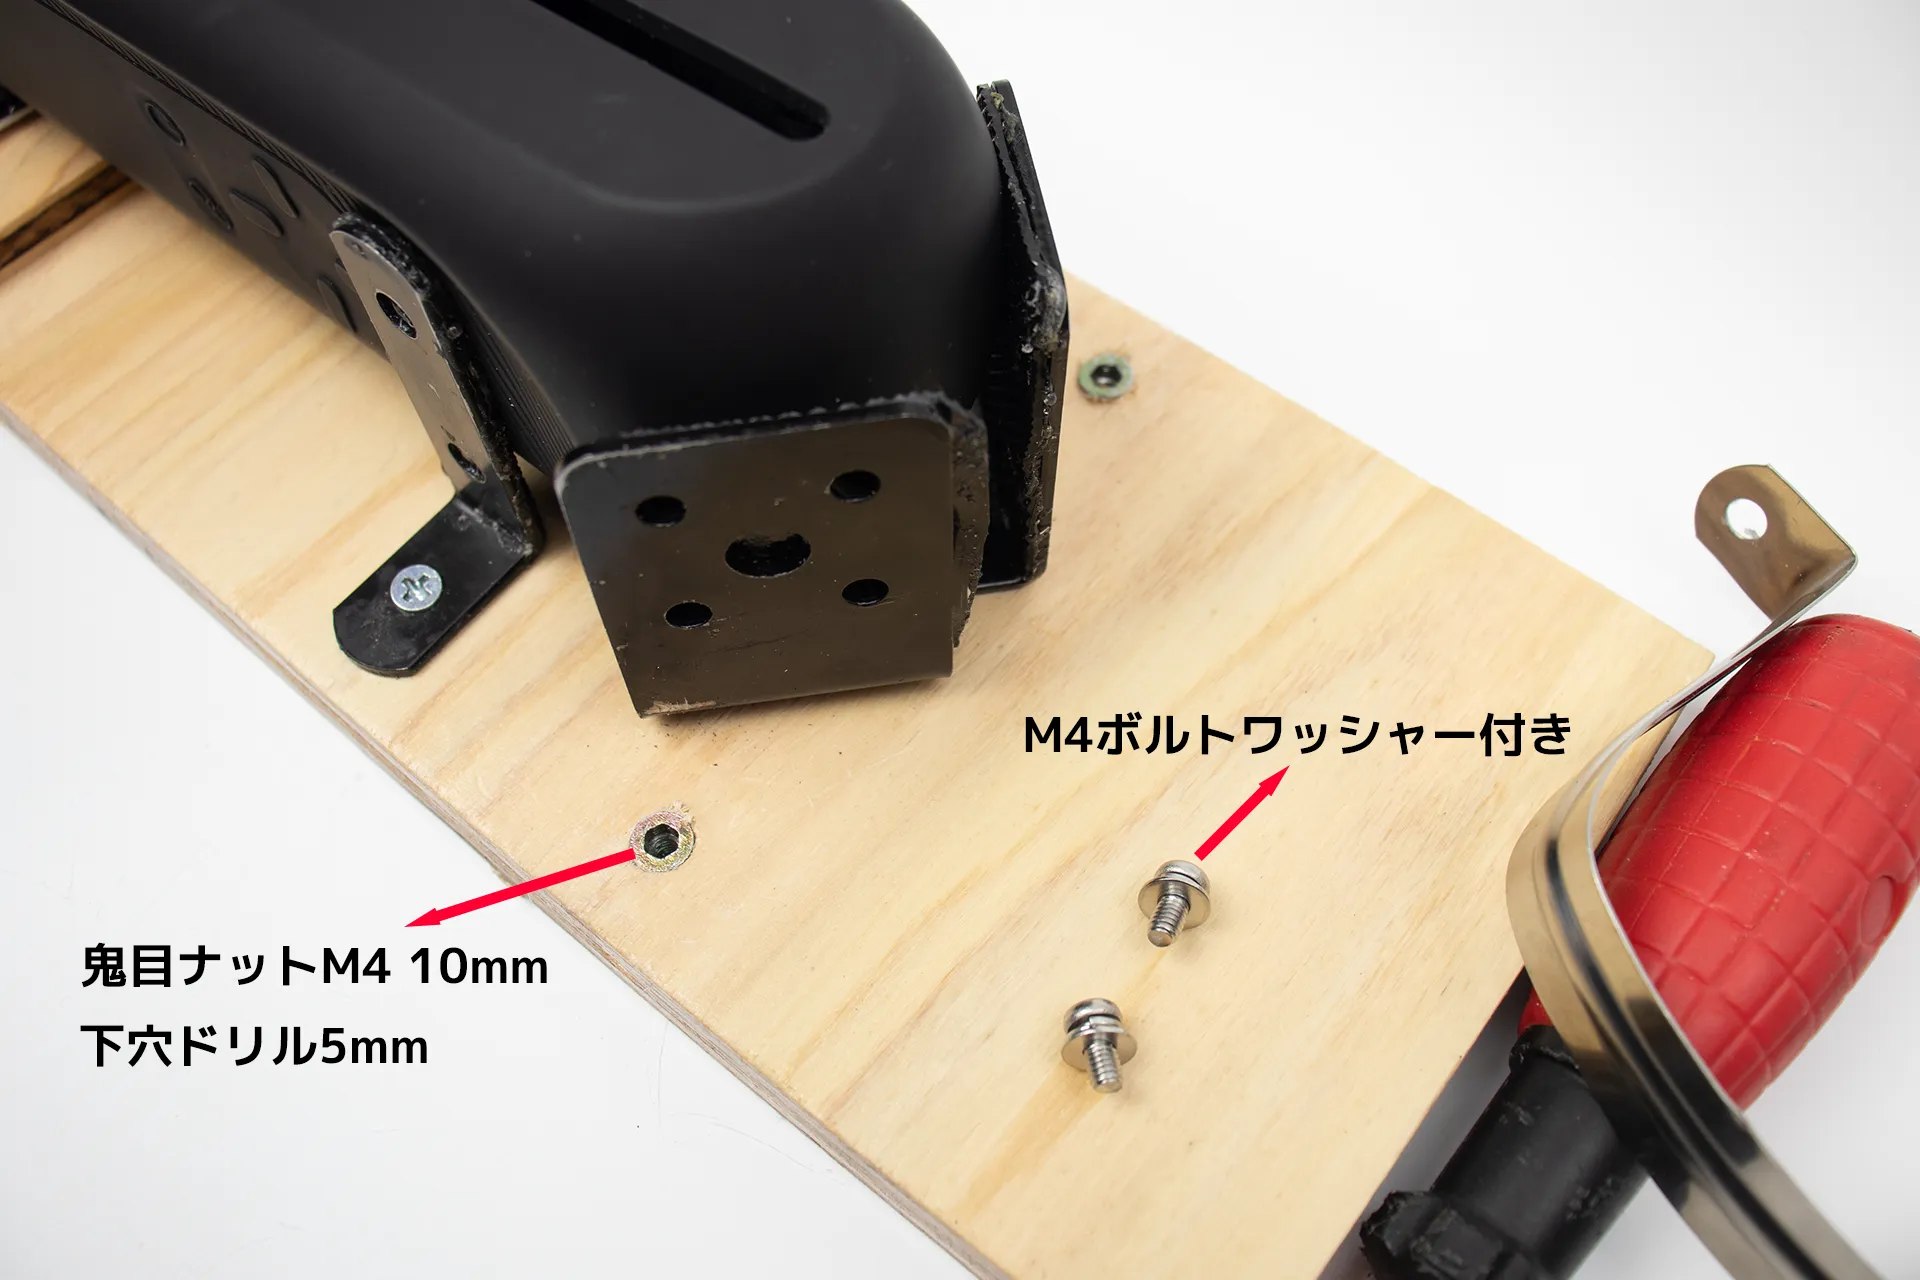
Embed the M4 threaded insert nuts. I used a 5mm drill bit for the pilot hole, but the depth of insertion will vary depending on the type of wood, so I recommend practicing on a scrap piece of wood before drilling the actual hole.
| Product name | Embedded insert nut, hexagonal nut, BESTU threaded type | ||
|---|---|---|---|
| retailers | |||
| price | Around 980 yen (tax included) | ||
I used an 8mm M4 bolt with a washer, but a 10mm M4 bolt would be more suitable in terms of length. You can also use an M4 knurled screw for fastening.
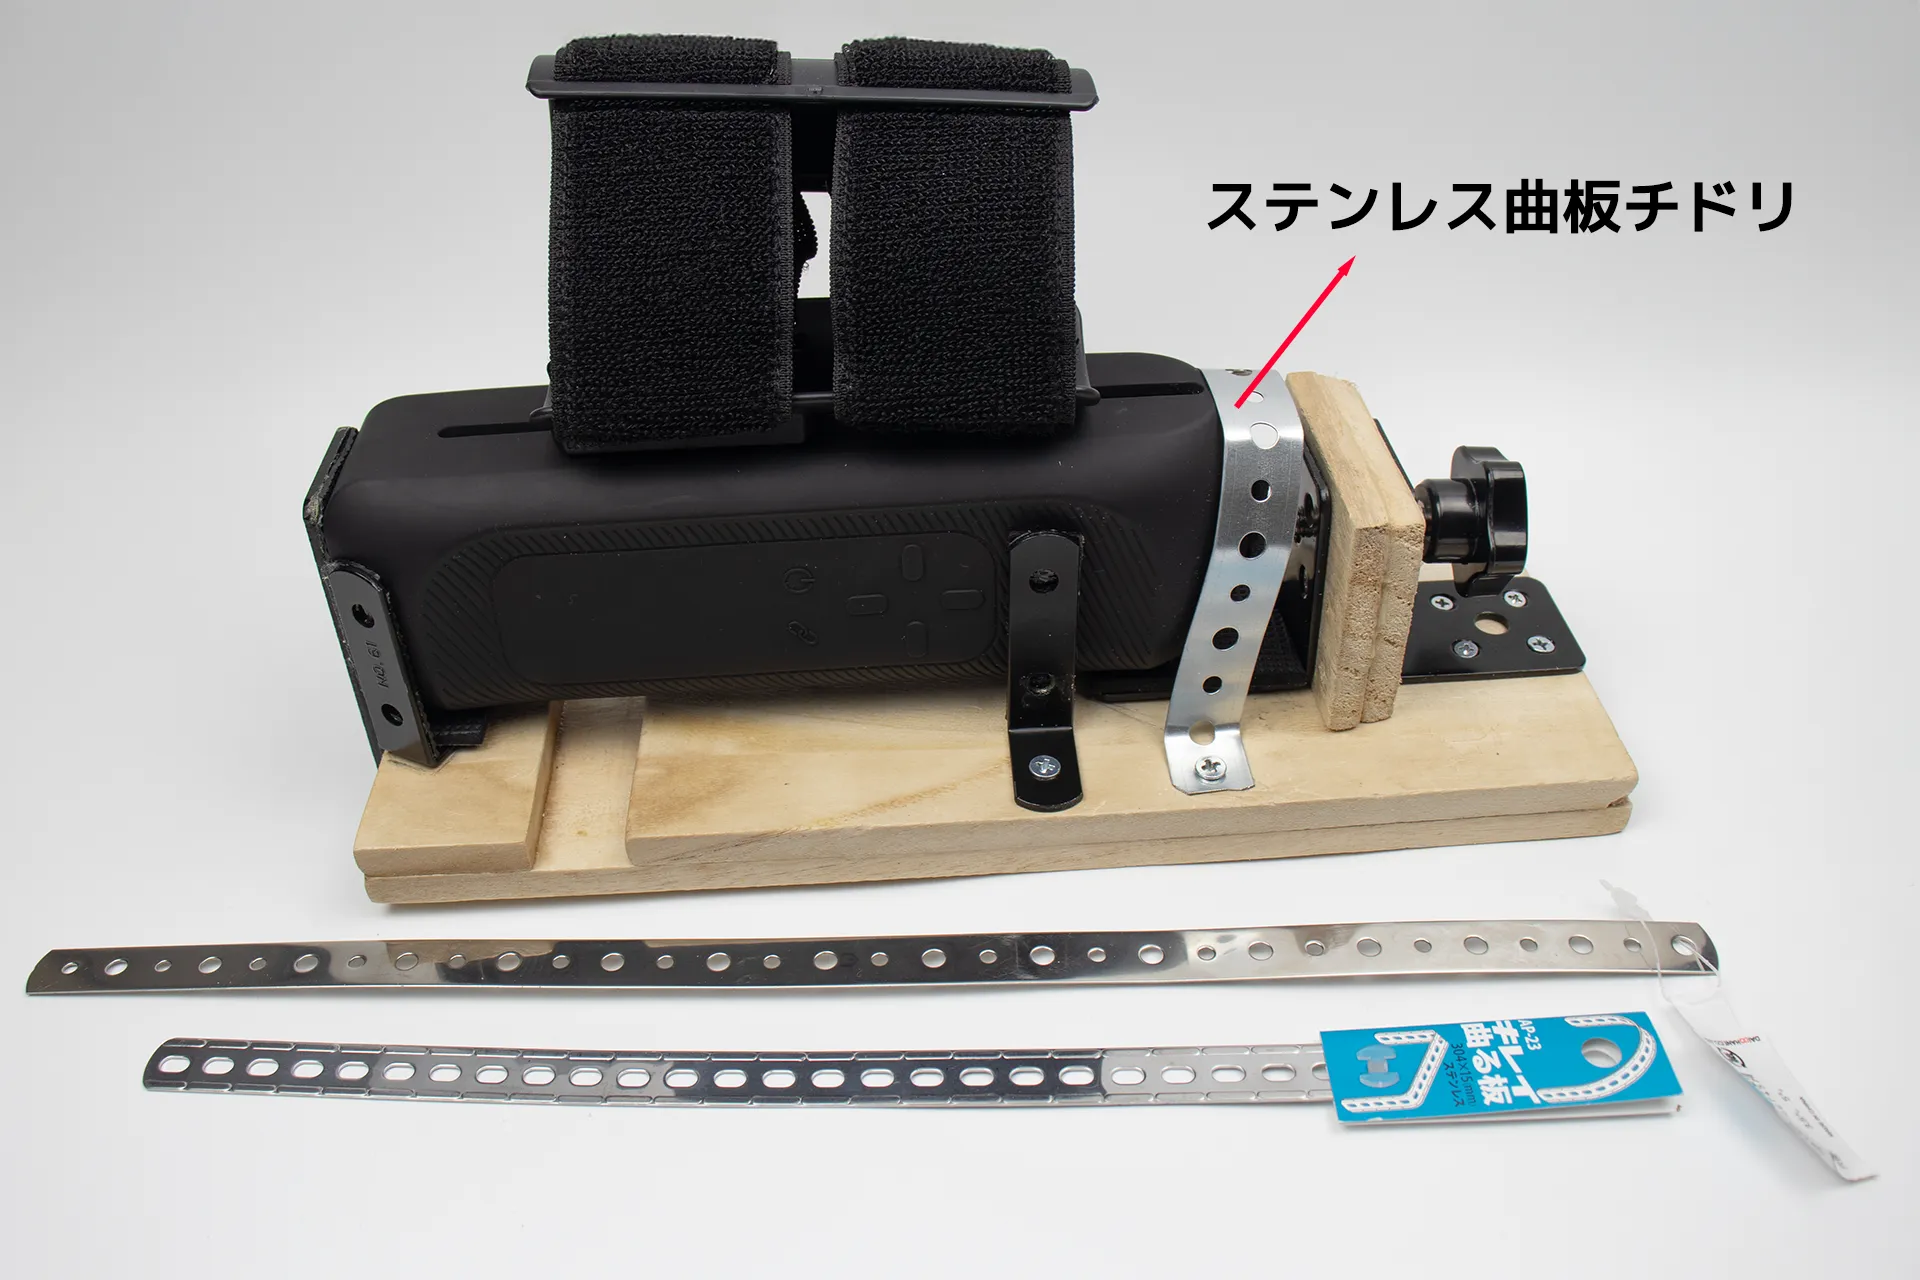
Since adjusting the bend of the pipe strap was a bit difficult, I'll also introduce another method. We'll use a stainless steel hand-bent saddle fitting.
This stainless steel plate is easy to bend, making it easy to create a shape that fits snugly to the rear of Handy2 . There were other plates that bent nicely as well, and both were about the same hardness, but I didn't use them because the holes were difficult to secure the screws into.
| Product name | Daido Hunt Hunt Stainless Steel Bent Plate Chidori 15X400 00062745 | ||
|---|---|---|---|
| retailers | |||
| price | From around 619 yen (tax included) | ||
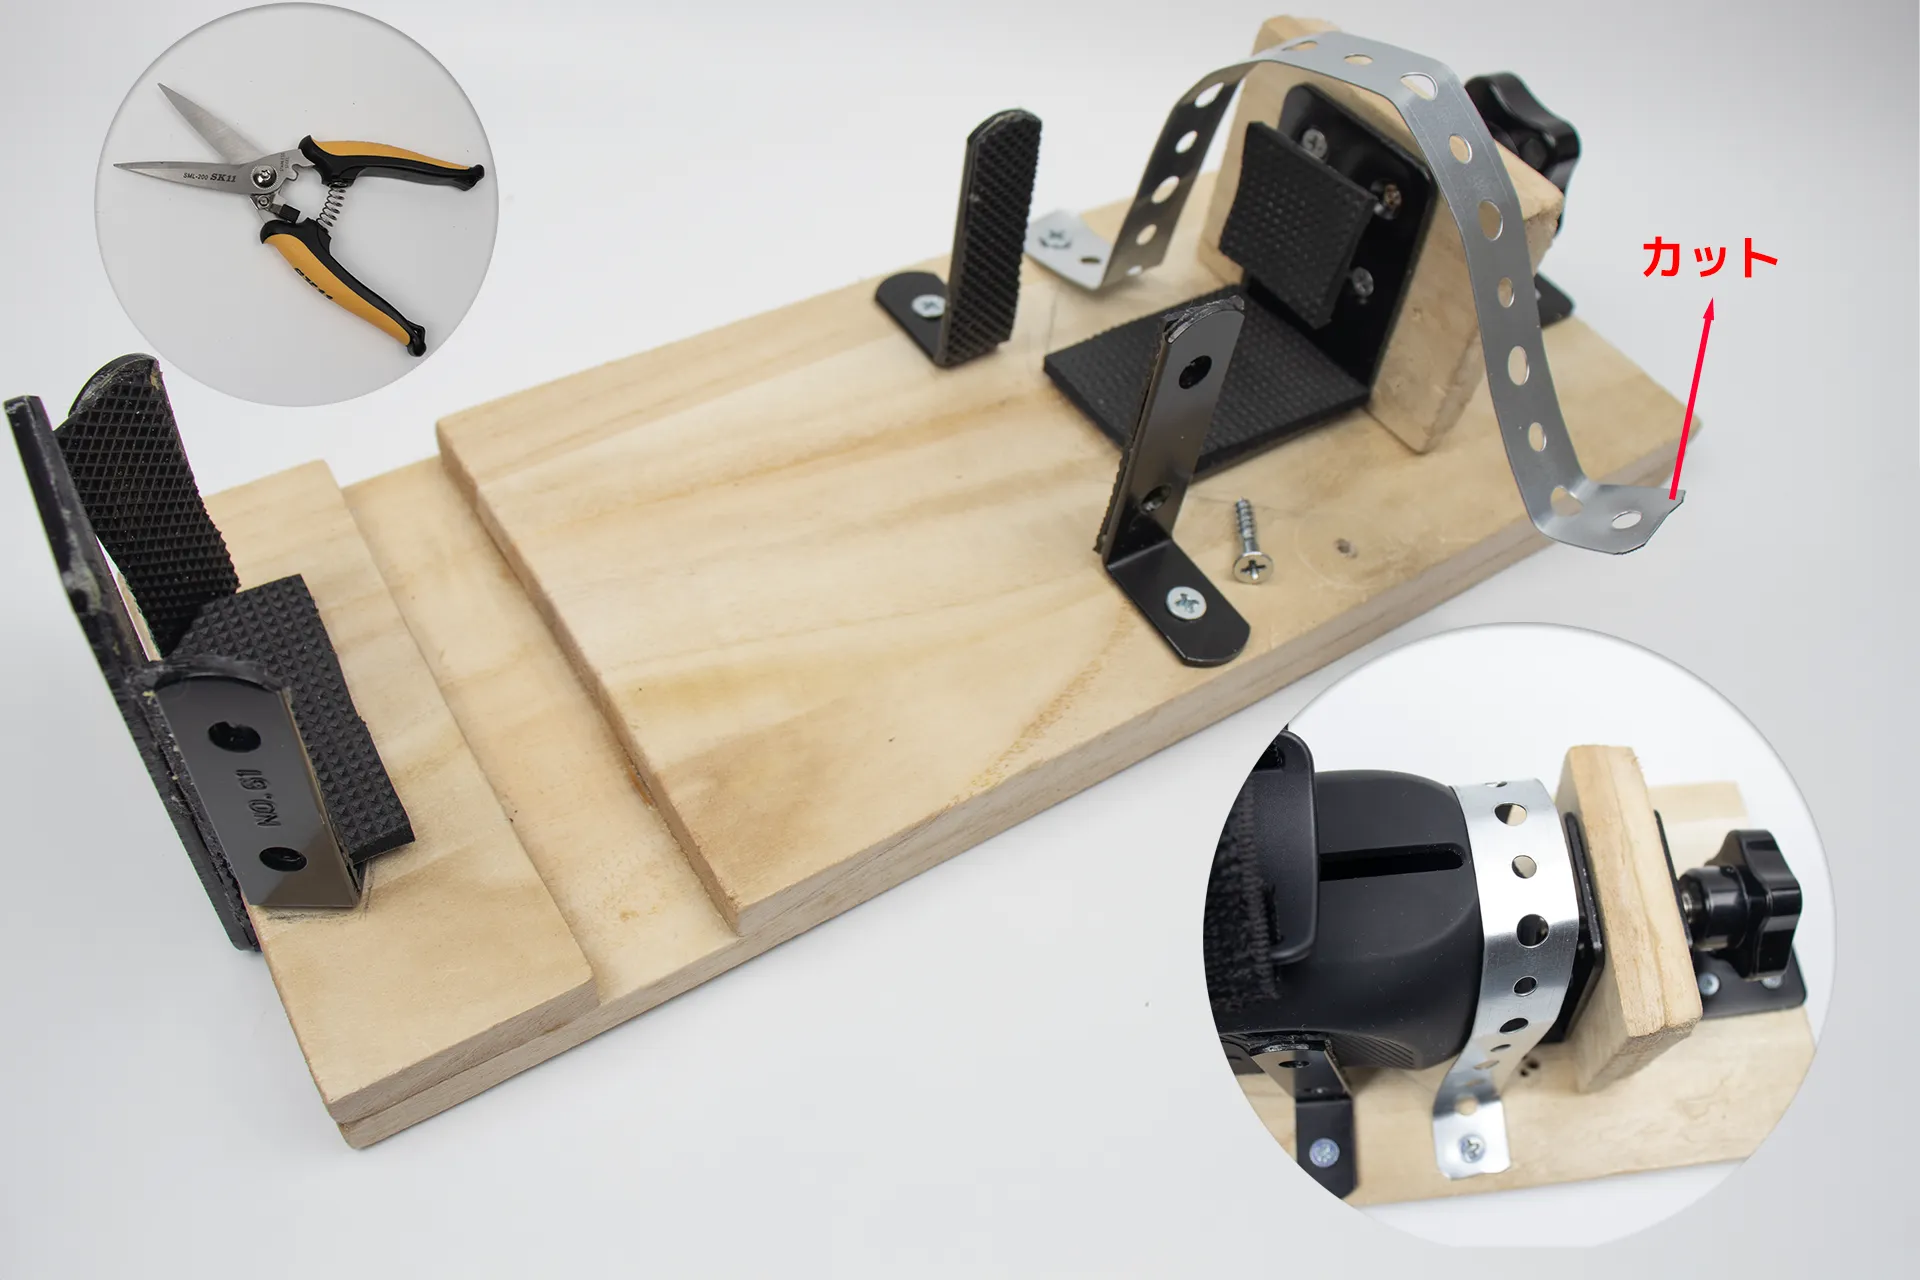
The prototype is simply secured with screws, but since this part will be removed and reattached many times, I recommend embedding threaded inserts.
One drawback of using bent sheet metal is that it's often too long and needs to be cut. Cutting requires tools such as metal shears, a hacksaw, or large wire cutters.
| Product name | SK11 Multipurpose Scissors | ||
|---|---|---|---|
| retailers | |||
| price | From around 1,665 yen (tax included) | ||
| Product name | NB ERGONOMIC Monitor Arm, Single | ||
|---|---|---|---|
| retailers | |||
| price | Around 3,980 yen (tax included) | ||
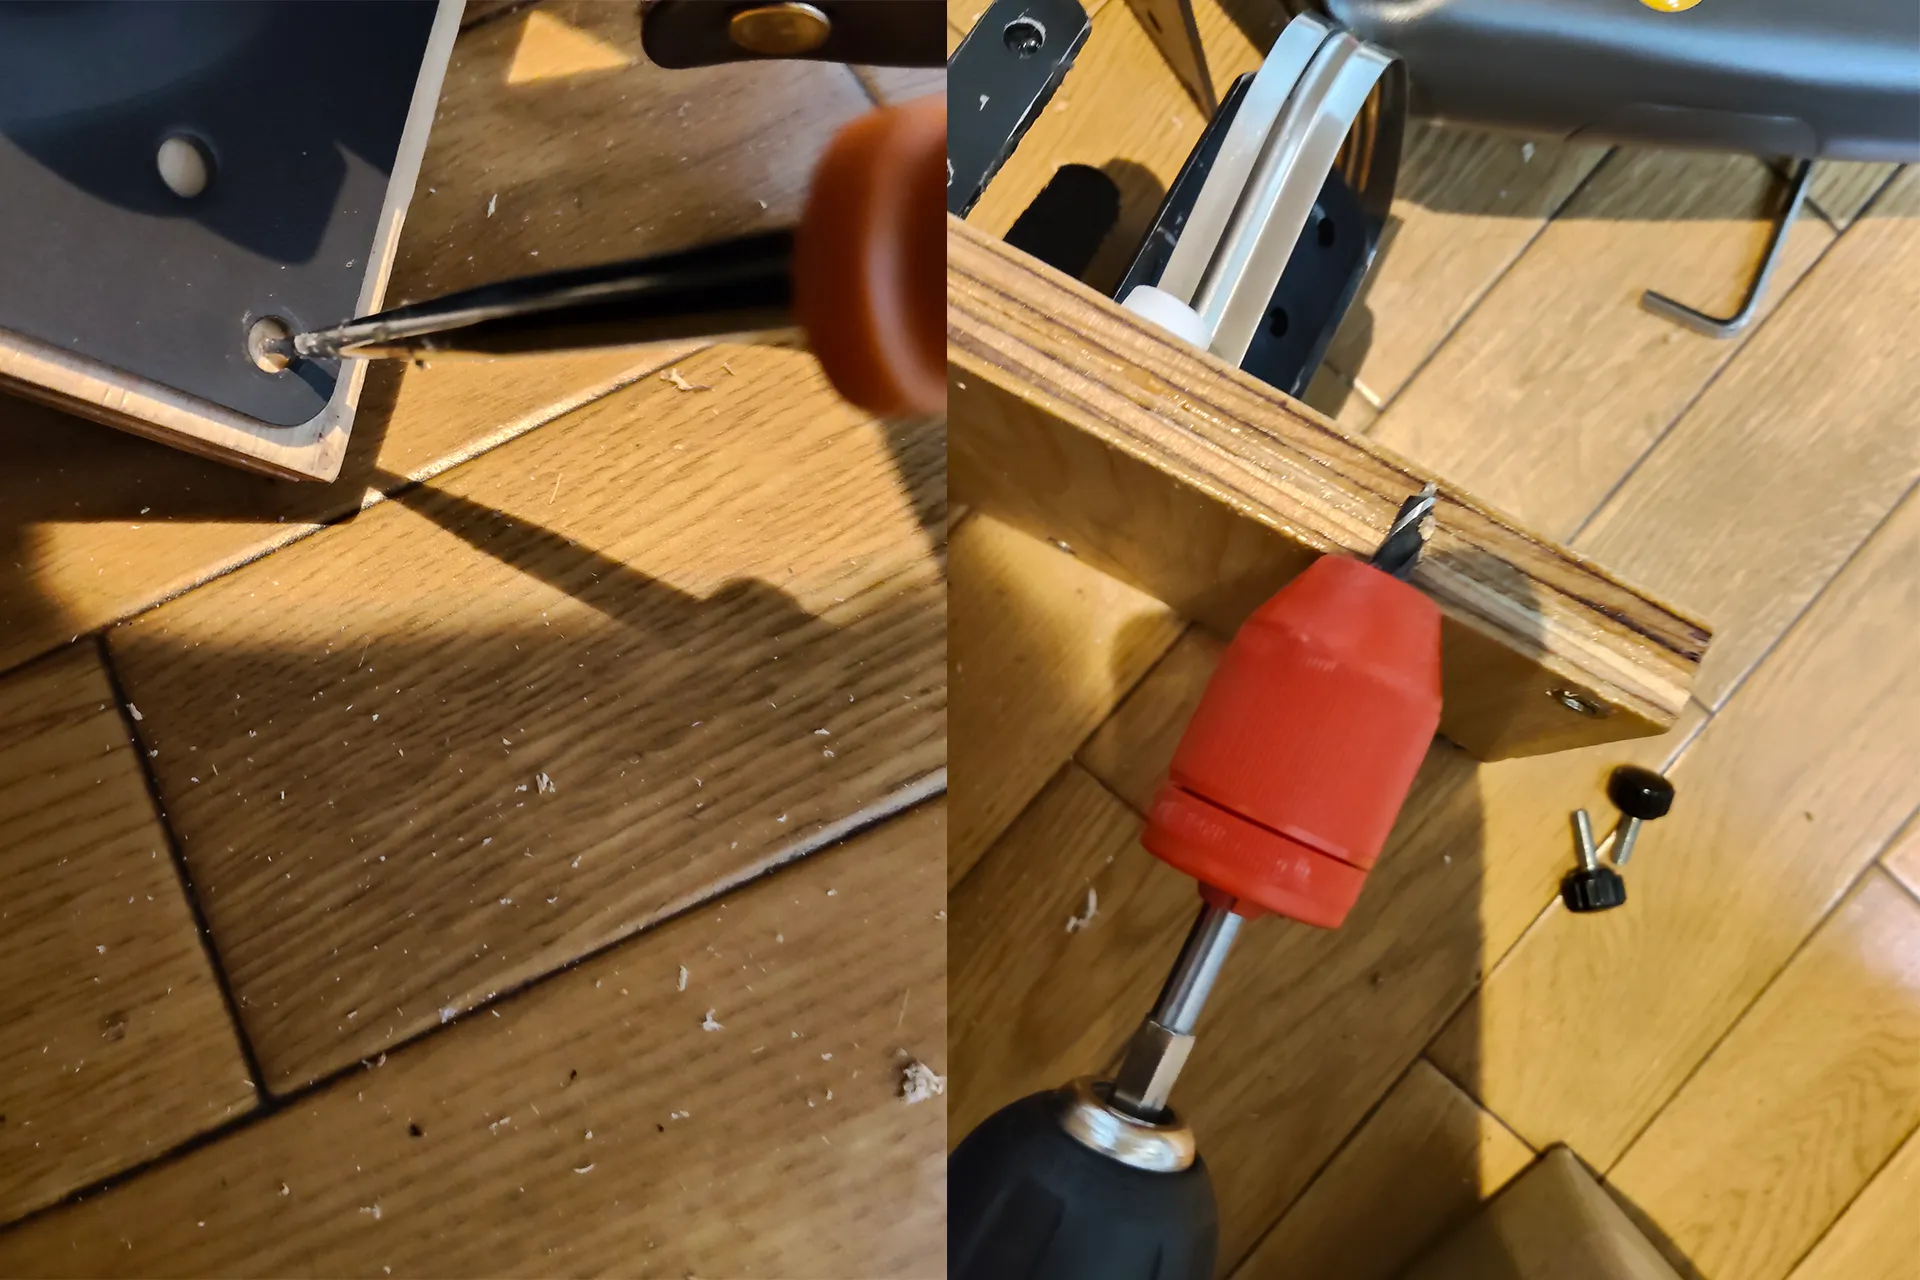
I attached all the mounting hardware first and then drilled the VESA mounting holes, but I later realized it would have been easier to finish it before anything was attached. However, it's not impossible, it's just more difficult with the hardware in place, so don't worry! (Though I don't recommend it.)
First, we'll mark the position of the first hole. Apparently, if you have a drill bit that can hit the center in one go, you won't miss the mark, but since I don't have one, I'll carefully mark the center with an awl.
I've attached a drill stopper to prevent the drill from going all the way through. Masking tape would also work.
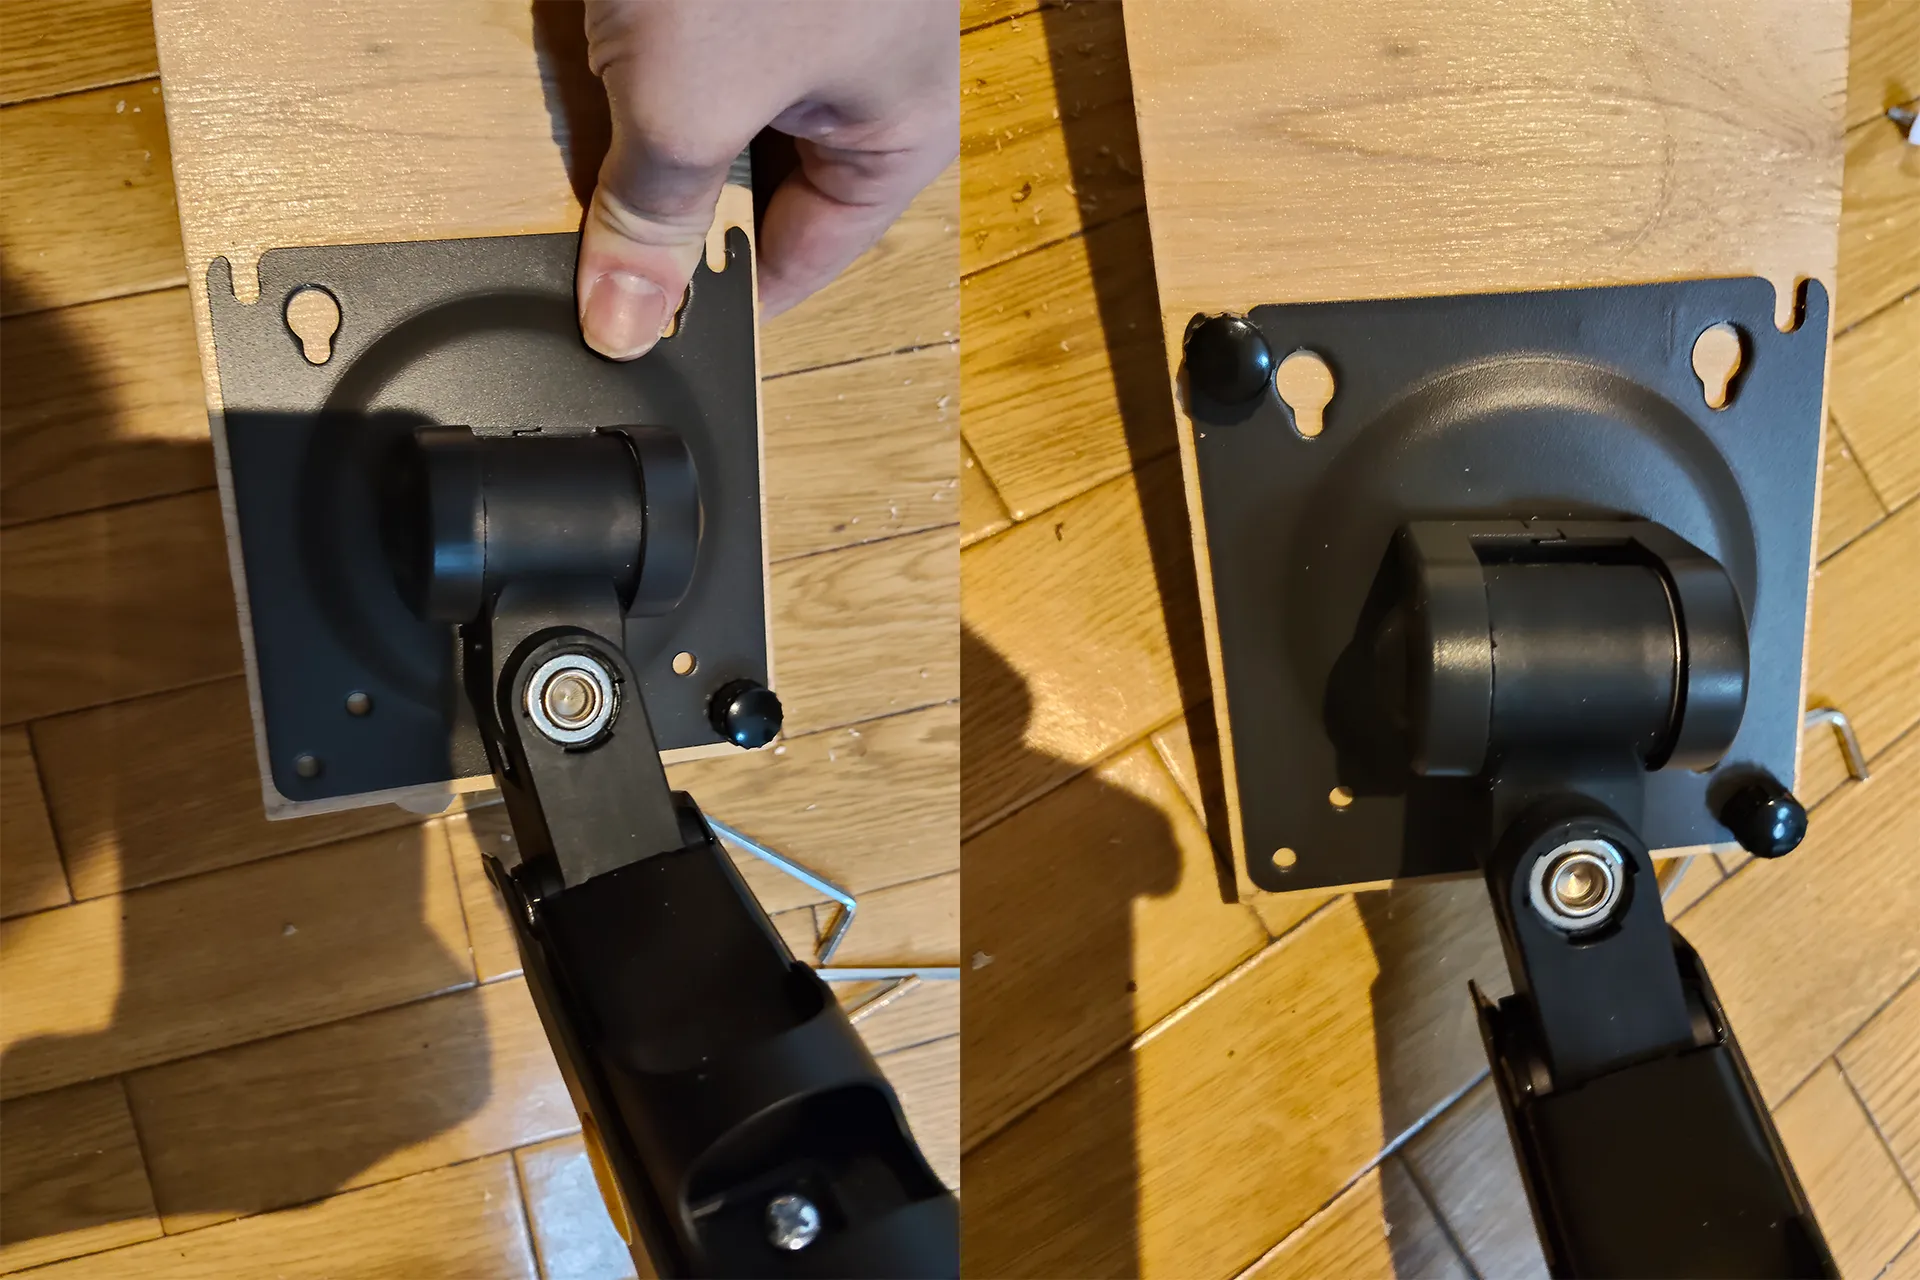
After drilling the first hole and embedding the M5 threaded insert, tighten it with a knurled screw. I think it's less likely to shift if you determine the position of the second hole in that state. Next, I drilled the holes diagonally opposite each other.
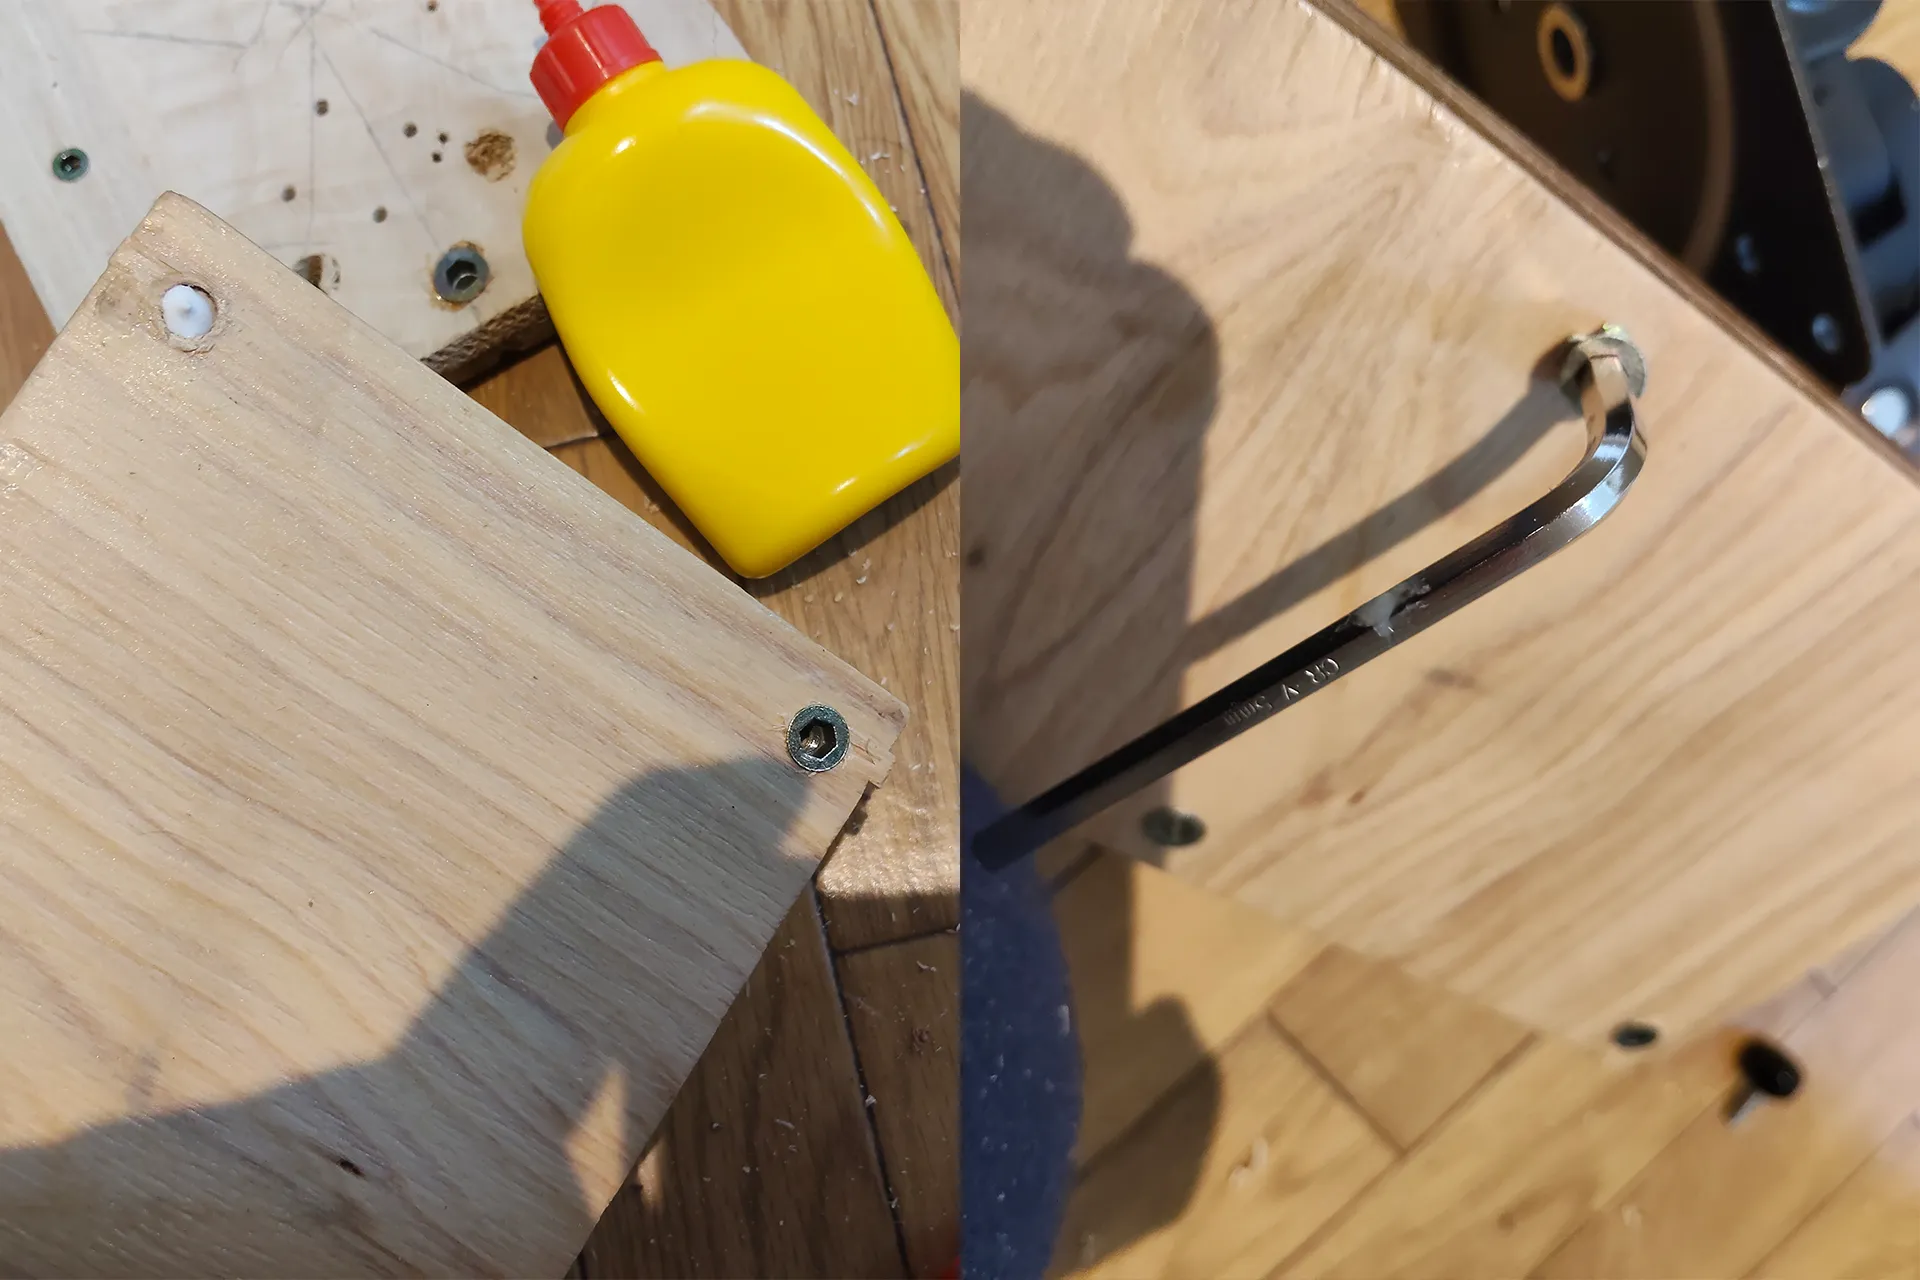
Tighten the M5 threaded insert nuts with a hex wrench. Also, add some wood glue.
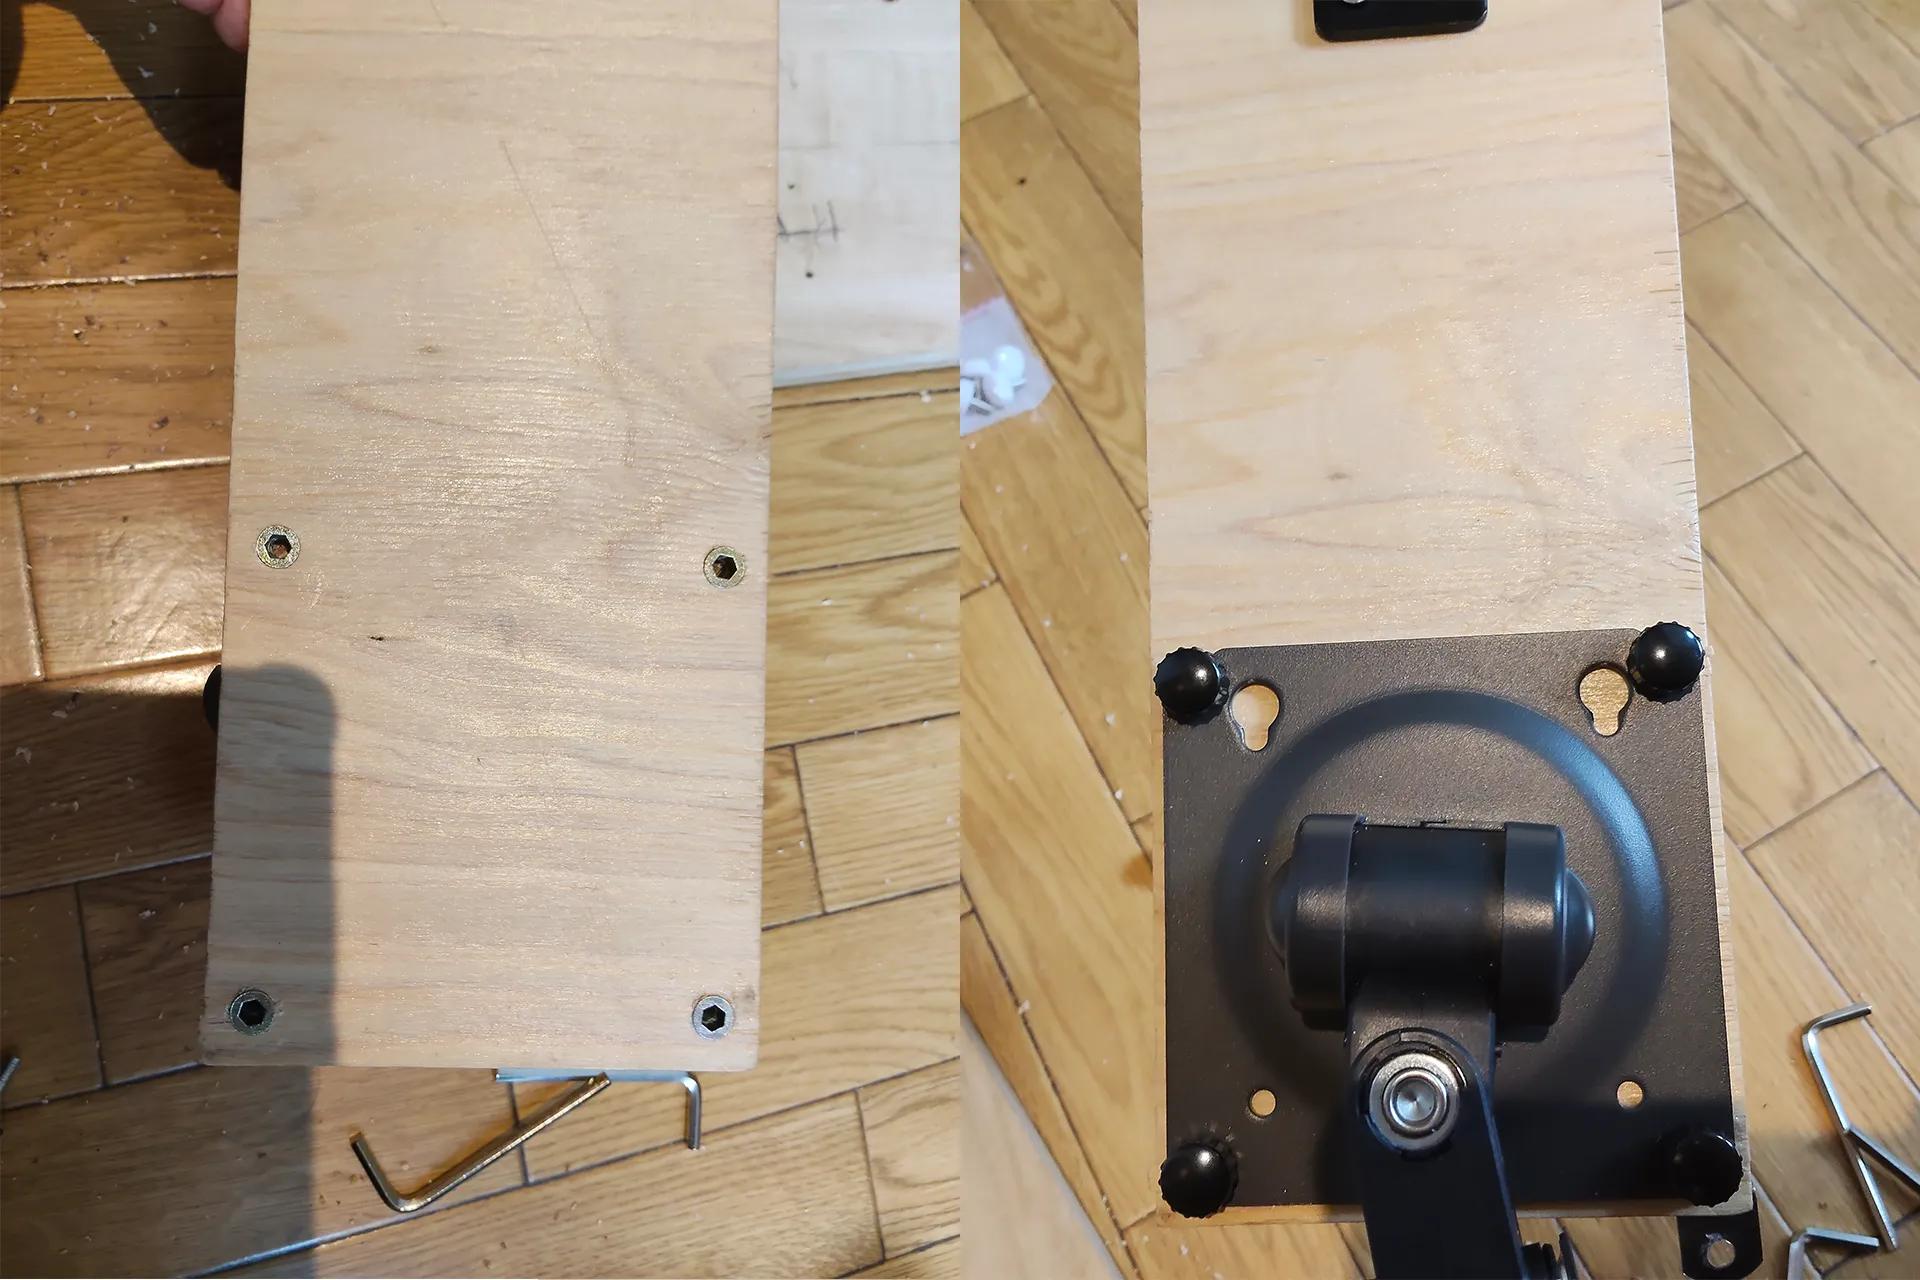
I drilled the holes one by one while tightening the knurled screws. Using this method, I was able to embed the threaded inserts for attaching the VESA mount in all four holes without any misalignment.
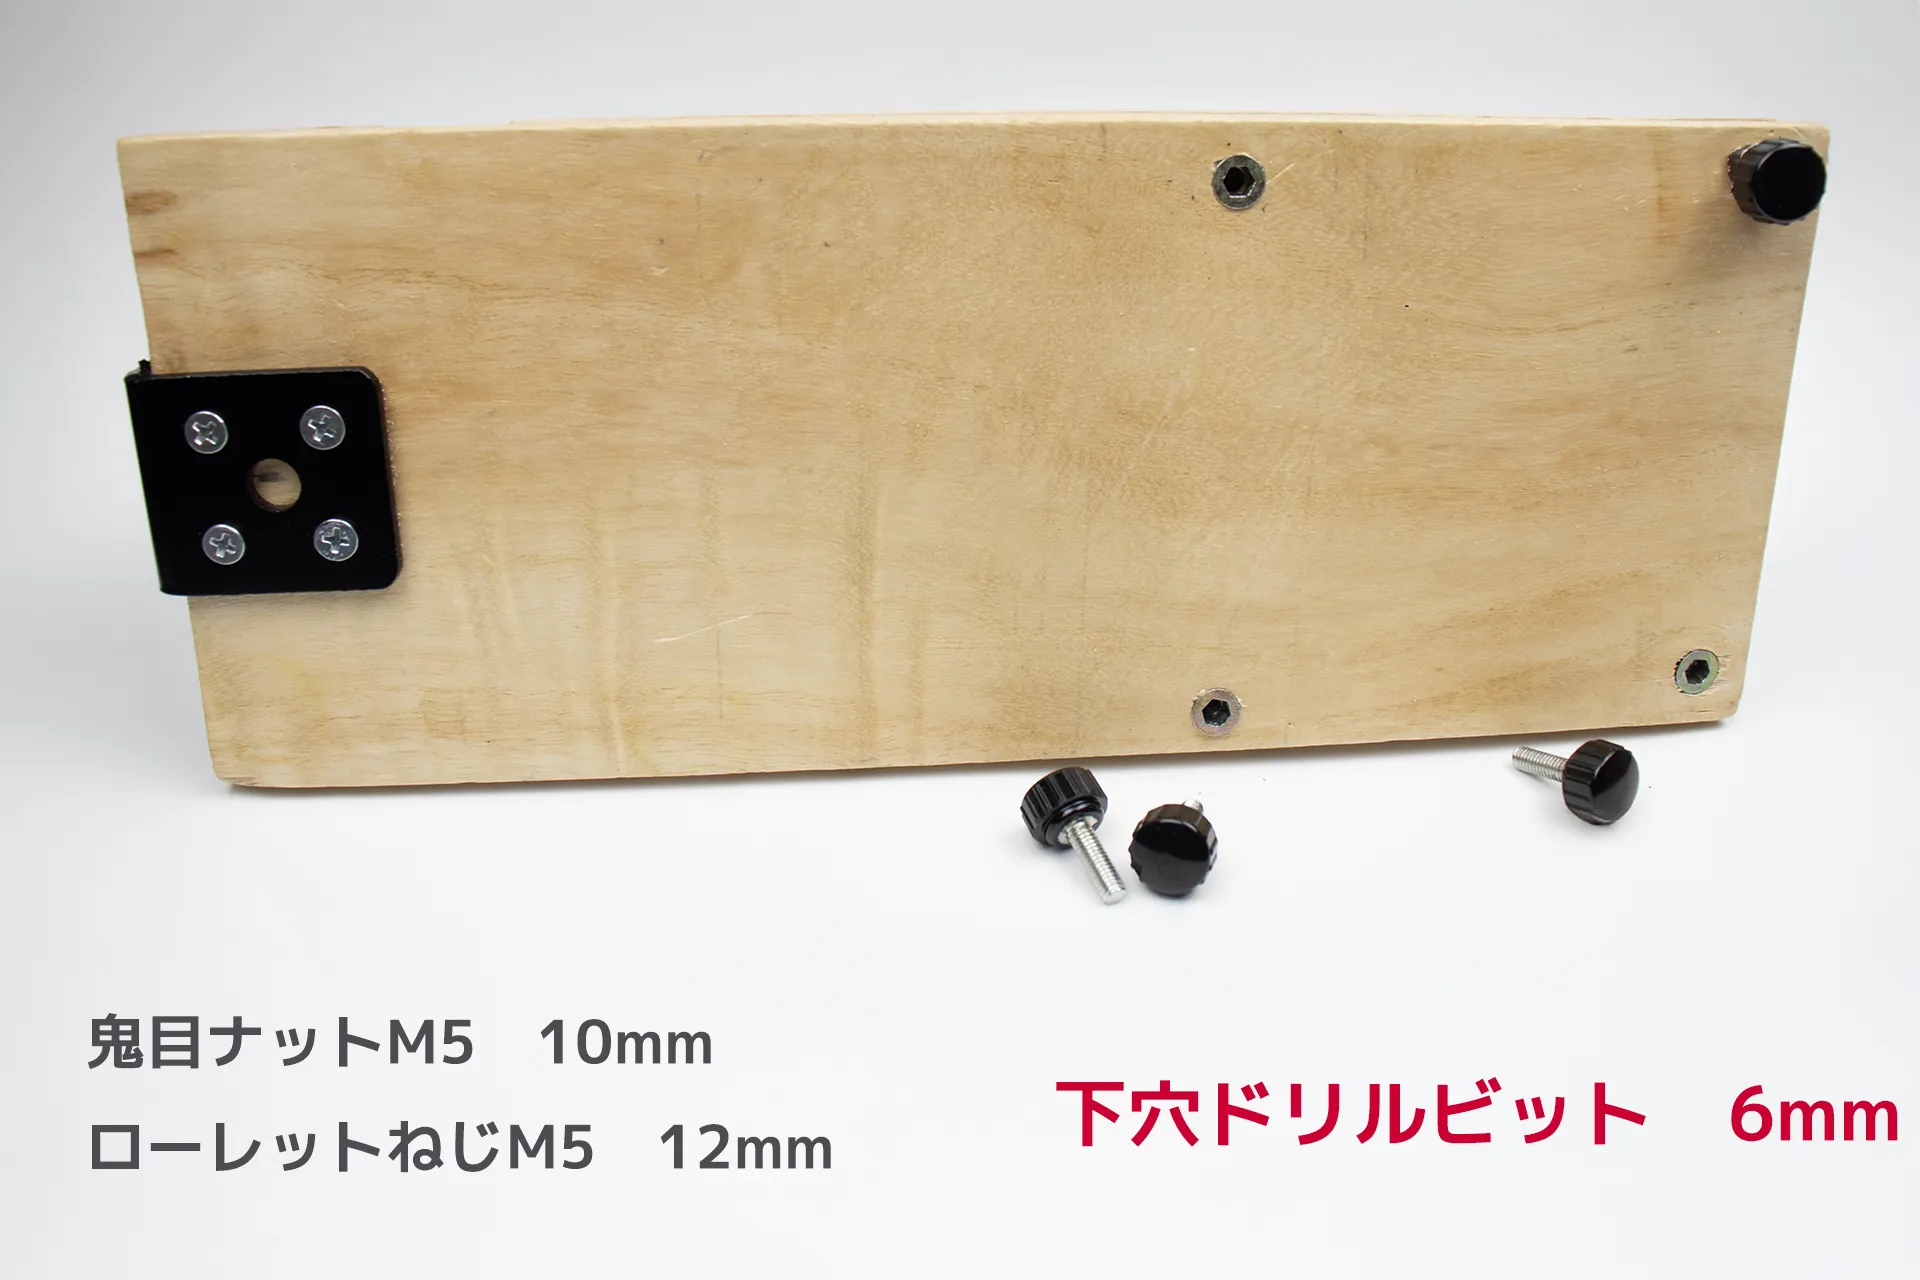
These are the sizes of the threaded inserts and the drill bits used to make the pilot holes.
For fastening bolts, knurled bolts are recommended if you frequently need to remove them, while hex socket bolts with washers are recommended if you plan to leave them in place. Knurled bolts offer sufficient strength, but hex socket bolts provide a more secure fastening.
| Product name | Embedded insert nut, hexagonal nut, BESTU threaded type | ||
|---|---|---|---|
| retailers | |||
| price | Around 980 yen (tax included) | ||
| Product name | uxcell 4pcs Knurled Knobs M5 x 12mm | ||
|---|---|---|---|
| retailers | |||
| price | Around 930 yen including tax and up | ||
| Product name | TRUSCO Low-profile Hex Socket Head Cap Screw, Stainless Steel, Fully Threaded, M5 x 12, 12 pieces (B089-0512) | ||
|---|---|---|---|
| retailers | |||
| price | Around 571 yen (tax included) | ||
| Product name | Stainless steel/SS black round washer [ISO] for M5 | ||
|---|---|---|---|
| retailers | |||
| price | Around 460 yen (tax included) | ||
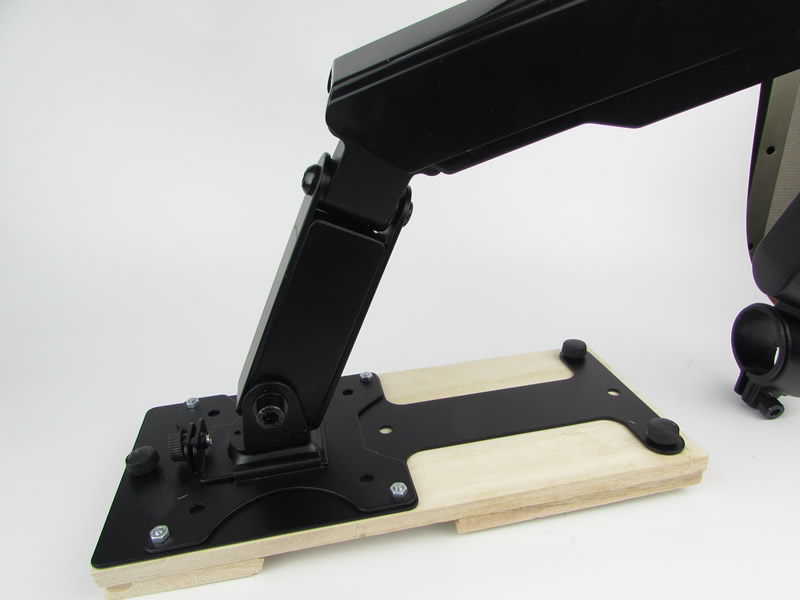
If you already own the VORZE arm stand, you can of course attach the monitor to it without purchasing a separate monitor arm. Please refer to the following page for installation instructions.
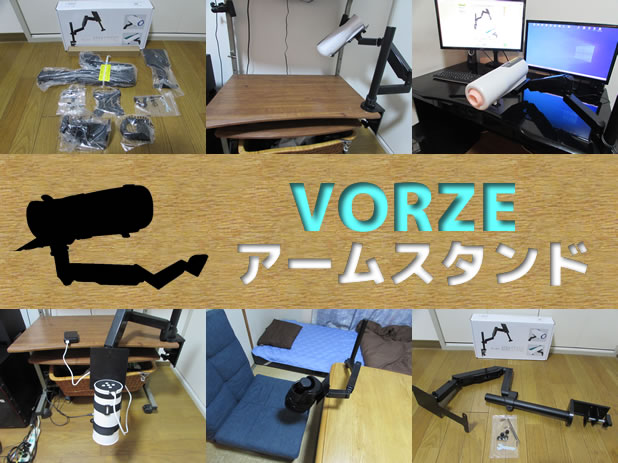
RENDS
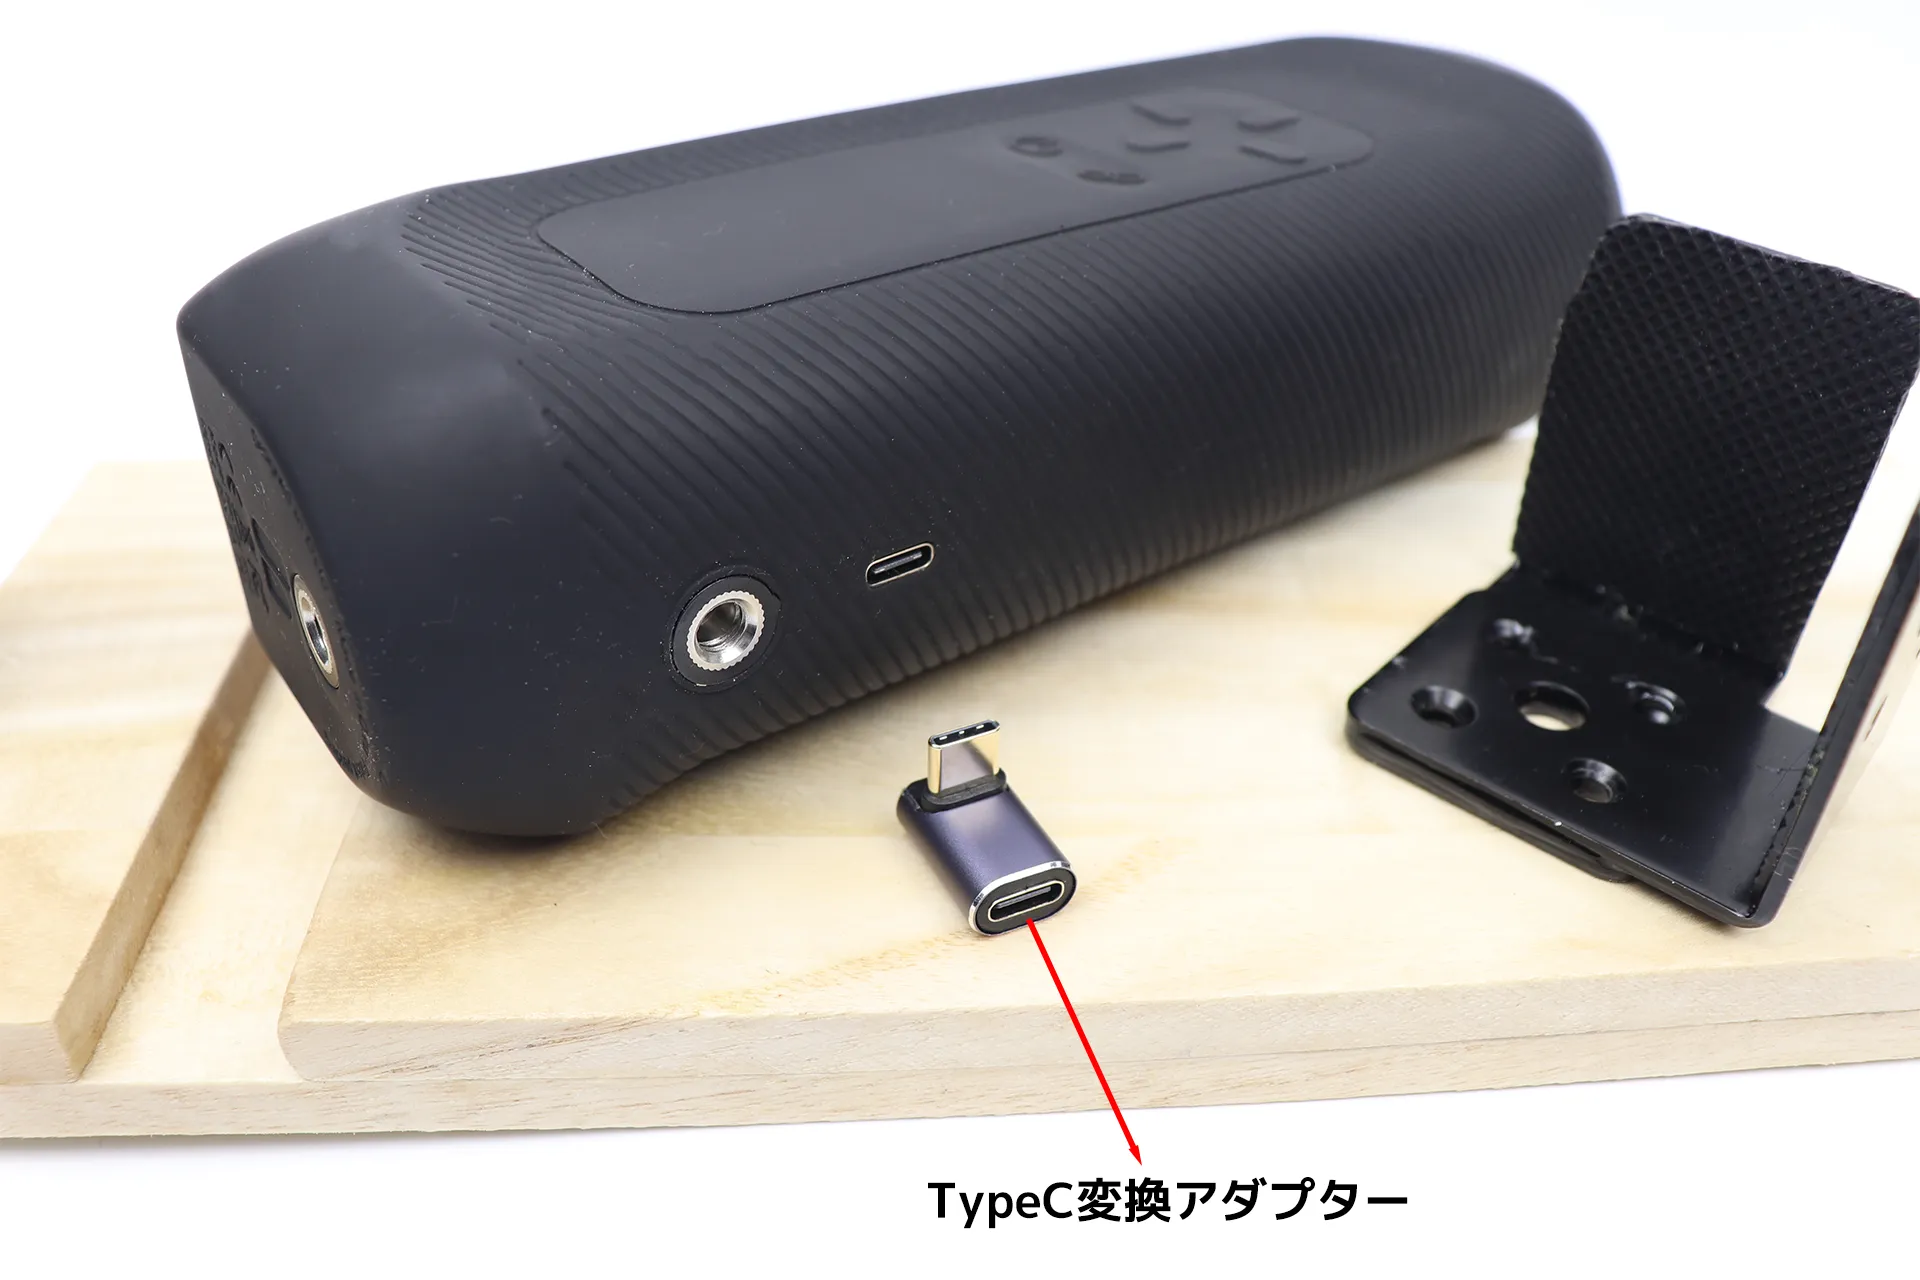
The USB-C port on Handy2 is located on the bottom of the device, so it cannot be plugged in once the mounting bracket is attached. However, by using an L-shaped adapter, it becomes possible to insert the USB-C cable through the gap in the groove provided in the mounting bracket. However,
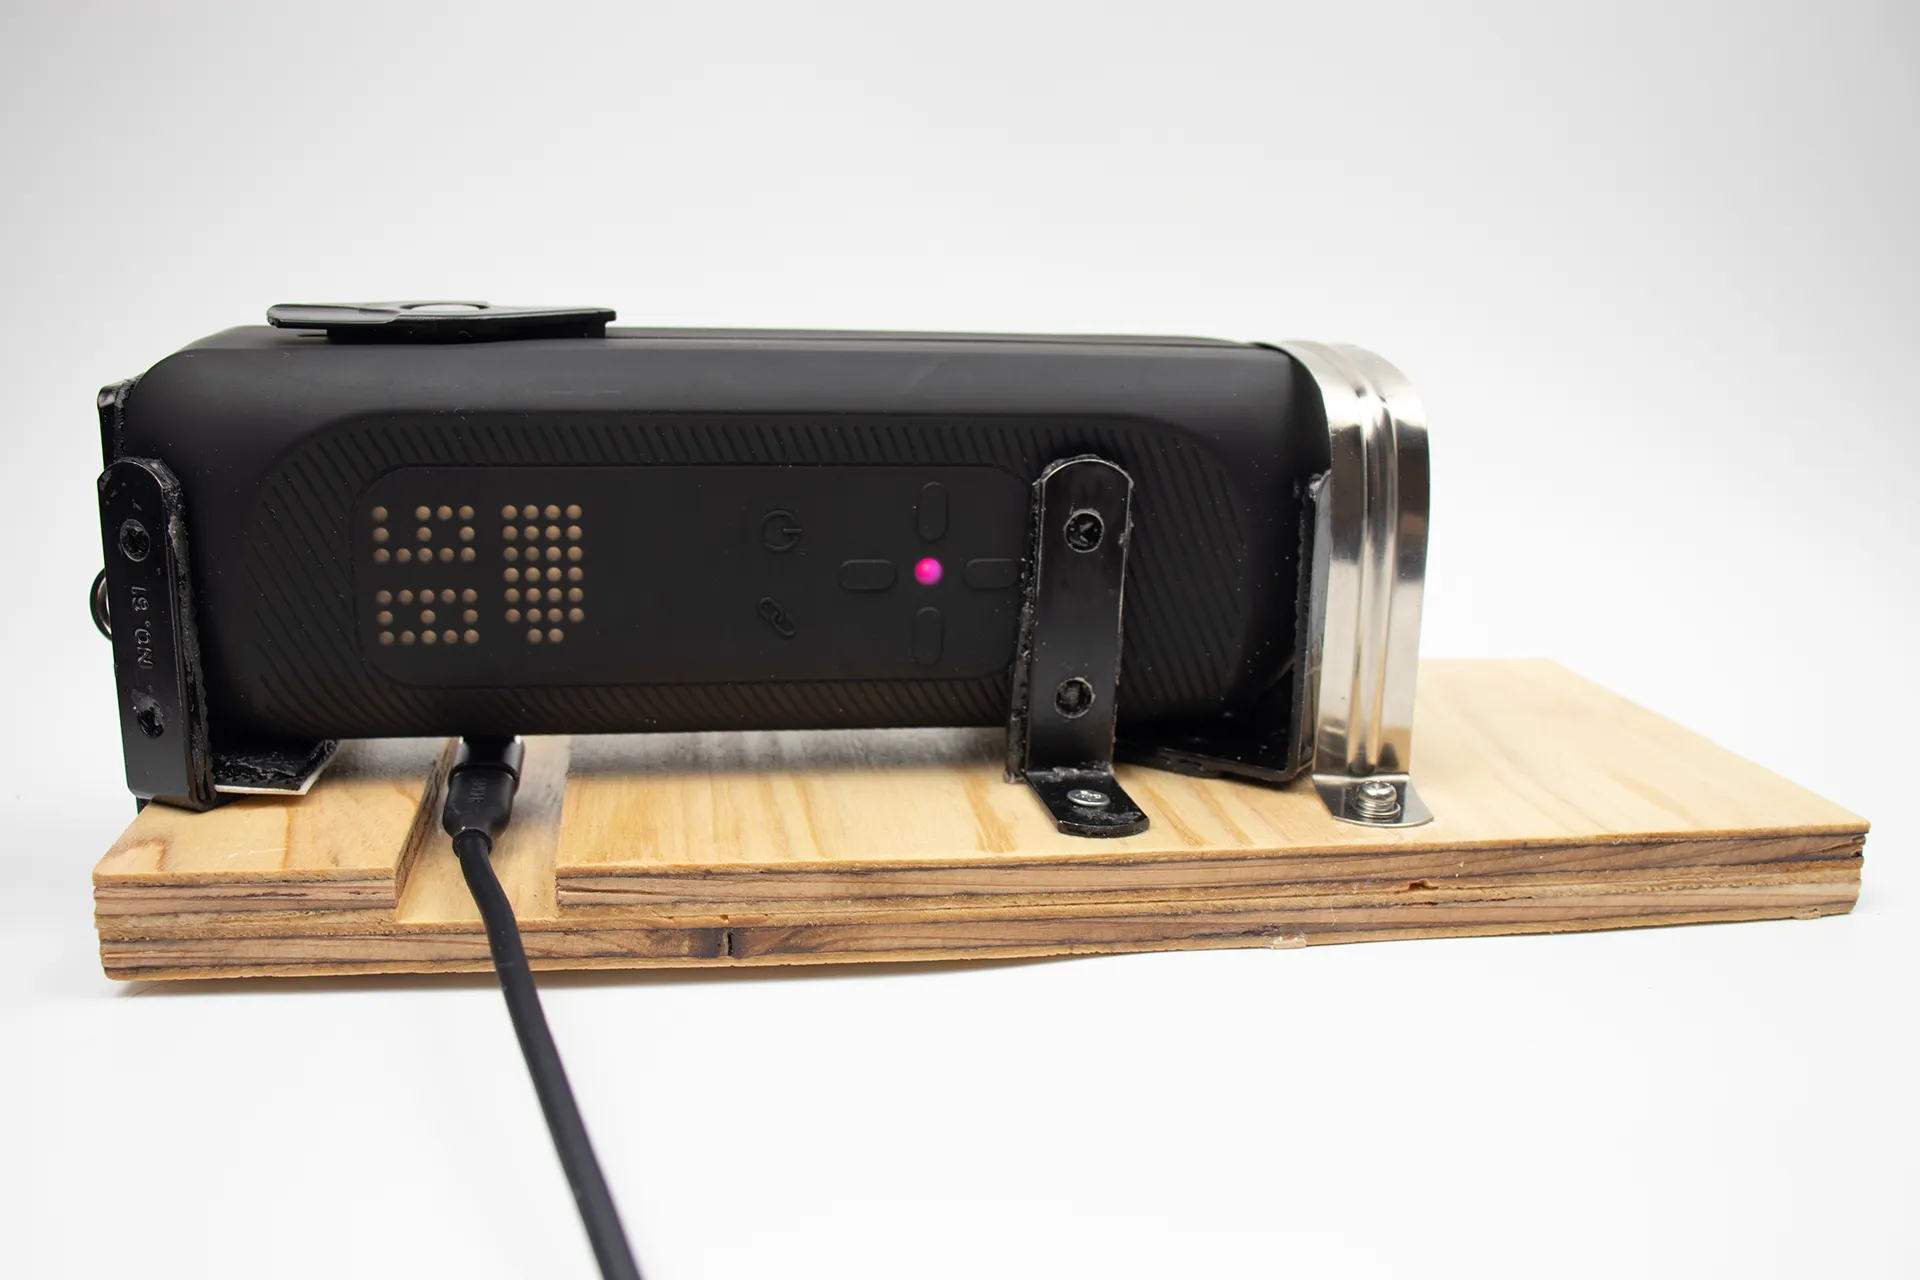
With an L-shaped connector that supports fast charging, you can even fast charge at 60W while the device is still attached to the mounting bracket, which is very convenient.
| Product name | YFFSFDC USB 4.0 Type C Conversion Adapter, 3-piece set with 90° left and right bends, PD 100W/5A fast charging. | ||
|---|---|---|---|
| retailers | |||
| price | Around 595 yen (tax included) | ||
The Daiso lumber I used for the prototype was from my existing stock, so I had to go buy more wood to make the improved version.
However, after visiting several Daiso stores, I couldn't find the lumber I was looking for anywhere. Could it be that there's a nationwide shortage of supply? So, as an alternative way to procure wood, I decided to try going to a home improvement store.
I've been interested in free cutting for a while now.
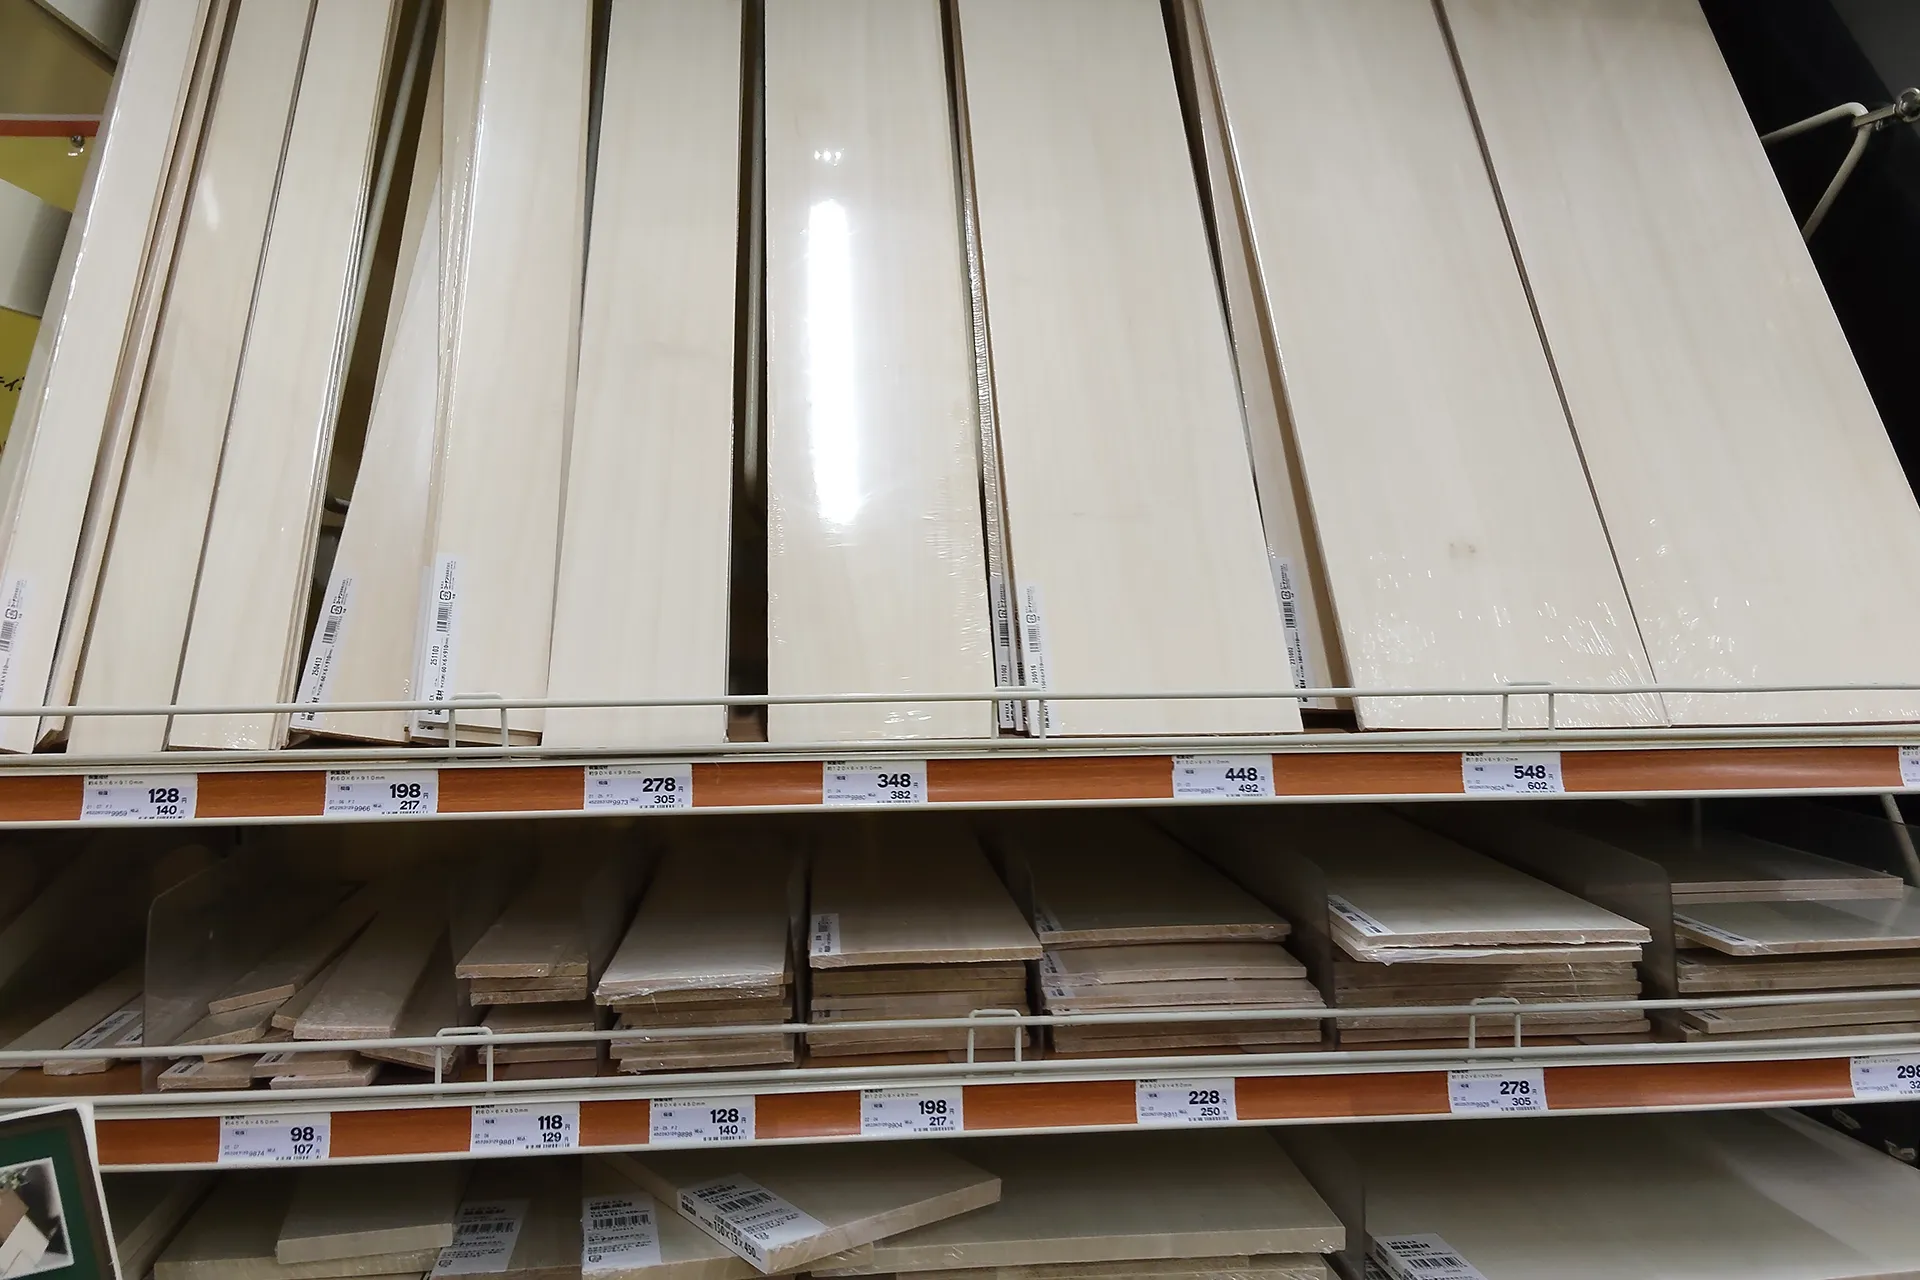
As you'd expect from a home improvement store, there are tons of neatly cut boards lying around. However, this time, I need boards that are 9mm thick, otherwise some parts won't be compatible with the prototype, so I have to find some 9mm thick boards.
I searched around for a while, but all I could find were expensive planks costing around 3500 yen. So I decided to ask a store clerk...
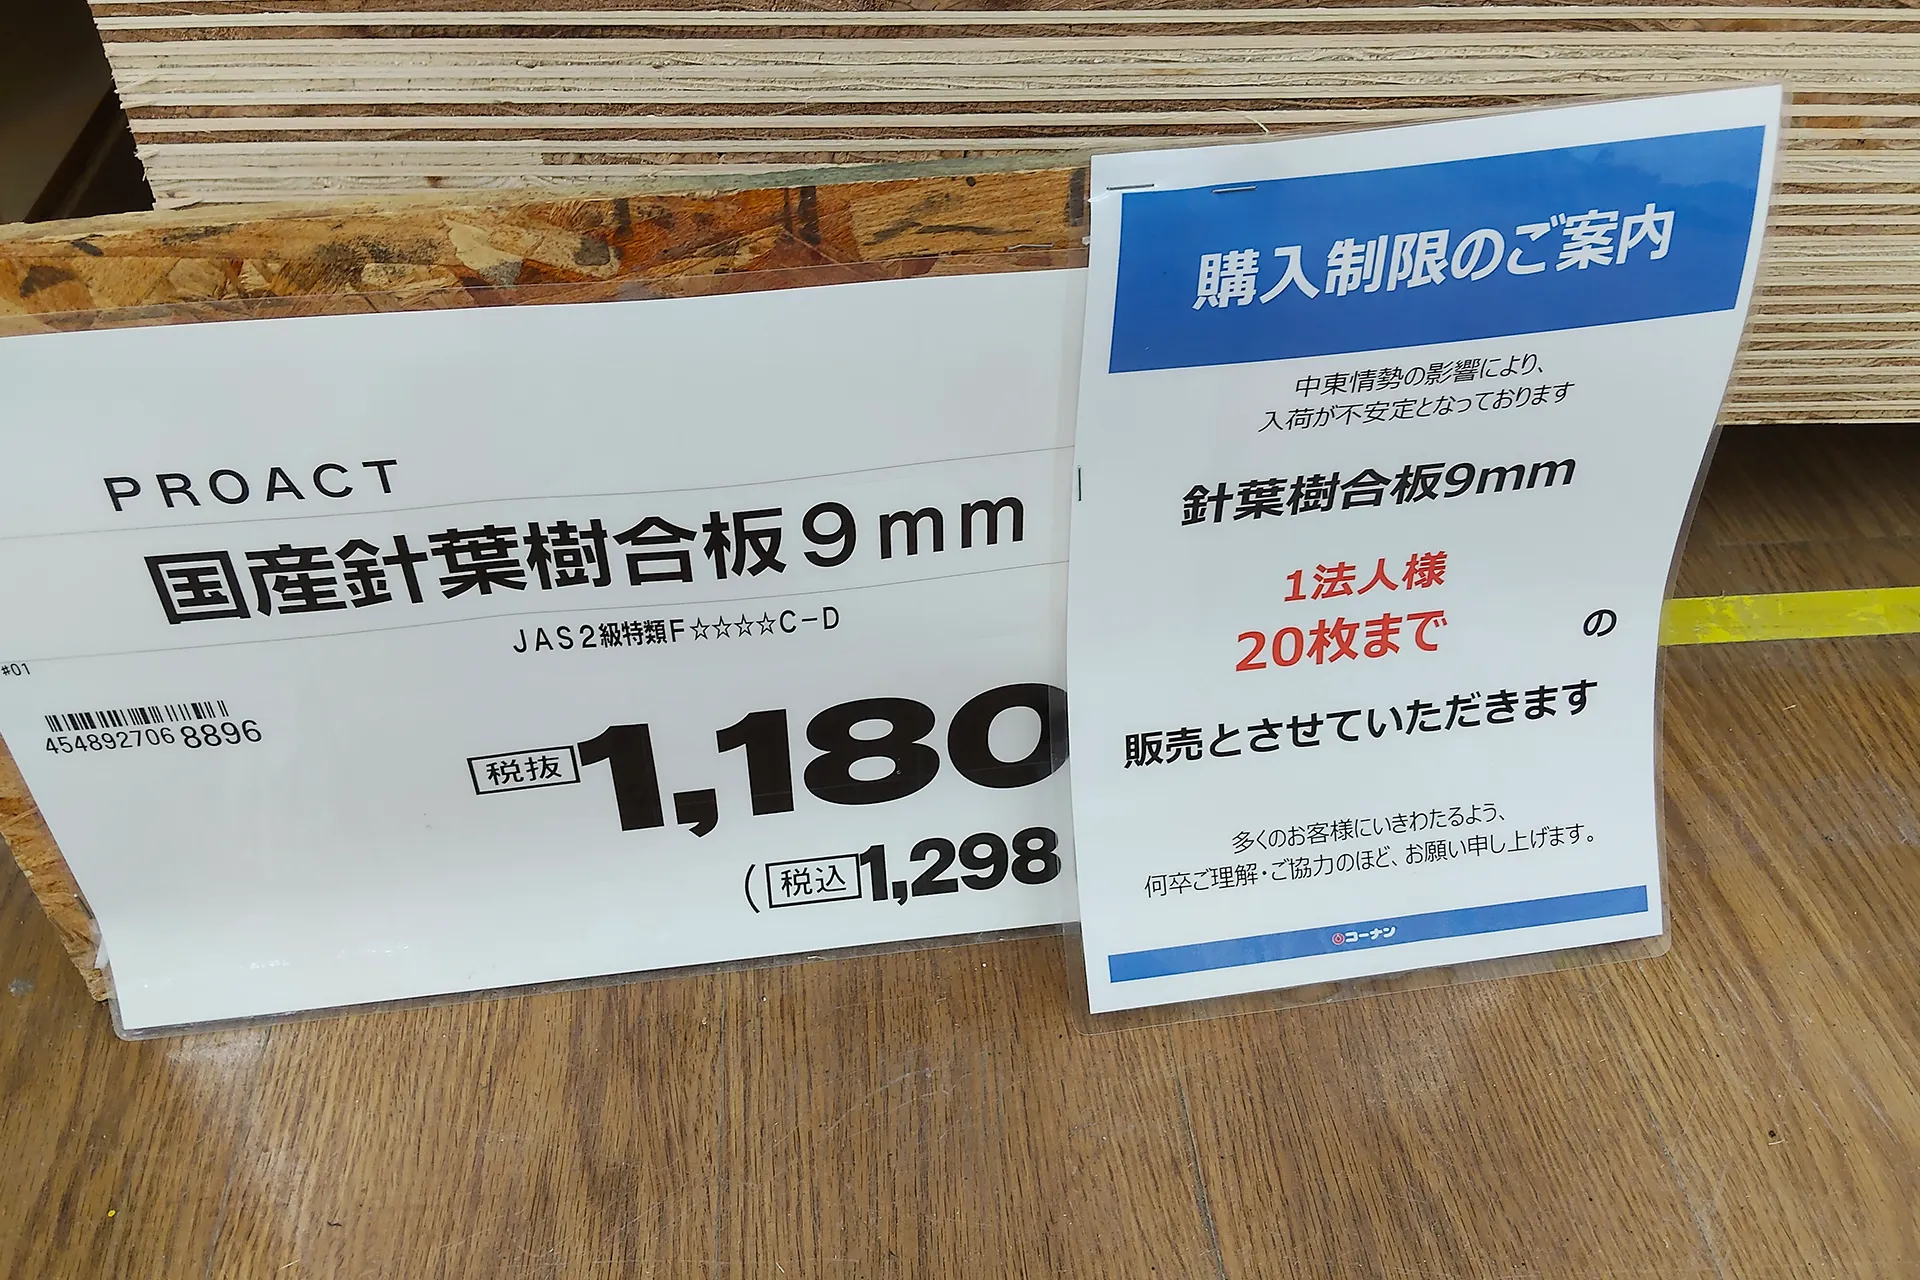
"Yes, we have it!" they said, and showed me this board. Looking at the price, it's around 1300 yen, which is a reasonable price.
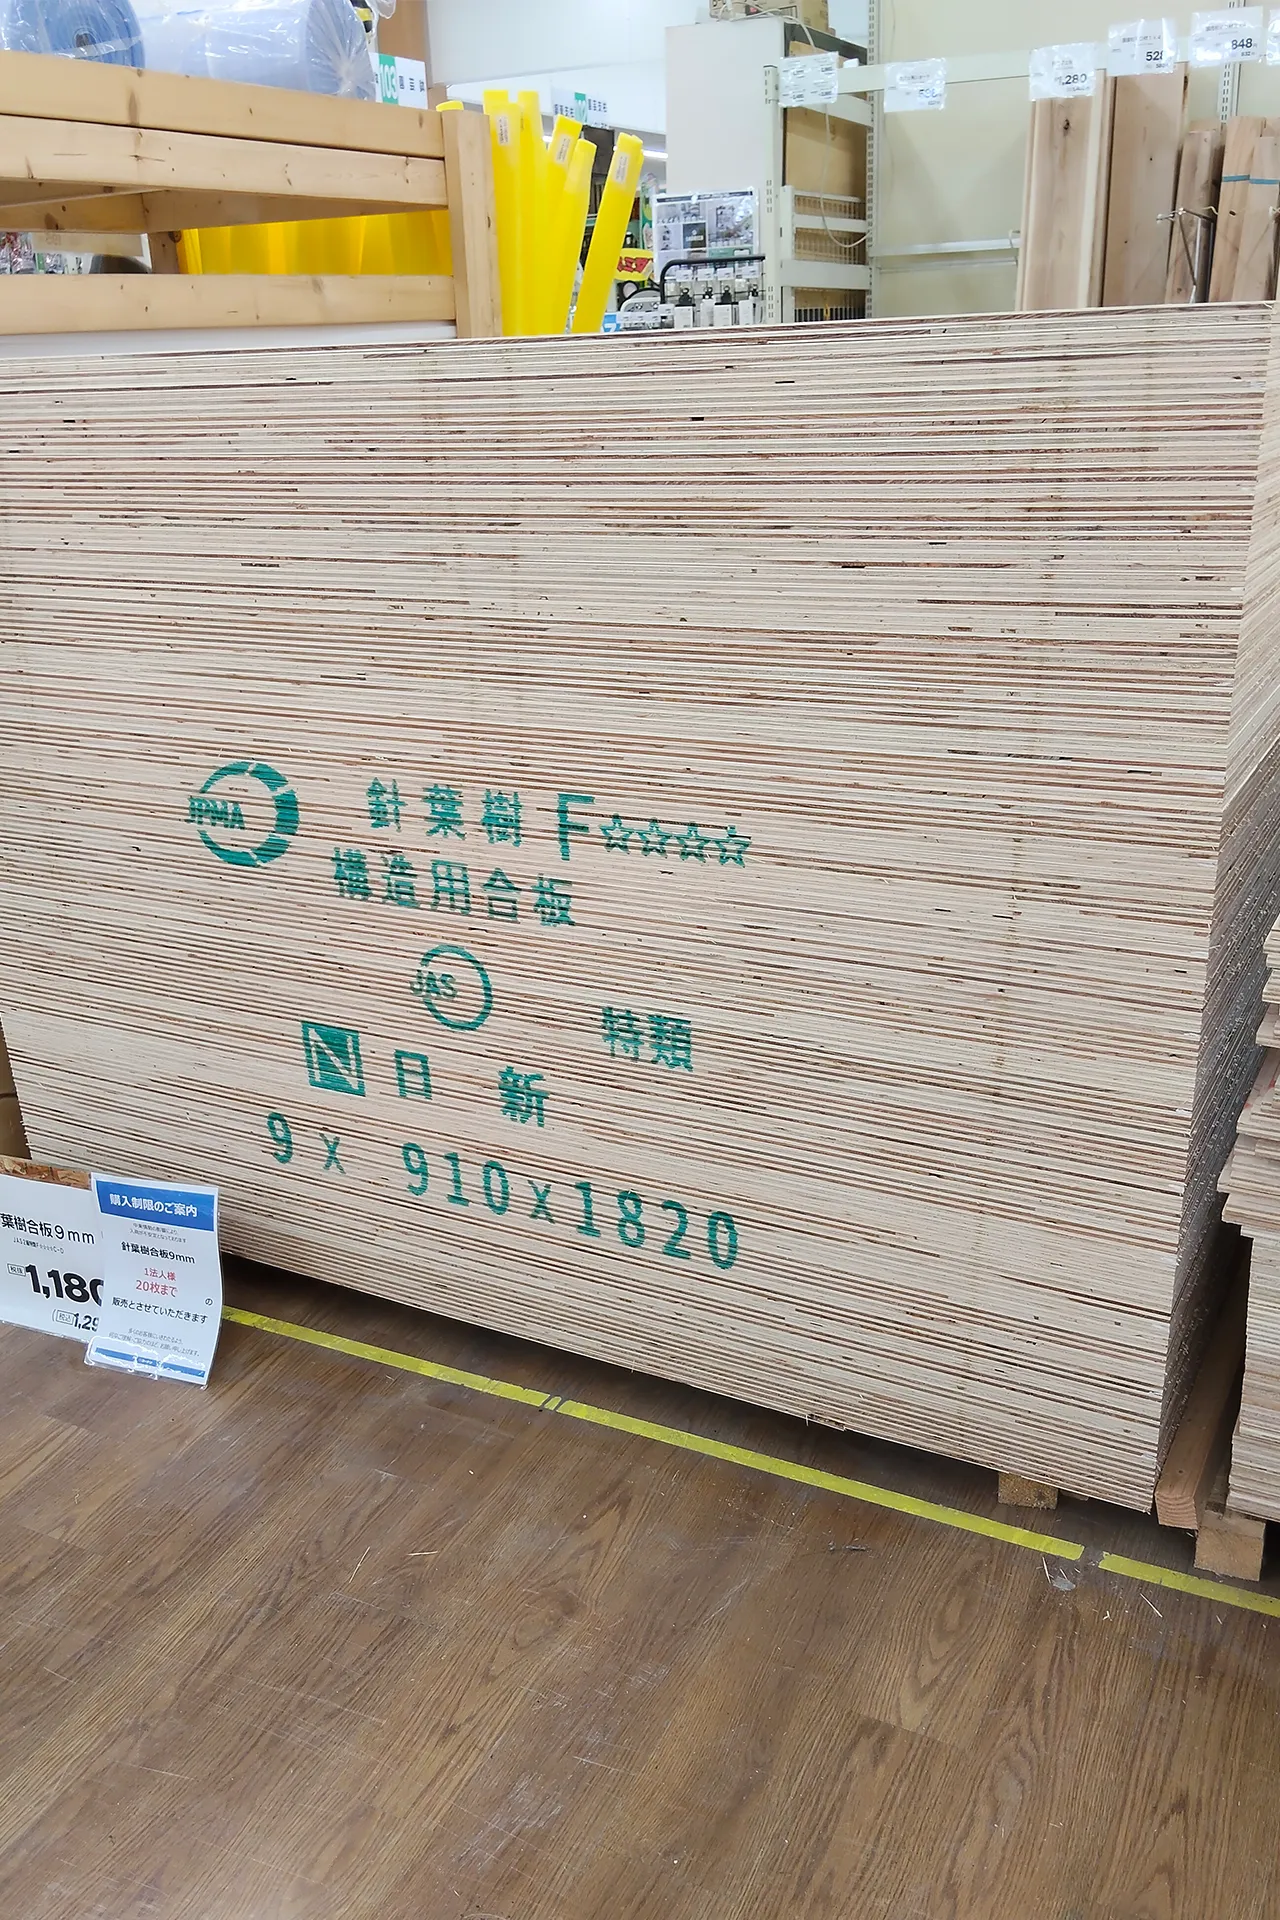
Wow, it's this big! It looks like this is the price for just one sheet. It's a plywood sheet that looks like it's about the size of one tatami mat.
By the way, if you do the math, one sheet is big enough to make about 20 sets for this purpose lol
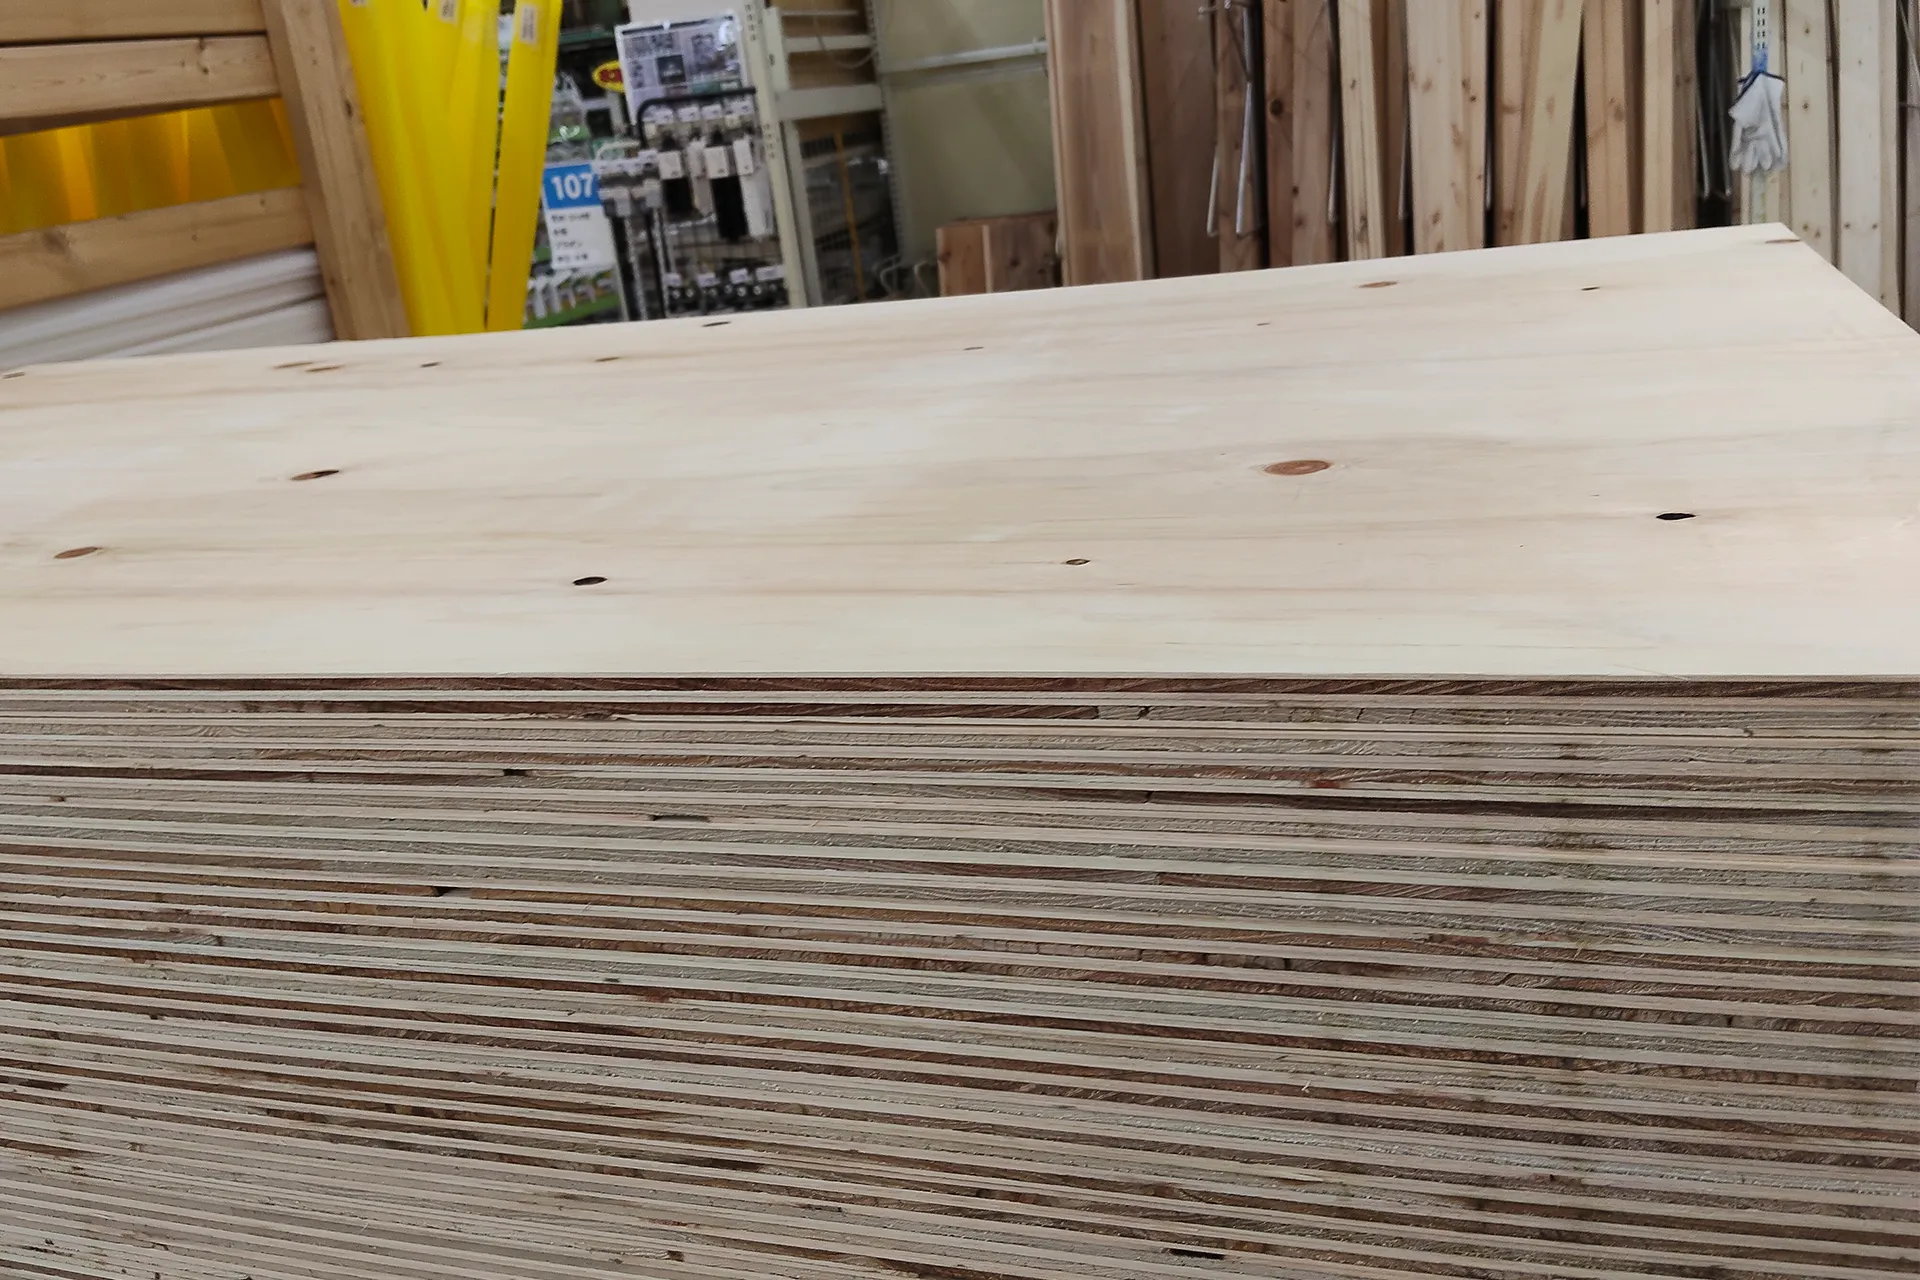
I thought to myself, "I don't need this much," but when I asked, "Could you cut this for me?", they replied, "Sure." Apparently, they'll even throw away the excess.
When I apologized for having a large amount of leftover lumber, they readily agreed, saying, "That's perfectly fine, a contractor will come and pick it up, so there's no problem."
The top of the board was warped, so they let me flip over several boards and choose the nicer one. Amazing service!
30cm × 12cm
23cm × 12cm
4.5cm × 12cm
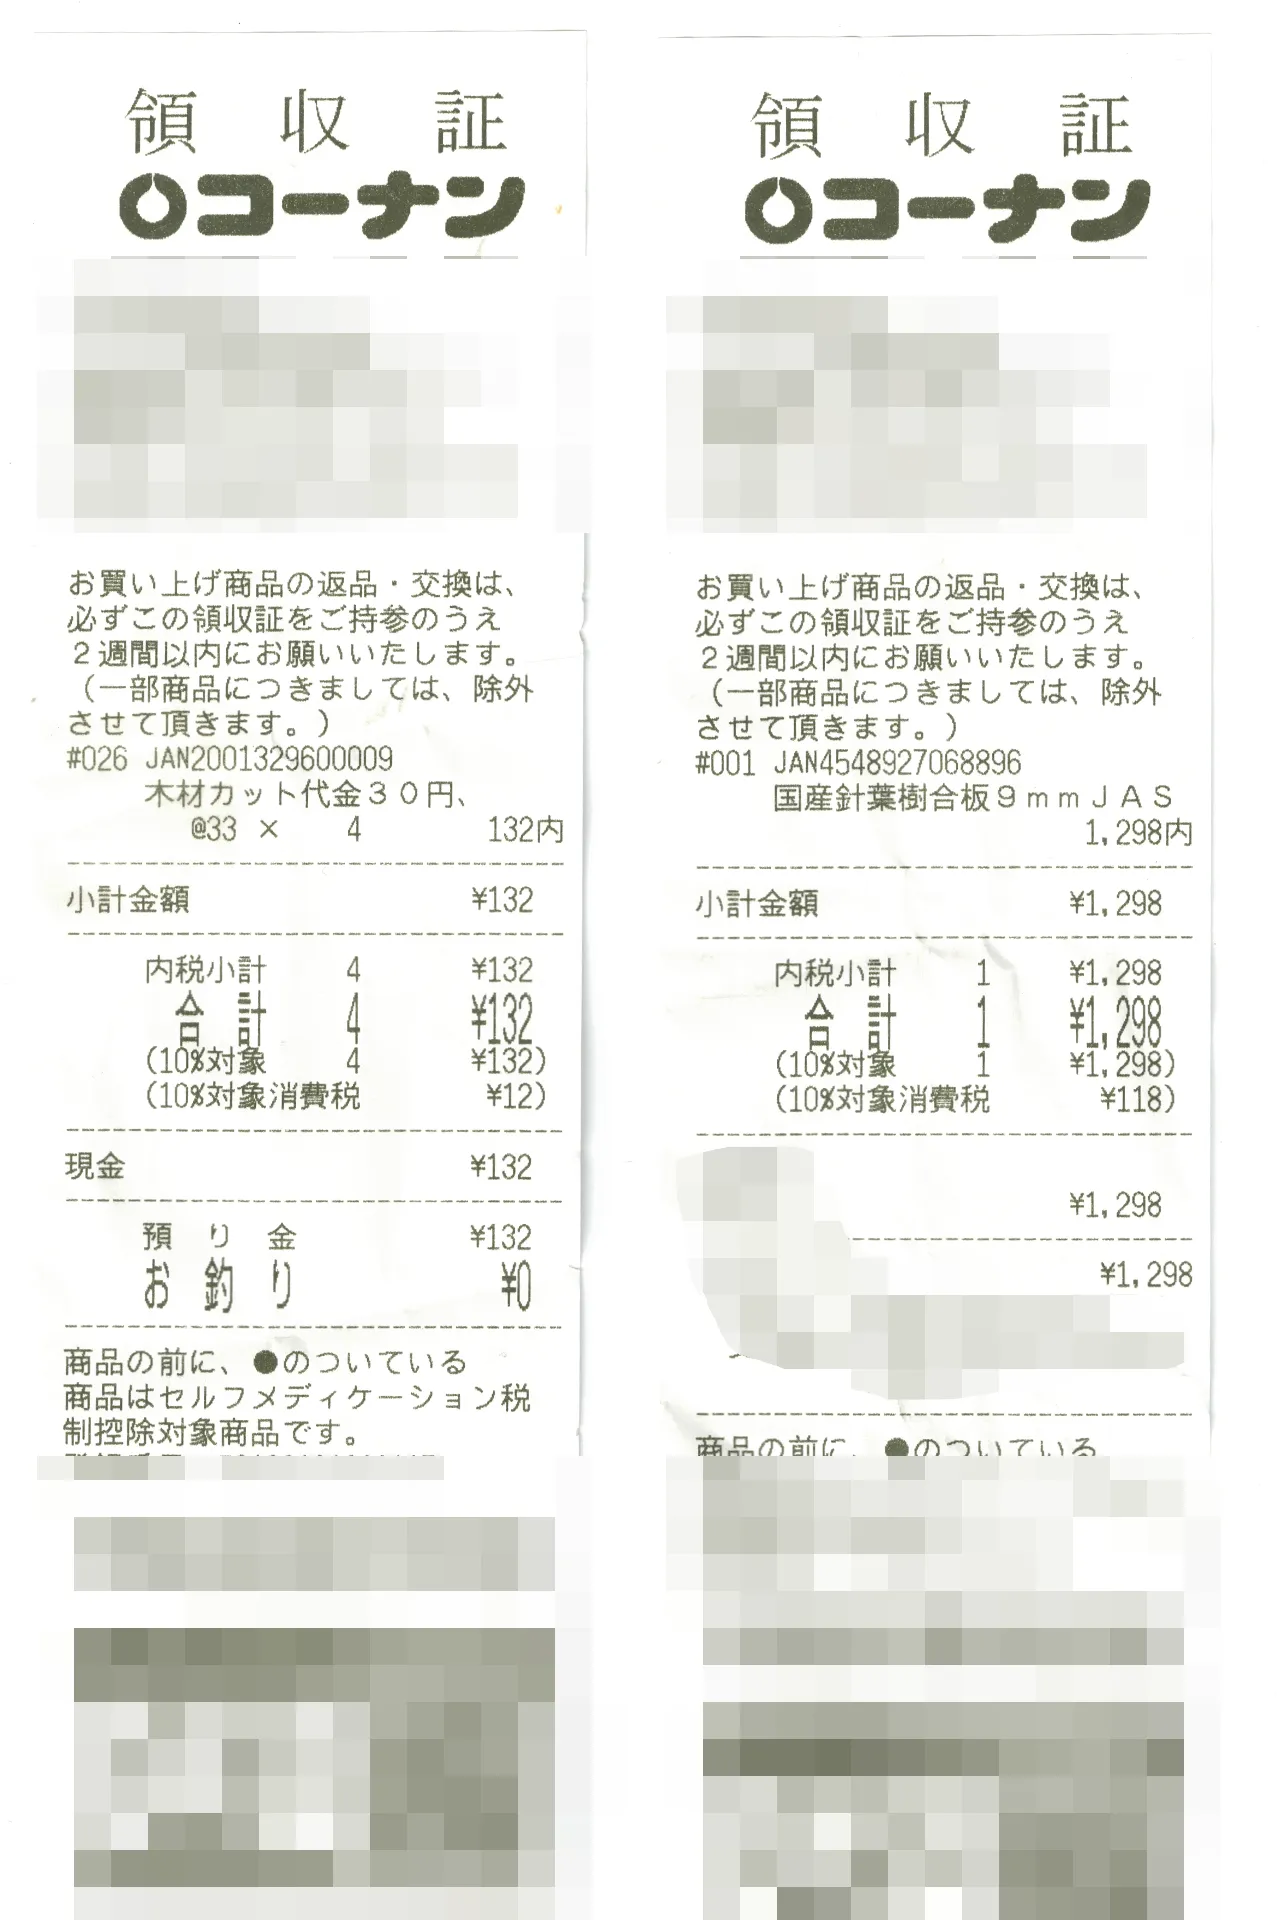
As for the price, the lumber cost 1298 yen, and the four cuts cost 132 yen, for a total of 1430 yen, which is a very reasonable price!
But there's one thing I regret a little: I should have paid an extra 132 yen and gotten two sets of hair cut. It's reassuring to have a spare, after all. It was my first time getting a free haircut, so I didn't think that far ahead.
According to the staff, if you register for the app, the first 10 cuts are free, so if you're using the service for the first time, be sure to register for the app and get two sets for free!
The boards they cut were, as expected from a professional, beautifully cut with clean, even edges, making the assembly process a pleasure! I would definitely recommend this service and would like to use it again in the future.
The monitor arm I purchased this time is a pole-type arm, and it's an inexpensive model that can sometimes be found for under 3000 yen during sales. Despite the low price, it seems to be quite well-made and has minimal vibration. What I liked most was that the clamp is very secure and doesn't budge at all, even without using any auxiliary brackets.
I chose the column-type monitor arm because it's supposed to be more resistant to vibrations than one without a support. I'm not sure how much stronger it actually is, though. I actually bought another monitor arm, but that one was completely useless. It was wobbly and unusable for this purpose.
| Product name | NB ERGONOMIC Monitor Arm, Single | ||
|---|---|---|---|
| retailers | |||
| price | Around 3,980 yen (tax included) | ||
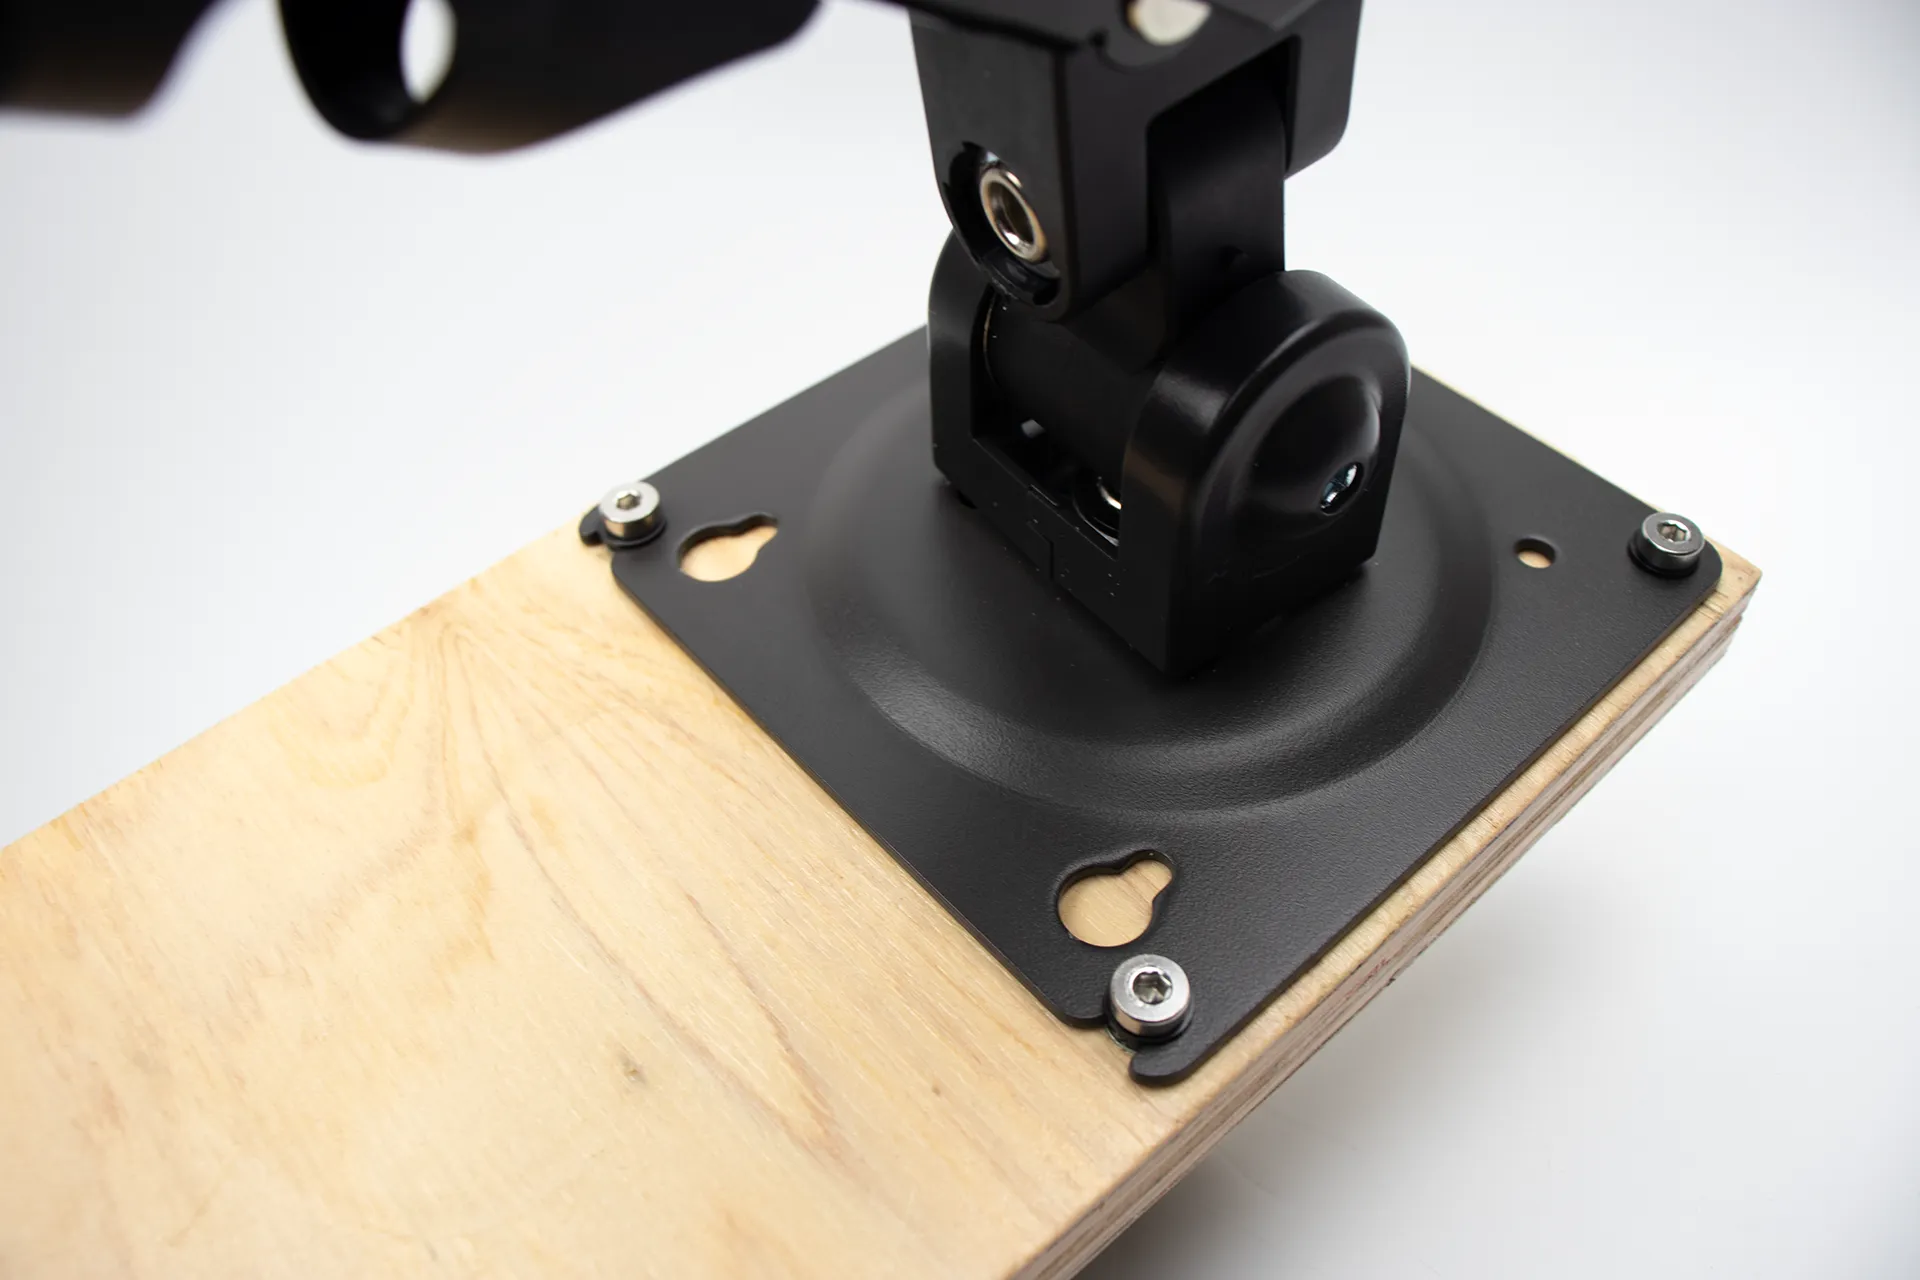
I'm finally able to confidently introduce an improved mounting system to everyone, so I'd like to share it with you right away. The VESA mount is secured with hexagonal head bolts. Washers are also included, so it can be tightened very securely.
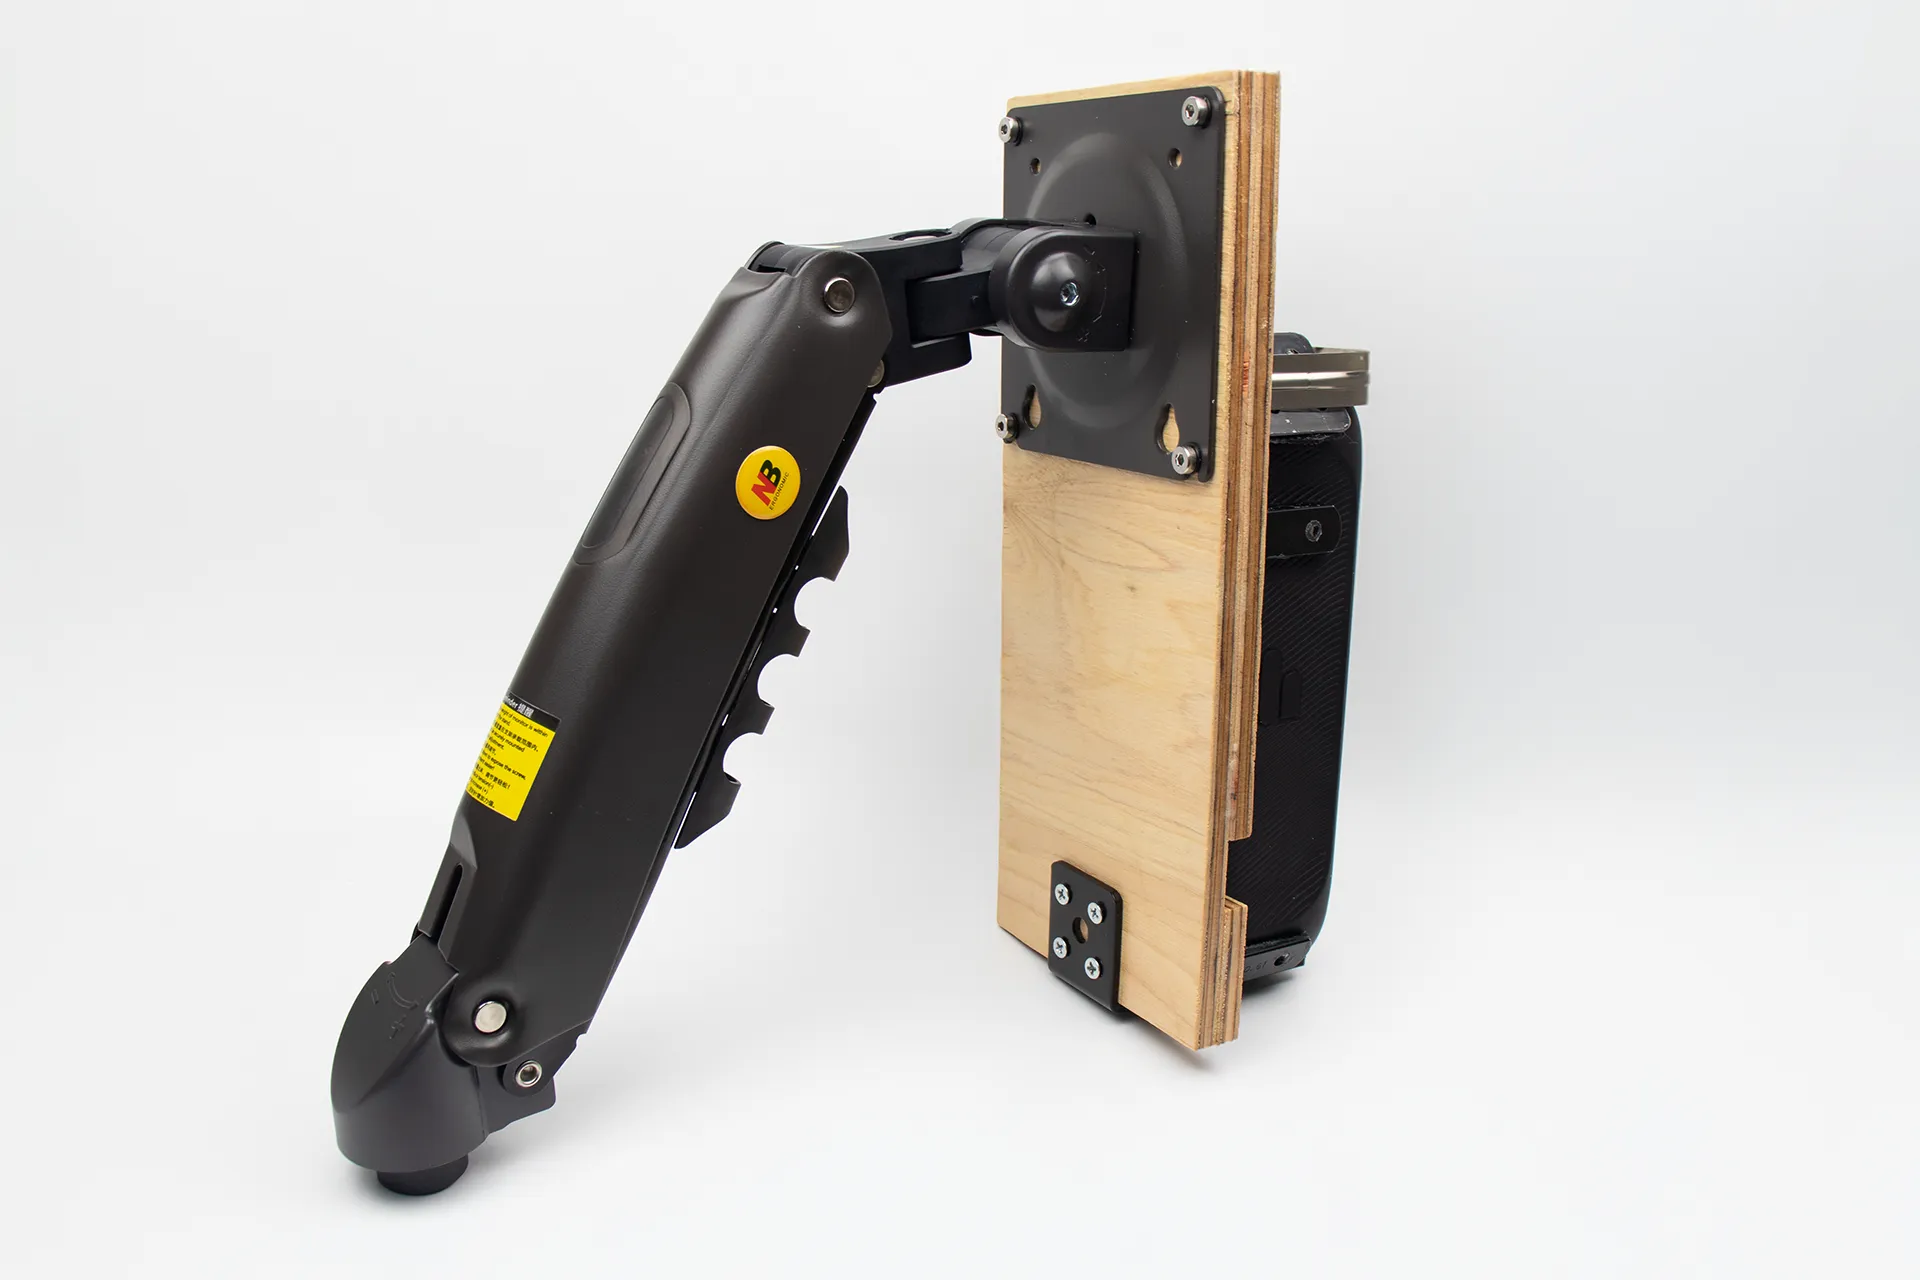
This is the monitor arm I bought from New Balance. Just kidding, it seems to be from a manufacturer called NB ERGONOMIC. The first joint of the arm is detachable. However, the VESA mount cannot be removed from the arm. I would have preferred a type where only the VESA mount could be removed.
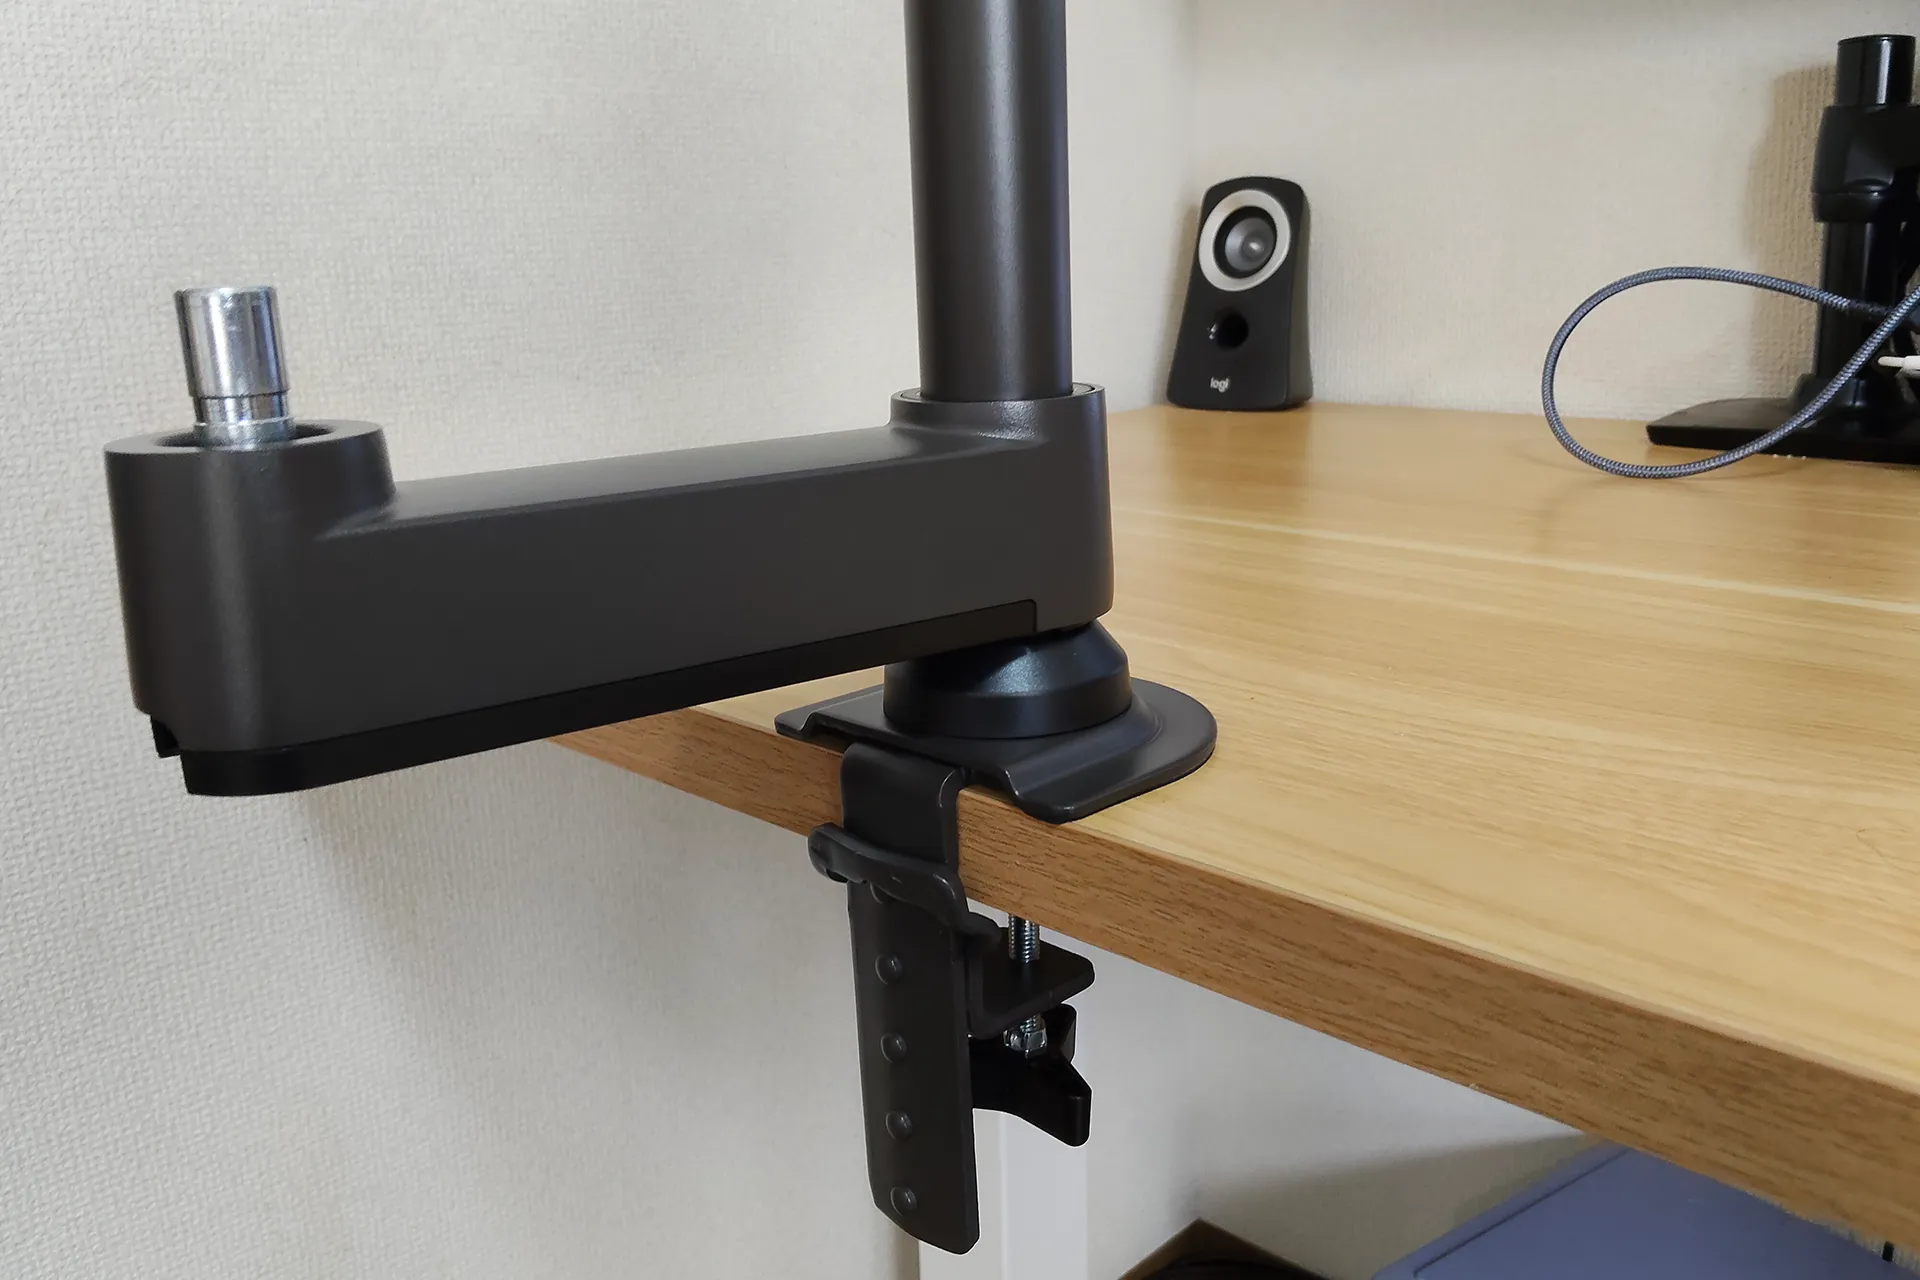
It can be mounted using either a clamp or a grommet. It is compatible with tabletops with a thickness of approximately 10 to 50 mm.
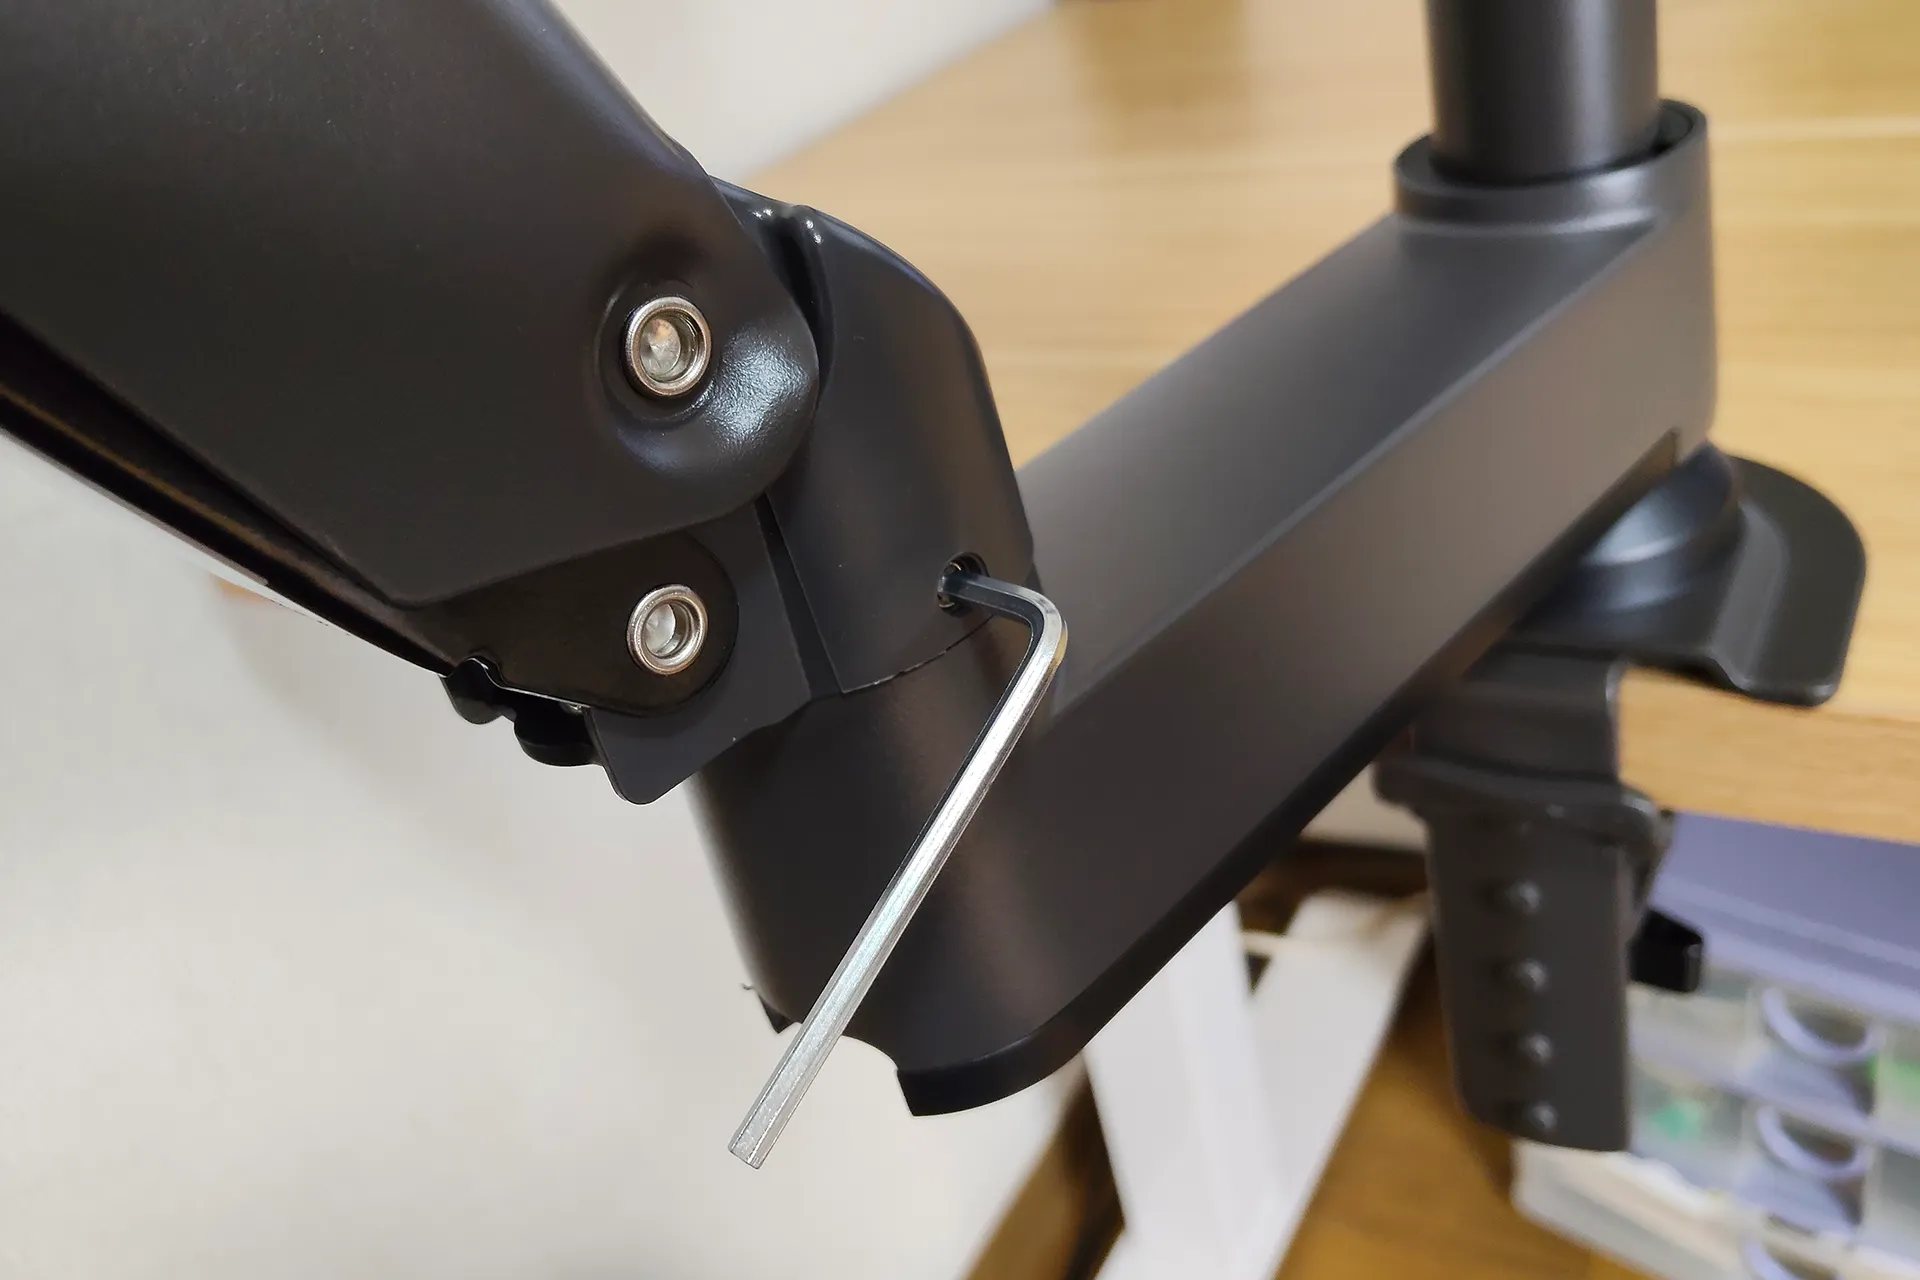
Reattach the first joint arm that you had removed, and then tighten the screw at the base with the included hex wrench to secure it.
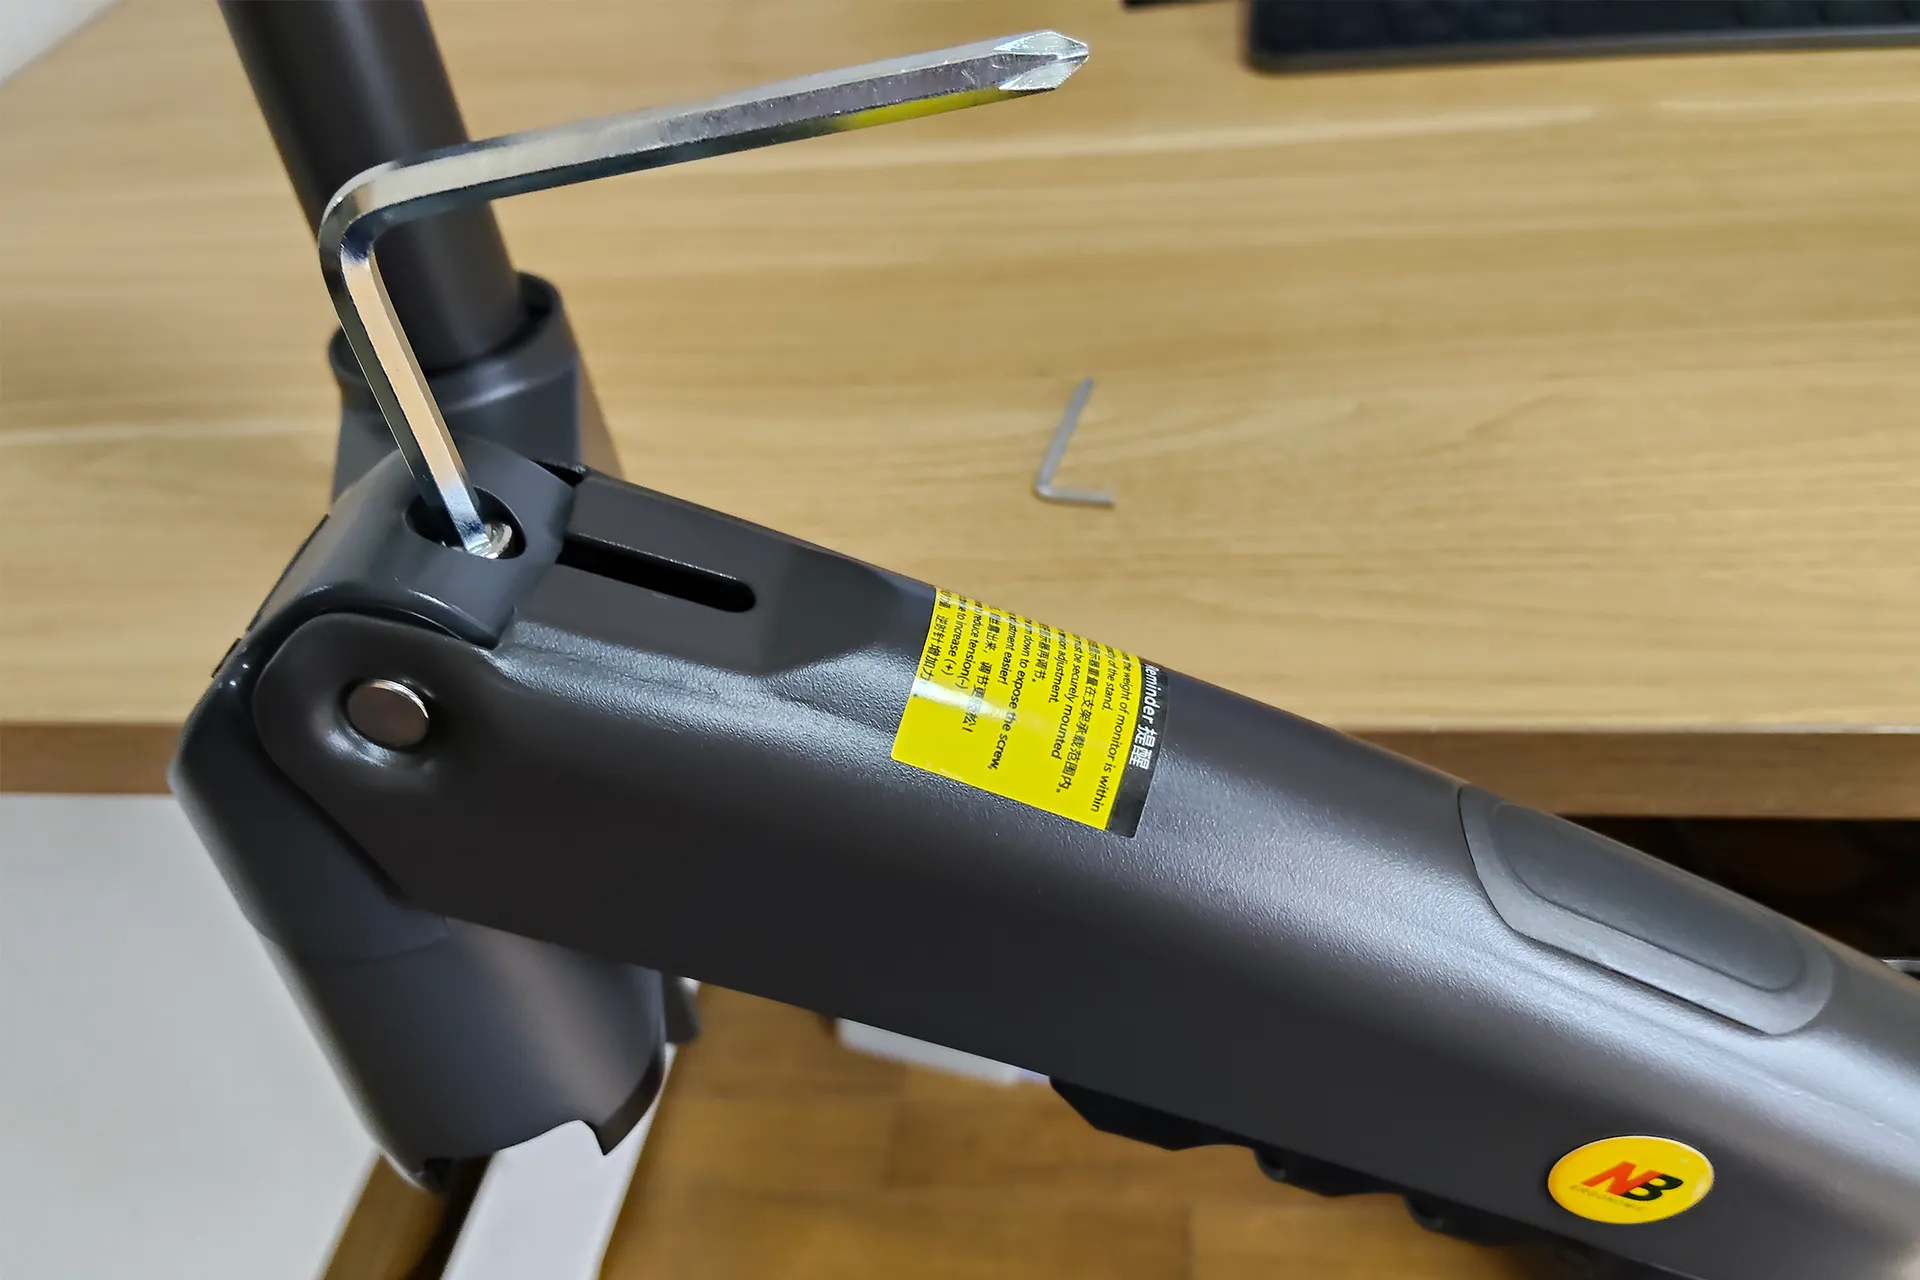
The upward force can be adjusted by tightening the screw at the base of the first joint with the included hex wrench.
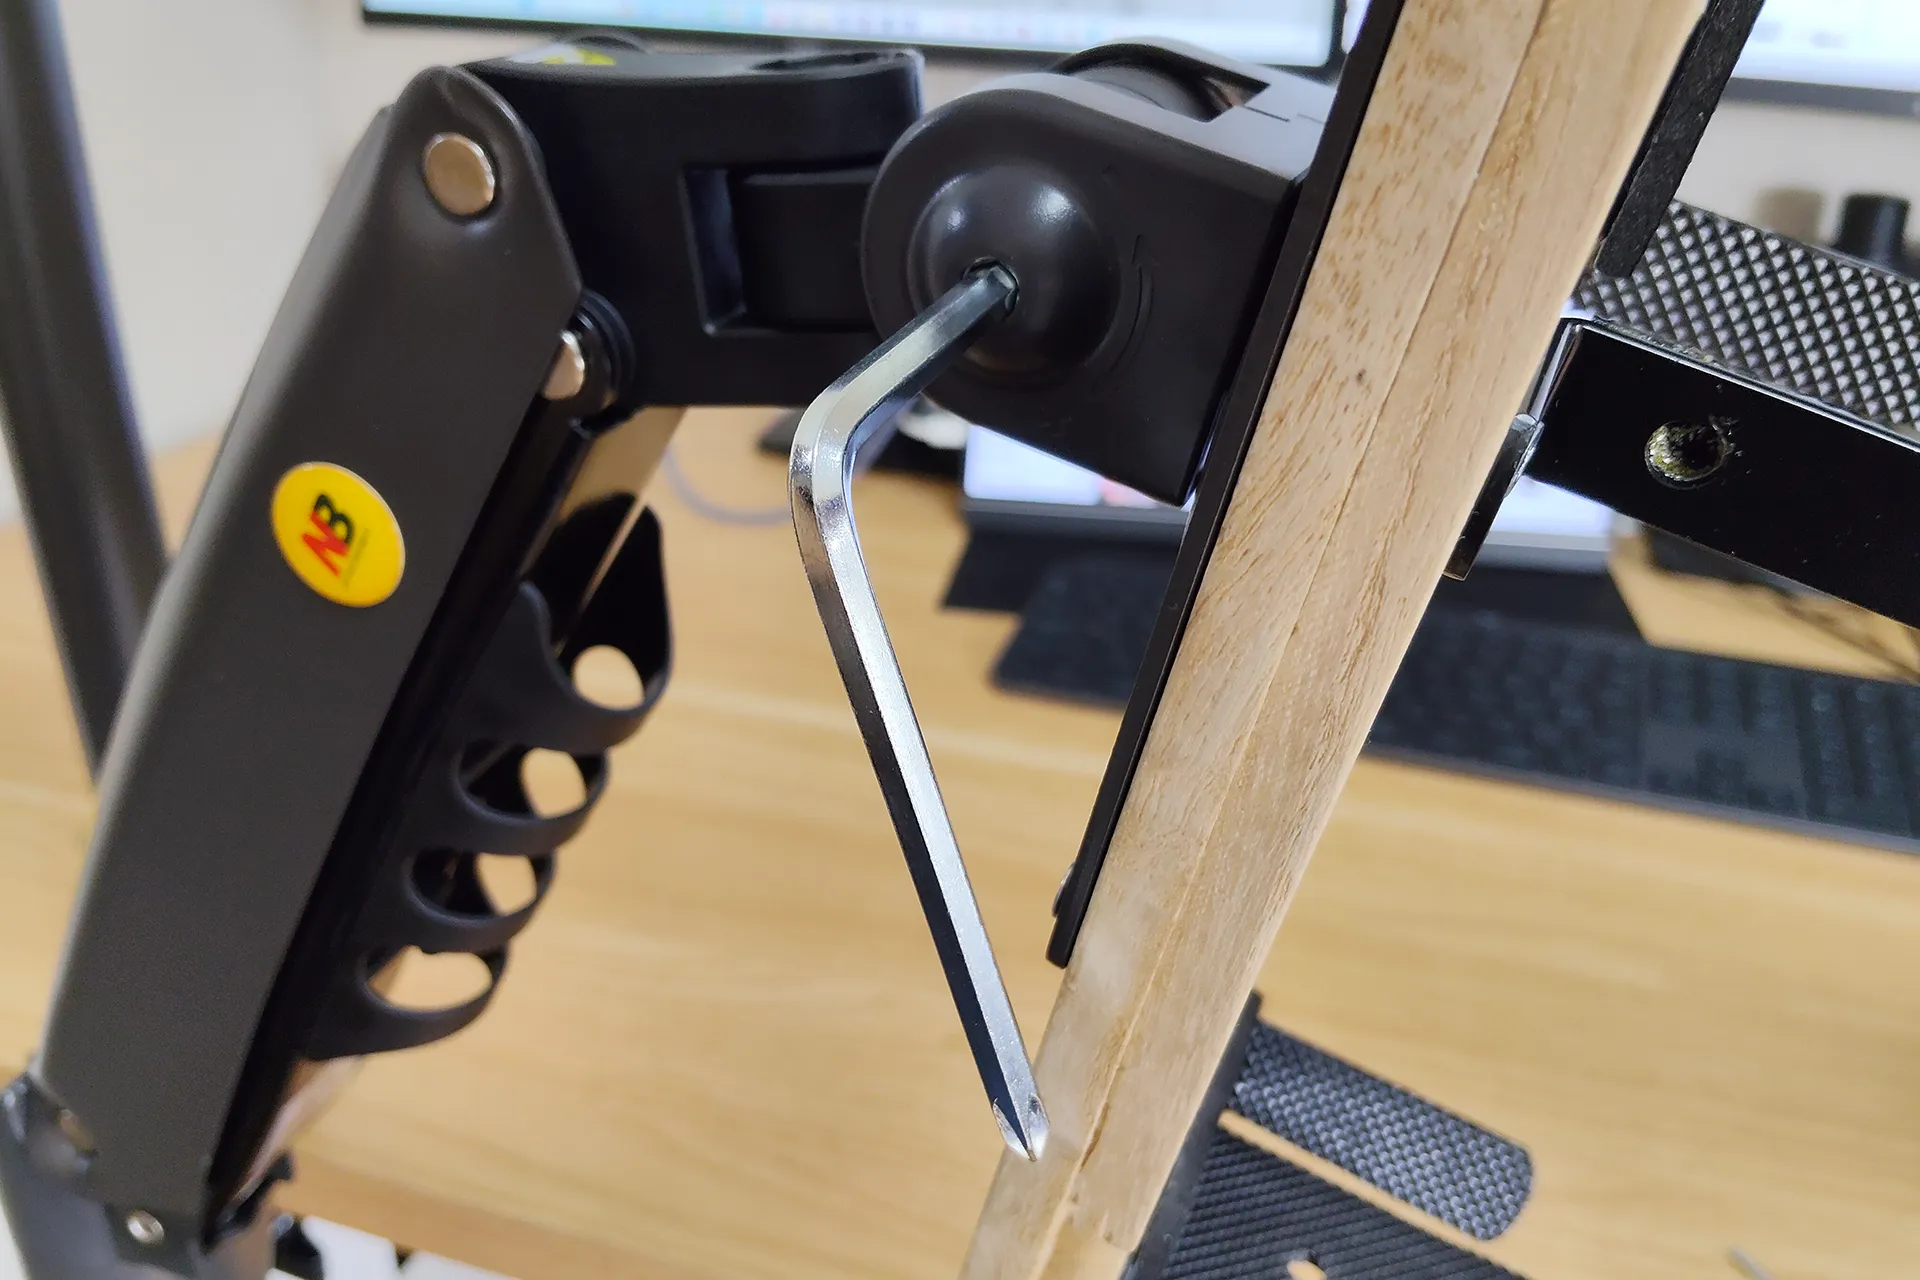
The angle adjustment part at the base of the VESA mount can also be adjusted using an Allen wrench to change its stiffness.
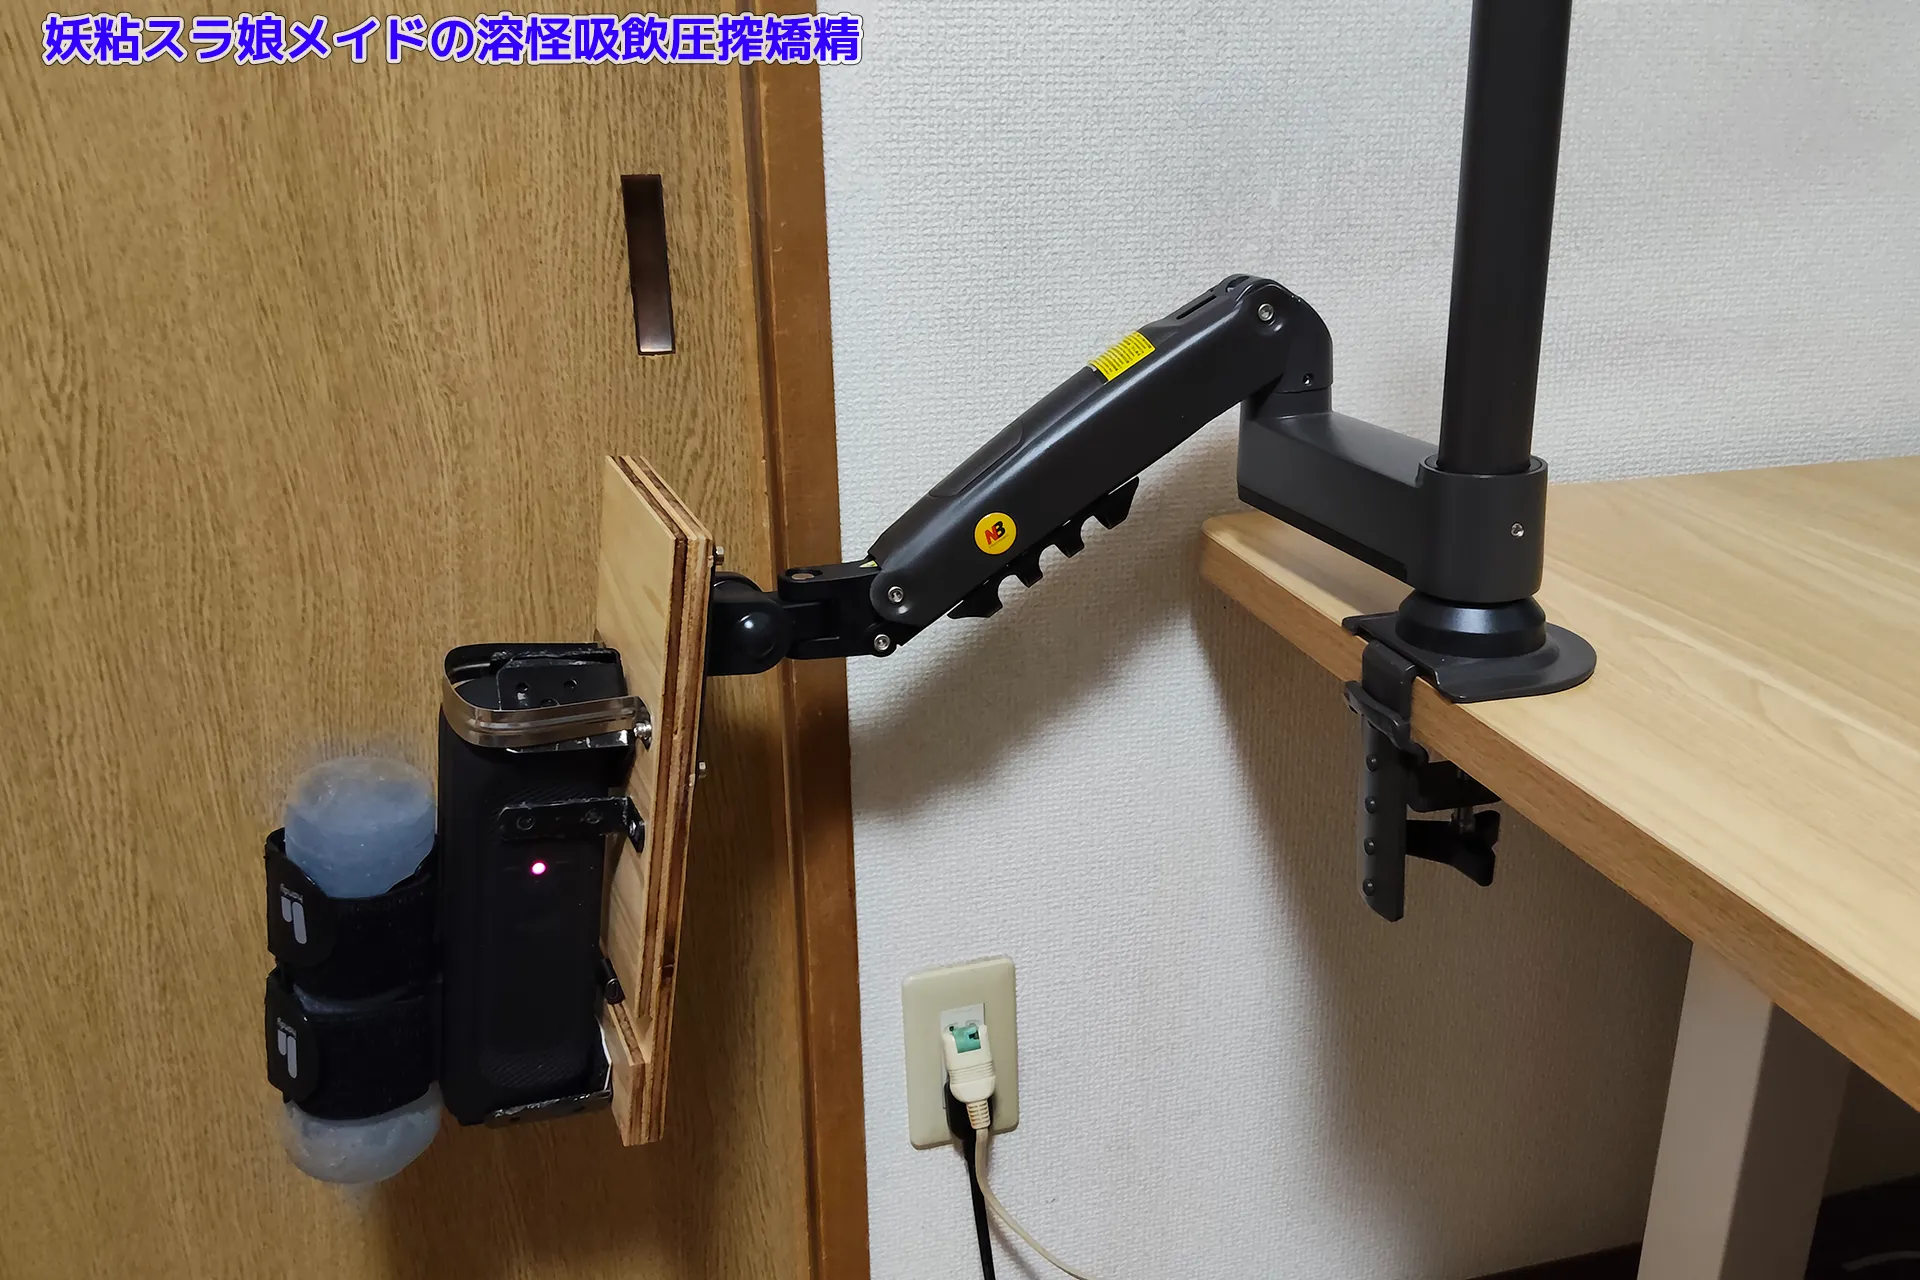
The arm is lowered all the way to the bottom of the support column. There's actually a ring part to prevent the arm from falling, but I've lowered it all the way to the base without attaching that either. Doing so allows me to lower the arm this far.
HOT POWERS
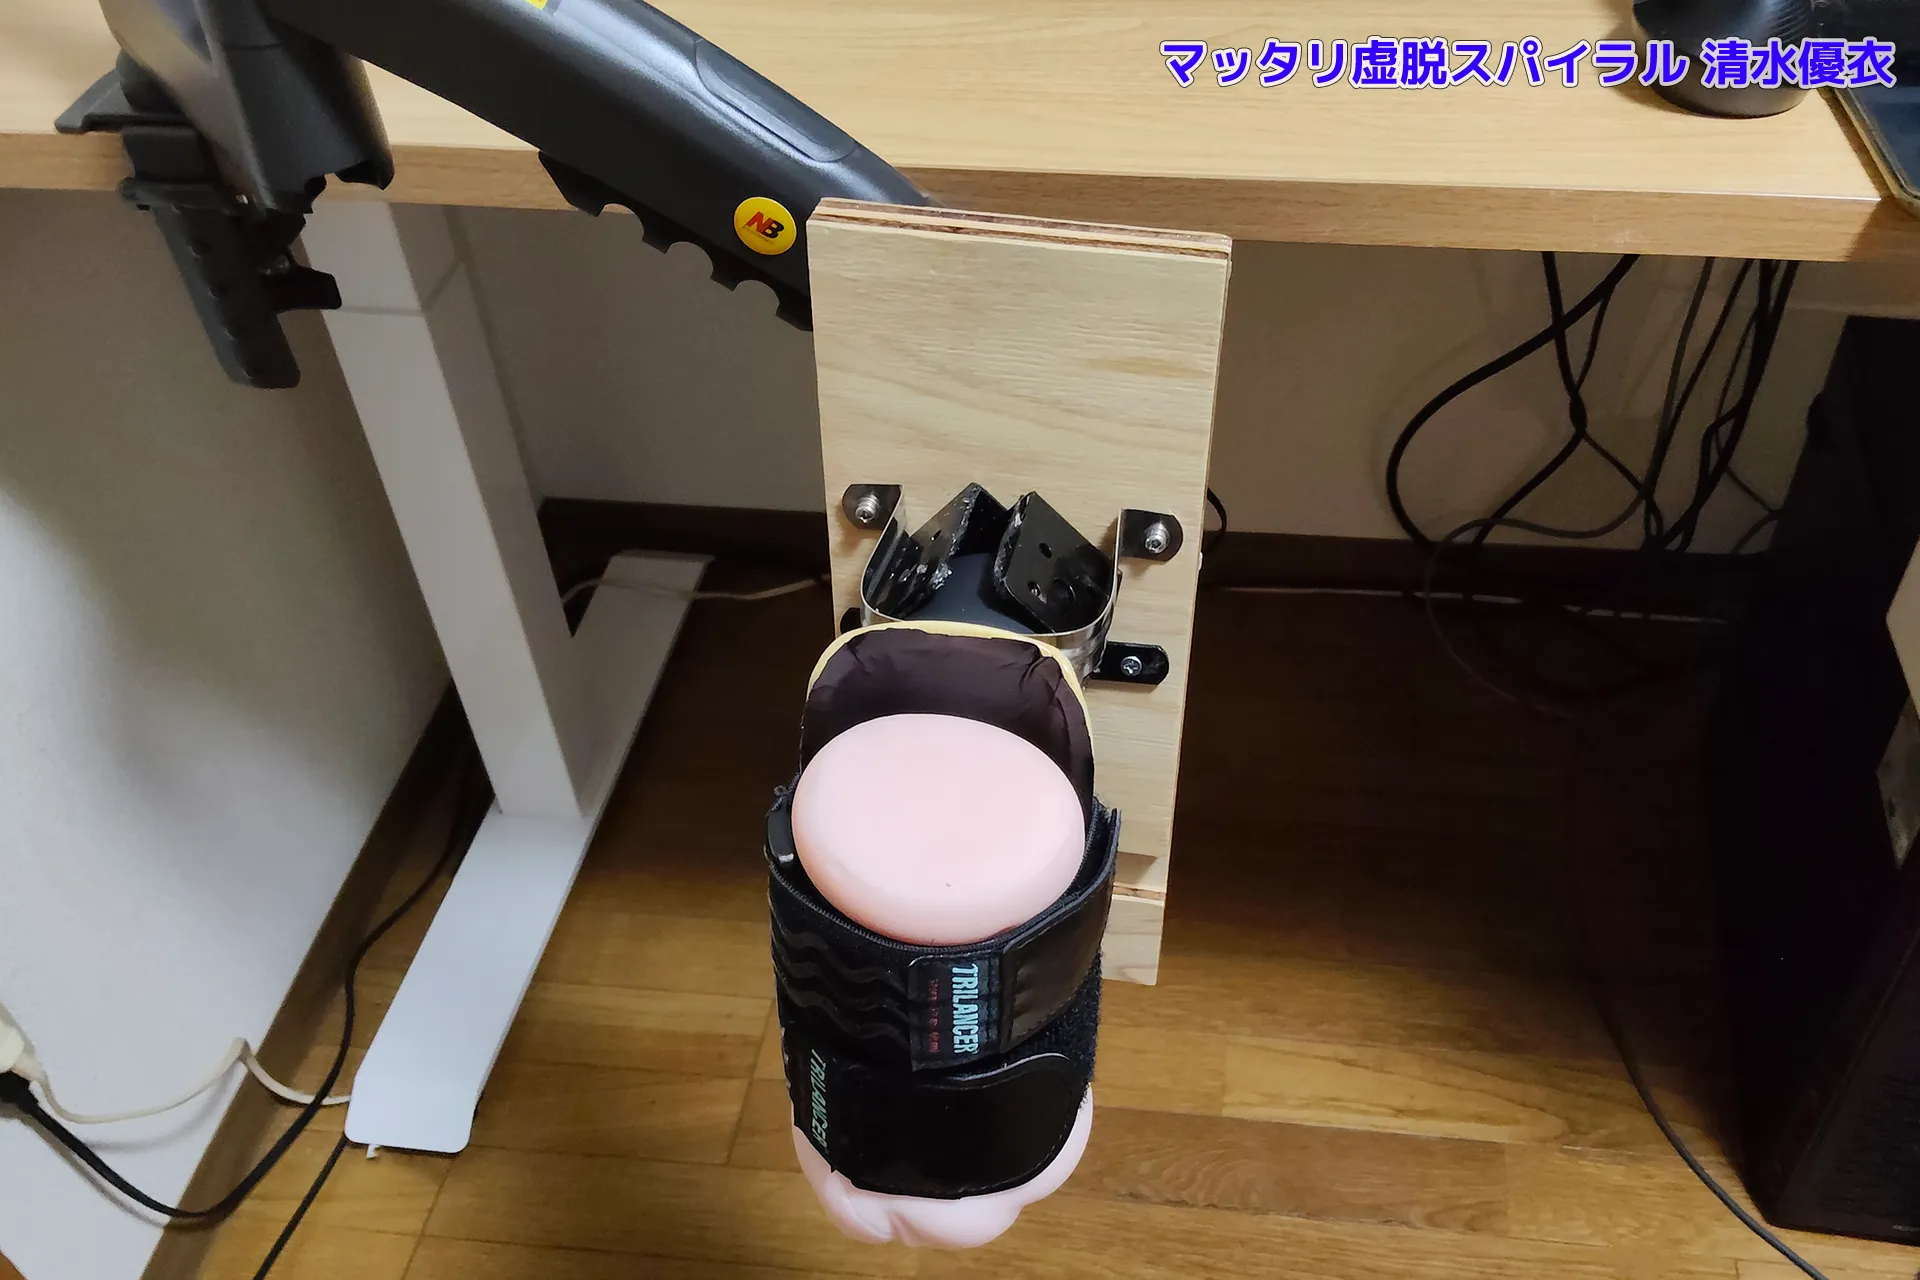
I've now put on my current favorites, male masturbator mellow , and the Spiral (featuring Yui Shimizu). I've also done a high-load test using this 1.37 lb (621 g) male masturbator , so please check out the video.
Magic Eyes
Regarding the noise level of Handy2 , it only seems quiet when used with a low-load, light-duty male masturbator like the official male masturbator .
Like me and many others, if you're using it to heavily utilize the large male masturbator , even version 2 will be noisy. The clicking sound that was present in the first generation is still present in version 2 and occurs under heavy load with the heavy male masturbator .
Of course, if you're driving a heavy male masturbator into the ground with a lot of force, it's going to make a clanging sound. I think this is an inherent characteristic of out-piston type engines, not just handy .
So, even though it's quieter, if you're using the large male masturbator and moving it around a lot, it will still make noise, so you shouldn't have overly high expectations. If you're looking for quietness, I recommend using noise-canceling headphones for a more immersive experience.
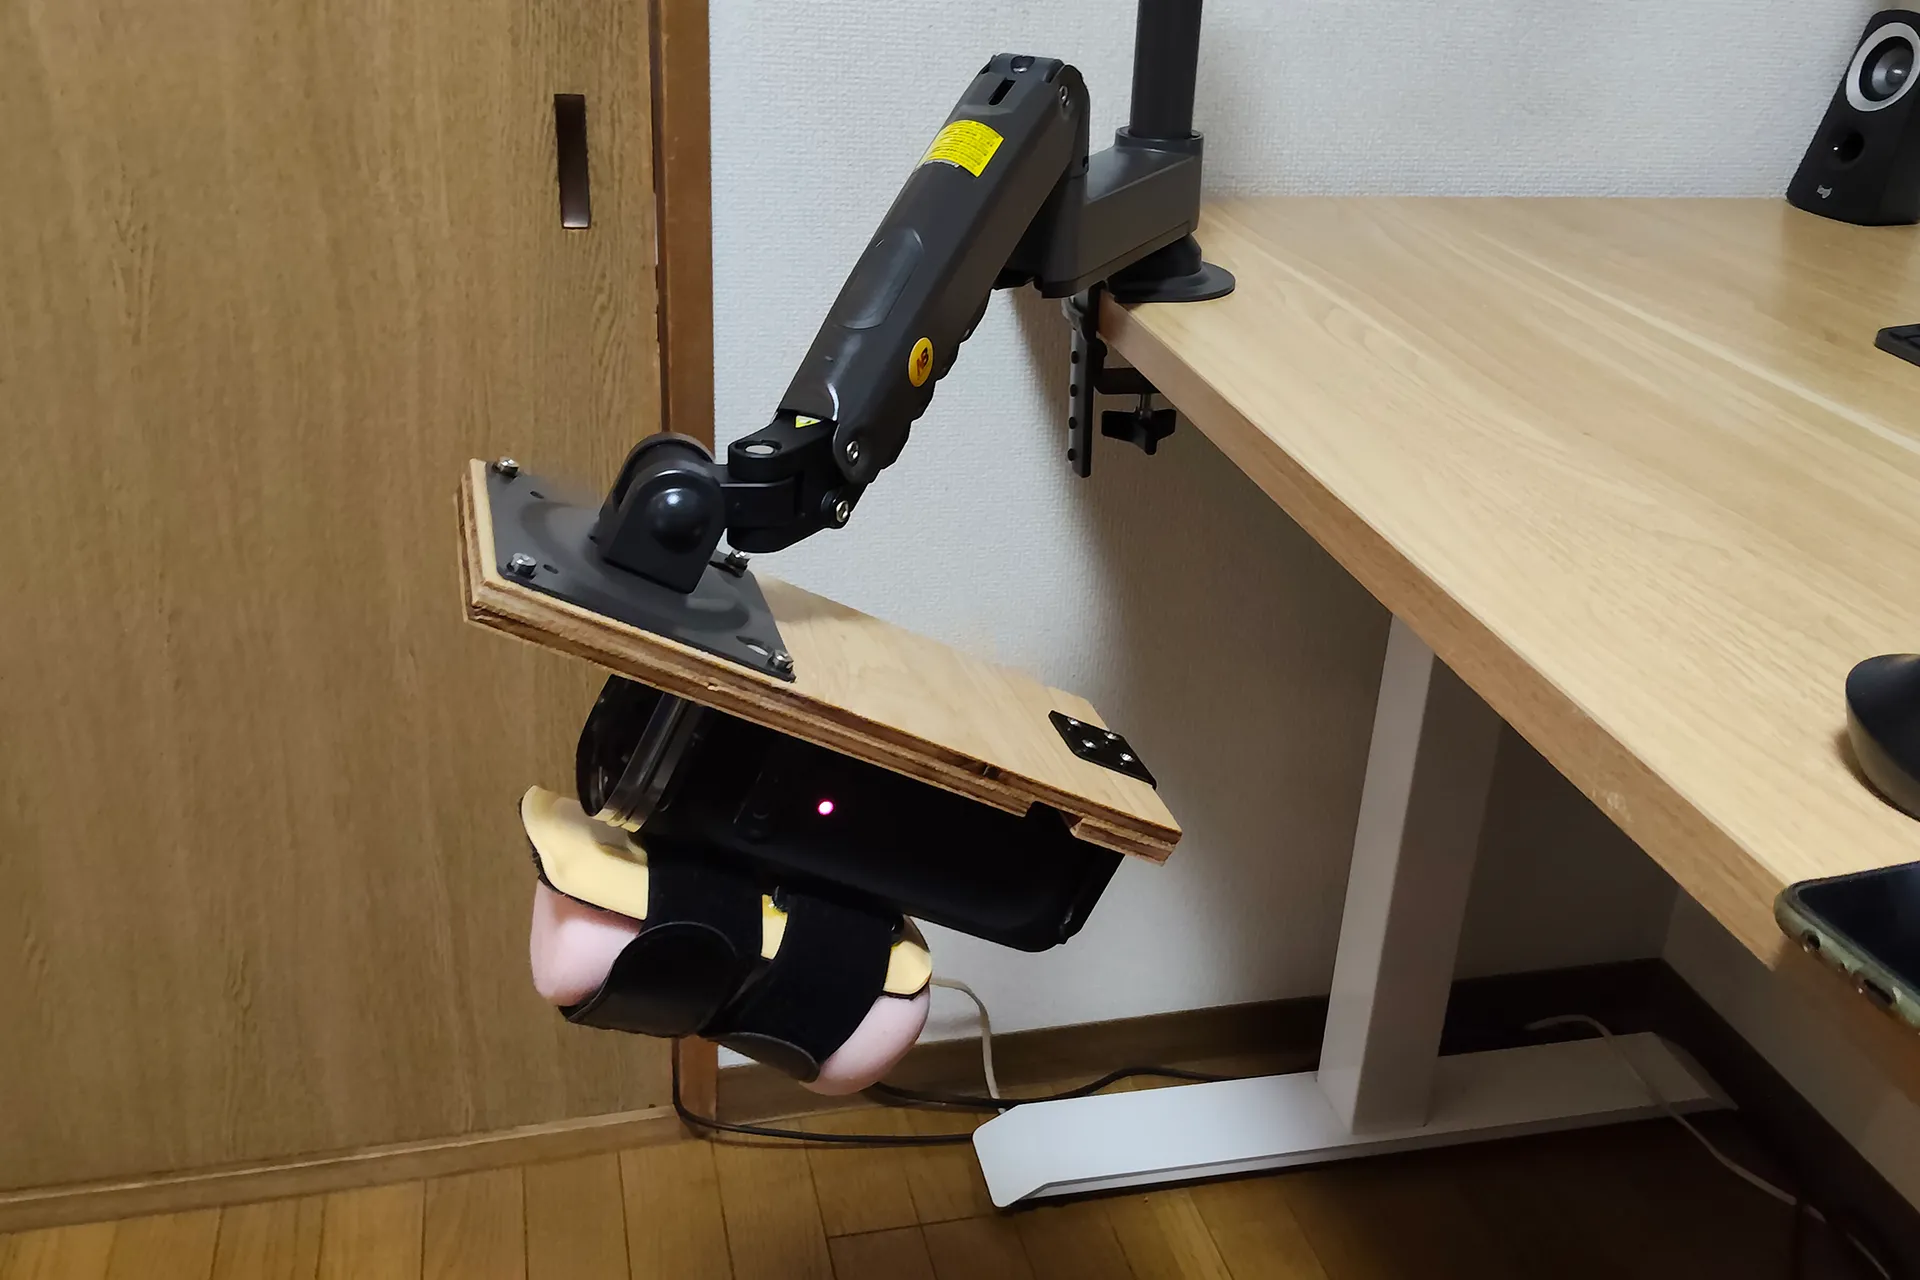
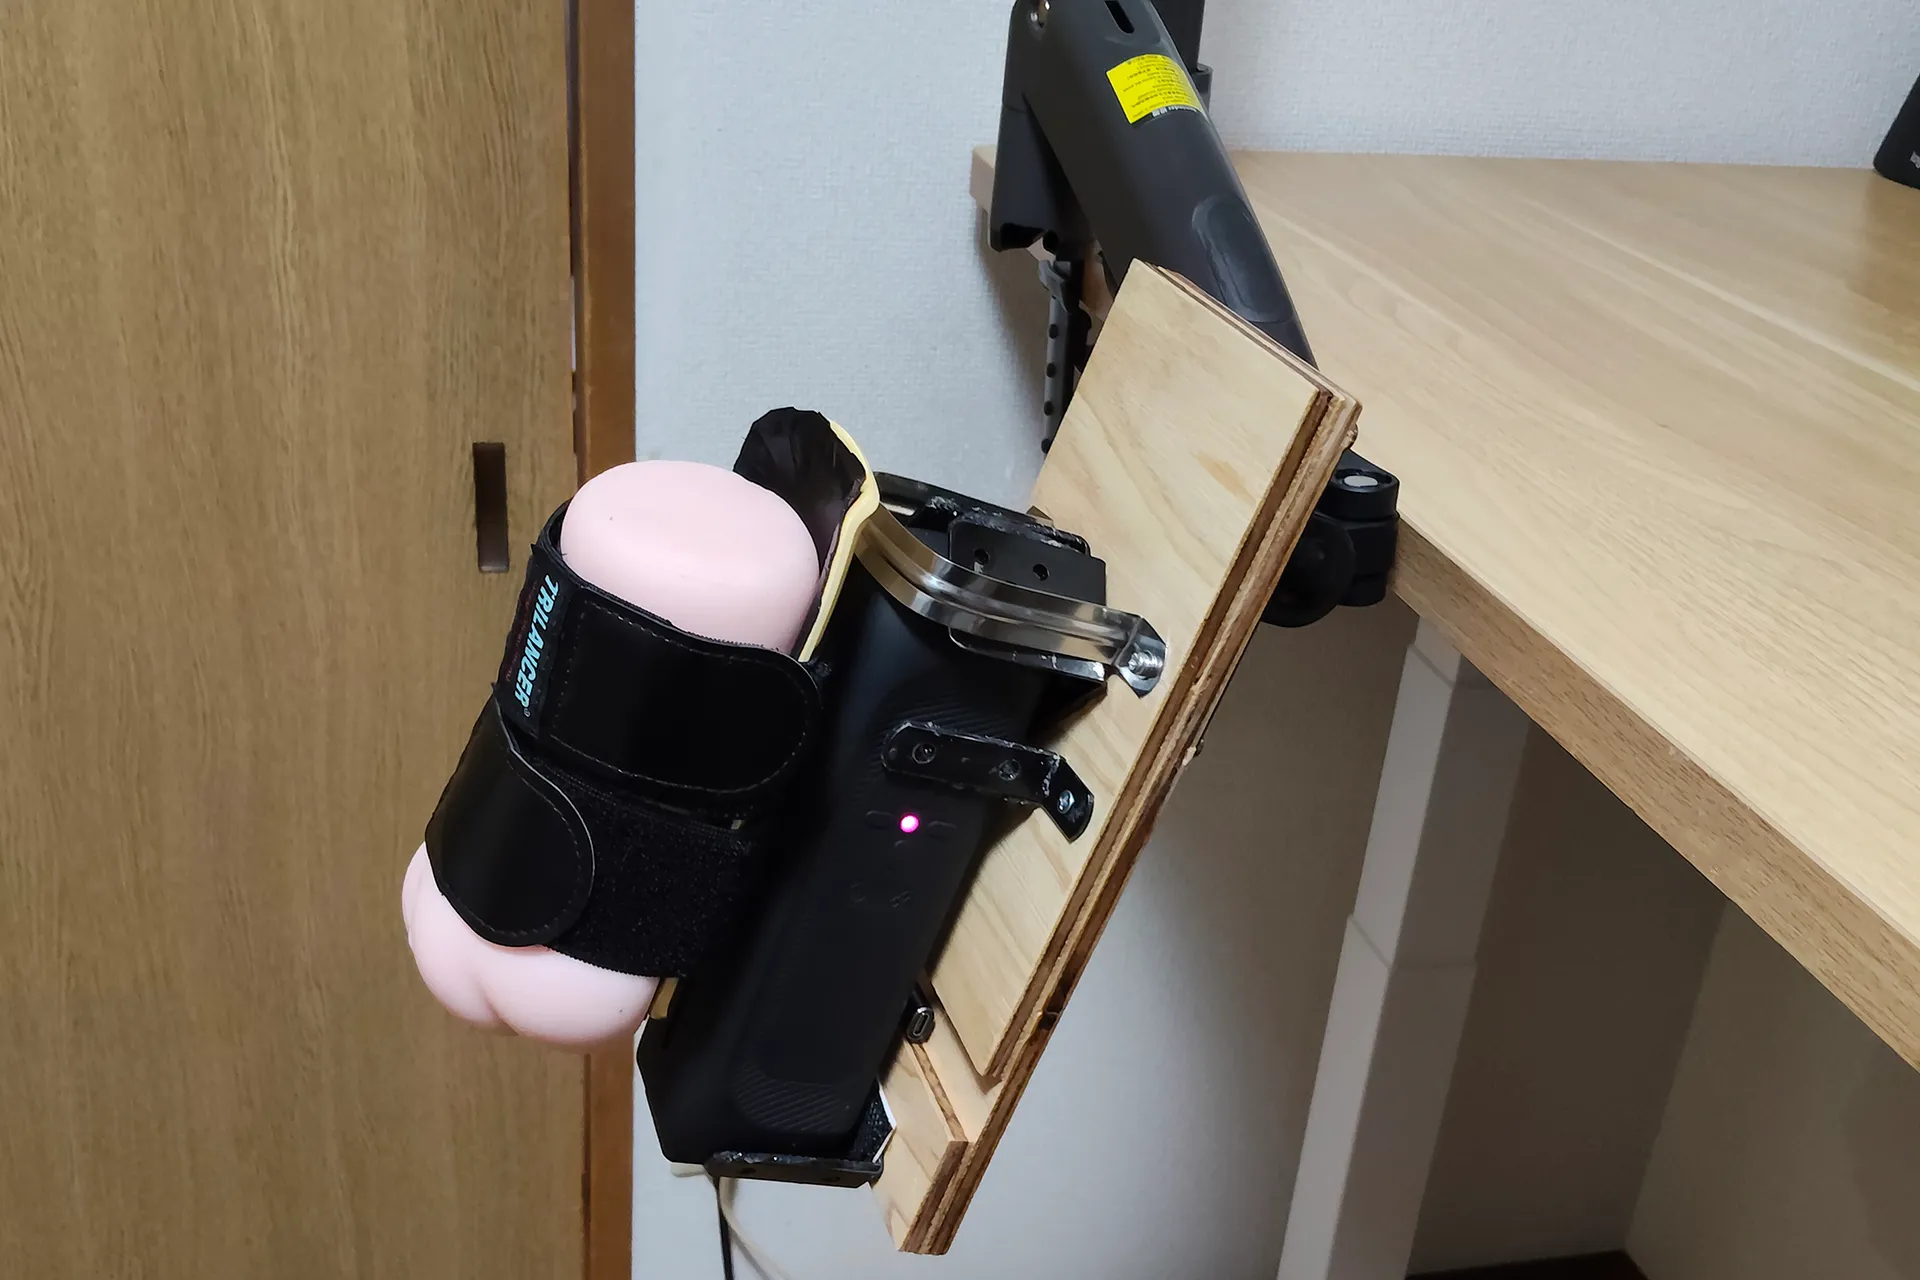
I don't think anyone else has their head tilted this far back, but this is how far you can tilt it to its limit.
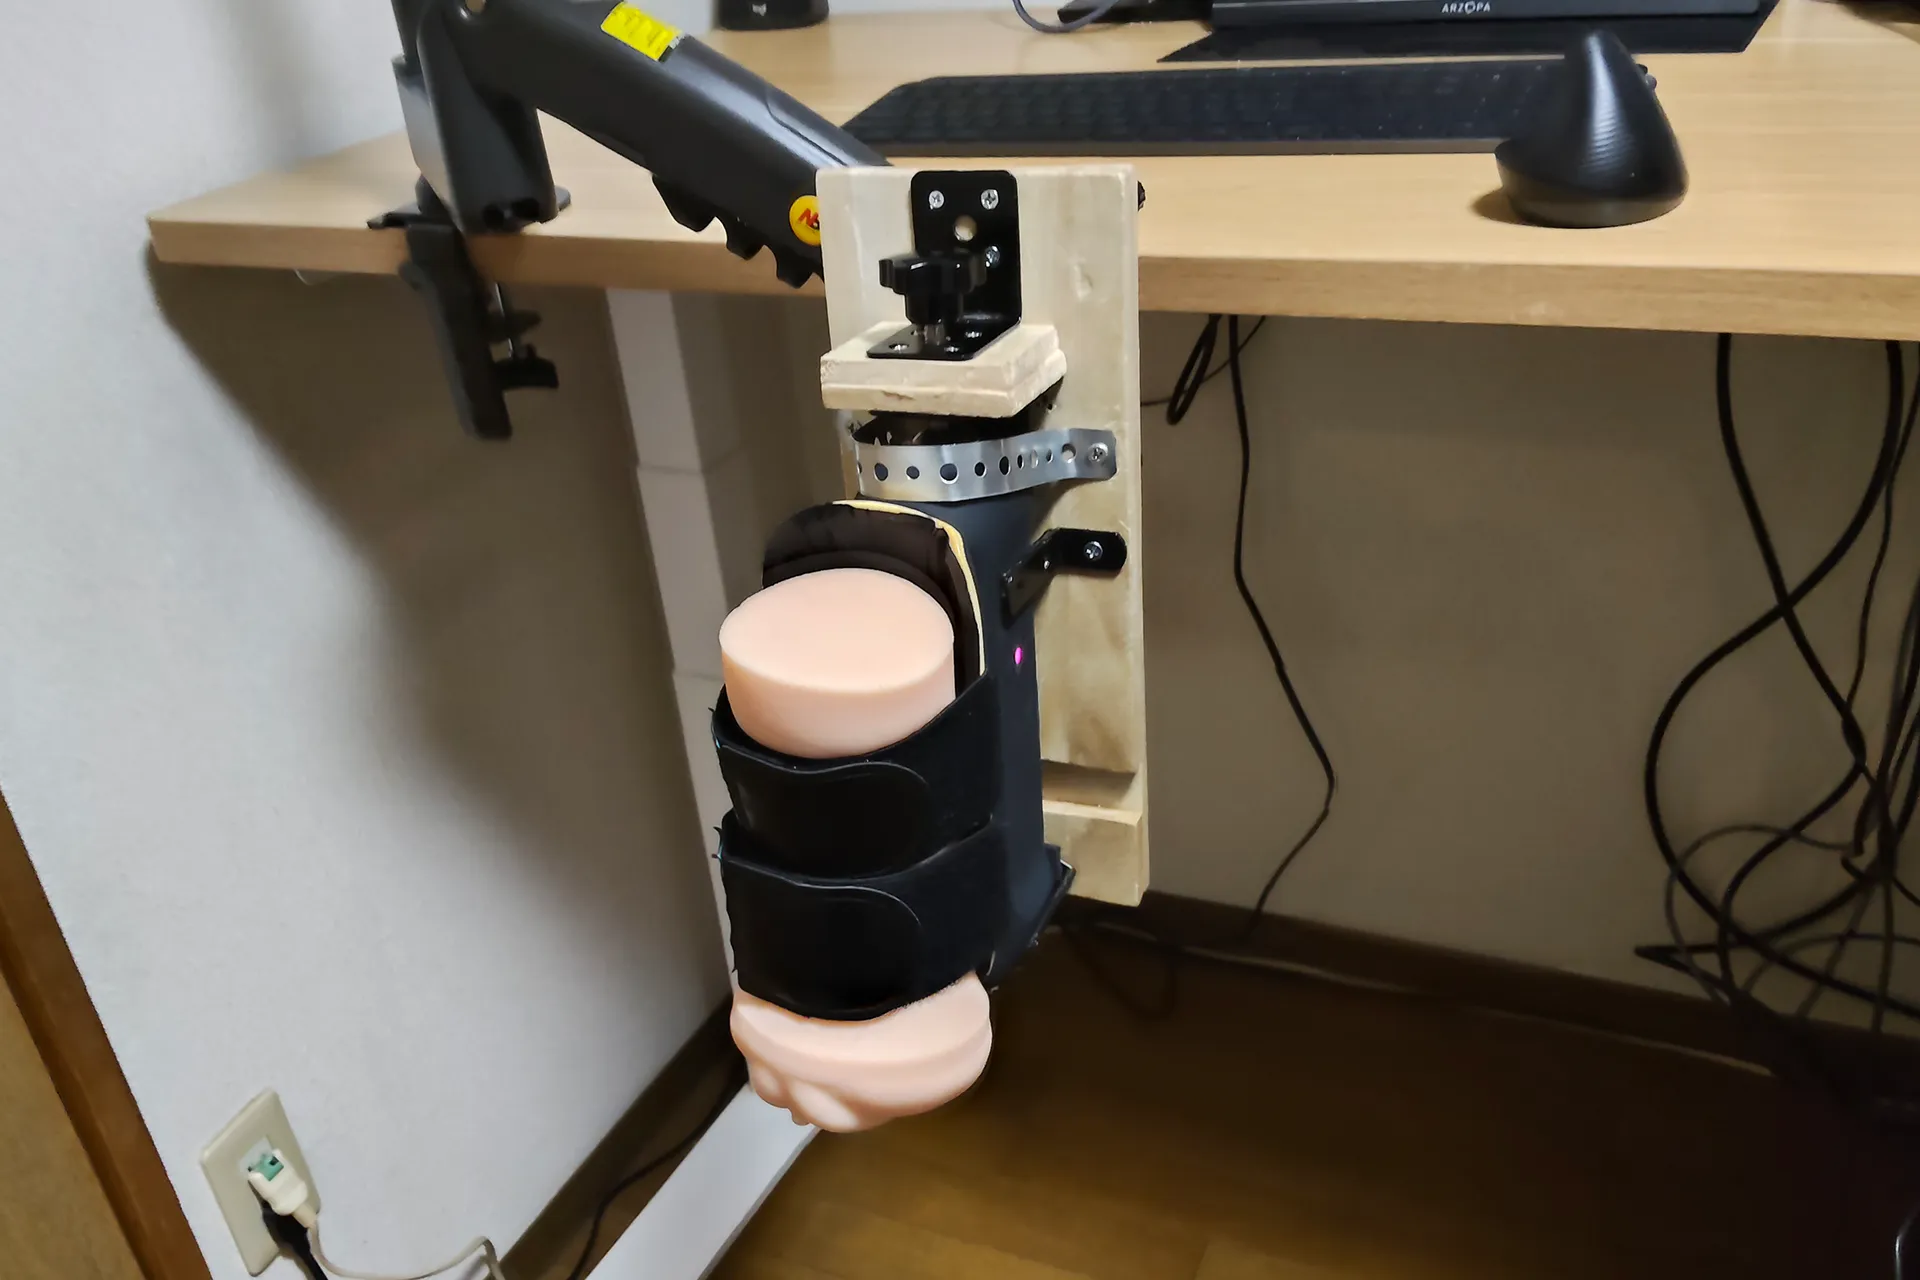
If you have an electric height-adjustable desk, I highly recommend raising the height and working while standing. I've recently become really hooked on working while standing.
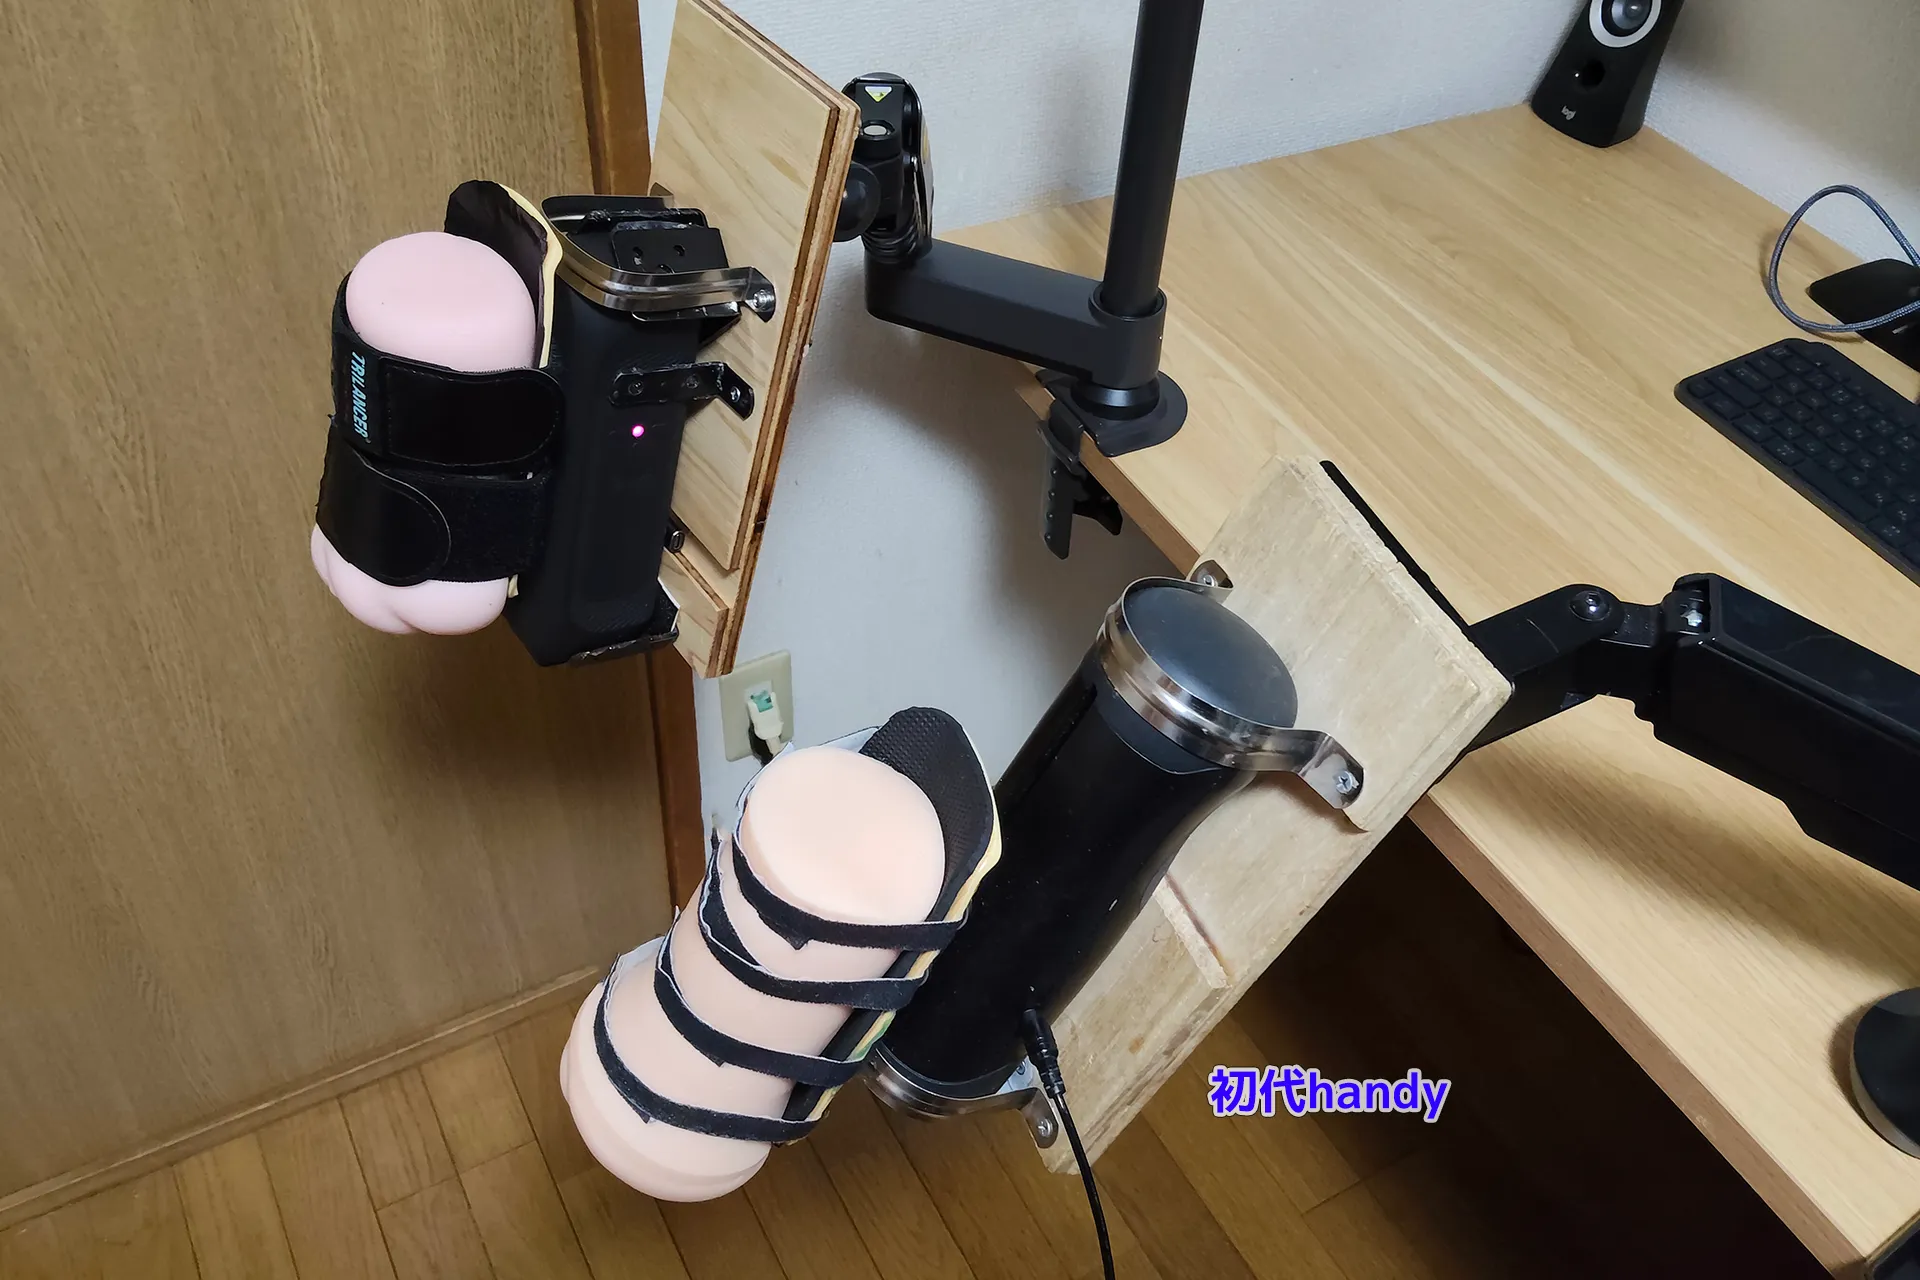
I placed the original unit next to the VORZE arm stand. male masturbator attached to the original unit is a Virgo Veritas Rich Soft.
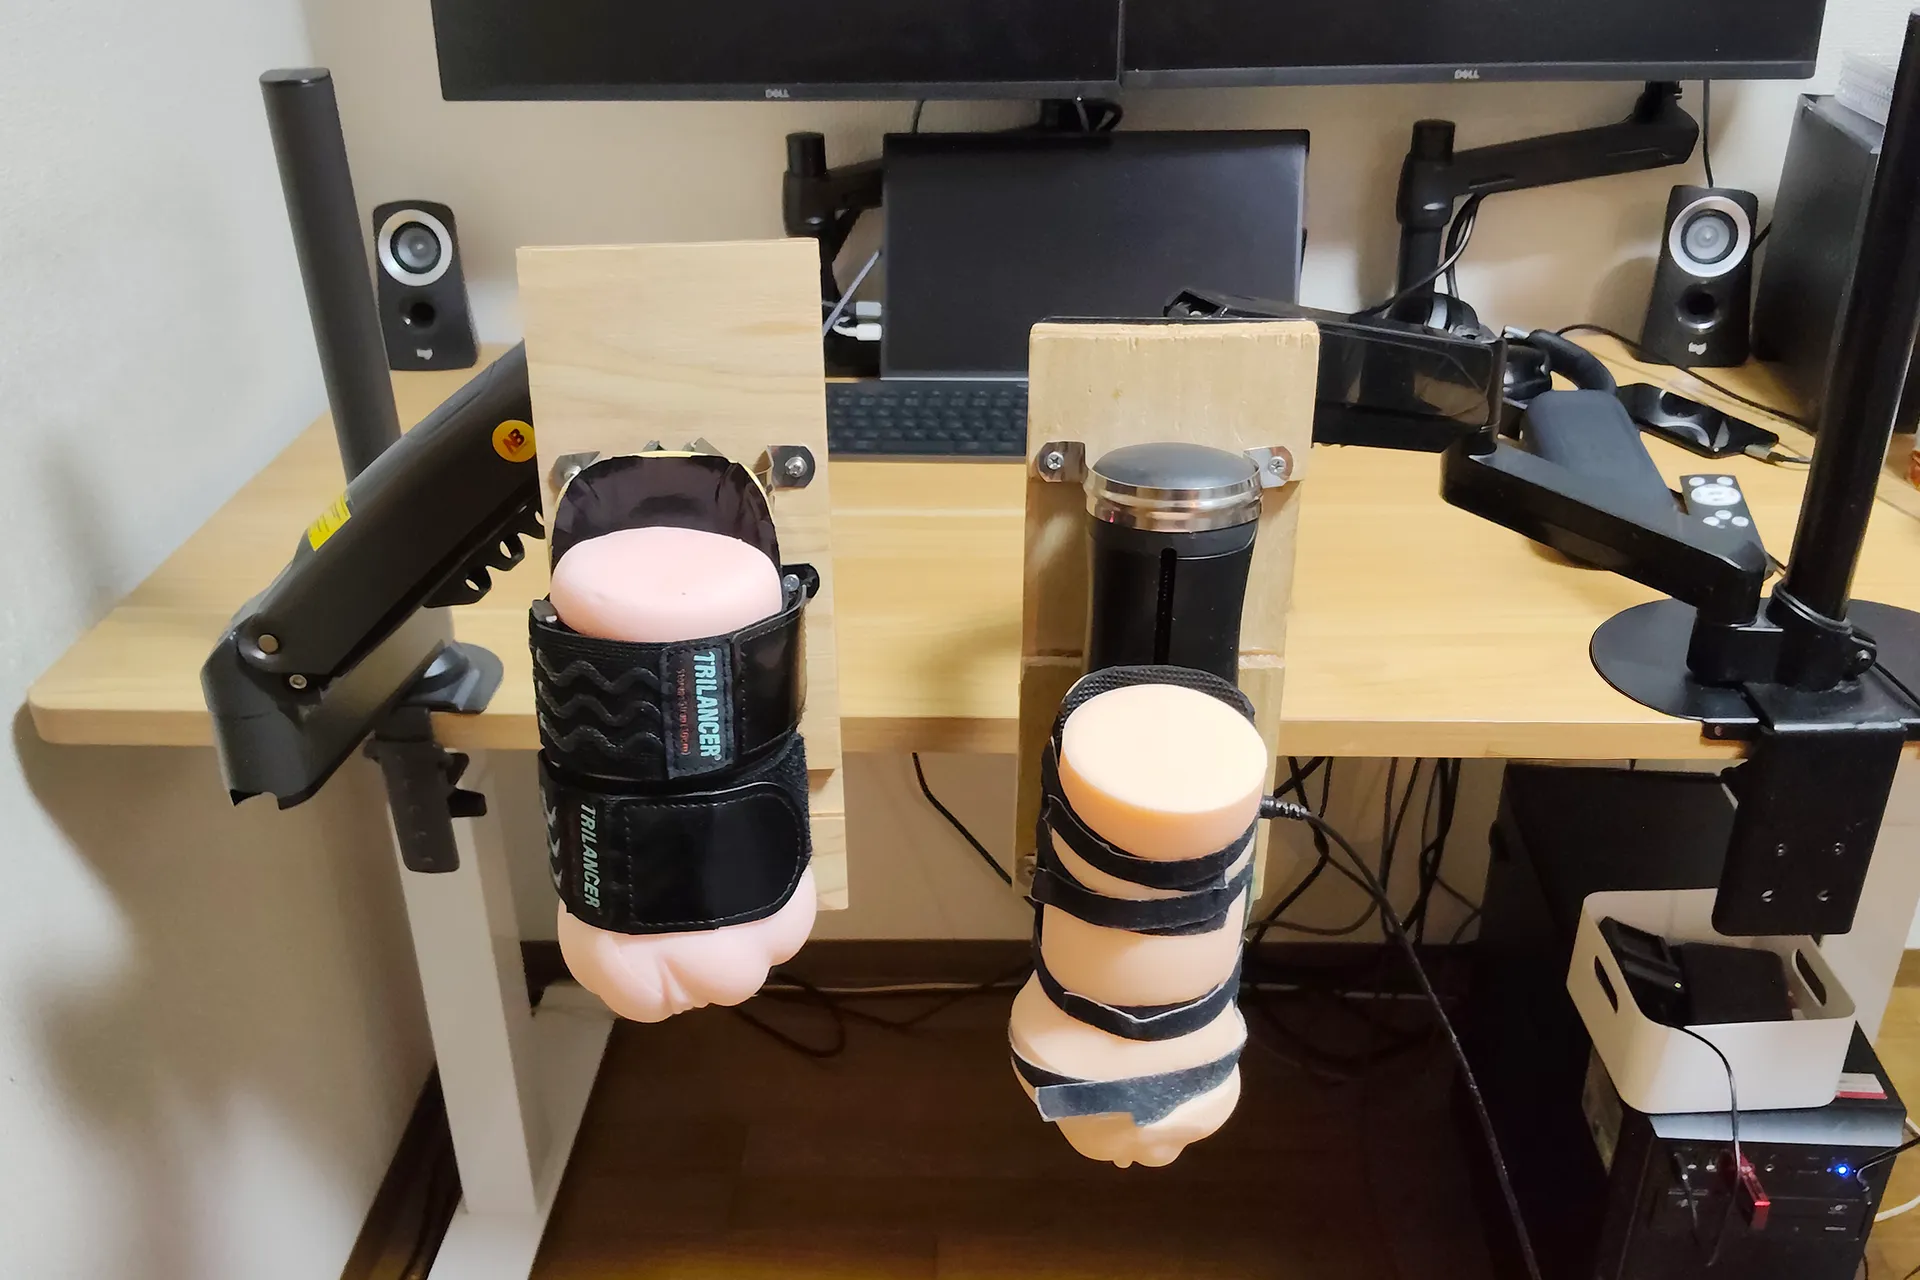
What I personally appreciate most about upgrading to version 2 is the increased stroke length. The long stroke feels incredibly good! The maximum stroke was 4.33 in (11 cm) for the original model, and 4.92 in (12.5 cm) for Handy2 , so it's increased by 0.59 in (1.5 cm). I think this difference is bigger than you might expect.
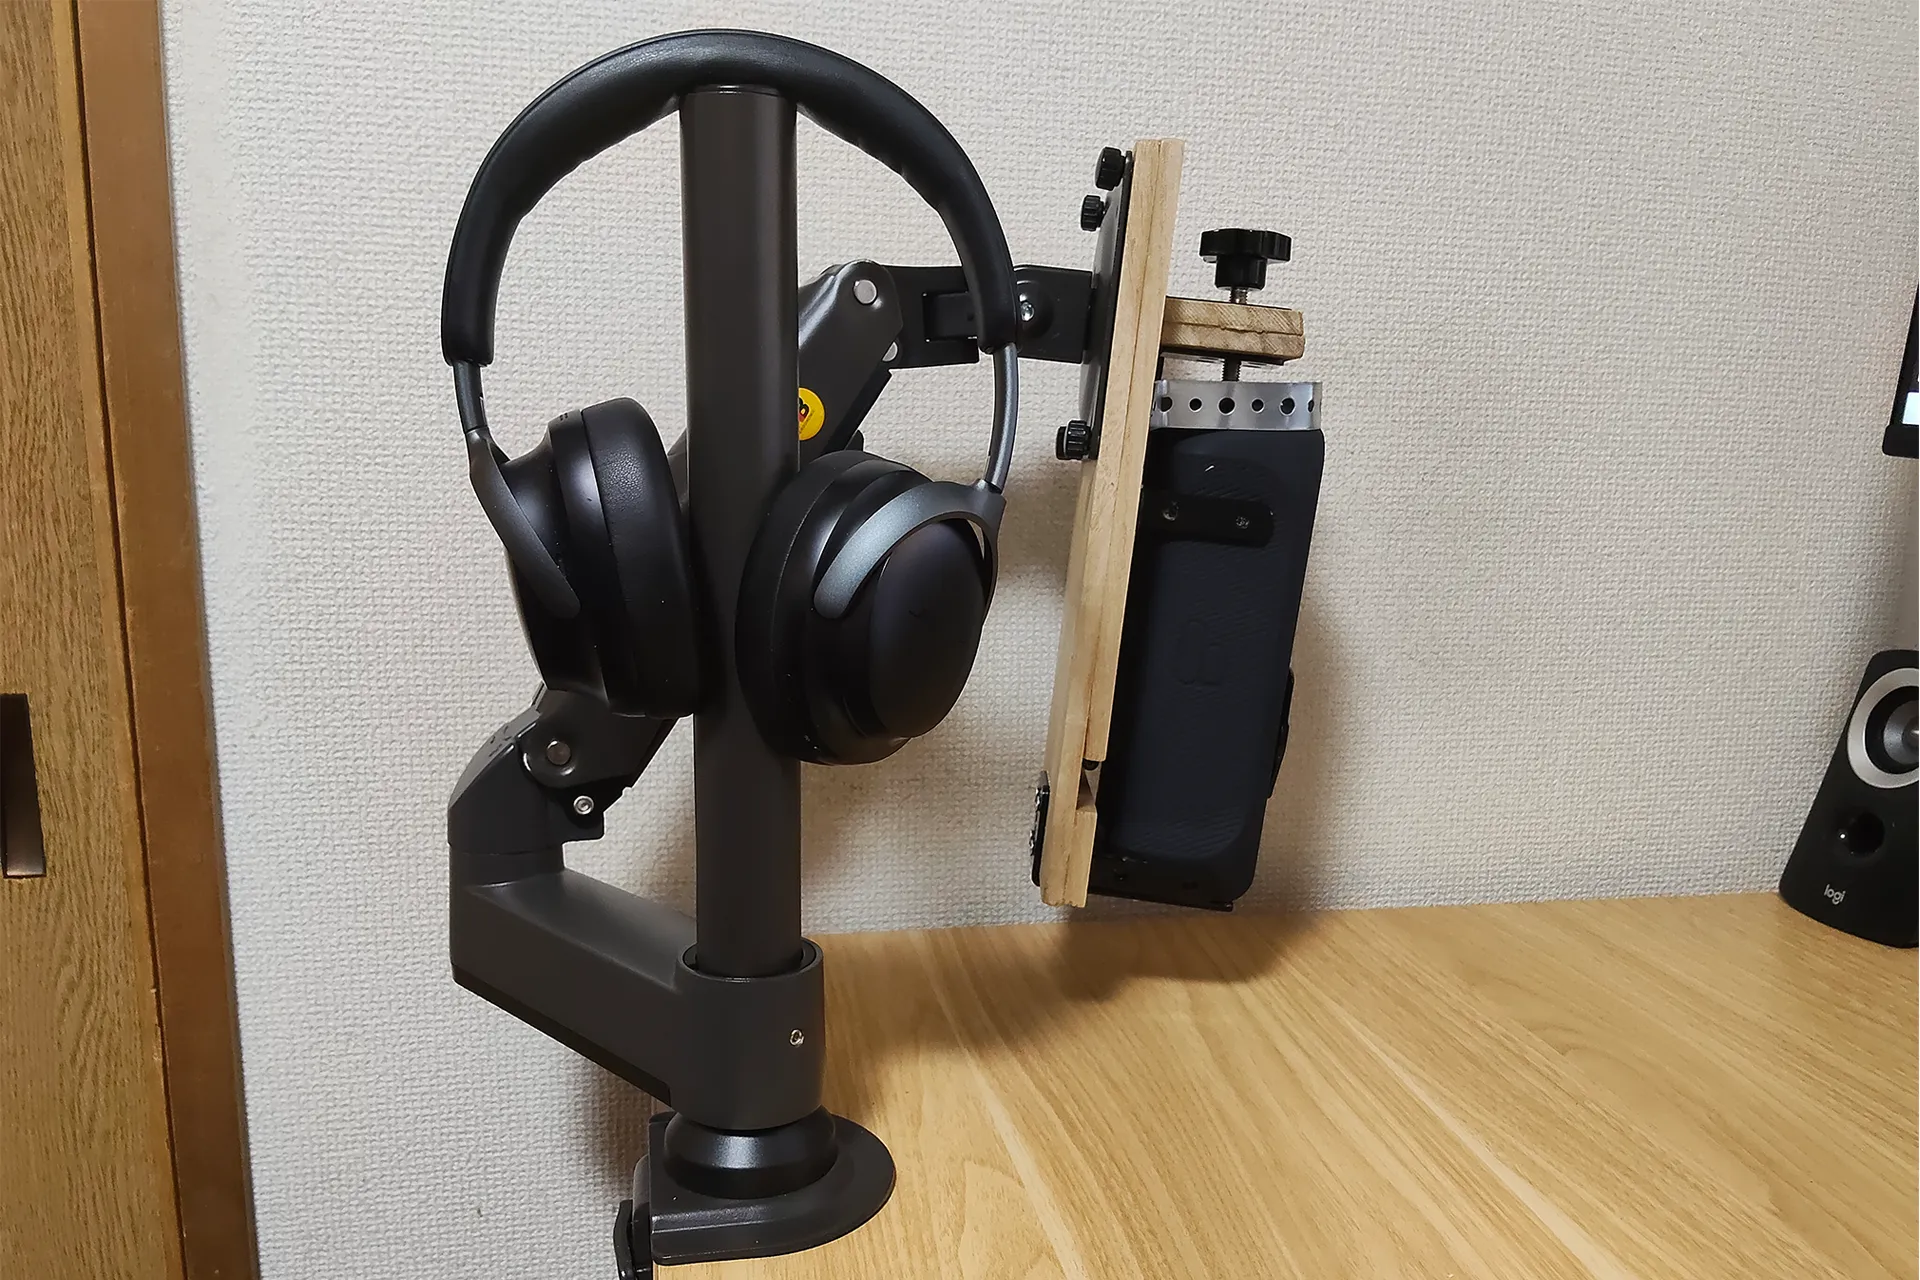
Since the holder part is detachable in this model, you might be able to attach just the main unit to the arm, fold it up, and move it to the side, and pass it off as some kind of audio device.
A progress review after the fabrication of the fixation device can be found here ↓
For instructions on how to make your own male masturbator tray, click here ↓